Advertisement
Quick Links
asdasd
8880 NW 18
Terrace Doral, FL 33172 USA T: 1.305.863.7779 F: 1.305.863.7478 TollFree: 1.855.797.8XTS
th
DDD8880
Brasil: 55.11. 7561.1089 Colombia: 571.610.0843 Mexico: 52.55.917.2118
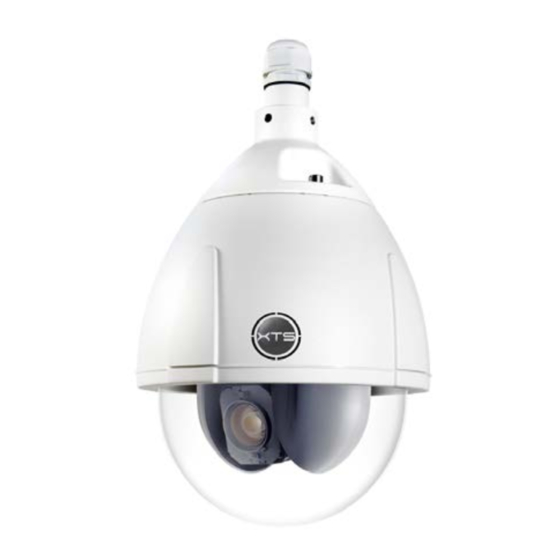
XTS-SD20XDN2MP-WIP Series
Quick Installation Guide
* Install IPScan on a Windows PC.
IPScan™ is a utility used to configure network settings for cameras & video servers. IPScan™ is available on the
CD-ROM.
Run Setup.exe to install IPScan.
* Camera Connections.
Displayed are the IO cable pin definitions.
Intelligent
Security
Solutions
Advertisement

Related Manuals for XTS XTS-SD20XDN2MP-WIP Series

Summary of Contents for XTS XTS-SD20XDN2MP-WIP Series
-
Page 1: Quick Installation Guide
Intelligent Security Solutions asdasd XTS-SD20XDN2MP-WIP Series Quick Installation Guide * Install IPScan on a Windows PC. IPScan™ is a utility used to configure network settings for cameras & video servers. IPScan™ is available on the CD-ROM. Run Setup.exe to install IPScan. -
Page 2: Package Contents
Intelligent Security Solutions asdasd Replace dome cover Insert the adapter power line (AC24V) into the power terminal block or plug the RJ45 cable to a PoE+ switch for 60W output at least. 1 Package Contents The AC24V adaptor is an optional accessory. Please order before the product purchase is confirmed. -
Page 3: Configure The Network Settings
Intelligent Security Solutions asdasd Configure the Network Settings The factory defaults IP address settings: IP Address 192.168.1.2 Subnet Mask 255.255.255.0 Gateway 192.168.1.1 Run IPScan 5 Access IP Camera Web Interface When accessing an IP camera using the web interface for the first time (or when the IP address changes), some configuration for ActiveX controls are required. - Page 4 Intelligent Security Solutions asdasd Click on the add-on message, and choose Run Add-on Repeat the above until all ActiveX controls have been initiated. Once the process is complete, the Live View will be displayed in IE. 6 Adding the Camera to an NVR System Please refer to the NVR instructions and firmware User’s Manual for additional details.
Need help?
Do you have a question about the XTS-SD20XDN2MP-WIP Series and is the answer not in the manual?
Questions and answers
Cuál es el precio actual de XTS-SD20XDN2MP-WIP