Advertisement
Original Instruction Manual
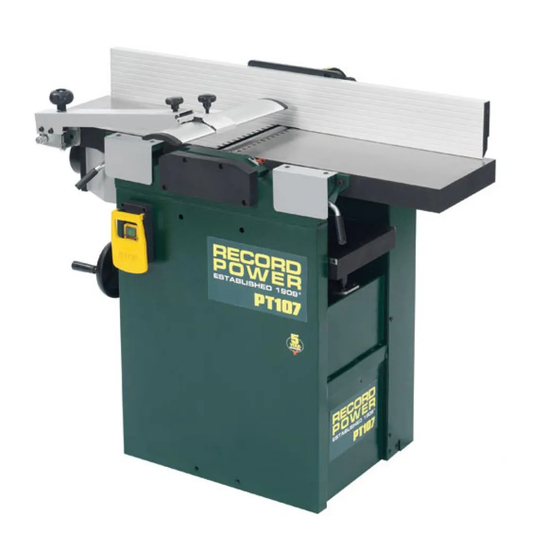
PT107 10" x 7" Heavy
Duty Planer Thicknesser
Version 3.0
January 2013
It is important to register your product as soon as possible in order to receive efficient after sales
support and be entitled to the full 5 year guarantee. Your statutory rights are not affected.
Kg
Always wear safety glasses when
using woodworking equipment.
To register this product please visit
www.recordpower.info
Please see back cover for contact details.
Important
i
For your safety read instructions carefully before
assembling or using this product.
Always read the instructions
provided before using
Save this manual for future reference.
woodworking equipment.
Advertisement
Table of Contents

Related Manuals for Record Power PT107


Summary of Contents for Record Power PT107
- Page 1 Original Instruction Manual PT107 10" x 7" Heavy Duty Planer Thicknesser Version 3.0 January 2013 To register this product please visit www.recordpower.info It is important to register your product as soon as possible in order to receive efficient after sales support and be entitled to the full 5 year guarantee.
-
Page 2: Table Of Contents
Contents Terms & Conditions Of Usage Explanation of Symbols General Health & Safety Guidance Additional Safety Instructions For Planer Thicknessers Record Power Guarantee User Manual 1 Machine Specifications 2 Getting to Know Your Machine 3 Electrical System 4 Assembly 5 Operation... - Page 3 Explanation of Symbols THE SYMBOLS AND THEIR MEANINGS SHOWN BELOW MAY BE USED THROUGHOUT THIS MANUAL. PLEASE ENSURE THAT YOU TAKE THE APPROPRIATE ACTION WHEREVER THE WARNINGS ARE USED. Mandatory Instructions Read and fully understand the instruction manual before attempting to use the machine. Indicates an instruction that requires particular attention Wear protective eyewear Use respiratory protective equipment...
- Page 4 General Health & Safety Guidance Ensure that you carefully read and fully understand the • If the machine is suitable to be used on a workbench, ensure that the instructions in this manual before assembly, installation and use workbench is well constructed and capable of withstanding the weight of this product.
- Page 5 General Health & Safety Guidance cont. of children. Do not allow persons unfamiliar with these instructions or • When feeding the work piece towards the blade or cutting tool never with the machine to operate it. position your hands in direct line of the cutting path. Avoid awkward operations and hand positions where a sudden slip could cause your 14.
- Page 6 General Health & Safety Guidance cont. instruction manual. 32. Have your machine repaired by a qualified person • This machine complies with the relevant safety rules and standards • Do not use the machine if the switch does not turn the machine ‘ON’ appropriate to its type when used in accordance with these instructions and ‘OFF’.
- Page 7 Additional Health & Safety for Planer Thicknessers WARNING: FOR YOUR OWN SAFETY, DO NOT ATTEMPT TO • If the work piece binds when thicknessing the machine may stall. If OPERATE YOUR PLANER THICKNESSER UNTIL IT IS COMPLETELY this happens, switch the machine ‘OFF’ immediately and follow the ASSEMBLED AND INSTALLED ACCORDING TO instructions detailed in the manual for safely removing the work piece.
- Page 8 Guarantee should be made directly to Record Power or its Authorised Record Power guarantees that for a period of 5 years from the date Distributor (for details of the Authorised Distributor in your country of purchase the components of qualifying Products (see clauses 1.2.1 please see your Product manual or check www.recordpower.info...
-
Page 9: Machine Specifications
1. Machine Specification CUTTER BLOCK DIAMETER: 75 mm NUMBER OF CUTTERS: 3 BLADE SIzE: 260 x 18.5 x 3 mm CUTTER BLOCK SPEED: 4000 rpm PLANING TABLE SIzE: 1100 x 265 mm MAxIMUM PLANING WIDTH: 260 mm THICKNESSING TABLE SIzE: 600 x 258 mm MAxIMUM THICKNESSING WIDTH: 258 mm MAxIMUM CHIP REMOVAL: 3 mm (Planing) MAxIMUM CHIP REMOVAL: 2 mm (Thicknessing) -
Page 10: Electrical System
3. Electrical System Power Switch Fig. 3.1 Switch the planer ON at the small green button (Fig 3.1 - A). Switch the planer OFF at the big red button (Fig 3.1 - B). The red button has emergency-stop function. The large yellow flap (B) can be used to stop the machine. - Page 11 4. Assembly Assembling the Optional Wheelkit Fig. 4.3 Items provided in the PT107 optional wheelkit (Fig. 4.3): A Lifting Bracket B Wheels C Hex nuts and bolts D Jockey bar with wheels Simply attach the wheels (Fig. 4.3, B) to each corner at the back of the machine as shown in Fig.
- Page 12 Warning: Do not smoke while using solvents. A risk of explosion or fire exists and may result in serious personal injury. Contents of Carton After all the parts have been removed from the carton, you should have: PT107 main unit Bridge guard assemby ? Picture Fence assemby...
-
Page 13: Operation
5. Operation General information Fig. 5.1 Safety instructions Before every use, check: • All required guards are properly installed. • All clamping screws of the blade holders are tight (minimum tightening torque: 15 Nm). • That you are always using sharp planer blades (minimizes the risk of kickback). - Page 14 5. Operation Fig. 5.3 Out-feed Table Adjustment Please note: The height of out-feed table is factory set. It should only require adjustment in cases where other normal adjustments to the planer knives have not rectified any alignment issues. Please note: Before carrying out any of the adjustments below, Fig.
- Page 15 5. Operation Fig. 5.6 Changeover from Planing to Thicknessing Warning: Remove the planer fence before changeover. 1. Open the table lock (A - Fig. 5.6) of the out-feed table and pull out the lever until it stops. 2. Now lift up the out-feed table. 3.
- Page 16 5. Operation Fig. 5.11 Edge planing Allow the planer bridge guard to rest on the planer table and cover the cutter block and allow for the width of the work-piece, Fig. 5.11. Press the work-piece against the planer fence and guide evenly over the cutter block.
- Page 17 5. Operation Thicknessing Fig. 5.15 1. Adjust the thicknessing table height to suit the workpiece. 2. Activate the feed by raising the feed clutch lever (A - Fig 5.15) then release it. 3. Slide the work-piece into the machine until it is drawn in by the feed rollers.
-
Page 18: Maintenance
4. Keep infeed / outfeed tables and thicknessing bed free of resin. Clean regularly with white spirit, then coat with a light film of silicone spray such as Record Power CWA195 to enhance passage of workpiece on table Fig 6.1. -
Page 19: Drive Belts
6. Maintenance The cutter block in this machine is designed to hold three blades. Fig. 6.4 Never attempt to use the machine if any of the blades are missing or damage. All blades used must conform to BS EN 847-1. Changing the Planer Blades Check the height of the Blade The blades should be periodically replaced or adjusted. -
Page 20: Dust Extraction
7.2 Record Power Extractors 0.5 micron filtration; suitable for MDF Record Power offer a range of high quality dust extractors, starting at the single motor 45 litre RSDE1 right up to the 200 litre twin motor DX5000. We Cx2600 Chip collector offer both drum and bag type extractors high filtration models filter down Large capacity chip collector, with a powerful 0.37 kW induction motor. -
Page 21: Electrical Connection & Wiring Diagram
8. Electrical Connection & Wiring Diagram Machines supplied for use in the UK are fitted with a 3 pin plug conforming machine. If replacing the original fuse, always fit a fuse of equivalent rating to BS1363, fitted with a fuse conforming to BS1362 and appropriate to the to the original. -
Page 22: Troubleshooting
9. Troubleshooting Problem Cause Solution Motor is slow or weak: 1. Voltage from source is low. 1.Request a voltage check from local 2. Windings are burned out or open. power company. 3. Power switch is defective. 2. Have the motor checked / repaired. 4. -
Page 23: Parts List & Diagrams
10. Parts List & Diagrams DESCRIPTION Q'TY DESCRIPTION Q'TY Main frame Inner shield Shaft seat, thicknessing table 1 Cross sunk head screw M5x6 5 Seat, lock lever Scale, thicknessing height Oil seal Pan head screw M5x6 Seat, bearing Gear cover Hex lock nut Pan head screw M5x6 Hex screw M6x16... - Page 24 10. Parts List & Diagrams - cont. DESCRIPTION Q'TY DESCRIPTION Q'TY Out-feed table, planer Washer 8mm Table lock seat Allen screw M8x30 Table swing seat Roll pin D6x20 Eccentric seat Roll pin D6x30 Fork Circle ring 12mm Table lock Handle, table swing Table swing shaft Safe link rod Sleeve, table lock...
- Page 25 10. Parts List & Diagrams - cont. DESCRIPTION Q'TY DESCRIPTION Q'TY Feed table, planer Allen screw M8x25 Table lock seat Roll pin D6x30 Table lock Roll pin D6x20 Fork Hex head screw M6x12 Table swing seat Hex nut M16 Table swing shaft Circle ring 12mm Eccentric seat Handle, table swing...
- Page 26 10. Parts List & Diagrams - cont. DESCRIPTION Q'TY DESCRIPTION Q'TY Ticknessing table Hex head screw M6x60 Raise guide rail Set screw M8x12 Special guide Oil seal Height indicator Allen screw M8x16 Edge -plate Allen screw M8x35 Fixed guide rail Spring washer 8mm Screw guide Hex nut M6...
- Page 27 10. Parts List & Diagrams - cont. DESCRIPTION Q'TY DESCRIPTION Q'TY Cutter block Hex head screw M6x60 Blade holder Set screw M8x12 Hex head screw M6x12 Oil seal Blade Allen screw M8x16 Spacer Allen screw M8x35 Bearing cover Spring washer 8mm Bearing 6205 Hex nut M6 Circle ring 52 mm...
- Page 28 10. Parts List & Diagrams - cont. DESCRIPTION Q'TY DESCRIPTION Q'TY Sprocket A Spring Flange Handle, friction lever Pan head screw M5x8 Tension plate Set screw M6x6 Tension rod Shaft pulley Spring Wheel friction Washer 10mm Sprocket B Bearing 6303 Allen screw M6x12 Feeding chain Shaft, friction wheel...
- Page 29 10. Parts List & Diagrams - cont.
- Page 30 10. Parts List & Diagrams - cont. DESCRIPTION Q'TY DESCRIPTION Q'TY Bridge guard arm Flat washer 8 mm Swivel base, guard Spring Rod, spring Star-type screw M6x35 Joint, bridge guard Star-type screw M8x35 Insert, guard Star-type nut Bolt guide Cap nut M8 Protective guard plate Allen screw M6x10 Spring...
- Page 31 10. Parts List & Diagrams - cont. DESCRIPTION Washer 16mm Castor Roll pin 4x30 Bracket castor Allen screw M12x50 Bracket castor Washer 10mm Hex screw M12x80 Washer 12mm Bushnig bracket Support, pull rod Hex screw M10x55 Pull rod Bolt, bracket Shaft, castor...
- Page 32 EU Declaration of Conformity Cert No: EU / PT107 / 1 RECORD POWER LIMITED, Unit B, Ireland Industrial Est. Adelphi Way, Staveley, Chesterfield S43 3LS declares that the machinery described:- Type: Planer Thicknesser Model No: PT107 Serial No ................. Conforms with the following directives:-...
- Page 34 Woodworking Machinery & Accessories United Kingdom Eire Australia New zealand Record Power Ltd Record Power Ltd Tools 4 Industry Tools 4 Industry Unit B Adelphi Way, Ireland Unit B Adelphi Way, Ireland Po Box 3844 Po Box 276079 Industrial Estate, Staveley,...
Need help?
Do you have a question about the PT107 and is the answer not in the manual?
Questions and answers