Table of Contents
Advertisement
Available languages
Available languages
MANUAL DE INSTRUCCIONES /
INSTRUCTIONS MANUAL
ACONDICIONADOR DE AIRE PORTÁTIL /
PORTABLE AIR CONDITIONER
MODELO / MODEL:
FAP09C3AJW
FAP12C3AJW
FAP12P3AJW
FAP12P5AJW
Lea todas las instrucciones antes de utilizar
el aparato y guardelas para futuras referencias.
Read all instructions prior to using
appliance and keep this manual for future reference.
Advertisement
Chapters
Table of Contents

Related Manuals for Frigidaire FAP09C3AJW


Summary of Contents for Frigidaire FAP09C3AJW
- Page 1 MANUAL DE INSTRUCCIONES / INSTRUCTIONS MANUAL ACONDICIONADOR DE AIRE PORTÁTIL / PORTABLE AIR CONDITIONER MODELO / MODEL: FAP09C3AJW FAP12C3AJW FAP12P3AJW FAP12P5AJW Lea todas las instrucciones antes de utilizar el aparato y guardelas para futuras referencias. Read all instructions prior to using...
-
Page 2: Table Of Contents
Cuidado y mantenimiento ................. 18 Frigidaire una vez más fabrica lo mejor en lo que se refiere a electrodomésticos. Solución de problemas ................19 Informaciones técnicas ................41 Consejos ambientales El material del embalaje es reciclable. -
Page 3: Precauciones De Seguridad
Precauciones de seguridad La operación incorrecta del aparato, por no seguir las instrucciones, podría peligrosos para limpiar el artefacto ni lateral del gabinete, detrás de la causar accidentes o daños. Para evitar accidentes al usuario o a otras deje que entren en contacto con la rejilla. -
Page 4: Descripción
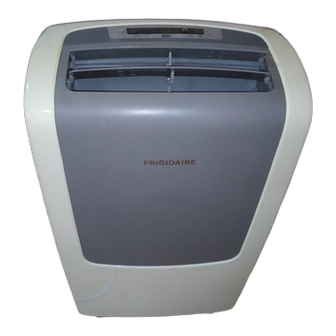
Descripción Lista de piezas NUMERACION NOMBRE DE LA PIEZA CANTIDAD Manguera de extracción y adaptador B (boca plana) 1 juego Adaptador A (unidad) 1 juego 1 Pieza Adaptador B (ventana) 1 juego Kit extensible para ventana 3 Piezas Burlete de espuma Control remoto 1 Pieza Pilas (para el control remoto) -
Page 5: Instrucciones De Instalación
Instrucciones de instalación Ubicación Instalación del kit de ventana • El acondicionador de aire debe Su kit de ventana ha sido diseñado ubicarse sobre una base firme para adaptarse a la mayoría de las para minimizar el ruido y las aplicaciones de ventanas "verticales"... - Page 6 3. Corte el burlete de espuma 3. Corte el burlete de espuma (autoadhesivo) a la longitud (autoadhesivo) a la longitud adecuada y fíjelo a la parte superior adecuada y fíjelo a la parte superior de la ventana. de la ventana. Kit para ventana 4.
- Page 7 3. Extender cualquiera de los dos Drenaje del agua lados de la manguera y enroscar 1. Durante los modos de el adaptador de manguera A. Extraiga el tapón deshumidificación, retire el tapón de drenaje de drenaje de la parte trasera de la unidad, instale el conector de Extender cualquier lado de la manguera 4.
-
Page 8: Panel De Control
Panel de control Indicadores del modo (Auto, Cook, Dry y Heat*) *solo en algunos modelos Botones UP (Arriba) y DOWN (Abajo) Selección de modo (MODE) SLEEP (Dormir) SWING (Oscilar) Botón de selección de modo Botón CHECK FILTER (limpiar (MODE) filtro) RESET AND LOCK (Reinicializar y trabar) Botones UP (Arriba) y DOWN... -
Page 9: Como Funciona El Acondicionador De Aire
Como funciona el acondicionador de aire Cooling mode (función de enfriamiento) Timer (Temporizador) En esta función la manguera de salida de aire DEBE ser usada. Puede ajustar los dos el parado diferido y inicio diferido, mientras la unidad esta en la posición ON o OFF. 1. -
Page 10: Cuidado Y Mantenimiento
Cuidado y mantenimiento Filtro A Swing (Oscilar) Limpieza del filtro de aire Cuando se enciende la unidad, el aire oscila y para a cierto Angulo. Usted • Esta unidad tiene 3 filtros, son puede presionar el botón “SWING” para dejar que oscile automáticamente. Filtro A, B, y C. -
Page 11: Solución De Problemas
Solución de problemas Códigos de error PROBLEMA SOLUCIÓN Cuando los siguientes problemas ocurran, los indicadores parpadearan como Acondicionador de 1. Filtro de aire sucio – Aire esta restringido. Limpie el filtro de aire y refiérase a la se muestra aquí. Si el errores se repetem, llame al servicio de reparaciones. aire esta enfriando, sección de limpieza y cuidados. - Page 12 Welcome to the world of Contents simple handling and no worries. Security .....................23 Thank you for choosing Electrolux for your air conditioner. Our conditionerare developed with high technical and quality standards, with features to offer you Description ....................25 even more comfort. Parts list .....................26 Read all instructions before using this appliance.
-
Page 13: Security
Security Incorrect operation due to ignoring of Always install circuit breaker and a Do not clean the air conditioner Do not place heavy object on the instructions may cause harm or dedicated power circuit: Incorrect with water: Water may enter the unit power cord and ensure that the damage. -
Page 14: Description
Description Parts list NUMBER PART NAME QTY. Exhaust hose 1 kit Exhaust adaptor A 1 kit 1 piece Exhaust adaptor B 1 kit Window sliding kit 3 pieces Foam seal Remote control 1 piece Battery (For remote control) 2 pieces Air inlet Control panel Dehumidifying drain outlet... -
Page 15: Installation
Installation Location Window kit installation • The air conditioner should be The window kit has been design to located on a firm base to minimize adapt to the majority of windows sound and vibrations. To achieve "verticals" and "horizontal"standard. a secure location, position the unit But it might be necessary to in an even floor and solid enough improvise or modify some aspects of... - Page 16 3. Cut the adjustable window slider kit if the height of window is less than 67.6cm. Open the window 4. Close the window sash securely sash and place the window slider against the window slider kit. Window slider kit kit on the window stool. Window stool 4.
- Page 17 3. Extend either side of the hose and Drainage screw the hose to adaptor A. 1. During dehumidifying mode, Remove the drain remove the supplied rubber plug stopper from the hose connector. 4. Extend the other side of the hose Screw a suitable length of hose and screw it to adaptor B.
-
Page 18: Control Panel
Control panel Mode indicators (auto, cool, dry and heat*) *only in some models Up and down buttons Mode selection Sleep Swing Mode selection button CHECK FILTER button Reset and lock Up and down buttons On/Off button Fan speed indicators Fan speed button Display Fan speed Sleep Button... -
Page 19: How The Air Conditioner Works
How the air conditioner works Cooling mode Timer operation In this mode the exhaust adaptor hose MUST be used. You can set both delay stop and delay start while unit is in ON position or OFF 1. Press the MODE button until the "Cool" indicator lights. position. -
Page 20: Care And Cleaning
Care and cleaning Filter A Check filter Air Filter Cleaning This feature is a reminder to clean the Air Filter (See Care and Cleaning) for more • This unit has three filters, they are efficient operation. The LED (light) which above the "Filter" button will illuminate filter A, B and C. -
Page 21: Solutions For Problems
Solutions for problems Error Codes PROBLEM SOLUTION When the following problems occur, the indicators will flash as is shown here. Air conditioner If the errors repeat, call the service team. 1. Dirty air filter - air restricted. Clean air filter. Refer to Care and Cleaning section. cooling, but room is 2. -
Page 22: Technical Informations
Informaciones técnicas / Technical informations MODELOS FAP12P3AJW MODELOS FAP09C3AJW Frío y Calor / Cool and Heat Frío / Cool Ciclo / Cycle Ciclo / Cycle Capacidad enfriamento / Cooling capacity (Btu/h) 12000 Capacidad enfriamento / Cooling capacity (Btu/h) 9000 Capacidad calentamiento / Heating capacity (Btu/h)
Need help?
Do you have a question about the FAP09C3AJW and is the answer not in the manual?
Questions and answers
Calienta poco