Hoshizaki DCM-270BAH Service Manual
Cubelet icemaker/dispenser
Hide thumbs
Also See for DCM-270BAH:
- Service manual (46 pages) ,
- Parts list (35 pages) ,
- Instruction manual (24 pages)

Related Manuals for Hoshizaki DCM-270BAH


Summary of Contents for Hoshizaki DCM-270BAH
- Page 1 Hoshizaki Hoshizaki America, Inc. Cubelet Icemaker/Dispenser Models DCM-270BAH(-OS) F-A Control Board Models SERVICE MANUAL “A Superior Degree of Reliability” www.hoshizaki.com Number: 73202 Issued: 5-6-2014 Revised: 7-2-2014...
- Page 2 Hoshizaki provides this manual primarily to assist qualified service technicians in the service and maintenance of the icemaker. Should the reader have any questions or concerns which have not been satisfactorily addressed, please call, send an e-mail message, or write to the Hoshizaki Technical Support Department for assistance. Phone: 1-800-233-1940; (770) 487-2331 Fax: 1-800-843-1056;...
-
Page 3: Table Of Contents
IMPORTANT This manual should be read carefully before the icemaker is serviced. Read the warnings and guidelines contained in this booklet carefully as they provide essential information for the continued safe use, service, and maintenance of the icemaker. Retain this booklet for any further reference that may be necessary. CONTENTS Important Safety Information .................... - Page 4 VI. Preparing the Icemaker for Periods of Non-Use ............. 47 VII. Disposal ......................... 48 VIII. Technical Information ....................49 A. Specification and Performance Data ................49 1. DCM-270BAH ......................49 2. DCM-270BAH-OS ....................50 B. Wiring Diagrams ......................51 1. DCM-270BAH(-OS) ....................51...
-
Page 5: Important Safety Information
Important Safety Information Throughout this manual, notices appear to bring your attention to situations which could result in death, serious injury, damage to the appliance, or damage to property. WARNING Indicates a hazardous situation which could result in death or serious injury. - Page 6 WARNING, continued • Do not make any alterations to the appliance. Alterations could result in electric shock, injury, fire, or damage to the appliance. • Do not place fingers or any other objects into the ice discharge opening. • The appliance is not intended for use by persons (including children) with reduced physical, sensory, or mental capabilities, or lack of experience and knowledge, unless they have been given supervision or instruction concerning use of the appliance by a person responsible for their safety.
-
Page 7: Construction And Water Refrigeration Circuit Diagrams
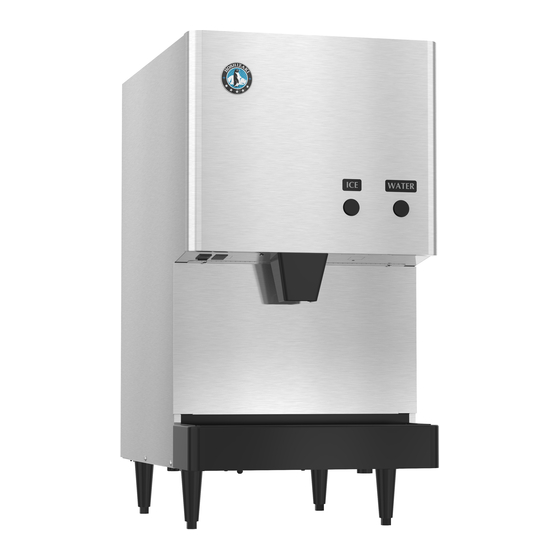
I. Construction and Water Refrigeration Circuit Diagrams A. Construction DCM-270BAH DCM-270BAH-OS... -
Page 8: Water/Refrigeration Circuit Diagrams
B. Water/Refrigeration Circuit Diagrams DCM-270BAH(-OS) Inlet Water Valve Water Reservoir Supply Water Level Float Switch Bin Drain Thermostatic Hose Evaporator Expansion Valve Overflow Evaporator Water Supply Hose To Drain Drain Valve To Drain Gear Motor Dispense Water Valve Drier High-Pressure Switch... -
Page 9: Sequence Of Operation And Service Diagnosis
II. Sequence of Operation and Service Diagnosis A. Sequence of Operation Flow Chart... -
Page 10: Service Diagnosis
B. Service Diagnosis WARNING • The appliance should be diagnosed and repaired only by qualified service personnel to reduce the risk of death, electric shock, serious injury, or fire. • Risk of electric shock. Use extreme caution and exercise safe electrical practices. •... - Page 11 2. Diagnostic Procedure The diagnostic procedure is a sequence check that allows you to diagnose the electrical system and components. Before proceeding, check for correct installation, adequate water pressure (10 to 113 PSIG), and proper voltage per unit nameplate. Note: • When checking high voltage (115VAC), always choose a neutral (W) wire to establish a good neutral connection.
- Page 12 4) Fill Cycle – "WTRIN" LED is on. WV energizes. The 90-sec. low water safety timer begins. LFS closes. Nothing occurs at this time. The reservoir continues to fill until UFS closes, terminating the 90-sec. low water safety timer, starting the 30-min. freeze timer, and de-energizing WV.
- Page 13 7) Refill Cycle/Low Water Safety – As ice is produced, the water level in the reservoir drops. UFS opens. Nothing occurs at this time. When LFS opens, WV energizes, 90-sec. low water safety timer (fill timer) starts. Comp, GM, CDR, and FM continue. When UFS closes, WV de-energizes, 90-sec.
-
Page 14: Control Board Check
C. Control Board Check Before replacing a CB that does not show a visible defect and that you suspect is bad, always conduct the following check procedure. This procedure will help you verify your diagnosis. Before proceeding, check for proper voltage per appliance nameplate. Check that the 24VAC 1A fuse and 115VAC 3A GM breaker are good. - Page 15 1) Startup-"POWER OK" LED on: Move control switch to "ICE" position, then move power switch to "ON" position. "POWER OK" LED turns on. "POWER" LED remains on unless power supply is interrupted. NOTICE! Appliance will not start unless the safety switch is engaged. Diagnosis: Check that "POWER OK" LED is on. If not, check for proper 115VAC supply voltage to CT (main breaker or fuse and power switch).
- Page 16 2a) 5VDC CB K9 Connector Continued: a) Control Switch"DRAIN" Position CB K9 connector pins #1 (W/BK) and #2 (W/BK): • "ICE" Position: When the control switch is in the "ICE" position, CB K9 connector pin #1 and pin #2 are open. 5VDC is present between CB K9 connector pin #1 (W/BK) and pin #2 (W/BK).
- Page 17 2b) 5VDC CB K8 Connector: See Fig. 2. 5VDC CB K8 Connector Component Pin # (Wire Color) Bin Control (BC) #3 (GY) and #4 (GY) Float Switch (FS) Common #5 (BK) Common Upper Float Switch (UFS) #6 (R) Lower Float Switch (LFS) #7 (BU) Multimeter Red positive...
- Page 18 2c) 5VDC CB K7 Connector: See Figs. 3, 4, 5, and 6. a) Water Dispense 1. Push Button Model CB K7 connector pins #3 (W/BK) and #8 (P): "WTRDP" LED is on: Before engaging the water dispense switch, check for the correct VDC from the locations given in the "Disengaged"...
- Page 19 2. Opti-Serve Model CB K8 connector pins #7 (R), #8 (P), and #9 (BK): Before engaging the water dispense OS sensor, check for the correct VDC from the locations given in the "Disengaged" column in the table below. If the VDC is different than in the table, replace CB.
- Page 20 b) Ice Dispense 1. Push Button Model CB K7 connector pins #2 (Y) and #3 (W/BK): "ICE" and "AM" LEDs are on: Before engaging the ice dispense switch, check for the correct VDC from the locations given in the "Disengaged" column in the table below. If the VDC is different than in the table, replace CB.
- Page 21 2. Opti-Serve Model CB K8 connector pins #1 (W/R), #2 (Y), and #3 (W/BK): Before engaging the ice dispense OS sensor, check for the correct VDC from the locations given in the "Disengaged" column in the table below. If the VDC is different than in the table, replace CB.
- Page 22 3) Fill Cycle–"WTRIN" LED is on: "WTRIN" LED turns on only when the reservoir water level is low enough to open LFS. Diagnosis: Confirm LFS is open. If "WTRIN" LED is off and LFS is open and the control switch is in the "ICE" position (open), replace CB.
-
Page 23: Bin Control Check
D. Bin Control Check When BC (microswitch) is not engaged, BC circuit (CB K8 #3 (GY) and CB K8 #4 (GY)) is closed and the appliance produces ice. S1 dip switch 7 must be in the "OFF" position and S1 dip switch 8 must be in the "ON" position. -
Page 24: Float Switch Check And Cleaning
"OFF" position. 3) Remove FS assembly from the reservoir cover. See Fig. 8. 4) Wipe down FS assembly with a mixture of 1 part Hoshizaki Scale Away and 25 parts warm water. Rinse the FS assembly thoroughly with clean water. - Page 25 Red (R) (upper float switch) Black (BK) (common) Blue (BU) (lower float switch) Magnet (towards top) Upper Float (blue) Spring Retainer Clip Magnet (towards top) Lower Float (white) Plastic Retainer Clip Fig. 7 Float Switch Assembly Reservoir Cover Reservoir Fig. 8...
-
Page 26: Diagnostic Tables
F. Diagnostic Tables Before consulting the diagnostic tables, check for correct installation, proper voltage per appliance nameplate, and adequate water pressure (10 to 113 PSIG). Check control board using the steps in "II.C. Control Board Check." 1. No Ice Production No Ice Production - Possible Cause Startup 1. - Page 27 No Ice Production - Possible Cause Freeze Cycle 1. Control Board a) No power to compressor delay relay circuit (5VDC) or not reading circuit. b) Compressor relay defective 2. Start Relay a) Defective. 3. Start Capacitor a) Defective. 4. Compressor a) Internal protector.
- Page 28 2. Ice/Water Dispensing Ice Dispense-Push Button 1. Power Supply a) Off, blown fuse, or tripped breaker. 2. Control Board a) No power from control board to ice dispense switch (5VDC) or not reading signal. b) No power to ice dispense solenoid or dispense relay (115VAC). 3.
-
Page 29: Controls And Adjustments
III. Controls and Adjustments • A Hoshizaki exclusive control board is employed in Hoshizaki icemakers. • All models are pre-tested and factory adjusted. • For a control board check procedure, see "II.C. Control Board Check." NOTICE • The control board is fragile; handle very carefully. -
Page 30: Control Board Layout
A. Control Board Layout 1. DCM-270BAH High-Pressure Switch #3 to #4 (Y) Compressor Delay Relay Circuit Open-5VDC #5 to #6 (W/O) Control Switch Closed-0VDC Relay De-Energized-Open-5VDC #1 to #2 (W/BK) Relay Energized-Closed-0VDC "ICE"-Open-5VDC • "DRAIN"-Closed-0VDC K9 Connector • "SERVICE" Button... - Page 31 2. DCM-270BAH-OS High-Pressure Switch #3 to #4 (Y) Compressor Delay Relay Circuit Open-5VDC #5 to #6 (W/O) Closed-0VDC Relay De-Energized-Open-5VDC Control Switch Relay Energized-Closed-0VDC #1 to #2 (W/BK) "ICE"-Open-5VDC • K9 Connector "DRAIN"-Closed-0VDC • "SERVICE" Button (Ice Purge Cycle Bypass)
-
Page 32: Led Lights And Audible Alarm Safeties
B. LED Lights and Audible Alarm Safeties The "POWER" LED indicates proper control voltage and will remain on unless a control voltage problem occurs. For further details, see "II. Sequence of Operation and Service Diagnosis." Icemaking Sequence Energized Sequence Step Components Min. -
Page 33: Settings And Adjustments
Do not adjust. Setting not used on this model. When dip switch 7 is off, 1, 2, and 3 are ignored. Factory set. DCM-270BAH(-OS) does not use a bin control with an infrared sensor. The appliance uses a bin control with a mechanical microswitch for ice level control. -
Page 34: Continuous Dispensing Timer (S1 Dip Switch 5 & 6)
The factory setting allows ice to be dispensed continuously for 20 sec. The DCM-270BAH may be adjusted to other dispense time options. NOTICE! On DCM-270BAH-OS, do not adjust S1 dip switch 5 & 6 out of the factory default position. -
Page 35: Switches
D. Switches The power switch and control switch are used to control the operation of this icemaker. 1. Power Switch The power switch has 2 positions, "OFF" and "ON." 2. Control Switch The control switch is a double-pole double-throw switch with 3 positions, "ICE," "OFF," and "DRAIN."... -
Page 36: Removal And Replacement Of Components
IV. Removal and Replacement of Components WARNING • This icemaker should be diagnosed and repaired only by qualified service personnel to reduce the risk of death, electric shock, serious injury, or fire. • Move the power switch to the "OFF" position and turn off the power supply to the icemaker before servicing. -
Page 37: Refrigerant Recovery
1. Refrigerant Recovery This icemaker is provided with refrigerant access valves. Using proper refrigerant practices, recover the refrigerant from the service valves and store it in an approved container. Do not discharge the refrigerant into the atmosphere. 2. Brazing WARNING •... -
Page 38: Important Notes For Component Replacement
Remember to loosen the connection and purge the air from the hose. See the rating label inside the icemaker for the required refrigerant charge. Hoshizaki recommends only virgin refrigerant or reclaimed refrigerant which meets ARI Standard 700 (latest edition) be used. -
Page 39: Evaporator Assembly
Evaporator Assembly Cutter Extruding Head (Upper Bearing) Drip Ring Auger Cover "O"-Ring Seal Bolt Evaporator Socket Head Cap Screw Ring Mechanical Seal "O"-Ring Housing (Lower Bearing) Gear Motor Spline Coupling Socket Head Cap Screw Fig. 8... -
Page 40: Icemaking Unit
C. Icemaking Unit 1. Upper Bearing Wear Check To ensure that the bearing inside the extruding head does not exceed the wear tolerance of .02", follow the instructions below. See Fig. 3. 1) Move the control switch to the "OFF" position, then turn off the power supply. Remove the front and top panels, then move the power switch to the "OFF"... -
Page 41: Removal And Replacement Of Extruding Head
2. Removal and Replacement of Extruding Head 1) Move the control switch to the "DRAIN" position and drain all of the water from the evaporator. 2) After the water has stopped draining, move the control switch to the "OFF" position, then turn off the power supply. -
Page 42: Removal And Replacement Of Evaporator
4. Removal and Replacement of Evaporator NOTICE • Always install a new drier every time the sealed refrigeration system is opened. • Do not replace the drier until after all other repair or replacement has been made. Install the new drier with the arrow on the drier in the direction of the refrigerant flow. -
Page 43: Removal And Replacement Of Mechanical Seal And Lower Housing
15) Use an electronic leak detector or soap bubbles to check for leaks. Add a trace of refrigerant to the system (if using an electronic leak detector), and then raise the pressure using nitrogen gas (140 PSIG). Do not use R-404A as a mixture with pressurized air for leak testing. - Page 44 5b. Lower Housing 11) Remove the O-ring and the bolts securing the housing to the gear motor and remove the housing from the gear motor. If inspection of the upper bearing inside the extruding head (see "IV.C.1. Upper Bearing Wear Check") indicates that it is out of tolerance, replace both it and the bearing inside the lower housing.
-
Page 45: Removal And Replacement Of Gear Motor
6. Removal and Replacement of Gear Motor 1) Move the control switch to the "DRAIN" position and drain all of the water from the evaporator. 2) After the water has stopped draining, move the control switch to the "OFF" position, then turn off the power supply. -
Page 46: Maintenance
V. Maintenance The maintenance schedule below is a guideline. More frequent maintenance may be required depending on water quality, the appliance's environment, and local sanitation regulations. WARNING • Only qualified service technicians should service the appliance. • Move the control switch and power switch to the "OFF" positions, then turn off the power supply before servicing. -
Page 47: Preparing The Icemaker For Periods Of Non-Use
VI. Preparing the Icemaker for Periods of Non-Use NOTICE When storing the icemaker for an extended time or in sub-freezing temperatures, follow the instructions below to prevent damage. When the icemaker is not used for two or three days under normal conditions, it is sufficient to only move the power switch to the "OFF"... -
Page 48: Disposal
VII. Disposal This icemaker contains refrigerant and must be disposed of in accordance with applicable national, state, and local codes and regulations. Refrigerant must be recovered by properly certified service personnel. -
Page 49: Technical Information
We reserve the right to make changes in specifications and design without prior notice. A. Specification and Performance Data Pressure data is recorded at 5 min. into freezing cycle. The data not in bold should be used for reference only. 1. DCM-270BAH SPECIFICATION SHEET AC SUPPLY VOLTAGE 115/60/1 AMPERAGE 8.5 A [AT 104°F(40°C)/WT 80°F(27°C)]... -
Page 50: Dcm-270Bah-Os
2. DCM-270BAH-OS SPECIFICATION SHEET AC SUPPLY VOLTAGE 115/60/1 AMPERAGE 8.5 A [AT 104°F(40°C)/WT 80°F(27°C)] MAXIMUM FUSE SIZE MINIMUM CIRCUIT AMPACITY ELECTRIC & WATER CONSUMPTION 90/70°F 70/50°F ELECTRIC W (kWH/100 lbs.) 669 (8.16) 638 (5.3) WATER gal./24HR (gal./100 lbs.) 26 (12) -
Page 51: Wiring Diagrams
B. Wiring Diagrams 1. DCM-270BAH(-OS) a) Serial Number: C10508L to D00829A (except C17634M and C17641M) WIRE COLOR CODE BK -BLACK BR -BROWN BU -BLUE (BR) DBU -DARK BLUE GR -GREEN 115/60/1 GY -GRAY LBU -LIGHT BLUE -ORANGE -PINK -RED POWER... -
Page 52: Dcm-270Bah(-Os)
2. DCM-270BAH(-OS) a) Serial Number: C17634M, C17641M, and D00833A and Later S1 DIP SWITCH SETTING No. 1 No. 2 No. 3 No. 4 No. 5 No. 6 No. 7 No. 8 No. 9 No. 10 DCM-270BAH(-OS)
Need help?
Do you have a question about the DCM-270BAH and is the answer not in the manual?
Questions and answers