Table of Contents
Advertisement
Quick Links
See the label attached on the set and
quote this information to your dealer
when you require service.
For The Warranty Terms & Conditions, Please Refer To Warranty Certificate.
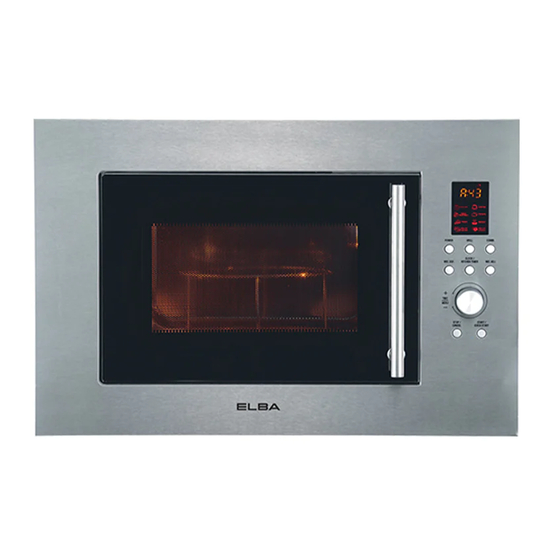
BUILT-IN MICROWAVE OVEN
MODEL: EMO-B2361BI(SS)
Owner's Manual
Please read this manual carefully
before operating your set.
Retain it for future reference.
Record model number and serial
number of the set.
Advertisement
Table of Contents

Subscribe to Our Youtube Channel
Related Manuals for Elba EMO-B2361BI(SS)


Summary of Contents for Elba EMO-B2361BI(SS)
- Page 1 BUILT-IN MICROWAVE OVEN MODEL: EMO-B2361BI(SS) Owner’s Manual Please read this manual carefully before operating your set. Retain it for future reference. Record model number and serial number of the set. See the label attached on the set and quote this information to your dealer when you require service. For The Warranty Terms & Conditions, Please Refer To Warranty Certificate. ...
-
Page 2: Precautions To Avoid Possible Exposure To Excessive Microwave Energy
Failure to observe the following precautions can result in hamful to microwave energy: 1. Do not attempt to temper with, or make any adjustment or repairs the door, control panel, safety interlocks or any other parts of the oven on your own, it must be repaired or replaced by the authorized service agent or after‐sales service centre or a similarly qualified person in order to avoid hazards. WARNING: It is hazardous for anyone other than a trained person to carry out any service or repair operation which involves the removal of any cover which gives protection against exposure to microwave energy. 2. Do not place any object between the oven front face and the door or allow soil or cleaner residue to accumulate on sealing surfaces. 3. Do not operate the oven if it is damaged. It is particularly important that the door of the oven is ... -
Page 3: Installation
explode. 10. Microwave heating of beverage can result in delayed eruptive boiling, therefore care has to be taken when handling the container. 11. Do not fry any food in the oven ! Hot oil can damage the oven parts and utensils and even result in skin burns. 12. Eggs in their shell and whole hard‐boiled eggs should not be heated in microwave ovens since they may explode even after microwave heating has ended. 13. Pierce foods with heavy skins such as potatoes, whole squashes, apples and chestnuts before cooking. 14. The contents of feeding bottles and baby jars should be stirred or shaken and the temperature should be checked before serving in order to avoid burns. 15. Cooking utensils may become hot because of heat transferred from the heated food. Potholders may be needed to handle the utensil. 16. Utensils should be checked to ensure that they are suitable for use in microwave oven. 17. WARNING: It is hazardous for anyone other than a trained person to carry out any service or repair operation which involves the removal of any cover which gives protection against exposure to microwave energy. 18. This appliance is not intended for used by persons (including children) with reduced physical, sensory or mental capabilities, or lack of experience and knowledge, unless they have been given supervision or instruction concerning use of the appliances by a person responsible for their safety. 19. This appliance is for domestic and household use only. 20. Save these instructions for future reference. 1. Place the oven on a flat and stable surface. Make sure all the packaging materials are removed from the inside of the door. Check the oven whether accessories all in good conditions. Warning: Check the oven for any damage, such as misaligned or bent door, damaged door seals and sealing surface, broken or loose door hinges and latches inside the cavity or on the door. If there is any damage, do not operate the oven and contact qualified service personnel. ... -
Page 4: Grounding Instructions
3. Relocate the microwave oven with respect to the receiver. 4. Move the microwave oven away from the receiver. 5. Plug the microwave oven into a different outlet so that microwave oven and receiver are on different branch circuits. This appliance must be grounded. This oven is equipped with a cord having a grounding wire with a grounding plug. It must be plugged into a wall receptacle that is properly installed and grounded. In the event of an electrical short circuit, grounding reduces risk of electric shock by providing an escape wire for ... -
Page 5: Product Descriptions
3. Do not use recycled paper products when microwave cooking, as they may contain small metal fragments which may cause sparks and/or fires. 4. Round /oval dishes rather than square/oblong ones are recommend, as food in corners tends to overcook. 5. Narrow strips of aluminum foil may be used to prevent overcooking of exposed areas. But be careful don’t use too much and keep a distance of 1 inch (2.54cm) between foil and cavity The list below is a general guide to help you select the correct utensils. Cookware Microwave ... -
Page 6: Control Panel
5. Control Panel 6. Wave Guide (Please do not remove the mica plate covering the wave guide) 7. Glass Tray 8. Grill Heater Metal Rack Display Screen Cooking time, power, indicators and present time are displayed. Power Press to select microwave power. Grill Press to set the grill cooking program. ... -
Page 7: O P E R A T I N G T H E M I C R O W A V E O V En
TIMER This is a 12 and 24 hours timer. You can take the steps below to set the timer. Press the clock/kitchen timer button for 3 seconds. “Hr 12” will shows on the screen, press the button once if you want to set 24 hours clock. Adjust the time/menu knob until the correct hour is displayed. Press the clock/kitchen timer button again. Adjust the time/menu knob until the correct minute is displayed. Press the clock/kitchen timer button to confirm. MICROWAVE COOKING Microwave cooking allows you to customize the cooking power and time. First, select a power level by pressing the power button (see the table below). Maximum cooking time is 95 minutes. Suppose you want to cook for 5 minutes at 60% Power Level. 1. Open the door and place the food into the oven, close it. 2. Press power button till the screen show the intended power. ... -
Page 8: Micro+Grill
GRILL Grill cooking is particularly useful for thin slices of meat, steaks, chops, kebabs, sausages and pieces of chicken. It is also suitable for hot sandwiches and au gratin dishes. Maximum cooking time can be set is 95 minutes. Suppose you want to program grill cooking for 12 minutes. Open the door and place the food into the oven, close it. Press gril button once. Adjust the time/menu knob to 12:00 (12minutes). Press the start/quick start button to start cooking. MICRO+GRILL The maximum cooking time that can be set is 95 minutes. Suppose you want to set combination cooking for 25 minutes. Open the door and place the food into the oven, close it. Press the combi. button once or twice. Cooking time Press combi. button Combination Use Microwave Grill once Co‐1 30% 70% fish, potatoes or au gratin pudding, omelets, baked twice Co‐2 55% 45% potatoes and poultry Adjust the time/menu knob to 25:00 (25minutes). ... -
Page 9: Kitchen Timer
KITCHEN TIMER You could set the oven timer to remind you the cooking time. The longest time you can set is 95 minutes. Suppose you want to set the kitchen timer for 30 minutes : 1. Press the clock/kitchen timer button once. 2. Adjust the menu/time knob to set 30:00 (30minutes). 3. Press the start/quick start button to confirm. NOTE : When the timer is counting, you can press the clock/kitchen timer button to see the timer and press stop/cancel within 5 seconds to cancel it. MENU COOK For food or the following cooking mode, it is not necessary to program the time and the cooking power. It is sufficient to indicate the type of food that you want to cook as well as the weight of the food. Open the door and place the food into the oven, close it. Adjust the time/menu knob in the position of anti‐clockwise direction once and turn it again to select food code. Press the wei. adj. to select the weight, check the screen for number of servings or preset weights, which should match weight of food you have placed in the oven. Press the start/quick start button to start cooking. Food Code Menu Cooking mode A‐1 POPCORN (99g) MICRO. A‐2 COFFEE (200ml/cup) ... -
Page 10: Weight Defrost
WEIGHT DEFROST Weight defrost enables you to defrost food according to the weight of food you insert. The weight range is from 100g to 1800g. Suppose you want to set the oven to weight defrost for 200g of food. Open the door and place the food into the oven, close it. Press the wei. def. button once. Press the wei. adj. button to select the weight. Press start/quick start button to start cooking. NOTE: During the defrosting process, the oven will pause and sound beeps to remind you to turn food over, (for evenly cooked) after that, press the start/quick start button to resume defrosting process. MULTI‐STAGE COOKING This microwave oven allows you to program up to 3 automatic cooking sequences. Suppose you want to set the following cooking program. Microwave cooking (100%) Microwave cooking (60%) 1. Open the door and place the food into the oven, close it. 2. Press the power button to set power at 100%. 3. Adjust the time/menu knob to program the cooking time. 4. Press the power button to set power at 60%. 5. Adjust the time/menu knob to program the cooking time. 6. -
Page 11: To Stop The Oven While The Oven Is Operating
STOP OVEN WHILE OVEN OPERATING 1. Press the stop/cancel button. You can restart the oven by pressing the start/quick start button. Press the stop/cancel to erase all instructions. 2. Open the door of the oven. You can restart the oven by closing the door and press the start/quick start button. NOTE: The oven stops operating when the door is opened. 1. Turn off the oven and remove the power plug from the wall socket before cleaning. 2. Keep the inside of the oven clean. When food splatters or spilled liquids adhere to oven walls, wipe with a damp cloth. Mild detergent may be used if the oven gets very dirty. Avoid the use of spray and other harsh cleaners as they may stain, streak or dull the door surface. 3. The outside surfaces should be cleaned with a damp cloth. To prevent damage to the operating parts inside the oven, water should not be allowed to seep into the ventilation openings. ... -
Page 12: Specifications
Power Supply 230-240V~50Hz Power Consumption (Microwave) 1400W Power Consumption (Grill) 1000W Rated Microwave Power Output 900W Operation Frequency 2450MHz Oven Cavity Dimensions 340mm(W)x220mm(H)x320mm(D) Dimensions 595mm(W)×390mm(H)×390mm(D) Built-in Dimensions 560mm(W)×365mm(H)×410mm(D) Oven Capacity 23 Litres Cooking Uniformity Turntable System Net Weight Approx. 14.5kg... - Page 13 A 3x20mm Sequence Name Quantity Cabinet Microwave Oven Screw3 x 20...
- Page 14 Space for ventilation Fasten the oven into the cabinet with 4 screws Installtion complete Make a cabinet to the dimension...
Need help?
Do you have a question about the EMO-B2361BI(SS) and is the answer not in the manual?
Questions and answers