Table of Contents
Advertisement
Quick Links
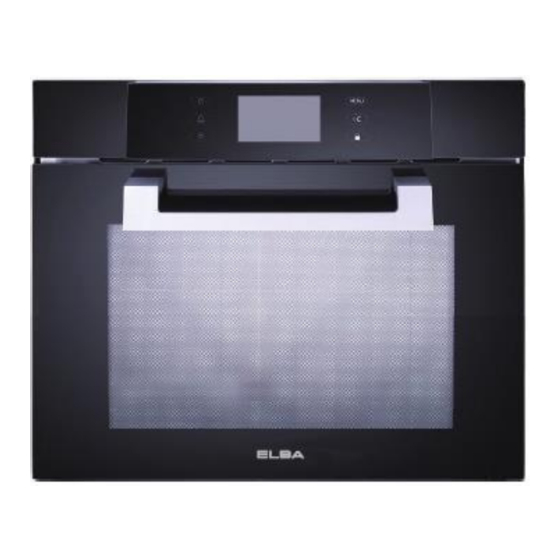
BUILT-IN MICROWAVE OVEN
MODEL: EMO-H3880TFT(BK)
Owner's Manual
Please read this manual carefully before
operating your set.
Retain it for future reference.
Record model number and serial number
of the set.
See the label attached on the set and
quote this information to your dealer when
you require service.
For The Warranty Terms & Conditions, Please Refer To Warranty Certificate
Advertisement
Table of Contents

Related Manuals for Elba EMO-H3880TFT(BK)


Summary of Contents for Elba EMO-H3880TFT(BK)
- Page 1 BUILT-IN MICROWAVE OVEN MODEL: EMO-H3880TFT(BK) Owner’s Manual Please read this manual carefully before operating your set. Retain it for future reference. Record model number and serial number of the set. See the label attached on the set and quote this information to your dealer when you require service.
-
Page 2: Table Of Contents
CONTENTS SAFETY PRECAUTIONS …………..…………………………………………………………………………………………….1 ATTENTIONS …………………………………………………………………………………………………………………………2 INSTALLATION …………………..…………………………………………………………………………………………….2 BEFORE THE INSTALLATION………………………………………………………………………………………………2 INSTALLATION OF BUILT-IN OVEN…………………………………………………………………………………………3 CONNECTION OF THE APPLIANCE …………………………………………………………………………………………4 FITTING ON A POWER SUPPLY CABLE……………………………………………………………………………………4 CONNECTING THE SUPPLY CABLE TO THE MAINS…………………………………………………………………4 HOW TO USE YOUR OVEN …………………………………………………………………………………………………….4-5 PRODUCT DESCRIPTIONS ……………………………………………………………………………………………………….5 PRODUCT OVERVIEW………………………………………………………………………………………………………………..5 OVEN CONTROL PANEL.………………………………………………………………………………………….…………………6... -
Page 3: Safety Precautions
We recommend that you read the instructions in this owner’s manual carefully before using it for the best performance and to extend the lifespan of your appliance, as it will provide you with all the instructions you require to ensure its safe installation, use and maintenance. 1. -
Page 4: Attentions
In order to avoid electric shock, please make sure the oven has been shut off before carrying out the maintenance. Use only original accessories provided by ELBA or its authorized service center. Do not use wet parts of body to touch the oven. -
Page 5: Installation Of Built-In Oven
3.2 Installation of Built-in Oven The material of the cabinet should be insulated, and the clearance between the edge of the cabinet and the oven should be over 100mm for ventilation. The panels of the adjacent cabinets must be made of heat-resistant material which can withstand temperatures of up to 100°C. In compliance with current safety standards, contact with the electrical parts of the oven must not be possible once it has been installed. -
Page 6: Connection Of The Appliance
4. CONNECTION OF THE APPLIANCE 4.1 Fitting on a Power Supply Cable The appliance has to be equipped with a three-core power supply cable which is designed to operate with an alternating current. The AC power supply should be supplied with 220-240V, 50/60Hz and a minimum 15A distribution circuit fuse or at least 15A distribution circuit breaker. -
Page 7: Product Descriptions
damage the enamel. Always place your cookware (dishes, aluminum foil, etc.) on the grilling rack provided with the appliance inserted especially along the oven guides. After baking food contains sugar and salt, please clean your oven promptly, or these will attach to the oven surface. -
Page 8: Oven Control Panel
6.2 Oven Control Panel Number Icon Descriptions ON / OFF Button, Press button to turn appliance on or off. Buzzer Button, Press button and set the countdown timer for reminder. Light Button, Press button to turn light on or off. Menu Button, Press button to return to the main menu screen. -
Page 9: Display Descriptions
6.3 Display Descriptions Number Descriptions Menu Current Time Program Selection Scroll Up Scroll Down Press to turn on appliance. The main menu appears in the display with a list of options. Select the program by touching the screen. If the desire program is not appear in display screen, please scroll up or down to search for the programs. -
Page 10: Symbol
6.5 Symbol The following symbols will be appear in the display screen. Symbol Descriptions You may scroll up or down by touching button. A tick will appear behind the option which is currently selected. This indicates additional information is available. This information window will be turned off by selecting OK button. -
Page 11: Programs And Functions
7. PROGRAMS AND FUNCTIONS 7.1 Selecting the Cooking Programs To select the cooking programs, turn the knob to desire program. The detail of the programs as below: Symbol Function Descriptions Microwave: This function is ideal for reheat, melting defrosting with several of power voltage selection. - Page 12 DATE Click date setting and enter the actual date by touching the keyboard input. The date sequence will display as “YEAR / MONTH / DATE” (YYYY/MM/DD). Click “OK” to save and return back to setting interface. TIME Click time setting and enter the actual time by touching the keyboard input. The time sequence will display as “HOURS : MINUTES”...
- Page 13 LANGUAGE Click language setting and select the language by touching the screen. The language selection are Simplified Chinese and English. Click the desire language and your selection will show as “√”behind the option. Click “OK” to save and return back to setting interface. BRIGHTNESS Click brightness setting and select the brightness by sliding the screen.
- Page 14 TEMPERATURE UNITS Click temperature units setting and select the temperature units by touching the screen. The temperature unit selection are ºC / ºF. Click the desire temperature unit and your selection will show as “√” behind the option. Click “OK” to save and return back to setting interface. FACTORY DEFAULT SETTING Click factory default setting if you wish to restore all the setting into default setting.
-
Page 15: Cooking With Microwave
Cooking with Microwave Warning! Read the section “Safety Precautions” before cooking with your microwave. Follow these recommendations when cooking with microwave: Before heating or cooking foods with skin (e.g. apples, tomatoes, potatoes, sausages) peel them so that they do not burst. Cut the food up before starting to prepare it. ... -
Page 16: Defrosting With Microwave
Vegetables Water Microwave Time Name Weight (G) Notice (ml) Power (Min) 9-11 Cauliflower Cut into slices and Broccoli cover well Mushroom Peas Cut into slices or blocks, Carrots 8-10 cover well Peel and cut into uniform size, Potatoes cover well Cut into segments or slices, Chives cover well... -
Page 17: Cooking With Grill
Please refer to the following table for different temperature of various foods. Defrosting Time Follow-up Time Frequency of Type of Food Weight (G) (Min) (Min) turnover 5-10 5-10 Meat 10-12 10-15 (Veal, Beef, Pork) 1000 21-23 20-30 1500 32-34 20-30 2000 43-45 25-35... -
Page 18: What Kind Of Ovenware Can Be Used
GRILL ELEMENT Name QUANTITY(G) TIME(MIN.) INSTRUCTIONS FISH Bass 18-24 Spread lightly with butter. After half of Sardines 6-8 FISH 15-20 cooking time turn and spread with seasoning. MEAT Sausages 6-8 UNITS 22-26 Prick after half cooking time and turn. Frozen Hamburgers 3 UNITS 18-20 Spare Rib (approx.3 cm thick) -
Page 19: Change The Running Program
TEMPERATURE The temperature default setting is 180ºC, the minimum is 50ºC / 120ºF and up to maximum 250ºC / 480ºF. The defrost function will be excluded the temperature setting. Slide left to lower down the temperature and slide right to set the higher temperature. Each slide is about 10ºC. -
Page 20: Cancel The Running Program
7.9 Cancel the running program In the program is running, you may touch button to return to the function interface. The display will show the message as below. Touch “YES” to back on the function interface and will terminate the running program. If you wish to continue to running program, touch “NO” to continue. - Page 21 To cancel the kitchen timer and enter to setup interface. Set the time to 00:00 and click “OK” and return back to Touch menu. The timer will cancel and timer display will not show anymore. NOTE: The kitchen timer does not interrupt the cooking process and only a reminder to the user.
-
Page 22: Cleaning And Maintenance
8. CLEANING AND MAINTENANCE Before cleaning or performing maintenance on your oven, disconnect the oven from the power supply. To extend the lifespan of your oven, it must be cleaned frequently. The enamel or stainless steel parts should be cleaned with lukewarm water without using any abrasive powders or corrosive substances which could damage the surface. - Page 23 Removing the Oven Door For a thorough cleaning, you can remove the oven door. Proceed as follow: 1. Open the oven door to the fullest extends. 2. Open the lever A completely on the left and right hinge (Fig.2). 3. Hold the door as shown (Fig.3). 4.
-
Page 24: Technical Specification
9. TECHNICAL SPECIFICATION Model EMO-H3880TFT(BK) Capacity 220 – 240V Voltage Frequency 50/60Hz 1,350 – 1,500W Convection Power Microwave Frequencies 2450MHZ Microwave Power 1,000W 1,500 – 1,600W Rated Power(Microwave) 1,400 – 1,650W Rated Power(Grill) Product Dimension (mm) 594 (W) x 455 (H) x 465 (D) Built-in Dimension (mm) 565 (W) x 458 (H) x min 600 (D) Carton Dimension (mm)
Need help?
Do you have a question about the EMO-H3880TFT(BK) and is the answer not in the manual?
Questions and answers