
Related Manuals for Onvif CM260IR-IP


Summary of Contents for Onvif CM260IR-IP
- Page 1 IR Water-Proof Network Camera Please read this instruction carefully for correct use of the product...
- Page 2 Notes „ Before operation, we strongly advise users to read this manual and keep it properly for using later. „ Please use the specified power supply to connect. „ Avoid from in correct operation, shock vibration, heavy pressing which can cause damage to product.
-
Page 3: Table Of Contents
2 Mega Pixel IP Camera User Manual Table of Contents Introduction ........................1 1.1 Summarization ......................1 1.2 Check Package Content ....................1 1.3 Overview ........................2 Installation ........................3 2.1 Install IP-CAM ......................3 2.2 Install CMS ............................. 4 IE Remote Access ...................... - Page 4 2 Mega Pixel IP Camera User Manual 5.5.5 DDNS Configuration ...................... 24 5.5.6 RTSP ........................... 25 5.5.7 UPnP ........................... 25 5.5.8 Mail Setting ........................26 5.5.9 FTP ............................26 5.6 Advanced Configuration ......................27 5.6.1 User Configuration ......................27 5.6.2 Security Configuration ....................
-
Page 5: Introduction
2 Mega Pixel IP Camera User Manual Page 1 1 Introduction 1.1 Summarization This IP-CAMERA (short for IP-CAM) is designed for high performance CCTV solutions. It adopts state of the art video processing chips. It utilizes most advanced technologies, such as video encoding and decoding technology, complies with the TCP/IP protocol, SoC, etc to ensure this system more stable and reliable. -
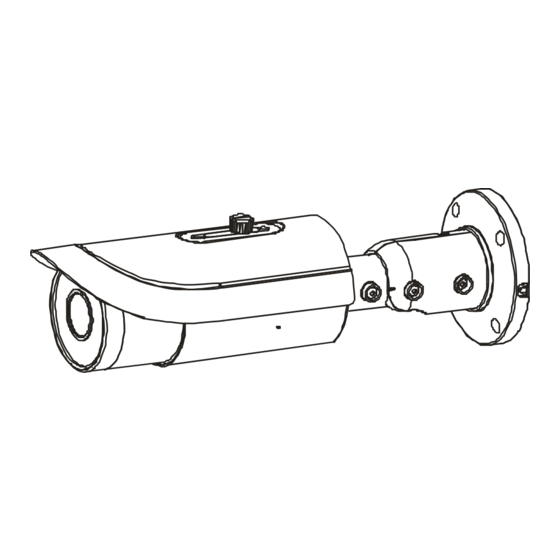
Page 6: Overview
2 Mega Pixel IP Camera User Manual Page 2 1.3 Overview This series of cameras support varifocal lens and prime lens. If the camera you get is prime lens, please skip the descriptions of the zoom and focus. Network cable Zoom MIC IN cable Focus... -
Page 7: Installation
2 Mega Pixel IP Camera User Manual Page 3 2 Installation 2.1 Install IP-CAM Before you start, please make sure that the wall or ceiling is strong enough to withstand three times the weight of the camera and check whether the power supply is in conformity with your AC outlet. -
Page 8: Install Cms
2 Mega Pixel IP Camera User Manual Page 4 2.2 Install CMS Find CMS software from CD and then double click “Setup.exe” file to pop up installation wizard. Install the software according to the prompts in the wizard. After you complete the installation, you will see the CMS and IP-Tool icon on the desktop. -
Page 9: Ie Remote Access
2 Mega Pixel IP Camera User Manual Page 5 3 IE Remote Access You may connect IP-Cam via LAN or WAN. Here only take IE browser (6.0) for example. The details are as follows: 3.1 LAN In LAN, there are two ways to access IP-Cam: 1. Access through IP-Tool; 2. Directly access through IE browser. -
Page 10: Directly Access Through Ie
2 Mega Pixel IP Camera User Manual Page 6 administrator and click “Modify” button to modify the setting. The default password of the administrator is “123456”. Double click the IP address and then the system will pop up the IE browser to connect IP-CAM. -
Page 11: Wan
2 Mega Pixel IP Camera User Manual Page 7 Select “Property” and then select internet protocol according to the actual situation (for example: IPV4). Next, click “Property” button to set the network of the PC. Open the IE browser and input the default address of IP-CAM and confirm. The IE browser will download Active X control automatically. - Page 12 2 Mega Pixel IP Camera User Manual Page 8 Go to Config ÆNetwork ConfigÆWired menu to modify the IP address. Go to the router’s management interface through IE browser to forward the IP address and port of the camera in the “Virtual Server”. Port Setup IP Setup Router Setup...
-
Page 13: Remote Preview
2 Mega Pixel IP Camera User Manual Page 9 4 Remote Preview 4.1 The Remote Preview Interface Icon Description Icon Description Motion alarm Sensor alarm indicator icon indicator icon Fix size Start/Stop record Actual size Playback Zoom in Snap Zoom out Talk Full screen Enable audio... -
Page 14: Playback
2 Mega Pixel IP Camera User Manual Page 10 The descriptions of the control panel are as follows: Button Description to rotate the dome upwards to rotate the dome downwards; to rotate the dome towards left; to rotate the dome towards right to rotate the dome diagonally up-left;... -
Page 15: Snap Pictures
2 Mega Pixel IP Camera User Manual Page 11 4.3 Snap Pictures Select the picture number, and then click “Snap” icon as shown below: Single Snap Snap multiple pictures Select the picture number from Frame pull down list box, such as 2, and check “Title” and “Time”... -
Page 16: Remote Live Surveillance
2 Mega Pixel IP Camera User Manual Page 12 5 Remote Live Surveillance Functions of remote configurations include: System Configuration, Video Configuration, PTZ Configuration, Alarm Configuration, Network Configuration and Advanced Configuration. You should firstly select the menu on the left, and then set the relative parameters. When one user configures parameters of a certain device, other users can not set this device. -
Page 17: Date & Time Configuration
2 Mega Pixel IP Camera User Manual Page 13 5.1.2 Date & Time Configuration Setting steps: 1. Go to ConfigÆDate & Time menu as shown below. 2. Set time zone. 3. Enable DST mode as required. 4. Set time. You may set time manually or enable NTP. 5.1.3 SD Card 1. -
Page 18: Camera Configuration
2 Mega Pixel IP Camera User Manual Page 14 5.2.1 Camera Configuration Setting steps: 1. Go to “Video Configuration” Æ “Camera” interface as shown below. 2. You may adjust brightness, contrast, hue and saturation of the picture. 3. Select white balance mode. 4. -
Page 19: Osd Configuration
2 Mega Pixel IP Camera User Manual Page 15 quality better in a constant bitrate but also help to calculate the capacity of the recording. VBR means that the compression bitrate can be adjustable according to the change of the video resources. -
Page 20: Roi Configuration
2 Mega Pixel IP Camera User Manual Page 16 To set up video mask 1. Enable video mask and select mask color. 2. Click “Draw” button and then drag the mouse to draw the video mask area. 3. Click “Save” button to save the settings. 4. -
Page 21: Ptz Configuration
2 Mega Pixel IP Camera User Manual Page 17 2. Check “Enable” and then click “Draw” button. 3. Drag the mouse to set the ROI area. 4. Set the level. 5. Click “Save” button to save the settings. Now, you will see the selected ROI area is clearer than other areas especially in low bitrate condition. -
Page 22: Preset Configuration
2 Mega Pixel IP Camera User Manual Page 18 2. Input the protocol, address and baud rate according to the speed dome. 5.3.2 Preset Configuration 1. Go to “PTZ Configuration”Æ “Preset” to see an interface as shown below: Button Meanings to rotate the dome upwards;... -
Page 23: Alarm Configuration
2 Mega Pixel IP Camera User Manual Page 19 5.4 Alarm Configuration Alarm configuration includes six submenus: Motion Detection Area, Motion Detection Trigger, Motion Detection Schedule, Alarm Input Trigger, Alarm Input Schedule and Alarm Out. 5.4.1 Motion Detection Area 1. Go to “Alarm configuration”Æ “Motion Detection Area” to see an interface as below. 2. -
Page 24: Motion Detection Schedule
2 Mega Pixel IP Camera User Manual Page 20 3. Set alarm holding time. 4. Set alarm trigger options. Alarm Out: If selected, this would trigger the external relay output on detecting a motion based alarm. Trigger Snap: If selected, the system will snap images on an alarm and save them in SD card. Trigger Email: If the email and attach picture checkbox is checked (Email address shall be set first in the Mail config interface), the triggered snap pictures and event will be sent into those address. -
Page 25: Alarm Input Trigger
2 Mega Pixel IP Camera User Manual Page 21 5.4.4 Alarm Input Trigger Æ 1. Enter “Alarm Configuration” “Alarm Input Trigger” to see a screen as shown below: 2. Select the sensor at the “Sensor” pull down list and set the sensor name and alarm type: NO and NC. -
Page 26: Alarm Out
2 Mega Pixel IP Camera User Manual Page 22 1. Select the sensor which needs to setup the alarm parameter at the “Sensor” pull down list. 2. The following setup steps are similar to Motion Detection Schedule’s. Please refer to Motion Detection Schedule chapter for more details. -
Page 27: Server Configuration
2 Mega Pixel IP Camera User Manual Page 23 device. 4. PPPoE: User needs to manual input the user name and password for dial-up internet. Firstly, log in IE clients and then enter user name and password of PPPoE, save the setting and exit. -
Page 28: Ddns Configuration
2 Mega Pixel IP Camera User Manual Page 24 selected, when the IP address of the device was changed, a new IP address will be sent to FTP server. 5.5.5 DDNS Configuration Æ 1. Go to “Network Configuration” “DDNS Configuration” tab as shown below. 2. -
Page 29: Rtsp
2 Mega Pixel IP Camera User Manual Page 25 After you successfully request your domain name, you will see your domain in the list. 3. Select the server type and then input the username, password and domain name you apply for in the DDNS configuration interface. -
Page 30: Mail Setting
2 Mega Pixel IP Camera User Manual Page 26 5.5.8 Mail Setting Go to “Network Configuration” Æ “Mail Setting” interface. 1. From Email: Sender’s e-mail address. 2. User name and password: Sender’s user name and password. 3. Server address: SMTP name of sender. 4. -
Page 31: Advanced Configuration
2 Mega Pixel IP Camera User Manual Page 27 Please refer to the following table for parameters and instructions of FTP configuration. Parameter Meaning Server name The name of the FTP server The address of the FTP server Server address Port The port number of the FTP server The user name of the FTP server... -
Page 32: Security Configuration
2 Mega Pixel IP Camera User Manual Page 28 2. Clicking “Modify” button will pop up “Modify user” dialog box as shown below. Modify User 3. Input original password of this user in the “Password” text box. 4. Input new password in the “New password” and “Confirmation” text box. 5. -
Page 33: Configure Backup & Restore
2 Mega Pixel IP Camera User Manual Page 29 will display in the list box; the operation step of “Allow the following MAC address” is the same with “Deny the following IP address”. 5. Select the MAC address which needs to be deleted from the MAC address list box and click “Delete”... -
Page 34: Reboot Device
2 Mega Pixel IP Camera User Manual Page 30 5.6.4 Reboot Device Go to Advanced configuration—Reboot device to see an interface as shown below. Click “Reboot device” button to reboot the device. 5.6.5 Upgrade Go to Advanced Configuration—Upgrade interface as shown below. 1. -
Page 35: Video Search
2 Mega Pixel IP Camera User Manual Page 31 6 Video Search Click “Picture” icon and search the images which saved in the SD card. Set time: Select date in the “Calendar” and choose the start and end time. Choose event “Motion” or “Sensor”. Click “Search”... - Page 36 2 Mega Pixel IP Camera User Manual Page 32 Item Buttons Explanations Close: Select certain picture and click this button to close this picture. Close all: Click this button to close all pictures viewing. Save: Click this button to select the save path of the picture file on the PC for saving the current picture.
- Page 37 2 Mega Pixel IP Camera User Manual Page 33 7 Q & A Q: How to find my password if I forget it? A Reset the device to the default factory settings. Default IP: 192.168.226.201 User name: admin Password: 123456 Q Fail to connect devices through IE browser, why? A: Network doesn’t connect well.
- Page 38 2 Mega Pixel IP Camera User Manual Page 34 Then click OK to finish setup. b. Other plug-ins or anti-virus blocks ActiveX. Please uninstall or close them. Q No sound can be heard, why? A Audio input device is not connected. Please connect and try again. B: Audio function is not enabled at the corresponding channel.
-
Page 39: Specification
Support simultaneous monitoring for up to 10 users; Online Connection Support multi-stream real time transmission Network Protocol TCP/IP, UDP, DHCP, NTP, RTSP, PPPoE, DDNS, SMTP, FTP Interface Protocol ONVIF, GB-T/28181-2011 Function Smart Alarm Motion Alarm, Sensor Alarm PoE Power Supply Support...
Need help?
Do you have a question about the CM260IR-IP and is the answer not in the manual?
Questions and answers