Advertisement
Table of Contents
- 1 Installation Guide
- 2 Replacing Existing Thermostat
- 3 Mounting Holes
- 4 Programming Guide
- 5 Changing Fahrenheit (F) to Celsius (C)
- 6 Temporary Program Override
- 7 Manual Operation
- 8 Temperature Settings
- 9 To Test Thermostat
- 10 Troubleshooting
- 11 Wiring Diagrams
- 12 Cool Only
- 13 Limited Warranty
- Download this manual
ELECTRONIC THERMOSTATS
Installation Guide
IMPORTANT SAFETY INFORMATION WARNING:
•
Always turn off power at the main power source by unscrewing
fuse or switching circuit breaker to the off position before installing,
removing, cleaning, or servicing thermostat.
•
Read all of the information in this manual before installing or
programming this thermostat.
•
This is a 24V AC low-voltage thermostat. Do not install on voltages
higher than 30V AC.
•
All wiring must conform to local and national building and electrical
codes and ordinances.
•
Do not short (jumper) across terminals on the gas valve or at the
system control to test installation. This will damage the thermostat
and void the warranty.
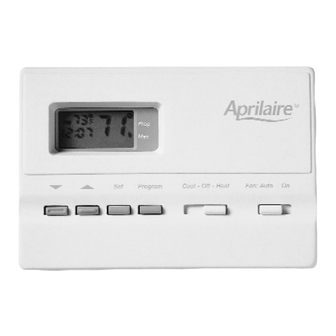
MODEL 8353
5 - 2 Day Programmable
1 Heat / 1 Cool
Electric / Gas
User's Manual
Installation and
Programming
1
®
Advertisement
Table of Contents

Related Manuals for Aprilaire 8353


Summary of Contents for Aprilaire 8353
-
Page 1: Installation Guide
Do not short (jumper) across terminals on the gas valve or at the system control to test installation. This will damage the thermostat and void the warranty. ® MODEL 8353 5 - 2 Day Programmable 1 Heat / 1 Cool Electric / Gas User’s Manual... -
Page 2: Replacing Existing Thermostat
Features • Four setpoints for weekday programming—two setpoints for weekend comfort. • Two “AA” ENERGIZER brand batteries retain program memory, even during power outages. • Low battery indicator. • Fahrenheit/Celsius display option. • Programmable from 45°F (4°C) to 90°F (32°C). •... - Page 3 Installing the Model 8353 Thermostat NOTE: For new installations, mount thermostat on inside wall, 4-5 feet above the floor. Do not install behind a door, in a corner, near air vents, in direct sunlight, or near any heat or steam generating fixtures.
-
Page 4: Mounting Holes
MORN DAY EVE NITE CHANGE 7. Drill the marked holes using a 3/16” drill bit. Note: Enclosed plastic anchors do not require a drilled hole for drywall. 8. Tap plastic anchors into the wall. 9. Align base with plastic anchors and feed wires through opening. See Fig 4. -
Page 5: Programming Guide
13. Install two “AA” ENERGIZER brand batteries or equivalent into battery compartment. Be sure to match positive (+) ends of batteries with positive (+) battery terminals in the battery compartment. The display will show as follows: 14. Replace cover onto thermostat by snapping into place. 15. -
Page 6: Changing Fahrenheit (F) To Celsius (C)
5. Press SET P *The Temperature Differential is Factory preset at 1°. This means that whenever the room temperature changes by one full degree from the temperature setting, the system will turn on. If the system turns on too often, increase the temperature differential. 7. - Page 7 4. Press SET. PROG SET PROG/MAN 5. Press MORN temperature. 6. Repeat Steps 2-5 for DAY, EVE, and NITE. 7. Press SET to finish. 8. Shift COOL-OFF-HEAT switch to HEAT position. 9. Repeat steps 2-7 to program HEAT (winter) settings. NOTE: Both summer and winter programs use the same time settings.
-
Page 8: Temporary Program Override
Temporary Program Override To temporarily increase or decrease temperature Press PROG SET PROG/MAN COOL-OFF-HEAT The thermostat will automatically return to the program at the next scheduled setting change or after four hours. Manual Operation Manual operation allows continuous override of the program settings. 1. -
Page 9: To Test Thermostat
To Test Thermostat WARNING: DO NOT SHORT (JUMPER) ACROSS TERMINALS OF GAS VALVE OR SYSTEM CONTROL TO TEST OPERATION. THIS WILL DAM- AGE THE THERMOSTAT AND VOID YOUR WARRANTY. CAUTION: Do not switch system to cool if the temperature is below 50°F (10°C). -
Page 10: Troubleshooting
Troubleshooting Symptom Thermostat does not turn on system Thermostat turns on and off too frequently. Display is blank, flashing or constant “LO BAT.” Weekend Program follows four adjustment settings. System fan does not operate properly. Time shown on display is not the current time of day. -
Page 11: Wiring Diagrams
Wiring Diagrams The following is just a sample of the most common types of HVAC sys- tems. Refer to your systems installation manual for wiring information. HEAT/COOL 4-WIRE SINGLE TRANSFORMER Transformer 24 VAC 120 VAC HEAT ONLY 2-WIRE SINGLE TRANSFORMER NOTE: Remove factory installed jumper Transformer... -
Page 12: Limited Warranty
Limited Warranty Your Research Products Corporation Aprilaire ® Thermostat unit is expressly warranted for two (2) years from date of installation to be free from defects in materials and workmanship. Research Products Corporation’s exclusive obligation under this warranty shall be to supply, without charge, a replacement for any thermostat which is found...
Need help?
Do you have a question about the 8353 and is the answer not in the manual?
Questions and answers