
Related Manuals for Mahindra 2816 HST


Summary of Contents for Mahindra 2816 HST
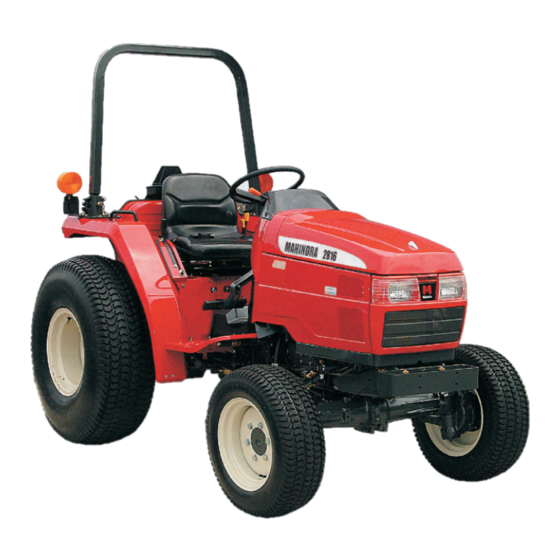
- Page 1 OPERATOR MANUAL '16' Series 2816 HST Click here to go on INDEX Main Menu contactus@almats.com...
-
Page 2: About This Manual
Prior to delivery, the tractor was carefully inspected, both at the factory and by your Mahindra dealer, to ensure that it reaches you in optimum condition. To maintain this condition and ensure trouble free performance, it is important that the routine services, as specified in this manual, are carried out at the recommended intervals. - Page 3 Off-Road Diesel Engine Emission Control System Warranty Statement MITSUBISHI DIESEL ENGINE MITSUBISHI HEAVY INDUSTRIES, LTD. GENERAL MACHINERY & SPECIAL VEHICLE HEADQUARTERS 16 Series, Model - 2816 HST...
- Page 4 Where a warrantable condition exists, the (OEMs) will repair your small off-road engine at no cost to you including diagnosis, parts and labor. 16 Series, Model - 2816 HST...
- Page 5 30 days. If you have any question regarding your warranty rights and responsibilities, you should contact (Mahindra, USA Inc) at 1-800-561-9256. The emission warranty is a defects warranty. Defects are judged on normal engine performance.
- Page 6 OEMs would sell engines. Claims and Coverage Exclusions Warranty claims shall be filled in accordance with the provisions of the OEMs engine warranty policy. Warranty coverage shall be excluded for failures of warranted parts 16 Series, Model - 2816 HST...
- Page 7 MHI owner’s manual. Consequential Coverage Coverage hereunder shall extend to the failure of any engine components caused by the failure of any warranted part still under warranty. 16 Series, Model - 2816 HST...
- Page 8 FRONT means the front grill end while REAR means the lifting arm end of the tractor. LEFT or RIGHT means the left or righthand side of the tractor looking forward from operator’s seat. LEFT REAR FRONT RIGHT 16 Series, Model - 2816 HST...
- Page 9 1. TRACTOR MODEL NUMBER _______________________________ 2. TRACTOR SERIAL NUMBER _______________________________ 3. ENGINE SERIAL NUMBER _________________________________ 4. ROPS SERIAL NUMBER ___________________________________ SERIAL NUMBER LOCATIONS ROPS SERIAL NUMBER PLATE TRACTOR MODEL NUMBER AND SERIAL NUMBER PLATE ENGINE SERIAL NUMBER 16 Series, Model - 2816 HST...
- Page 10 GENERAL TABLE OF CONTENTS Safety/Decals ..................1-19 Specifications ..................20-24 Instruments/Controls ................25-41 Operating Instructions ..............42 - 62 Field Operation .................. 63-77 Tires/Wheels/Spacing/Ballast ............. 78-87 Lubrication/Filters/Fluids..............88-115 Maintenance/Adjustments ............... 116-122 Electrical System................123-130 Storage ..................131-132 16 Series, Model - 2816 HST...
-
Page 11: Safety Precautions
4. Do not allow children or adults 2. Keep tractor steps clean to having no knowledge of the avoid accidents due to slip- tractor or tractor operation, to page. operate the tractor. 16 Series, Model - 2816 HST... - Page 12 Shut down the engine and wait while smoking. until it cools sufficiently. For removal, turn the cap to the first stop to relieve pressure. To replace the coolant, use the coolant recovery tank. 16 Series, Model - 2816 HST...
- Page 13 If diluted sulphuric acid from the battery has been swallowed: too little play in the steering. Rinse the mouth with clean water immediately and drink a lot of raw eggs or milk. Lie down quietly. 16 Series, Model - 2816 HST...
- Page 14 C-2. Starting and Driving the any attachment is completely Tractor touching the ground. Always operate the tractor at the proper speeds which enable you to keep the tractor in your complete control. 16 Series, Model - 2816 HST...
- Page 15 Never attempt to jump on or off a moving tractor. When starting the tractor, operating any attachment or engaging the PTO make sure that no one is in the way, especially children. 16 Series, Model - 2816 HST...
- Page 16 For increase the stability and driving the 4-WD tractor on the operate with extra precaution. road, be sure to place the 4-WD shift lever in OFF position. 16 Series, Model - 2816 HST...
- Page 17 When using agricultural chemicals with an attachment on the tractor, always follow the instructions in the manual for the attachment as well as the instructions provided by the chemical manufacturer. 16 Series, Model - 2816 HST...
- Page 18 GAS. EXPLOSION CAN RESULT FROM SPARKS, FLAMES, OR WRONG CABLE CON- NECTIONS. TO CONNECT JUMPER CABLES OR CHARGER, SEE MANUAL(S) FOR THE CORRECT PROCEDURE. FAILURE TO FOLLOW THE ABOVE INSTRUCTIONS CAN CAUSE SERIOUS PERSONAL INJURY OR DEATH. 16 Series, Model - 2816 HST...
- Page 19 SAFETY/DECALS_______________________________________________________ WARNING ROTATING MACHINE PARTS STAY CLEAR, KEEP SHIELDS INSTALLED TO HELP PROTECT FROM CLOTHING ENTANGLEMENT AND INJURY. 321-3710 16 Series, Model - 2816 HST...
- Page 20 See Folding the ROPS in this manual. Normal Operating Position For normal operation, including transport, always use the foldable ROPS in the secured upright position with a fastened seat belt for full rollover protection. 16 Series, Model - 2816 HST...
- Page 21 Slowly raise the hitch to maximum height to check for necessary clearance. For drawbar attached and/or PTO driven equipment, check for clearance including turning corners. 16 Series, Model - 2816 HST...
- Page 22 Replacement parts must be the same as given in the Parts Catalog for your tractor. ROPS Label 1. ROPS is equipped with a ROPS label. 2. The label contains the ROPS serial number and applicable stand- ards. 16 Series, Model - 2816 HST...
- Page 23 Remove the lock nuts. bolts. STEP 2 STEP 4 LOCK PIN LOCK BOLT Loosen the lock bolts enough to Remove the lock pins. permit the position pin to be removed. DO NOT remove pins until STEP 6. 16 Series, Model - 2816 HST...
- Page 24 NOTE: The lock nuts can be omitted for operator conven- ience, if the ROPS is folded fre- quently. When the low clearance tractor operation is completed, return the ROPS to the secured upright position. 16 Series, Model - 2816 HST...
- Page 25 Place the tractor on level ground, put the range shift lever in the L position, apply the park brake and stop the engine. STEP 2 STEP 1 LOCK PIN LOCK NUT Remove the lock pins. Remove the lock nuts. 16 Series, Model - 2816 HST...
- Page 26 Loosen the jam nut on the lock to the upright position. bolts. STEP 5 STEP 8 ROPS BAR POSITION PIN LOCK BOLT Install the position pins. If both pins can be installed, continue to Loosen the lock bolts. STEP 10. 16 Series, Model - 2816 HST...
- Page 27 ROPS BAR Install the position pins. Align the CAREFULLY move the ROPS holes of the position pins and bar to the upright position. ROPS brackets so that the lock pins can be installed easily. 16 Series, Model - 2816 HST...
- Page 28 Tighten the jam nut on the lock tion pins are too tight or loose, bolts to a torque of 33 to 40 lb ft repeat STEP 15. (44 to 54 Nm). Continue to STEP 16 Series, Model - 2816 HST...
- Page 29 ROPS is folded frequently. Rollover protection is provided only with proper assembly. Lock pins, hinge pins and position pins must be in place. Correct parts may be obtained from your dealer. M234A 16 Series, Model - 2816 HST...
- Page 30 Fuel Injection Pump ........BOSCH M Plunger In Line NIPPONDENSO Injection Pump Timing ........17 Degrees Before Top Dead Center (BTDC) Fuel Injectors ............. Throttle Type, NIPPONDENSO *Manufacturer’s estimate under standard condition and subject to change without prior notice. 16 Series, Model - 2816 HST...
-
Page 31: Power Train
Hydrostatic Drive ....3 Speed ranges in Forward and Reverse with Variable Speeds Shift Control Hydrostatic Drive ....Actuated by Pedal on the RH Step and lever on the LH Fender Oil Cooler ................. Hydrostatic Drive PTO HP ....................21.1 HP 16 Series, Model - 2816 HST... -
Page 32: Differential Lock
Type Control ................ Position Control Type Valve ......... Three Positions, Lift, Hold and lower Lifting Capacity at 24” behind Lift Point (Per ASAE S349.1) ..................750 kg (1653 Lb) Type of Cylinder ............. Single Acting Type 16 Series, Model - 2816 HST... -
Page 33: Hydraulic System
Speed ............2000 RPM at 2632 Engine RPM Drawbar Type .................... Fixed Type Distance from Hitch Hole to the End of PTO Shaft..85mm (3.346 inch) Maximum Vertical Load on Drawbar ........136kg (300lbs) 16 Series, Model - 2816 HST... - Page 34 (To end of lower link) OVERALL WIDTH 54.3inch 1380mm (To end of tire) HEIGHT 84.3inch 2140mm (To Top of Rops) WHEELBASE 65.0inch 1650mm GROUND CLEARANCE 13.0inch 330mm TURNING RADIUS 94.5inch 2400mm (With brake assistance) WEIGHT 2370.4lbs 1075kg 16 Series, Model - 2816 HST...
- Page 35 RPM. Yellow line A shows the 540 rpm of the Rear PTO speed. Yellow line B shows the 2000 rpm of the MID PTO speed. 16 Series, Model - 2816 HST...
- Page 36 METER will operate when the turn signal switch is turned to the left. The RH indicator will operate when the switch is turned to the right. Both indicators will operate ON and OFF when Hazard switch is pushed down. 16 Series, Model - 2816 HST...
- Page 37 Check for the cause. 8. HIGH BEAM INDICATOR – This signal indicates the head lamp high beam is ON or OFF. The INDICATOR illumi- nates when the head lamp is on high beam position. 16 Series, Model - 2816 HST...
- Page 38 IMPORTANT: Do not keep the starter key switch in the ON position for a long period of time when the engine is not operating. 16 Series, Model - 2816 HST...
- Page 39 – Move the switch down to dim the head lamps. 5. FLASHER CONTROL BUTTON – To flash the Flasher Lamps when- ever the tractor is operated or traveling on roads. Push the button to energize the lamps. 16 Series, Model - 2816 HST...
- Page 40 To indicate that you are going to turn the tractor to the LEFT, move the turn signal switch down. Center position is OFF. 7. HORN BUTTON (OPTIONAL) — Press the button to energize the horn. 16 Series, Model - 2816 HST...
- Page 41 Push the pedal down to increase engine speed. NOTE: The engine speed control level must be set to give the slowest engine speed when the throttle pedal is used. 16 Series, Model - 2816 HST...
- Page 42 Remember that liquid in the tires, weights on the machine or wheels, tanks filled with fertilizer, herbicides or insecticides - all these add weight and increase the distance you need in which to stop. 16 Series, Model - 2816 HST...
- Page 43 To en- gage the park brake, lock the brake pedals together, push down on the brake pedals and move the park brake lever downward. Push the brake pedal down to release the park brake. 16 Series, Model - 2816 HST...
- Page 44 2. Pedal completely depressed – Transmission and PTO disengaged 8. CLUTCH LOCK LATCH – For long term storage, lock the clutch pedal in the disengaged position. This will prevent the clutch disc from sticking to the engine flywheel. 16 Series, Model - 2816 HST...
- Page 45 INSTRUMENTS/CONTROLS _____________________________________________ (Hydrostatic Drive) 16 Series, Model - 2816 HST...
- Page 46 NOTE: 1. The Rear and Mid PTO shaft can be operated at the same time. 2. When not using the Mid PTO shaft, cover the shaft with the Mid PTO cover. 16 Series, Model - 2816 HST...
- Page 47 4. HITCH CONTROL LEVER – Use this lever to control the position of the hitch. Move the lever forward to lower the hitch to the required depth. Move the lever to the rear to raise the hitch to the required height. 16 Series, Model - 2816 HST...
- Page 48 The remote hydraulic control lever which operates the remote control valve is located on the RH side fender. See Remote Hydraulic Control in this manual for more information. 16 Series, Model - 2816 HST...
- Page 49 (Hydrostatic Drive) 1. DIFFERENTIAL LOCK PEDAL – Push the pedal down to engage the differential lock. A spring inside the differential lock will push it out of engagement when pedal is released. HYDROSTATIC DRIVE 16 Series, Model - 2816 HST...
- Page 50 Turn the knob fully clockwise to lock the hitch in position. See Hitch Lowering Speed Adjustment in this manual for more in- formation. 16 Series, Model - 2816 HST...
- Page 51 2. Move the steering wheel rearward or forward to the required position, then return the lever upward to lock the steering column. 3. Make sure that the lock is en- gaged. 16 Series, Model - 2816 HST...
-
Page 52: Before Starting The Engine
8. Check the air pressure of the tires. 9. Make sure the PTO safety guard is installed. 10. Check the coolant level in the radiator and reservoir bottle. Add water and ethylene glycol coolant as needed. 16 Series, Model - 2816 HST... - Page 53 LOWER LINK BRACKET BOLTS After the first 10 hours of operation, check the Lower Link Bracket bolts. Tighten the bolts to the correct tightening torque 39 to 44 Nm (29 to 33 Ib ft). 16 Series, Model - 2816 HST...
- Page 54 RH side of the fuel tank. Before starting the engine, be sure all operating controls are in neutral or park lock position. This will eliminate accidental movement of the machine or start up of power driven equipment. M106D 16 Series, Model - 2816 HST...
- Page 55 Turn the starter key switch to the Put the range shift lever in the N heat & ON position. (Engine start) slot. Wait until the glow plug indicator lamp is put out. (Approximately 1 to 3 seconds.) 16 Series, Model - 2816 HST...
- Page 56 1500 RPM as soon as the engine starts. 2. If the engine starts and then stops, wait for the starting motor to stop turning before you turn the key switch to START position again. 16 Series, Model - 2816 HST...
- Page 57 N (Neutral) to an area where the transmission can be checked by your Dealer. Refer to Towing the Tractor in this manual. If there is no obvious gear clash, drive the tractor in the normal manner. 16 Series, Model - 2816 HST...
- Page 58 STEP 2 MID PTO LEVER REAR PTO LEVER Put the REAR PTO control lever, MID PTO control lever and the range shift lever in the OFF or N (neutral) position. 16 Series, Model - 2816 HST...
- Page 59 NOTE : Do not use ether as a cold temperature starting aid. IMPORTANT: temperatures, To start engine during cold ambient put the engine control level at the low idle position. After starting the engine, run at 1500rpm for approximately 5 minutes to warm the engine. 16 Series, Model - 2816 HST...
- Page 60 3. STOPPING THE ENGINE. A. Run the engine at slow speed for a short period of time. This will permit the engine temperature to decrease gradually before stop- ping the engine. 16 Series, Model - 2816 HST...
- Page 61 2. Hydrostatic Drive: Move the Speed Lock lever to OFF position and put the range shift lever in the L position. 3. Lock the brake pedals together, push the brake pedals down and move the park brake lever up to engage the park brake. 16 Series, Model - 2816 HST...
- Page 62 Travel speed should be such that complete control and machine sta- bility is maintained at all times. Where possible, avoid operating near ditches, embankments and holes. Reduce speed when turning, crossing slopes, and on rough, slick, or muddy surfaces. M109A 16 Series, Model - 2816 HST...
- Page 63 Do not drive on roads, or at high speed anywhere, with the differential lock engaged. Difficult steering will occur, and can result in an accident. In field operation, use the differential lock for traction improvement, but release for turning at row ends. M116 16 Series, Model - 2816 HST...
- Page 64 3. Release the clutch pedal slowly. The following table shows the required engine speed to get the required Rear PTO output shaft speed. PTO Output Required Shaft Speed Engine Speed 540 RPM 2356 RPM 16 Series, Model - 2816 HST...
- Page 65 Do not drive on roads, or at high speed anywhere, with the differential lock engaged. Difficult steering will occur, and can result in an accident. In field operation, use the differential lock for traction improvement, but release for turning at row ends. M116 16 Series, Model - 2816 HST...
- Page 66 3. Release the clutch pedal slowly. The following table shows the required engine speed to get the required Rear PTO output shaft speed. PTO Output Required Shaft Speed Engine Speed 540 RPM 2376 RPM 16 Series, Model - 2816 HST...
- Page 67 3. Release the clutch pedal. The following table shows the required engine speed to get the required Mid PTO output shaft speed. MID PTO Output Required Shaft Speed Engine Speed 2000 RPM 2632 RPM 16 Series, Model - 2816 HST...
- Page 68 PTO shaft (especially if the tractor PTO guard is moved upward or re- moved) extended shielding equivalent to the PTO guard must be in- stalled with the attachment. Install the PTO guard to its original posi- tion immediately when the attachment is removed. M126A 16 Series, Model - 2816 HST...
- Page 69 PTO running, keep clear of all moving parts as they are a potential safety hazard. M127 IMPORTANT: Follow the implement manufacturers recommendations in adjusting and aligning the implement and implement driveline with the tractor. 16 Series, Model - 2816 HST...
- Page 70 Rear upset can result if pulling from wrong location on tractor. Hitch only to the drawbar. Use 3 point hitch only with the implements de- signed for its use - not as a drawbar. M119 16 Series, Model - 2816 HST...
- Page 71 IMPORTANT: When towing an implement or wagon with the tractor, the complete rear area warning system (amber warning lamps, rear red lamp and SMV emblem) must be easily seen by any vehicle operator coming near the tractor. 16 Series, Model - 2816 HST...
- Page 72 The rear work lamp is turned on by the switch on the lamp. The starter key switch must be in the ON position before the work lamp can be turned on. IMPORTANT: Do not turn on the rear work lamp while travelling on pub- lic roads. 16 Series, Model - 2816 HST...
- Page 73 PTO operation of trailing type equipment. DRAWBAR PTO RPM PTO SHAFT DIAMETER DIMENSION A 14 In. 1.375 In. (356 mm) (34.9 mm) IMPORTANT: The maximum fixed drawbar vertical load is 300 lbs (136 kg). 16 Series, Model - 2816 HST...
- Page 74 Connect the chain to the tractor drawbar support and the towed equipment as shown in the illustration. Check the adjustment of the safety chain by turning the tractor completely to the right and left. Adjust the chain as necessary. SAFETY CHAIN 16 Series, Model - 2816 HST...
- Page 75 B – Diameter of holes in top of 19.1 mm (3/4 inch) Implement mast C – Diameter of hitch pins 22.2 mm (7/8 inch) D – Lower Hitch Pin 682.6 mm (26-7/8 Inch) Inner Shoulder Spread MAST HITCH PIN HITCH PIN 16 Series, Model - 2816 HST...
- Page 76 RH LIFT LINK Turn the turnbuckle clockwise to shorten the link or counter- clockwise to lengthen the link. IMPORTANT: After the lift link is adjusted, make sure the locknut is tightened against the turnbuckle. 16 Series, Model - 2816 HST...
- Page 77 After making final adjustments carefully raise the implement to make sure that there is proper clearance between the implement tractor components. LOCK NUT NOTE: Make sure the lock nut is tightened after adjusting the stabilizer. 16 Series, Model - 2816 HST...
- Page 78 4. Stop the engine and remove the key from the key switch before leaving the tractor. 5. Disconnect the implement from the hitch. NOTE: Be sure the tractor and implement are stable and free from any tendency to roll over. 16 Series, Model - 2816 HST...
- Page 79 IMPORTANT: Position of the raise stop should not be set so rearward that a insufficient free play of the lift arms is available at the highest position when hitch control lever is moved until the lever is reached to the raise stop. 16 Series, Model - 2816 HST...
- Page 80 The depth of the implement RAISE will be automatically controlled by the draft on the implement. LOWER Slowly move the hitch control lever forward until the implement is at the needed depth. 16 Series, Model - 2816 HST...
- Page 81 10. Re-enter the field and lower the plow by moving the hitch control lever forward to the stop. 11. The plow will maintain the desired depth as previously set by the draft control lever. 16 Series, Model - 2816 HST...
- Page 82 Put the hydraulic flow control knob in the LOCK position. Lower or block elevated implements and other attachments before servicing or when leaving the equipment. M132A 16 Series, Model - 2816 HST...
- Page 83 Connect the implement hoses to the remote hydraulic couplers so that the implement lowers when the control lever is pushed forward and raises when the lever is pulled rearward. Switch the hoses if the imple- ment works in the opposite way. HYDRAULIC COUPLERS 16 Series, Model - 2816 HST...
- Page 84 If it is necessary to service the implement in the raised position, use jack stands to safely block the implement in place. Put the hydraulic flow control knob in the LOCK position. 16 Series, Model - 2816 HST...
- Page 85 Hydraulic block. Change the set position of shut-off plate to “0” position, if the remote attachment is not installed. Failure to do so will cause damage to the hydraulic system. 16 Series, Model - 2816 HST...
- Page 86 If injured by leaking fluid, see your doctor immediately. M149A The implement should be lowered to the ground before uncoupling of the remote hydraulic hoses. M134 Lower or block elevated implements and other attachments before servicing or when leaving the equipment. M132A 16 Series, Model - 2816 HST...
- Page 87 MEMO 16 Series, Model - 2816 HST...
- Page 88 Before using your tractor check the air pressure in the tires to make sure that the air pressure does not exceed the maximum pressures shown in the tire and wheel equipment chart. 16 Series, Model - 2816 HST...
- Page 89 6 ply, R-4 Front 27x8.50-15 Industrial Tire 12.3 1570 @ 40 6 ply, R-4 Rear 13.6x16 Turf Tire 17.5 1570 @ 14 4 ply, R-3 Front 25x8.50-14 Turf Tire 11.3 1060 @ 22 4 ply, R-3 16 Series, Model - 2816 HST...
- Page 90 NOTE: Tires can be inflated 28 kPa (4 PSI) over maximum recom- mended in chart when tractor is used for heavy draft operation and ground compaction is not a problem. 16 Series, Model - 2816 HST...
- Page 91 IMPORTANT: Check the wheel bolts and nuts after the first 10 hours of operation and again after every 100 hours of operation. Also do this procedure any time the wheel or rim is removed. 16 Series, Model - 2816 HST...
- Page 92 59 to 88 Nm (43 to 65 LB FT) Check the bolts to keep them tight at the intervals recommended in the Service Chart in this manual. NOTE: The front wheel of tires must always be assembled with the valve side out. 16 Series, Model - 2816 HST...
- Page 93 Make sure the toe-in is adjusted properly. If not, adjust the toe-in. FRONT AXLE TYPE TOE-IN (L — L 0 to 0.20 INCH (0 to 5 mm) TURN THE WHEELS ONE-HALF REVOLUTION 16 Series, Model - 2816 HST...
- Page 94 : Turn the lock-nut clockwise Lengthen : Turn the Tie-Rod clockwise Shorten : Turn the Tie-Rod counterclockwise 2. One turn of the Tie-Rod makes about 12 mm (a half inch) difference of the Toe-in. 16 Series, Model - 2816 HST...
- Page 95 When replacing tires, consult your Dealer. MODEL NUMBER 2816 TIRE SIZE STYLE Front 7-16 Rear 11.2-24 Front 25X8.50-14 Rear 13.6-16 Front 27X8.50-15 Rear 15-19.5 *R-1 – Agricultural tread for general farming *R-3 – Turf tire *R-4 – lndustrial tire 16 Series, Model - 2816 HST...
-
Page 96: Tractor Ballast
Use front end weights as needed to provide effective steering control and front end stability and to achieve maximum operating efficiency and tractor field performance. FRONT END WEIGHT BRACKET 16 Series, Model - 2816 HST... - Page 97 With too little ballast, the tire tread marks will not show because of the tire slippage. TOO MUCH CORRECT BALLAST TOO LITTLE BALLAST BALLAST 16 Series, Model - 2816 HST...
- Page 98 Pull the hood latch to release the Unlock the rubber latches on top hood. of each side cover to release the side cover. STEP4 STEP2 BONNET PROP ROD Remove both side covers. Lift the hood, and connect the Support Rod. 16 Series, Model - 2816 HST...
- Page 99 Lithium or aluminium complex type grease Grease – – Grease with high viscosity base oil, takiness and Nipple molybdenum disulfide are suitable. Grease approved for the NL GI certification mark GC-LB are recommended. 16 Series, Model - 2816 HST...
- Page 100 The remaining numbers are white on black. Use the hourmeter along with the Lubrication Chart to service your tractor at the correct time periods. 16 Series, Model - 2816 HST...
- Page 101 Inspect for loose fit or leakage. See AIR INDUCTION SYSTEM in this manual. 7. Water Pump, Fan and Alternator Belt Tension Check the belt for tension, replace if necessary. See Fan Belt Adjustment in this manual. 16 Series, Model - 2816 HST...
- Page 102 7.1 QTS 6.7 Litres 5.9 QTS coolant bottle 0.4 QTS 0.4 Litres 0.4 QTS Transmission Oil hydrostatic drive 23.2 QTS 22 Litres 19.4 QTS Front Axle 4.2 QTS 4.0 Litres 3.5 QTS 16 Series, Model - 2816 HST...
- Page 103 Battery Terminals MARK Y: Yearly or 1000 Hours, Whichever occur first. AY: Yearly or as needed. Note 1: Consult your Dealer. Note 2: Replace element after 10 cleanings or yearly. Note 3: Apply Gear Oil. 16 Series, Model - 2816 HST...
- Page 104 LUBRICATION / MAINTENANCE CHARTS 100 HRS 1000 HRS 10 HRS Fluid 10 HRS 100 HRS Levels Filters FULL Coolant Recovery Reservoir Engine Oil – Change Radiator and Coolant – Drain, Air Cleaner – Clean Engine Oil – Drain – Check Flush and Fill 10 HRS 200 HRS...
- Page 105 LUBRICATION / MAINTENANCE CHARTS FRONT AXLE 10 HRS 10 HRS USE NLGI No.2 MULTIPURPOSE LITHIUM EP GREASE. Front Axle Pivot Pin – Grease Tie Rod End – Grease 10 HRS Power Steering Piston End – Grease 200 HRS MFD Lubricant – Check 200 HRS 200 HRS 200 HRS...
- Page 106 Do not raise the oil level above the F(Full) mark. ADD MARK FULL MARK ENGINE OIL DIPSTICK IMPORTANT: The level should be checked before starting or 5 minutes after the engine has been shut off. 16 Series, Model - 2816 HST...
- Page 107 Check for oil leaks at the filter base and drain plug. 6. Stop the engine. Wait approximately five minutes for the oil to return to the oil pan. Check the oil level on the dipstick and add oil if needed. 16 Series, Model - 2816 HST...
- Page 108 When the filter is too tight, you can cause dam- age to the O-ring and filter. 5. Put new oil in the engine. See En- gine Oil change in this manual. 16 Series, Model - 2816 HST...
- Page 109 While the tractor is in operation, a weak hose can break and cause injury or damage. Check all hoses and hose connections with frequency. KEEP HOSES, HOSE CONNECTIONS AND PRESSURE CAP IN GOOD CONDITION. 16 Series, Model - 2816 HST...
- Page 110 – 37°C ( –34°F). More than 50 percent ethylene glycol decreases heat transfer and will cause the engine surface temperature to be higher than normal. 16 Series, Model - 2816 HST...
- Page 111 IMPORTANT: Never drain the coolant when the engine is hot. NOTE: After the cooling system is completely filled, run the engine for approximately five minutes to remove all air from the system. Check the coolant level and add coolant if needed. 16 Series, Model - 2816 HST...
- Page 112 NOTE: Be careful not to allow dirt, water and other foreign materials to get into the filter when cleaning the cup. FILTER CUP 16 Series, Model - 2816 HST...
- Page 113 NOTE: When the temperature is very cold, the use of a mixture of Number one and Number Two Diesel Fuel is permitted for a short period of time. See your fuel Dealer for winter fuel requirements in your area. 16 Series, Model - 2816 HST...
- Page 114 NOTE: If the engine does not of filter cup. have power with a full load after you have done the filter service and removed the air from the system, see your Dealer to find and correct the cause. 16 Series, Model - 2816 HST...
- Page 115 Tighten the No. 1 switch “ON” position until the fuel air vent screw. flowing from the pump is free of air bubbles. Tighten the air vent screw. 16 Series, Model - 2816 HST...
- Page 116 Never use your hand to check for suspected leaks under pressure. Use a piece of cardboard or wood for this purpose. If injured by leaking fluid, see your doctor immediately. M149A 16 Series, Model - 2816 HST...
- Page 117 Correct maintenance will add to the life of the engine. Keep all connections on the outlet hose tight. Dump Valve The dust in a filter case should be dumped daily using the dump valve when operating in extremely dusty conditions. DUMP VALVE 16 Series, Model - 2816 HST...
- Page 118 When installing the element, inspect the element gasket. If the Remove the LH side cover. gasket or element surface is damaged, replace the element immediately. 16 Series, Model - 2816 HST...
- Page 119 All the connections on the hoses must be tight. All the gaskets must be in good condition and the bolts must be drawn up tight. NOTE: Inspect the hoses and connections after the first 50 hours of operation and replace when necessary. DUMP VALVE 16 Series, Model - 2816 HST...
- Page 120 Check the oil level on the transmission dipstick. If the oil level is below the lower line of the dipstick, add the recommended oil to the transmis- sion to raise the oil level to the F (Full) marked position. 16 Series, Model - 2816 HST...
- Page 121 7. Start the engine and check for leaks. 8. Recheck the oil level after stopping the engine. If the oil level is low, add oil up to the specified level. FILL HOLE HYDROSTATIC DRIVE 16 Series, Model - 2816 HST...
- Page 122 When the filter is too tight, you can cause damage to the O-ring and filter. 6. Wipe around the hydraulic filter with a dry cloth. 7. Change the transmission oil. See Transmission Oil Change in this manual. 16 Series, Model - 2816 HST...
- Page 123 5. Add the transmission oil through the fill port and check the oil level. 6. Run the engine and check for leaks. 7. After stopping the engine, check the oil level. If it is low, add clean oil. 16 Series, Model - 2816 HST...
- Page 124 OIL LEVEL oil type through the fill hole located PLUG on the RH side of axle housing until the oil begins to flow out of the level plug holes. 16 Series, Model - 2816 HST...
- Page 125 Add the recommended oil through the fill hole until the oil begins to flow out of the level plug holes. Install the oil level plugs and the fill cap. 16 Series, Model - 2816 HST...
- Page 126 STEP 1 STEP3 Clean the radiator screen and the surrounding area. STEP4 Install the radiator screen. Lower the hood. Lift and Lock the hood. STEP 2 RADIATOR SCREEN Lift the radiator screen. 16 Series, Model - 2816 HST...
- Page 127 Tighten the adjusting bolt and pivot nut to a torque of 16 Nm (12 lb ft). NOTE: Too much tension will cause alternator and water pump bearing failure and belt wear. Too little tension will cause a decrease in alternator output and belt wear. 16 Series, Model - 2816 HST...
- Page 128 STEP 2 ADJUSTING BOLT STEP4 Loosen the alternator adjusting Install new fan belt and adjust the bolt. belt tension. See Fan Belt Adjust- ment in this manual for instruc- tions. 16 Series, Model - 2816 HST...
- Page 129 To increase free movement, turn the nuts in. ADJUSTING To decrease free movement, turn CLUTCH NUTS the nuts out. Tighten the nuts to a torque of 44 to 54 Nm (32 to 40 lb ft). 16 Series, Model - 2816 HST...
- Page 130 To increase Maximum Pedal Move- ment – Loosen the lock nut and turn the stop bolt in. To decrease Maximum Pedal Move- ment – Loosen the lock nut and turn the stop bolt out. STOP BOLT 16 Series, Model - 2816 HST...
- Page 131 With this much play obtained, tighten the lock nut. Confirm that the right and left brakes BRAKE ROD operate simultaneously by running LOCK NUT the tractor. If not, adjust both of them by means of the brake rods. 16 Series, Model - 2816 HST...
- Page 132 6. Check a free play of the lift arm to be 5 to 10 mm at the tip of the lift arm by hands. 7. If the insufficient free play is available, move the raise stop forward and check again with the same procedure as before. 16 Series, Model - 2816 HST...
-
Page 133: Specifications
Charge indicator lamp, Engine oil pressure indicator lamp ....10Amp Engine Coolant Temperature Gauge, Fuel Gauge, Fuel Pump Head lamps, Rear Red Lamp, High Beam indicator lamp ....15Amp Instrument Panel Lamps Turn signal lamps ................15Amp Other optional electrical equipments ........... 15Amp 16 Series, Model - 2816 HST... - Page 134 7. If you must do welding, disconnect the battery. Put the welder ground cable as close as you can to the weld area. Do not put the ground cable where the current can flow through bearings or along channels with wire harnesses. 16 Series, Model - 2816 HST...
- Page 135 Fuse(a)(10 AMP) is for the glow plug indicator lamps. Fuse(b)(15 AMP) is for turn lamps. Fuse(d)(10 AMP) is for instrument panel lamps. Fuse(e)(15 AMP) is for head lamps and tail lamps. Fuse(f)(15 AMP) is for work lamps and horn. 16 Series, Model - 2816 HST...
- Page 136 Dealer to replace and correct. FUSIBLE LINK LINE FUSE Two Line fuses are installed and the circuit can be identified by color of box. Red Box (50AMP):Solenoid switch circuit Yellow Box (60AMP):Wirling harness and alternator charging system 16 Series, Model - 2816 HST...
- Page 137 IMPORTANT: Always connect the negative cable last and disconnect the negative cable first so you do not cause a spark at the battery. A spark can cause a battery explosion and cause injury. 16 Series, Model - 2816 HST...
- Page 138 NOTE: When disconnecting the battery, remove the negative cable first from the battery and reconnect it last for safety reasons. IMPORTANT: Do not start or operate the engine with the electrical system not completely connected. 16 Series, Model - 2816 HST...
- Page 139 1.240. A storage battery not in use will slowly discharge. A battery that has discharged can freeze at low ambient temperature and cause damage to the battery and tractor. 16 Series, Model - 2816 HST...
- Page 140 NOTE: Some countries have different regulations for head lamp alignment and operation on a road. Check your local regulations. MARK DISTANCE OF CENTER OF HEAD LAMP FROM GROUND 16” (405mm) 20’ (6.1m) 16” (405mm) CENTER OF HEAD LAMP BEAM 16 Series, Model - 2816 HST...
- Page 141 A clutch lock latch is pro- vided on your tractor to lock the clutch in the disengaged position and should be used to prevent this condition if your tractor is not used for an extended period of time. 16 Series, Model - 2816 HST...
- Page 142 IMPORTANT: Keep the doors wide open and move the machine outside of the storage room immediately to avoid danger from exhaust fumes. Do not accelerate the engine rapidly or operate it at high speed immediately after starting. NOTE: Mahindra Tractors 16 Series, Model - 2816 HST...
Need help?
Do you have a question about the 2816 HST and is the answer not in the manual?
Questions and answers