Table of Contents
Advertisement
Advertisement
Table of Contents

Related Manuals for Unitron BTE Next


Summary of Contents for Unitron BTE Next
- Page 1 Next BTE Guide...
-
Page 3: Table Of Contents
Table of Contents ™ Your Next Hearing Instruments ........1 Practical Solutions to Everyday Problems ......2 ™ Getting the Most Out of Your Next Hearing Instruments..............3 ™ Using the Next BTE Guide..........4 ™ Putting Your Next Hearing Instruments on Your Ears...6 ™... -
Page 5: Your Next Hearing Instruments
Your Next ™ Hearing Instruments Hearing Healthcare Professional: _________________________ _____________________________________________________ Telephone: ___________________________________________ Model:_______________________________________________ Serial Number: ________________________________________ Replacement Batteries: Size 13 Warranty: ____________________________________________ Program 1 is the Automatic Program (Available on Next 16 and Next 8 only) Program 2 is the Manual Program for: _____________________ Program 3 is the Manual Program for: _____________________ Program 4 is the Manual Program for: _____________________ Date of Purchase:______________________________________... -
Page 6: Practical Solutions To Everyday Problems
Practical Solutions to Everyday Problems Congratulations on choosing your new Next™ BTE (Behind-the-Ear) hearing instruments. For over 40 years, Unitron Hearing has been committed to making life better for people with hearing loss. This means a commitment to developing high-quality hearing... -
Page 7: Getting The Most Out Of Your Next Hearing Instruments
Getting the Most Out of Your Next ™ Hearing Instruments Adjusting to your new hearing instruments will take some time. In the beginning it is important that you do not use the hearing instruments for longer than is comfortable. Depending on your previous experience with hearing instruments, a few hours a day may be enough and then you can increase wearing time gradually. -
Page 8: Using The Next Bte Guide
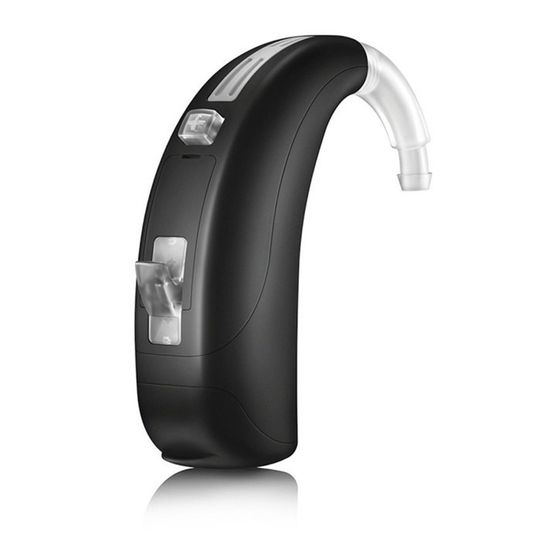
Using the Next BTE Guide ™ Refer to the table of contents for a complete listing of the topics covered in this guide. There are different styles of BTEs available. The diagrams below identify some of the components on your hearing instruments. - Page 9 Legend 1 Earhook 2 Microphone and Microphone Shield 3 Program Button or Push Button Volume Control (depending on your customized fitting) 4 Volume Control or Comfort-Clarity Balance (depending on your customized fitting) 5 Battery Door/On & Off Switch 6 Slim Tube 7 Dome 8 Retention Piece 9 Earmold...
-
Page 10: Putting Your Next Hearing Instruments On Your Ears
Putting Your Next ™ Hearing Instruments on Your Ears Your BTE hearing instrument may be color-coded red for your right ear and blue for your left ear. This color indicator is located inside the battery door with a small colored dot. BTEs with Slim Tubes 1. - Page 11 BTEs with Earhooks 1. Carefully insert the earmold in your ear. The earmold should fit into your ear snugly and comfortably. 2. Place the hearing instrument over the top of your ear. 3. Repeat steps 1-2 for your other ear if you wear two hearing instruments.
-
Page 12: Turning Your Next Hearing Instruments On And Off
Turning Your Next ™ Hearing Instruments On and Off Your hearing instruments have a three-position battery door that acts as an off/on switch and that allows access to the battery compartment. To turn the hearing instrument on, close the battery door fully. -
Page 13: Feedback-Free Listening
Feedback-Free Listening Your Next hearing devices have an optional start up delay that can be activated by your hearing healthcare professional. If the start up delay is activated, your hearing instruments will not turn on for 10-15 seconds after the battery door is closed fully. The hearing instruments return to the start up delay position each time you turn your hearing instruments on. -
Page 14: Replacing The Battery
Replacing the Battery 1. Gently swing out the battery door with your fingernail. 2. Grasp the battery with your thumb and index finger and remove. Plus (+) Signs 3. Insert the new battery into the battery compartment with the plus (+) sign on the battery facing the same way as the plus (+) sign on the edge of the battery door. - Page 15 Low Battery Warning When you hear two long beeps, your hearing devices are warning you that their batteries are low. You will hear the warning approximately every 30 minutes until you change the batteries or the batteries die. After the first warning, you may experience some reduction in sound quality.
-
Page 16: Operating Instructions
Operating Instructions Changing Programs on Your Next Hearing ™ Instruments Your Next hearing instruments may have an automatic program and up to three additional manual programs. Next’s automatic program will satisfy most of your listening needs by adjusting to different listening environments without requiring manual adjustments. -
Page 17: Adjusting The Volume
Program Beeps Your hearing devices beep to indicate which program you are in (i.e. one beep for program 1, two beeps for program 2, etc.) If you prefer, your hearing healthcare professional can adjust the pitch and loudness of the program beep or turn it off entirely. - Page 18 optional remote control which allows you to adjust your volume levels. Ask your hearing healthcare professional for more information on the remote control. Push Button Volume Control If the push button has been configured as a volume control, you can adjust the volume level by pushing the button.
- Page 19 Volume Control If the lever has been configured as a volume control, you can adjust the volume by pushing the volume control lever up to increase the volume and pressing the volume control lever down to decrease the volume. Note that your volume control may be disabled by your hearing healthcare professional and, therefore, could be inactive.
- Page 20 This control provides an additional sound refinement option beyond a traditional volume control. If your hearing healthcare professional has enabled this option, you can adjust your comfort-clarity levels using the lever on your hearing instruments. Before adjusting the comfort-clarity levels on your hearing instruments, secure the device on your ear with your thumb and middle finger.
- Page 21 Note: As the Comfort-Clarity Balance moves toward the midpoint position, the effect on sound is minimized. Your hearing healthcare professional can help you identify your different Comfort-Clarity Balance settings. If you prefer, your hearing healthcare professional can adjust the pitch and loudness of the Comfort-Clarity Balance beeps or turn them off entirely.
- Page 22 background noise is reduced. Your hearing healthcare professional can tell you how your directional system has been customized for you and which listening programs have the directional microphones activated. ™ In addition, Next contains antiShock technology that identifies and minimizes sudden impulse sounds that many hearing instrument wearers find irritatingly loud such as slamming doors or clattering dishes.
- Page 23 interference that sounds like static, buzzing or beeping. If you experience interference, increase the distance between your hearing instrument and the phone receiver. Easy-t for the Telephone or Cell/Mobile Phone Next comes equipped with easy-t (automatic telephone switch) that can help you listen on the telephone. Easy-t automatically switches your hearing instrument into a telephone listening mode with hearing instrument compatible phones.
- Page 24 To affix the easy-t magnet: 1. Clean the telephone receiver. 2. Hold the magnet near the “listening end” of your telephone receiver and release it (Figure 1). The magnet will flip to the appropriate side and seek the optimal position on the telephone receiver. 3.
-
Page 25: Assistive Listening Devices
electronic systems. Always keep the magnet (or the telephone equipped with the magnet) at least 30 cm (12”) away from pacemakers, credit cards, floppy disks or other magnetically sensitive devices. • Too high distortion during dialing or phoning may mean that the phone handset is stressed by the magnet. - Page 26 such as your stereo, television, etc. is connected to your hearing instruments. A short melody will play to confirm that easy-DAI is active. When you disconnect from the device, your hearing instruments will return to the program you were in before connecting your device.
-
Page 27: Caring For Your Next Hearing Instruments
Using FM and Infrared Systems Some FM systems consist of a teleloop worn around the neck, which is connected to the FM receiver worn on a belt or in a shirt pocket. To listen through the FM system, select the telecoil program and turn on the FM receiver. To keep the signal clear, you may need to adjust the volume control on your hearing instruments, as well as on the FM receiver. - Page 28 Caring for Your Next ™ Hearing Instruments • Open the battery door when not in use. • Always remove your hearing instruments when using hair care products. The hearing instruments can become clogged and cease to function properly. • Do not wear your hearing devices in the bath or shower or immerse them in water.
-
Page 29: Cleaning Your Next Hearing Instruments
Cleaning Your Next ™ Hearing Instruments Ear wax is natural and common. Ensuring your hearing instruments, earmolds and domes are free of ear wax is an important step in your daily cleaning and maintenance routine. • Never use alcohol to clean your hearing devices, earmolds or domes. - Page 30 fit into your ears snugly and comfortably. If amplified sound leaks out of your ear, you may hear whistling. Always ensure earmolds are clean and free of ear wax and moisture. Do not use alcohol to clean your earmolds. If the earmolds become plugged, clear the opening with a wax loop or pipe cleaner.
- Page 31 healthcare professional approximately every three to six months or when they become stiff or brittle. Clean the domes daily with a damp cloth. You should also clean the slim tubes periodically, with the cleaning pin provided, when you begin to notice debris in and around the tubes.
-
Page 32: Warnings
Warnings • Hearing devices should only be used as directed by your physician or hearing healthcare professional. • Hearing devices will not restore normal hearing and will not prevent or improve a hearing impairment resulting from organic conditions. • Do not use your hearing devices in explosion hazard areas. - Page 33 maximum output of your hearing devices is suitable for your particular hearing loss. Note to hearing healthcare professional • Domes should never be fitted on patients with perforated eardrums, exposed middle ear cavities, or surgically altered ear canals. In the case of such a condition, we recommend to use a customized ear mold.
- Page 34 head in a different direction or locate the cell phone and move away from it. Labeling The serial number and year of manufacture are located inside the battery door.
-
Page 35: Troubleshooting Guide
Troubleshooting Guide CAUSE POSSIBLE REMEDY No sound • Turn on • Not turned on • Replace battery • Low/dead battery • Consult your hearing healthcare professional • Poor battery contact • Insert battery plus (+) side up • Battery upside down •... - Page 36 CAUSE POSSIBLE REMEDY Intermittent • Replace battery • Low battery • Consult your hearing healthcare professional • Dirty battery contact Two long beeps • Replace battery • Low battery Whistling • Remove and reinsert carefully • Earmolds/slim tubes/ domes not inserted properly •...
- Page 37 CAUSE POSSIBLE REMEDY Earmolds/slim tubes/domes falling out of ear • Consult your hearing healthcare professional • Poorly fitting earmolds/ slim tubes/domes • See “Putting Your Next Hearing Instruments • Earmolds/slim tubes/ on Your Ears”. Reinsert carefully. domes not inserted properly Weak on the telephone •...
-
Page 38: Warning To Hearing Instrument Dispensers
Warning to Hearing Instrument Dispensers A hearing instrument dispenser should advise a prospective hearing instrument user to consult promptly with a licensed physician (preferably an ear specialist) before dispensing a hearing instrument if the hearing instrument dispenser determines through inquiry, actual observation, or review of any other available information concerning the prospective user, that the prospective user has any of the following conditions: (i) Visible... - Page 39 Important Notice for Prospective Hearing Instrument Users Good health practice requires that a person with a hearing loss have a medical evaluation by a licensed physician (preferably a physician who specializes in diseases of the ear) before purchasing a hearing instrument.
- Page 40 Many hearing instrument dispensers now offer programs that permit you to wear a hearing instrument for a period of time for a nominal fee after which you may decide if you want to purchase the hearing instrument. Federal law restricts the sale of hearing instruments to those individuals who have obtained a medical evaluation from a licensed physician.
- Page 43 5, rue Maryse Bastié - BP 15 69671 WA1 1PD Bron Cedex, France U.S.A. Netherlands Suite A, 2300 Berkshire Lane North, Ir. D.S. Tuijnmanweg 10, Plymouth, MN 55441 4131 PN VIANEN Manufacturer Unitron Hearing Ltd. 20 Beasley Drive, P.O. Box 9017, Kitchener, ON N2G 4X1 Canada...
- Page 44 D i st r i b u to r www.unitron.com B/09-013 029-5670-02...
Need help?
Do you have a question about the BTE Next and is the answer not in the manual?
Questions and answers
How do I change the filter on my Moxi (BTE)?