Table of Contents
Advertisement
Advertisement
Table of Contents

Related Manuals for Labgear HDSR300


Summary of Contents for Labgear HDSR300
-
Page 2: Table Of Contents
......................3 AFETY NSTRUCTIONS 1. INSTALLATION OF STB ....................4 1.1 F .........................4 RONT ANEL 1.2 R ........................4 ANEL 1.3 C ........................5 ONNECTION 1.4 R ..........................7 EMOTE 2. MAIN MENU ........................8 3. EDIT CHANNEL........................ 8 3.1 TV C ......................8 HANNEL 3.2 D ........................10 ELETE 4. - Page 3 8.4 J ..........................18 9. OTHER FUNCTIONS INTRODUCTION..............18 9.1 P ROGRAM INFORMATION ....................18 9.2 F AVORITE ......................18 9.3 P ROGRAM UIDE ......................18 9.4 V OLUME ONTROL .......................19 9.5 R ECORD PROGRAM ......................19 10. TECHNICAL SPECIFICATION..................20 11. TROUBLESHOOTING ....................21...
-
Page 4: Safety Instructions
SAFETY CAUTION: Safety Instructions DO NOT INSTALL YOUR RECEIVER: • In a closed or poorly ventilated cabinet; • Directly on top of or under any another equipment; • On a surface which might obstruct the ventilation slots. DO NOT EXPOSE THE RECEIVER OR ITS ACCESSORIES: •... -
Page 5: Installation Of Stb
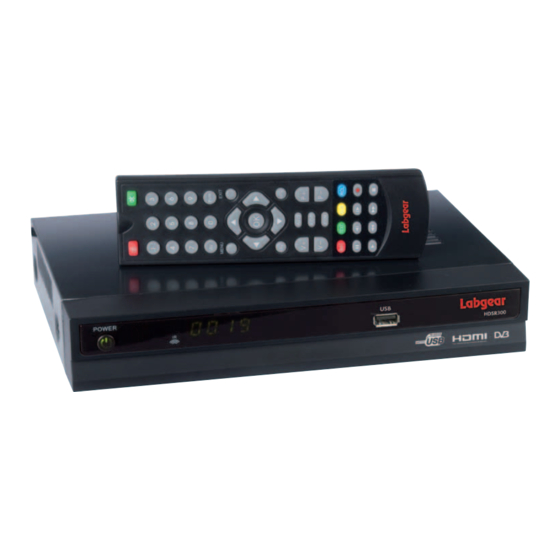
1. Installation of STB 1.1 Front Panel 1. POWER Button Turns the receiver On/Off 2. Display (4-digi 7-segment) 4-digi displays channel information; In Standby mode, 7-segment displays local time 3. USB2.0 Port For PVR function, software updates, and other USB functions 1.2 Rear Panel 1. -
Page 6: Connection
Make sure to check the power specification before connecting your receiver to the wall outlet. 1.3 Connection Note: Before connect this HD receiver to other devices, please shut down all devices to be connected. Connecting to TV 1. Connect the satellite signal from the LNB to the LNB IN connector. 2. - Page 7 <Connecting multiple fixed dishes to your receiver using a DiSEqC 1.0 switch> If you want to watch programmes from more than one satellite (For instance from Astra and from HotBird) it is suggested to use fixed dishes and a DiSEqC 1.0 switch. Have your installer aim the dishes at the requested satellites and connect the LNBs with coax cables to the IN connectors of the DiSEqC 1.0 switch.
-
Page 8: Remote
1.4 Remote : Switches between operational and standby modes. : Press to temporarily cut off the sound. 0-9: Enter number or select a channel number to watch. AV: Switches between AV aspect ratios format. TV/R: Switch between TV and Radio mode. MENU: Displays the main menu. -
Page 9: Main Menu
2. Main Menu This HD receiver contains a facilitated user interface, this function is to make user easy to call all device functions. Operation Steps: Press “MENU”, you can see this main menu. When no menu is appeared on the screen, you press the【MENU】key that will display the main menu. - Page 10 3.1.2 Lock In “TV Channel List” menu, you can select a channel by pressing UP/DOWN key, then press the “RED” key and then the “OK” key to lock this channel. Press “OK” again to cancel lock. 3.1.3 Skip In “TV Channel List” menu, you can select a channel by pressing UP/DOWN key, then press the “GREEN”...
-
Page 11: Delete All
3.2 Delete All In “Edit Channel” menu, press UP/DOWN key select “Delete All”, and press “OK” key, you can delete all channels. 4. Installation In the main menu, you can press UP or DOWN key to select “Installation” icon. From this menu, we can select “Antenna Connection”, “Satellite List”, “Antenna Setup”, “Single Satellite Search”, “Multi Satellite Search”, “TP List”... -
Page 12: Antenne Setup
Rename Press UP or DOWN button to select one satellite, press RED button to enter “Edit Satellite” menu, press numeric key to input the new name. Press GREEN button to add new satellite. Delete Press BLUE button to delete selected satellite. 4.3 Antenne Setup From “Installation”... -
Page 13: Tp List
4.6 TP List In this menu, you can edit the transponders, add the transponders, delete the transponders, and search channels with the selected transponder. Edit Press UP or DOWN key to select one of the transponders, press the RED key to edit it by setting Frequency, Symbol Rate and Polarity. -
Page 14: Other
Search Press UP or DOWN key to select one transponder, press BLUE key to search channels by setting FTA Only, Scan Channel and Network Search. 4.7 Other In this menu, you can set LNB Power (On or Off), Channel Play Type (All, Free or Scrambled) and BER –... -
Page 15: Display Setting
5.3 Display Setting You can set Brighness, Contrast and Saturation. 5.4 Local Time Setting you can set your STB’s time. This function is useful for EPG and some timer functions. If a broadcaster provides GMT signal, you can set the time using GMT or set your own time by yourself. -
Page 16: Parental Lock
5.5 Parental Lock In “Parental Lock” menu, you can set Menu Lock, Channel Lock and change the password. 5.6 OSD Setting You can set OSD Timeout and OSD Transparency. 5.7 Favorite You can select the favorite group and press “OK” key to rename it. -
Page 17: Information
6.1 Information From “Tools” menu, you can select “Information ” menu. In this menu, you can view the HW version and SW version. 6.2 Factory Setting You can restore to factory settings by selecting “Load Factory Setting” and pressing “OK” key. Select “Yes”... -
Page 18: Game
7. Game There are three games in this menu, they are Tetris, Othello and Sudoku, you can play them following the introductions. 8. REC(Record) In the main menu, you can press UP or DOWN key to select “REC” icon. From this menu, you can select “Record Manager”, “Storage Information”, “DVR Configuration”, and “Jump”... -
Page 19: Dvr Configuration
8.3 DVR Configuration In this menu, you can set Time Shift On or Off, Time shift to Record On or Off and Record Type. 8.4 Jump In this menu, you can set the jump time. 9. Other functions introduction 9.1 Program information If you press the INFO button once, a banner is displayed on the screen, and if you press the button again before the banner is disappeared, the banner will show the record list. -
Page 20: Volume Control
EPG in a week. Move the cursor to an event in the required time zone, and press “BLUE” key. Then the timer is set to the designated time. 9.4 Volume Control Adjust volume: Press “Left/Right” key on the remote controller at No menu state. -
Page 21: Technical Specification
10. Technical Specification Item Name Parameters Ali M3602 High Definition STB decoder Flash SDRAM 128MB Memory AT88SC-08(HDCP KEY) EEPROM Composite Video Output: 1 RCA Stereo Audio Output:2 RCA S/PDIF Output: Coaxial 1 RCA Rear SCART Output: 1 SCART Panel HDMIOutput : 1 HDMI 1 Tuner Power Switch Key: 1Power key... - Page 22 10. Technical Specification Item Name Parameters Ali M3602 High Definition STB decoder Flash SDRAM 128MB Memory AT88SC-08(HDCP KEY) EEPROM Composite Video Output 1 RCA Stereo Audio Output 2 RCA S/PDIF Output: Coaxial 1 RCA Rear SCART Output: 1 SCART Panel HDMIOutput : 1 HDMI 1 Tuner Power Switch...
Need help?
Do you have a question about the HDSR300 and is the answer not in the manual?
Questions and answers