Miele TX3587 Operating And Installation Instructions
Gourmet warming drawer
Hide thumbs
Also See for TX3587:
- Operating and installation instructions (180 pages) ,
- Operating and installation instructions (52 pages) ,
- Operating and installation instructions (60 pages)
Table of Contents
Advertisement
Quick Links
Advertisement
Table of Contents

Related Manuals for Miele TX3587


Summary of Contents for Miele TX3587
- Page 1 Operating and installation instructions Gourmet warming drawer To avoid the risk of accidents or damage to the appliance, it is essential to read these instructions before it is installed and used for the first time. en - AU, NZ M.-Nr. 09 656 730...
-
Page 2: Table Of Contents
Contents Description of the appliance ......... 3 ESW 6114 / ESW 6214 . -
Page 3: Description Of The Appliance
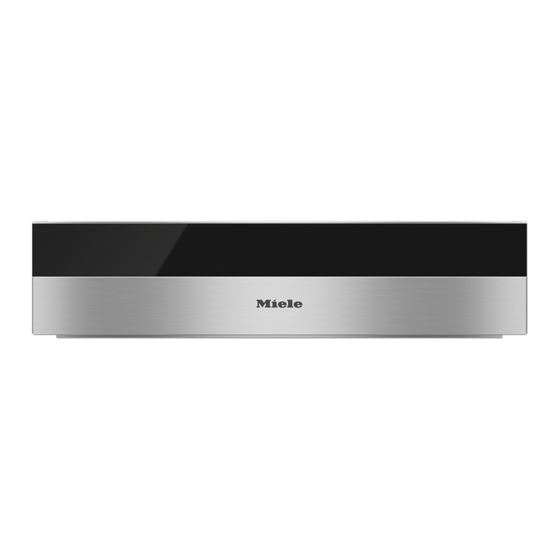
Description of the appliance ESW 6114 / ESW 6214 a Anti-slip mat b Control panel c Drawer with push mechanism to open and close. Press lightly in the middle of the drawer front to open and close it. -
Page 4: Esw 6129 / Esw 6229
Description of the appliance ESW 6129 / ESW 6229 a Anti-slip mat b Control panel c Air vents d Rack... -
Page 5: Control Panel
Description of the appliance Control panel Sensors On/Off sensor for the appliance For selecting the function For setting the temperature For setting the duration Displays Functions: For warming cups and glasses For warming plates and dishes For keeping food warm ¯... -
Page 6: Accessories Supplied
Description of the appliance Accessories supplied The accessories supplied with your appliance, as well as a range of optional ones, are available to order from Miele (see "Optional accessories"). Rack For increasing the loading area (ESW 6*29) Anti-slip mat For keeping crockery secure Miele cookbook "Cooking with low temperatures"... -
Page 7: Warning And Safety Instructions
They contain important notes on installation, safety, use and maintenance. Miele cannot be held liable for damage caused by non-compliance with these Warning and Safety instructions. Keep these instructions in a safe place and pass them on to any... - Page 8 Warning and Safety instructions Correct application This Gourmet warming drawer is designed for domestic use and for use in similar environments by guests in hotel or motel rooms, bed & breakfasts and other typical living quarters. This does not include common/shared facilities or commercial facilities within hotels, motels or bed &...
- Page 9 Warning and Safety instructions Safety with children Young children must not be allowed to use this appliance. Older children may only use the Gourmet warming drawer when its operation has been clearly explained to them and they are able to use it safely, recognising the dangers of misuse.
- Page 10 Technical safety Repairs and other work by unqualified persons could be dangerous. Installation, maintenance work and repairs to electrical appliances must only be carried out by a Miele approved service technician. A damaged appliance is dangerous. Check the appliance for any visible damage.
- Page 11 The manufacturer's warranty will be invalidated if the appliance is not repaired by a Miele approved service technician. Faulty components must only be replaced by genuine Miele spare parts. The manufacturer can only guarantee the safety of the appliance when Miele replacement parts are used.
- Page 12 Warning and Safety instructions Correct use You can hurt yourself on the hot drawer or hot crockery. It is advisable to use heat-resistant pot holders or gloves when using the appliance. Take care not to let the gloves get damp or wet, as this causes heat to transfer through the material more quickly with the risk of scalding or burning yourself.
- Page 13 Warning and Safety instructions Items made from plastic or aluminium foil melt at high temperatures. Only use heat-resistant containers made from porcelain, glass etc. If liquids get into the appliance through the vents, it can cause a short circuit. Take care when opening and closing the loaded drawer so that liquids do not spill over.
-
Page 14: Caring For The Environment
Caring for the environment Disposal of the packing Disposing of your old material appliance The packaging is designed to protect Electrical and electronic appliances the appliance from damage during often contain materials which, if transportation. The packaging materials handled or disposed of incorrectly, used are selected from materials which could be potentially hazardous to are environmentally friendly for disposal... -
Page 15: Before Using For The First Time
Before using for the first time Please stick the extra data plate for the appliance supplied with this documentation in the space provided in the "After sales service" section of this booklet. Cleaning and heating up for the first time ^ Remove any protective foil and sticky labels. - Page 16 Before using for the first time The appliance switches itself off automatically after 2 hours. The metal components have a protective coating which may give off a slight smell when heated up for the first time. The smell and any vapours will dissipate after a short time, and do not indicate a faulty connection or appliance.
-
Page 17: Operation
Operation Functions Use the X sensor to select the function you want. The applicable symbol lights up as follows: – H For warming cups and glasses – H For warming plates and dishes – 2 For keeping food warm – ¯ For low temperature cooking The last function selected is automatically activated the next time the drawer is switched on, and this is shown in the... -
Page 18: Temperature Settings
Operation Temperature settings Each function has its own temperature range. The factory default recommended temperatures are printed in bold. The temperature can be altered in 5° steps by touching the 6 sensor. The last temperature selected is automatically activated the next time the drawer is switched on, and this is shown in the control panel (Exception: Low temperature cooking). - Page 19 Operation How to operate the Gourmet warming drawer ^ Open the drawer. ^ Switch the appliance on by touching the On/Off s sensor. ^ Touch the X sensor until the function required lights up in the control panel. ^ If you wish to alter the temperature, touch the 6 sensor until the LED for the temperature required lights up.
-
Page 20: Keeping Food Warm
Keeping food warm In order to ensure that the temperature does not drop below the minimum required for keeping food warm (65 °C), select the 2 function only. This function is for keeping food warm that has just been cooked, i.e. food that is still hot. It is not for reheating food that has gone cold. - Page 21 Keeping food warm – Freshly cooked food is hotter than food which is being kept warm. Serve food which is being kept warm on pre-heated plates. – Nutrients are lost when food is cooked, and continue to diminish when food is kept warm. The longer food is kept warm for, the greater the loss of nutrients.
- Page 22 Keeping food warm Settings Food Crockery Cover Temperature for the Position in drawer 2 setting crockery? Floor Rack* ] ^ ^ ^ ^ Steak (rare) Plate ^ ^ ^ ] ^ Bake / Gratin Shallow dish ^ ^ ] ^ ^ Roast meat Plate ^ ^ ^ ] ^...
-
Page 23: Warming Crockery
Warming crockery – Distribute the crockery over the whole area of the drawer. Stacks of plates heat up more slowly than individual pieces of crockery. If large stacks of plates are unavoidable, place them at the front of the drawer. Use the rack (depending on model). -
Page 24: Capacity
Warming crockery Capacity The quantity that can be loaded will depend to a great extent on the size and weight of your crockery. Do not overload the drawer. The maximum load bearing capacity of the drawer is 25 kg. ESW 6114 / ESW 6214 The loading examples shown here are suggestions only. -
Page 25: Esw 6129 / Esw 6229
Position the rack to suit. With two racks you can increase the load area even more by placing one rack on the left and the other on the right. Another rack can be obtained from Miele (see "Optional accessories"). -
Page 26: Low Temperature Cooking
For precise results, we recommend using a proprietary food probe to monitor the core temperature. Do not use the food probe from a Miele steam combi oven or Miele oven in the Gourmet warming drawer. Core temperature Food can be cooked in the warming drawer up to a core temperature of 70 °C. - Page 27 Low temperature cooking – The meat must be at room temperature. Take it out of the refrigerator approx. 1 hour before preparation. – Sear the meat on all sides over a high heat on the cooktop. Procedure ^ Select the ¯ low temperature cooking function. The appliance will pre-heat automatically for 15 minutes and then operate at the preset temperature and duration, e.g.
-
Page 28: Cooking Chart
Low temperature cooking Cooking chart Type of meat Searing time Core Cooking time Temperature for the ¯ setting in minutes temperature* °C in minutes Beef ^ ] ^ ^ ^ Fillet 4–6 in total 45–50 105–135 ^ ^ ^ ] ^ approx. - Page 29 Low temperature cooking Type of meat Searing time Core Cooking time Temperature for the ¯ setting in minutes temperature* °C in minutes Pork ^ ^ ^ ] ^ Fillet 5–6 in total 90–110 approx. 350 g 120–140 ^ ^ ^ ^ ] Boned gammon 6–8 in total 180–200...
- Page 30 Low temperature cooking Type of meat Searing time Core Cooking Temperature for Crockery in minutes temperature* time ¯ setting °C in minutes Lamb ^ ^ ^ ] ^ Rack of lamb 3 in total 90–100 Oven-safe ^ ^ ^ ^ ] approx.
-
Page 31: Other Uses
Other uses Type of Crockery Cover Temperature Temperature Position in drawer Duration food crockery for the for the in h: min 2 setting H setting Floor Rack* ] ^ ^ ^ ^ Defrosting Bowl / 0:50 berries Dish ^ ^ ^ ^ ] Dissolving Bowl 0:15... -
Page 32: Combination With Cva
Combination with CVA The warming drawer can be set to come on automatically before your Miele coffee machine to ensure your cups are the perfect temperature for your first cup of the day. Note: The warming drawer can only be combined with the CVA 6800 or CVA 6805. -
Page 33: Cleaning And Care
Wipe the surfaces dry using a soft cloth. For cleaning, you can also use a clean, damp microfibre cloth without any cleaning agent, such as the Original Miele all purpose microfibre cloth. All surfaces of this appliance are all susceptible to scratching. -
Page 34: Anti-Slip Mat
Cleaning and care To avoid damaging the surfaces of your appliance, do not use: – cleaning agents containing soda, ammonia, acids or chlorides, – cleaning agents containing descaling agents, – abrasive cleaning agents, e.g. powder cleaners and cream cleaners, – solvent-based cleaning agents, –... -
Page 35: Problem Solving Guide
Problem solving guide With the aid of the following guide, minor problems can be diagnosed and easily corrected without contacting Miele. This will save you time and money because you won't need to book a service technician. Please note that a call-out fee will be applied to unnecessary service visits where the problem could have been rectified as described in these operating instructions. - Page 36 Problem solving guide Problem Possible cause Remedy The crockery is too hot. The function for warming Select the correct function. plates and dishes H or cups and glasses H is not selected. The temperature setting is too Set a lower temperature. high.
-
Page 37: Optional Accessories
Optional accessories Miele offers a range of useful accessories, as well as cleaning and conditioning products for your appliance. These can be ordered online at: These products can also be purchased by contacting Miele directly (see back of manual for contact details). -
Page 38: Safety Instructions For Installation
The warming drawer must only be installed in combination with Miele appliances. If the warming drawer is used in combination with other appliances, the warranty will be invalidated as correct operation cannot be guaranteed. -
Page 39: Building-In Dimensions
Building-in dimensions ESW 6114 / ESW 6214 Built-in ovens Microwave combination oven a Vent cut-out for when appliance is installed in combination with a pyrolytic oven b Building-in dimension including mains connection cable Connection cable L=2200 mm * Appliances with a glass front ** Appliances with a metal front... - Page 40 Building-in dimensions Steam oven Steam combi ovens DGC 6300 / DGC 6400 a Ventilation cut-out for when b Building-in dimension including appliance is installed in combination mains connection cable with a steam combi oven Connection cable L=2200 mm b Building-in dimension including mains * Appliances with a glass front connection cable ** Appliances with a metal front...
- Page 41 Building-in dimensions Steam combi ovens Pressure cooker DGC 6500 / DGC 6600 / DGC 680* DGD 4635 / DGD 6635 / DGD 6605 a Spacer trim AB 45-7 a Ventilation cut-out for when (optional accessory) appliance is installed in combination b Building-in dimension including with a steam combi oven mains connection cable...
- Page 42 Building-in dimensions Coffee machine b Building-in dimension including mains connection cable Connection cable L=2200 mm * Appliances with a glass front ** Appliances with a metal front...
-
Page 43: Esw 6129 / Esw 6229
Building-in dimensions ESW 6129 / ESW 6229 Built-in ovens Microwave combination oven a Vent cut-out for when appliance is * Appliances with a glass front installed in combination with a ** Appliances with a metal front pyrolytic oven b Building-in dimension including mains connection cable Connection cable L=2200 mm... - Page 44 Building-in dimensions Steam oven Steam combi ovens DGC 6300 / DGC 6400 * Appliances with a glass front ** Appliances with a metal front a Ventilation cut-out for when appliance is installed in combination with a steam combi oven b Building-in dimension including mains connection cable Connection cable L=2200 mm...
- Page 45 Building-in dimensions Steam combi ovens Pressure cookerr DGC 6500 / DGC 6600 / DGC 680* DGD 4635 / DGD 6635 / DGD 6605 a Ventilation cut-out for when appliance is installed in combination a Spacer trim AB 45-7 with a steam combi oven (optional accessory) b Building-in dimension including mains b Building-in dimension including...
- Page 46 Building-in dimensions Coffee machine b Building-in dimension including mains connection cable Connection cable L=2200 mm * Appliances with a glass front ** Appliances with a metal front...
-
Page 47: Installing The Appliance
Installing the appliance Check that the base of the drawer is clean and that it is level (use a spirit level). This is important for the appliance to function correctly. ^ Push the appliance into the housing unit as far the vapour strip, and align it. -
Page 48: Electrical Connection
If the connection cable is damaged, it must be replaced with a special connection cable of type H 05 V V-F (pvc insulated), available from Miele. The voltage and rated load are given on the data plate. Please ensure these match the household mains supply. - Page 49 Electrical connection Important The wires in the mains lead are coloured in accordance with the following code: Green/yellow = earth Blue = neutral Brown = live As the colours of the wires in the mains lead of this appliance may not correspond with the coloured markings identifying the terminals in your plug, proceed as follows when it is necessary to change the plug: –...
-
Page 50: After Sales Service, Data Plate, Warranty
IIn the event of any faults which you cannot remedy yourself, please contact: – Miele (see back of manual for contact details). When contacting Miele, please quote the model and serial number of your appliance. These are given on the data plate. - Page 52 ESW 6114 ESW 6214 / ESW 6129 / ESW 6229 en - AU, NZ M.-Nr. 09 656 730 / 04...
Need help?
Do you have a question about the TX3587 and is the answer not in the manual?
Questions and answers