Table of Contents
Advertisement
Quick Links
Advertisement
Table of Contents

Related Manuals for Micromax Q7


Summary of Contents for Micromax Q7
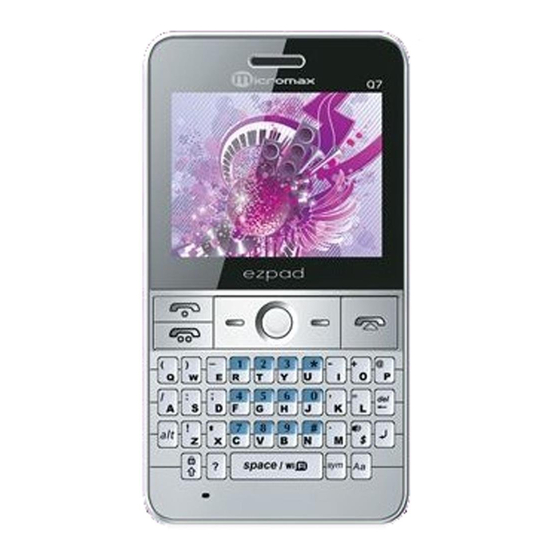
- Page 1 User manual Q7 User Manual Page 1 of 34...
-
Page 2: User Manual
User manual INTRODUCTION Thank you for purchasing this mobile phone. To obtain the best performance of your phone, please read this user manual carefully. Page 2 of 34... -
Page 3: Table Of Contents
User manual Table of Contents Safety ......................... 5 1.1 Safety Precautions ..................5 Introduction ....................... 6 Phone and Accessories ................6 Parts of the Phone ................. 6 Description of Display Contents ............. 7 About SIM Card and the Battery ............7 To switch ON and OFF ................ - Page 4 User manual Templates .................... 15 SMS Settings ..................15 SMS counter ..................16 Send MMS ................... 16 MMS Inbox ..................16 6.10 MMS Outbox ..................17 6.11 MMS Draftbox ..................17 6.12 MMS Settings ..................17 6.13 Templates .................... 17 6.14 Voice Mail Server ................
-
Page 5: Safety
Press the Send Key to call out. Disclaimer: Micromax will not bear any responsibility for any incompliance with the above mentioned guidelines or improper usage of the mobile phone. Our company keeps the right... -
Page 6: Introduction
User manual announcement in advance. The content of this manual may vary from the actual content displayed in the mobile phone. In such case, the latter shall govern. Open the packing box of the phone and check that you have the phone, charger,battery, USB cable, earphone and user manual. -
Page 7: Description Of Display Contents
User manual The table below lists the icons that may appear on the status bar according to the current priority of the phone. Icons Description It appears the phone is in related service area. The signal strength is divided into 5 grades, and the specific display content depends on the signal strength of the area where the phone set is located. - Page 8 User manual Inserting SIM card and battery Charging the battery 1. Insert the plug of the charger into the interface of the phone, and insert the charger into the power socket carefully. The battery icon will blink. 2. The red light is lit during charging. When the battery icon stops blinking or the green light is lit, it indicates that the charging is finished.
-
Page 9: To Switch On And Off
User manual Connecting the Hands-free Kit To switch on: Long press End key when the phone is in the OFF mode. If the phone lock has been activated, you need to enter the 4-digit password to unlock. (The preset unlock code is 0000.) If the SIM card has been inserted in the phone, and the related PIN code protection is activated, you need to enter the 4-8 digit password to unlock. -
Page 10: To Dial A Number From The Phonebook
User manual Or Menu > Phonebook > Search contact > Input characters Options > Search The desired contact will be highlighted. Press Send key to make a call. Tip: If the entry contains more than one numbers, the number selection screen will be displayed. -
Page 11: Caller Groups
User manual Options > Send vCard Send by SMS: Send this vCard by SMS。 Send by Bluetooth:Send this vCard by Bluetooth to Bluetooth equipment. Save as file:Send this name to File manager. Menu > Phonebook > Caller groups Select the group to be set: To edit the name: Highlight the name and select Edit. -
Page 12: Calling
User manual •Save contact notify •Memory Status Enter the Phonebook, select an entry from the entry list and press Send key to dial. Tip: If the entry contains more than one numbers , the number selection screen will be displayed. You can select one and press Send key to dial. ‘... -
Page 13: Conference Call
User manual function only after you apply to the local network operator. Menu > Settings > Ceneral call settings > Call waiting The phone supports Three-party Calling. A Three-party Calling, also called a multiparty call or a conference call , is a service based on call waiting. It is applicable to dual standby with GSM network. -
Page 14: Call History
User manual Press the top Calling Key to view> Dialed calls / Received calls/ Missed calls/ Rejected Calls You may select View: View the desired entry Call: Call the desired entry Save to Phonebook: to save the number to the Phonebook Edit: to edit the number to dial or save to the phonebook. -
Page 15: Sms Draftbox
User manual Delete all: delete all the messages from the Inbox. Save to Phonebook: Allows you to save the number from which the sms was received to the phonebook. Mark Several: Allows you to mark one or several messages to either delete or copy/move from one destination to another. -
Page 16: Sms Counter
User manual Voicemail Server Common settings •Delivery Report: Get the delivery report when the message is successfully delivered to the recipient. •Reply Path: Whether to use the service center which send the message to reply. •Save sent message: Allows you to choose the option of saving the sent messages. Memory status •Check the message memory status of the SIM and the phone. -
Page 17: Mms Outbox
User manual Delete: delete the MMS. MMS which have been sent or can’t be sent are stored in the Outbox. Menu > Messages > MMS > Outbox > Option View: read the highlighted MMS. Delete: delete the highlighted MMS. Select and Delete: select MMS to delete. Delete All: delete all the MMS from the Outbox. -
Page 18: Email
User manual Set the voice mail numbers. When connecting, you can call and listen to the voice mail. Tip: If you have set the voice mail number, press and hold 1 key on idle screen to dial the corresponding number. E-Mail Before use, you need to set the e-mail in the “E-mail accounts”... -
Page 19: Broadcast Message
User manual Menu > Messages > Broadcast Message The phone supports Broadcast Message. It is supported by GSM network. Broadcast messages are single-way messages sent to the users of the network operators by the message service center. For the contents and channel setup of broadcast messages, consult your network operator. -
Page 20: Settings
User manual Functions Description Set time and date Menu > Settings > Phone setup > Time and date Schedule power on/off Menu > Settings > Phone setup > Schedule power on/off To disable and enable status; to activate/deactivate, switch on/off, and time in turn. Select language Menu >... -
Page 21: Profile Setup
User manual Select preferred network Menu > Settings > Network setup > Preferred networks Set information of GPRS Menu > Connectivity> Data account>GPRS/GSM Data Connection Restore factory default Menu > Settings > Restore factory settings Tip: You need to enter the phone password when you want to restore factory default. - Page 22 User manual Note: Long press the key on your keypad to lock/unlock the phone. Change password Menu > Settings > Security Center> SIM1Security setup > Change password Page 22 of 34...
-
Page 23: Multimedia And Entertainment
User manual Menu > Multimedia > Camera: When the camera is activated, the phone enters the view finding status. On the view finding screen, press Ok Key to capture. Tip: If in weak light, such as night or indoor scene, the ISO Sensitivity may increase, which will cause noise or mottle. -
Page 24: Video Player
User manual Ok Key again to resume recording. Tip: If in weak light, such as night or indoor scene, the ISO Sensitivity may increase, which will cause noise or mottle. Before recording, you can set the following as needed. Select Options > To player: enter video player. -
Page 25: Fm Radio
User manual On the Sound Recorder list screen, you can select: New Record: begin recording. The recordings will be saved in the folder Audio under the File Manager automatically. Play: play the highlighted recording. Append: continue to record the highlighted recording. (The format must be AMR or AWB). Rename: rename the highlighted recording. -
Page 26: Java
User manual Menu > Applications> Java You can install Java applications to enhance the multimedia function. Allows you to connect to Facebook and Operamini as well. Run JAVA Menu > JAVA > Run JAVA Tip: 1. You can connect wirelessly to other compatible device with Bluetooth technology. Compatible devices may include computers, mobile phones. -
Page 27: Organizer
User manual Functions Description View the calendar Menu > Organizer > Calendar Add to do Menu > Organizer > To do Options > Add Or: Menu > Organizer > Calendar Options > Add task View the events in the Menu > Organizer > To do to do Options >... -
Page 28: File Manager
User manual When an USB cable is connected, you can use the phone as a USB mass storage. Functions Description View folders Menu > File manager> Options > Open Create folders Menu > File manager > Options > New folder View detailed Menu >... -
Page 29: Wap Services
User manual Menu > Connectivity > WAP You need to make the relevant settings in WAP Setup before you use the WAP browser to surf the web. When the WAP browser is activated, if a homepage is set in WAP Setup, the phone will link the website indicated by the homepage;... -
Page 30: Stk
User manual If your SIM card supports STK, you may use the corresponding value-added services. Menu > Connectivity Page 30 of 34... -
Page 31: Maintenance
User manual Use a dry soft cloth to wipe general dirt. Do not use a hard cloth, benzene or thinner to wipe the phone, otherwise, the surface of the phone will be scratched or could even result in the fading of colour. Page 31 of 34... -
Page 32: Taking Care Of Your Device
User manual • Your device is a product of superior design and craftsmanship and should be handled with care: The following suggestions will help you protect your phone: Always keep the small parts of the phone away from children. • Keep the device dry. -
Page 33: After Services
User manual For details, see the After Service Guide supplied with the phone. Page 33 of 34... - Page 34 User manual You can enter text in English and digit. Page 34 of 34...
Need help?
Do you have a question about the Q7 and is the answer not in the manual?
Questions and answers