Sunpak S34?TSR Installation, Operation And Maintenance Instructions
Outdoor gas infrared patio heater
Hide thumbs
Also See for S34?TSR:
- Installation, operation and maintenance instructions (16 pages) ,
- Manual (16 pages) ,
- Installation operation & maintenance (6 pages)
Advertisement
Installer: Please take the time to read and understand these instructions prior to installation. Installer
must provide a copy of this manual to the owner.
Owner: Keep this manual in a safe place in order to provide your service technician with the
necessary information.
My Business 2012\Sunpak TSR\New Instructions.doc
Infrared Dynamics, Inc © Copyright 2012
Printed in USA
Installation, Operation and & Maintenance Instructions
For Assistance Call Toll Free
(888) 317‐5255
Sunpak S34‐TSR
Outdoor Gas Infrared Patio Heater
Infrared Dynamics, Inc
3830 Prospect Avenue
Yorba Linda, CA 92886
http:\\sunpak.us
Form No 60043 – 5/12
Advertisement

Related Manuals for Sunpak S34?TSR


Summary of Contents for Sunpak S34?TSR
- Page 1 Sunpak S34‐TSR Outdoor Gas Infrared Patio Heater Installation, Operation and & Maintenance Instructions Installer: Please take the time to read and understand these instructions prior to installation. Installer must provide a copy of this manual to the owner. Owner: Keep this manual in a safe place in order to provide your service technician with the necessary information.
-
Page 2: Table Of Contents
Sunpak® Infrared Heaters Table of Contents Sunpak heaters work like the sun Warnings projecting radiant heat down to warm patio your patio and guests. This heater 2. Basic Operation was designed for outdoor installation 3. Heater Layout and Design however breezes will affect the heating 4. -
Page 3: Basic Operation
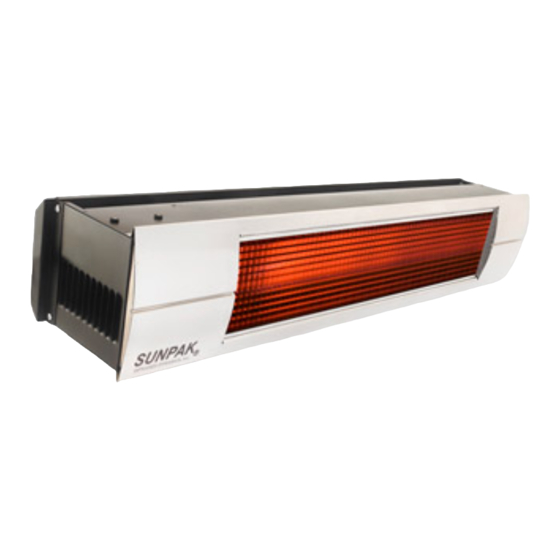
Sunpak® Infrared Heaters Basic Heater Operation Sunpak S34 TSR is an outdoor gas‐fired infrared heater which is operated with a wireless remote control. The heater can be operated at a High setting with an input of 34,000 BTU/Hr or at a LOW setting of 25,000 BTU/Hr. Each heater comes with a wireless operating remote control that is pre‐programmed for that heater. The number located on the louvered end of the heater corresponds to the number on the remote control. Should the original remote control become lost, additional remote controls can be purchased. However the heater will need to be re‐programmed to the new remote control. The Sunpak S34‐TSR should always be started up and operated on the HI mode for the first 5 minutes to allow the heater to warm up. Starting up the heater on the LOW mode before the heater is warmed up may cause the heater to shut down prematurely. To correct this situation press the OFF button followed by the ON button and the HI button. Always PRESS the button for at least 1 second to allow proper transmission of the remote signal. Sunpak heaters have a spark ignition and electronic flame safety control. The pilot is only ON while the heater is operating. If the flame safety sensor fails to sense flame at the pilot, the heater will shutdown and lockout. This may happen due to low gas pressure or a gusty wind. Should the heater lockout you may be able to hear a faint beeping from the heater control. To restart the heater, first press the OFF button before restarting the heater. Although the heater is designed for outdoor installation and use, it is important that the wireless remote control(s) be protected from the weather. Should the remote control become wet, it may be necessary to replace ... -
Page 4: Heater Layout And Design
® The variable environments in which Sunpak heaters are Sunpak heaters must always be operated in a location applied means that these general guidelines are generated that allows uniform air pressure around the heater. If only by necessity and may need to be refined for local part of the heater is located in a wind protected zone conditions. - Page 5 Sunpak® Infrared Heaters ...
- Page 6 Sunpak® Infrared Heaters ...
-
Page 7: Installation / Service
Sunpak® Infrared Heaters Gas Supply Installation/Service Instruction The gas inlet supply pressure and manifold pressure required Receiving Equipment for each heater are listed below. For gas supply line pressures in excess of ½ psig, consult with your On receipt of equipment it is suggested that a visual representative or the factory. - Page 8 Sunpak® Infrared Heaters Gas Piping A minimum pipe size of ½” is required for inlet piping. A ½” leaver handled shut-off gas cock should be installed within 6 feet of the appliance for servicing the unit. Check with local and state plumbing and heating codes regarding sizing of gas lines.
- Page 9 Sunpak® Infrared Heaters Ventilation Regular Service and Maintenance It is required that areas above the heater be Over time, particularly during long periods of non‐ properly vented to allow for necessary use, the heater can accumulate dirt and debris in combustion air and removal of combustion gases. and around the pilot and the burner. Routine Heaters shall be provided with natural or mechanical means to supply and exhaust at least maintenance should be performed at least once a ...
- Page 10 Sunpak® Infrared Heaters You must remove the Sunpak Face Trim to connect power to the heater. The Sunpak Face Trim is attached with four (4) screws located along each side of the heater. Basic Wiring Sunpak S34‐TSR requires 7.5 VDC for its controls. In most cases you will be running low voltage wire from the Power Adapter plugged into a 120 VAC outlet. The Power Adapter is not water proof and must be weather protected. The extension wire can be run 50 feet with 18 GA and must have suitable outdoor insulation. In order to add the extension wire you must: 1. Remove the Face Trim 2. Disconnect the Power Adapter from the control module. 3. Attach the slide connector to the extension wire. 4. Connect one end of the extension wire cable to the module and the other end to the Power Adapter WARNING: Do no attach the Extension Cable directly to the 120 VAC Outlet. NOTE: Male and Female connections are supplied in the extension kit supplied with each heater ...
- Page 11 Sunpak® Infrared Heaters ...
- Page 12 Sunpak® Infrared Heaters...
-
Page 13: Trouble Shooting Guide
Erratic winds • Deterioration of Front Grill Sunpak heater must be installed in such a manner as to allow the products of combustion or hot gases to vent out the top of the heater. When operating normally, only radiant heat passes through the front grill. - Page 14 Sunpak® Infrared Heaters Trouble Shooting Remote Controls Error Code: Reason Solution Module has four “beeps” every one Warns user that the pilot Adjust the sensor electrode to 3/16” second flame sensor detects a pilot for the pilot hood and 3/8” from the flame already present when spark electrode. Make sure the ignition sequence is electrode is within the flame zone. initiated. This fault will also occur if pilot flame sensor on main control module is shorted to ground Four beeps every two seconds Warn users the module’s Module’s internal temperatures must internal temperature has cool to below 160⁰ F (71⁰ C) and then exceeded 170⁰ F. (77⁰) press ON button One beep every four seconds Flame Safety Circuit has Press OFF button to reset then ON to locked out restart heater Each Sunpak TSR comes with wireless controls pre‐programmed for individual heaters. If you have a problem with the remotes, please review the following: 1. Make sure there is power to the unit through 7.5 VDC output from the plug‐in power adapter. 2. Make sure you have the correct control for the heater. Each control is marked with a number ...
- Page 15 Sunpak® Infrared Heaters 2. Locate the learn button of the heater control as shown in the diagram on page 3. Press and hold for 6 seconds before releasing. 3. Press and release the learn button on the heater control. Press the <ON> button on the wireless device within 10 seconds. 4. The heater should now recognize the wireless device. a. Press the <OFF> button on the wireless device b. Press the <ON> button c. Press the <HI> button d. Leave heater on HI for first 5 minutes Repeat procedure 4, if heater spark turns ON, but the heater does not light up. It is likely that there is still air in the gas line. If the heater fails to light or fails to stay lit after several tries, it may be necessary to bleed the gas line. Sunpak Pilot The two electrodes near the pilot provide for flame ignition and sensing. It is important that these electrode be position properly.
-
Page 16: Warranty
Sunpak® Infrared Heaters Warranty THIS WARRANTY IS APPLICABLE TO THE ORIGINAL OWNER ONLY. In accordance with the warranty terms and conditions specified below. Infrared Dynamics (the warrantor) will furnish the ORIGINAL OWNER, 1) a replacement Infrared Dynamics’ heater or 2) a replacement part for any component part which fails before one year when used for residential use.
Need help?
Do you have a question about the S34?TSR and is the answer not in the manual?
Questions and answers