Table of Contents
Advertisement
Advertisement
Table of Contents

Related Manuals for Mvision HD-450T


Summary of Contents for Mvision HD-450T
- Page 1 HD-450T Digital Terrestrial HD Receiver USER'S MANUAL...
-
Page 2: Safety Precaution
SAFETY PRECAUTION CAUTION: The lightening flash with Warning: The exclamation point arrowhead symbol, within To reduce the risk of within an equilateral an equilateral triangle, is electric shock, don't open triangle is intended to intended to alert the user the cabinet. Refer alert the user to important to "dangerous voltage"... - Page 3 Attachments: Never add any attachments and/or equipment without the manufacturer consent; as such additions may result in the risk of fire, electric shock or other personal injury. Locating: Slots and openings in the cabinet are provided for ventilation to protect it from overheating. Do not block these openings or allow them to be blocked by placing the STB on a bed, sofa or other similar surface, nor should it be placed over a radiator or heat register.
-
Page 4: Table Of Contents
Contents Contents 1. Remote Control & Panel Description ............... 3 1.1 Front Panel Description ...................3 1.2 Rear Panel Description ..................4 1.3 Remote Control Description ................5 2. Basic Operations ....................6 2.1 Switch on STB ....................6 2.2 Standby Mode ....................6 2.3 Mute .......................7 2.4 Audio ......................7 2.5 TV/STB ......................7 2.6 TV/Radio ......................7... - Page 5 Contents 3.1.4 Edit ...................... 17 3.1.5 Find ..................... 19 3.2 Radio Channel List ..................19 3.3 Channel Setup ..........¡Error! Marcador no definido. 3.4 Favorite group list name ........¡Error! Marcador no definido. 3.5 Delete All ............¡Error! Marcador no definido. 4.
-
Page 6: Remote Control & Panel Description
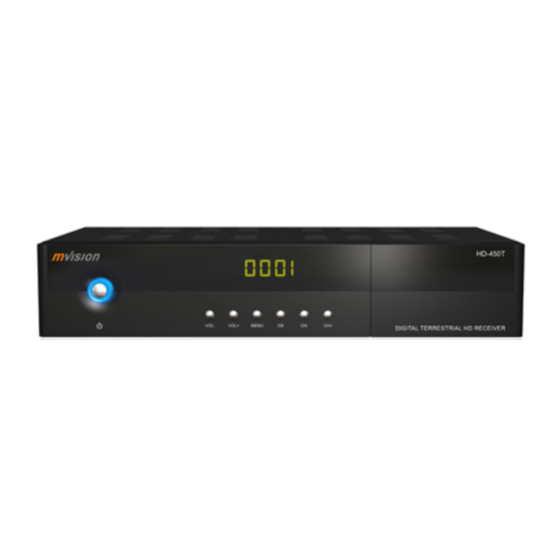
Remote Control & Panel Description 1. Remote Control & Panel Description 1.1 Front Panel Description LED POWER Mode indicator (LED) – red light in operating and standby mode. POWER Is used to switch between the working mode and the standby mode. LED LOCK Blue light when receiving a channel signal. -
Page 7: Rear Panel Description
Remote Control & Panel Description 1.2 Rear Panel Description ANTENNA IN Terr. input of the digital tuner. LOOP OUT Terr. output for cascading to others devices. TV SCART Output SCART for the connection to a TV set. To connect with USB disk. HDMI output for the connection to a TV set. -
Page 8: Remote Control Description
Remote Control & Panel Description 1.3 Remote Control Description... -
Page 9: Basic Operations
Basic Operations 2. Basic Operations 2.1 Switch on STB Switch the [Device’s Main Power] switch on. When the STB is first used it will display “Quick Setup” window. you will set Language, First Audio, Second Audio, LNB Power, Antenna Setup and Multi Search. -
Page 10: Mute
Basic Operations 2.3 Mute Press the [Mute] button to mute the sound. On the screen an icon will be displayed to indicate the muted sound. Press the [Mute] button again to restore the sound. 2.4 Audio In TV mode, press the [Audio] button to open the Audio Mode window. -
Page 11: Txt
Basic Operations 2.9 TXT Press [TXT] button in TV mode to open the teletext page. This service is depending on the support of the channel provider. If the channel does not support teletext information, it will show “No Teletext Data” on the screen. 2.10 P/N In TV mode, press [P/N] button to display Mode is used to switch the display mode. -
Page 12: Fav
Basic Operations 2.15 FAV +/- In full screen, press [FAV +/-] keys can switch the favorite channels in current satellite channels list directly. The sequence of the switch favorite channels is following the sequence that in the current satellite channel list, not follow the sequence in the favorite group. -
Page 13: Fav
Basic Operations 2.17 FAV In TV mode press the [FAV] button to display the Favorite Group window on the screen as the picture beside shows. In the Favorite Group window you can select the desired favorite channel with [CH▲/▼] and confirm it with [OK] to switch to it. In bigger groups you can navigate with [PGUP/ PGDN]. -
Page 14: Menu
Basic Operations Press [FAV] button to open FAV list. After selecting a Favorite Group the channel list will be reduced to the channels of this group. Press [Blue] button to open the Find window. You can use this feature to find channel by their names. -
Page 15: Edit
Basic Operations 2.25 EDIT In TV mode, press [EDIT] button to access directly to the “TV Channel List” menu or to the “Radio Channel List” menu. 2.26 INFO In TV mode, press [INFO] button can open information screen, in the window shows the parameters of current channel. -
Page 16: A-B
Basic Operations 2.31 REC button In recorded mode, during your watching, press REC button to set up a starting point 2.32 T.S. In TV mode, press [T.S.] button you will be asked to “Start time shift?” menu. 2.33 GOTO When you play the recorded channels, press [Goto] button, the “Jump to” message box will pop up, input the Time and press [OK], then the receiver will back to the input time point and play the program from that point continually. -
Page 17: I◄◄/►►I
Basic Operations ● 2.35 ● In TV mode, press [ ] button you will be asked to “Do you want to record?” menu. 2.36 ◄◄/►► When you play a recorded channel, press [◄◄] button to back the program fast and Press [►►] to fast forward the program. Selection: 2x, 4x, 8x speed . -
Page 18: Channel
Menu Operations 3. Channel Manager Press [Menu] in the TV/radio mode to enter the main menu. 1. Press [CH▲/▼] to select the channel item. 2. Press [OK] to enter the selected item. In the channel menu: Press [CH▲/▼] to select the wanted menu item among TV Channel List, Radio Channel List, Channel setup, Favorite group list name and Delete All. -
Page 19: Favorite
Menu Operations 3.1.1 Favorite 1. Press [FAV] to open the favorite window. 2. You can select between 32 favorite groups with [CH▲/▼]. Press [OK] to assign the channel to a favorite group, press [EXIT] to exit favorite group. 3. Press [OK] again to remove the channel from the marked favorite group. -
Page 20: Sort
Menu Operations 3.1.3 Sort Press [Green] to open the sort window. Press [CH▲/▼] to select and [OK] to confirm your choice. The ways of sorting are: ♦ Default: Sort channel factory default. ♦ FTA/CAS: Sort channel by free and scrambled sequence. Free channels will be listed first and scrambled channels behind in the channel list. - Page 21 Menu Operations 3.1.4.2 Skip In channel edit menu, press [Green] button to place a skip icon behind the name of the highlighted channel. Marked channels will be skipped when you change channels in TV mode after you confirm to save the changes when you leave this menu.
-
Page 22: Find
Menu Operations Press [OK] on the “Satellite” item to display the satellite list. You can select the satellite for which you want to create a new channel. With marked “TP Index” item press [OK] to display TP list, use [CH▲/▼] to select for which you want to create a new channel. - Page 23 Menu Operations Frequently Asked Question Q: IF I incautiously delete all channels, what should I do? there are two ways to restore: To research all channels in the “Installation” menu. Use “Factory Default” function to restore all channels in the “Tools” menu.
-
Page 24: Installation
Menu Operations 4. Installation When you enter to “Installation” menu, there will display the screen like right: In “Installation” menu; Press [▼/▲] key to select menu pages among Auto Scan, Channel Scan, Channel Setup and Aerial Adjustment. Press [▼/▲] key to select menu items among each items. -
Page 25: System Setup
Menu Operations When you complete your modification, move highlight to “Search” item and press [OK] key, then it will begin to scan. In the “Channel Scan” item, press [Exit] key to exit the scanning and save the current parameters. 4.3 Factory Default When you press [OK] on the “Factory Default”... -
Page 26: Tv System
Menu Operations language include: English, German, French, Spanish, Italian, Portuguese, Turkish, Polish, Russian, Danish, Greek, Hungarian, Arabic, Farsi and Dutch. First Audio: Some channels offer more than one audio language. This function allows you to set the preferred audio language for those channels. If a channel offers the same audio language as the “First Audio”... - Page 27 Menu Operations Subtitle Display: Press [Vol◄/►] to select “Off”, “Standard” or “Teletext Subtitle”. If the current channel has subtitle information, it will be displayed if this function is “Standard” or “Teletext Subtitle”. If this function is “Off” subtitles won’t be displayed. OSD Timeout: This setting determines the duration the info window is displayed on the screen when you change channels.
- Page 28 Menu Operations Local Time Setting: When you select “Local Time Setting” and press [OK] then you will see a window like the one beside: ♦ GMT Usage: This item is used to set the time by using the time signal from the satellite. Press [Vol◄/►] to change the setting.
-
Page 29: Parental Lock
Menu Operations 5.4 Parental Lock You can set a password for anyone who wishes to operate the “Installation” menu. You can also set the password to lock channels. Below you find how to set and change the password. On “Parental Lock” press [OK] to open dialogue input password. -
Page 30: Power Setting
Menu Operations Menu Lock: If Menu Lock is set to “Yes” then you need to enter the password every time you want to open the menu. If set to “No” then you can open the menu without entering the password first. Channel Lock: If set to “Yes”... -
Page 31: Tools
Menu Operations 6. Utility When you enter to “Tools” menu, you will see a screen like beside: In “Tools” menu: Press [CH▲/▼] to select the wanted item among Information, Quick Setup, Factory Default, Software Upgrade, SatcoDX Auto Programming and CAS. Press [OK] to enter the selected item. -
Page 32: Backup To Usb
Menu Operations be placed at the root path of your USB device. Upgrade Mode: the mode of the upgrade to be choosed, Press [Vol◄/►] to select Software, Whole, User Interface, Default DB, CAS and Ch.List & Setting. In the “Software” item press [Vol◄/►] to select the file which you want to scan or press [OK] to open the “USB list”... -
Page 33: Time & Timer Setting
Menu Operations 7. PVR When you enter to “PVR” menu, you will see a screen like beside: In “PVR” menu: 1. Press [CH▲/▼] to select the Media List, Media Control Disk Information. 2. Press [OK] to enter the selected item. 7.1 Timer When you enter “Time &... - Page 34 Menu Operations Wakeup Channel: Press [OK] to enter the channel list, and select the channel you want to see with [CH▲/▼], press [OK] to confirm Wakeup Date: Use number buttons to input your wakeup date. On Time: Use number buttons to input your wakeup time. If date and time are reached then no matter if the system is in standby mode or in playing mode, it will automatically switch to the channel you set and start to play.
- Page 35 Menu Operations 7.1 USB Press [CH▲/▼] to select the wanted item partition. Press [Red] button to open the “Rename” window like showed beside. Press [CH▲/▼] / [Vol◄/►] to select the leading character of the channel name and press [OK] to confirm it. If you enter the USB menu a window like the one below will open.
-
Page 36: All
Menu Operations 7.1.1 All [Edit] Press [Red] button to open the “Edit” window like showed beside. The color buttons offer further functions to manage. Rename ♦ Press [Red] button to open the “Rename” window like showed beside. Press [CH▲/▼] / [Vol◄/►] to select the leading character of the channel name and press [OK] to confirm it. - Page 37 Menu Operations b) Press [MENU] button you will be asked “Are you sure to save?”. Select “OK” to delete all “mp3 / image / video”. Select “Cancel” to cancel the operation. Move ♦ Press [Yellow] button to show a moving icon behind the “mp3 / image / video / folder”...
-
Page 38: Music
Menu Operations [Find] Press [Blue] button to open the “Find” window like showed beside. Press [CH▲/▼] / [Vol◄/►] to select the leading character of the channel name and press [OK] to confirm it. After entering the character(s) highlight “OK” in the window and press [OK] on the RCU. -
Page 39: Video
Menu Operations open another window. press [Red] to set the image as background. press [Green] to delete the image as background. 7.1.4 Video Basically the operation of “video” is same as “all”. 7.1.5 Music List The color buttons offer further functions to manage. [Delete] In media list menu press [Green] button will open another window where you can choose between add one image and add all image. -
Page 40: Cas
Menu Operations [Rename] 1. Press [Red] button to open the “Rename” window like showed beside. Press [CH▲/▼] / [Vol◄/►] to select the leading character of the channel name and press [OK] to confirm it. 2. After entering the character(s) highlight “OK”... - Page 41 Menu Operations [Lock] In channel Record menu, press [Green] button to place a lock icon behind the name of the highlighted Record. Marked Records will be locked and displayed only after password has been entered if you confirm to save the changes when you leave this menu.
-
Page 42: Media Control
Menu Operations 7.2 PVR Options Reserved TMS Size: Press [Vol◄/►] to switch between “0 MB / 200 MB and 500 MB”. Select “MENU / EXIT”, press [MENU / EXIT] to reset to make tms size valid now. Select “Cancel” press [OK] to cancel the operation. -
Page 43: Technical Specification
Technical Specification 8. Technical Specification VIDEO Decoding MPEG-2 & MEPG-1 compatible Bit rate Max 20Mbps Output PAL/NTSC / Auto Aspect ratio 4:3PS, 4:3LB, 16:9, Auto Active pixel 720x480 @ 30fps; 720x576 @25fps Output connector RCA, TV SACRT AUDIO Decoding MPEG-2/MPEG-1 layer I & II Sampling rate 32 / 44,1 / 48 DEMODULATOR... - Page 44 Technical Specification MISCELLANEOUS Supply voltage 100~240VAC~50~60Hz Power consumption Max 20 watts Operation temperature +5° to +40° Storage temperature -20° to +70° Dimension (W * D * H) 310*260*65 mm Weight 1.8 Kg...
Need help?
Do you have a question about the HD-450T and is the answer not in the manual?
Questions and answers