Avolites Tiger Touch Operator's Manual
Console
Hide thumbs
Also See for Tiger Touch:
- Operator's manual (211 pages) ,
- Operator's manual (229 pages) ,
- Operator's manual (261 pages)
Table of Contents
Advertisement
Quick Links
Download this manual
See also:
Operator's Manual
Advertisement
Table of Contents

Related Manuals for Avolites Tiger Touch


Summary of Contents for Avolites Tiger Touch
- Page 1 Tiger Touch Operator’s Manual Version 3.0...
- Page 2 TigerTouch_Man_v3-0.doc 30/03/2010 12:17:00...
- Page 3 Tiger Touch even if Avolites Ltd. has been advised of the possibility of such damages. Because some jurisdictions do not allow the exclusion or limitation of liability for consequential or incidental damages, the above limitation may not apply to you.
- Page 4 This manual was written by Tim Mitchell, Sabre Technology Ltd http://www.sabretechnology.co.uk TigerTouch_Man_v3-0.doc 30/03/2010 12:17:00...
- Page 5 SHAPES CUES CHASES CUE LISTS RUNNING THE SHOW 10. REMOTE CONTROL 11. USER SETTINGS AND OTHER OPTIONS 12. WORKING WITH FIXTURE PERSONALITIES 13. NETWORKING 14. TIGER TOUCH FOR AVOLITES USERS 15. RELEASE NOTES 16. GLOSSARY OF TERMS TigerTouch_Man_v3-0.doc 30/03/2010 12:17:00...
- Page 6 Page 6 – Reference Manual Contents TigerTouch_Man_v3-0.doc 30/03/2010 12:17:00...
-
Page 7: Table Of Contents
Visualiser ................... 23 1.3.6 Key profiles ..................24 1.3.7 Key macro buttons ................24 1.3.8 The Tiger Touch Titan application ............24 Loading and saving shows ............25 1.4.1 Manual save and load ................25 1.4.2 Autosave ................... 26 1.4.3 Backing up existing show files to USB pen drive ........ - Page 8 Advanced options ..............61 5.4.1 Shape fade mode................61 Cues Create ................. 63 6.1.1 How the Tiger Touch works when programming ........63 6.1.2 Creating a cue ..................64 6.1.3 Using shapes in cues ................64 Playback ................65 6.2.1 HTP and LTP..................
- Page 9 Reference Manual Contents - Page 9 Create ................. 75 7.1.1 Programming a chase ................75 Playback ................76 7.2.1 Playing back a chase ................76 7.2.2 Connecting a chase for control.............. 76 7.2.3 Setting speed and crossfade for a Chase ..........77 7.2.4 Manually controlling the steps of a chase ..........
- Page 10 Page 10 – Reference Manual Contents 9.2.1 View menu ..................99 9.2.2 Tiger Touch Titan application window ............ 99 Organising the console ............99 9.3.1 Using the Move function............... 99 10. Remote control 10.1 Setting up the remote ............101 10.1.1...
- Page 11 13.7.4 Automatically assigning IP addresses (DHCP)........139 13.7.5 Private IP address ranges..............139 13.8 Repairing a Network Connection ..........139 14. Tiger Touch for Avolites users 14.1 The controls and screen............141 14.2 New programming features ........... 142 15. Release notes 15.1 Version 3.0 .................
- Page 12 Page 12 – 1. Setting up the console TigerTouch_Man_v3-0.doc 30/03/2010 12:17:00...
-
Page 13: Setting Up The Console
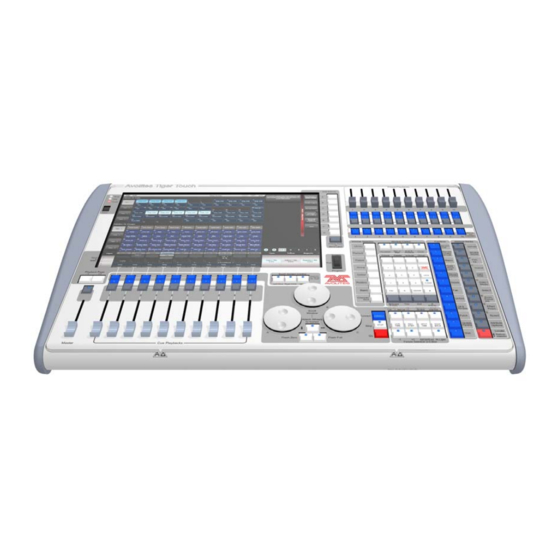
VDU windows; guide to where everything is on the console; loading and saving shows. Welcome to the Avolites Tiger Touch console. This manual is a reference guide to all the functions of the console. - Page 14 Page 14 – 1. Setting up the console System display Preset playbacks Macro buttons and menu softkeys Workspace windows with Attribute display touch buttons Power switch Playback legends and info Playback page select buttons DBO (blackout) button Numeric Attribute Mode Control Master fader Playback faders...
- Page 15 1. Setting up the console - Page 15 • The Playback faders are used to store and play back cues or chases. The Page Select buttons let you change to a different page of playbacks. The touch screen above the faders shows information about each playback.
-
Page 16: Connecting Up
Ethernet nodes and to the Avolites Console DMX Interface (ACDI) system which is used to connect visualiser applications. When you patch a dimmer or fixture you tell the Tiger Touch which of the 12 DMX universes it is on. Each universe can be configured to... -
Page 17: Connecting A Vdu Monitor
A 3-pin XLR socket for a desk lamp is provided on the rear edge of the console. Suitable lamps are available from Avolites. The lamps are 12 volt, wired from pins 1 and 2 of the XLR. TigerTouch_Man_v3-0.doc 30/03/2010 12:17:00... -
Page 18: Using The Touch Screen And Vdu
Page 18 – 1. Setting up the console Using the touch screen and VDU The Tiger Touch has many useful features on its onboard display and on the VDU. 1.3.1 Workspace windows The main area of the touchscreen contains the workspace windows. - Page 19 1. Setting up the console - Page 19 You can change the positions Window control buttons and sizes of the windows by AVO shift button using the Window Control buttons above the numeric keypad. The min/max button swaps the active window between full screen and quarter size.
-
Page 20: The Menu Area Of The Touch Screen
Page 20 – 1. Setting up the console 1.3.2 The menu area of the touch screen The right hand side of the touch screen is used for the operating menu display. Information window Menu softkeys Workspace selection buttons Attribute groups Current menu name Wheel... -
Page 21: The Toolbar
1. Setting up the console - Page 21 the centre of the roller shows the current attribute. If a chase is being controlled, information about the chase is shown here. Above this, the screen shows which attribute group (Intensity, Position, Colour, Gobo, Beam, Effect and Special) is selected (grey box) and which are currently modified (blue circle). - Page 22 Additional Programs allows you to run some diagnostic programs which might help Avolites Support find problems you’re having. Restart and Shutdown Software restarts and closes the Titan and Tiger Touch software. You would normally only use these when upgrading the software. Keyboard button...
-
Page 23: The Heads-Up Display (Hud)
The operation of Visualiser is not covered in this manual, please refer to the Visualiser manual. Auto Patch The Auto Patch function automatically creates a Visualiser rig from your Tiger Touch show. When you start Visualiser, it will open with an automatic representation of your patch. TigerTouch_Man_v3-0.doc 30/03/2010 12:17:00... -
Page 24: Key Profiles
1.3.6 Key profiles The Tiger Touch allows you to change the function of the blue and grey panel buttons associated with the playback faders. You can also change the way some of the touch keys work. You can save your settings as a Key Profile. -
Page 25: Loading And Saving Shows
If you save to hard drive, shows are saved in the C:/Program Files/Avolites/Titan/ShowData folder, unless you change this in the User Settings. The Tiger Touch will automatically load the last show when it is turned on. If you want to load a different show: 1>... -
Page 26: Autosave
USB drive. Clearing the console When you start a new show on the Tiger Touch it is usually a good idea to clear the console. All programming and patching is deleted, but user options are not changed. -
Page 27: Patching
You can change the fixture page at any time. The Tiger Touch also allows you to allocate fixtures and dimmers to Groups, which allows you to quickly select a set of fixtures with one button touch. -
Page 28: Patching Dimmers
Tiger Touch what you want to do and it will send the right control commands. There is a personality file in the Tiger Touch for most types of fixture, which tells it what attributes are available and how to control them. - Page 29 2. Patching - Page 29 your fixture, you can download further personalities from the Avolites website or Avolites can create one for you. See section 12 on page 125 for details of how to find personalities. 1> Press Patch (bottom right of console).
-
Page 30: Visualiser Auto Patch
• If a patch goes over the capacity of a DMX line, the Tiger Touch will patch at the beginning of the next line. For example if you try to patch a Mac500 at channel A510, it will actually be patched at B1. -
Page 31: Edit
2. Patching - Page 31 Edit 2.2.1 Changing the DMX address of a fixture You can re-patch a fixture to a different DMX address or a different DMX output line. All programming is kept. 1> Press Patch (if you’re not already in Patch mode). 2>... -
Page 32: View Fixture Patch
Page 32 – 2. Patching Number you entered, and the other selected fixtures will be given a number increasing by 1 for each fixture. • You can set a legend for the current page of fixtures using the [Set Legend] function from the main Program menu. -
Page 33: Update Personalities
2. Patching - Page 33 Fixture Exchange works best if you use Palettes to create your cues. This allows you to adjust for position differences and so on by reprogramming a few position palettes, rather than having to reprogram every cue. Cues recorded with absolute values will need to be re-recorded, preferably using palettes. -
Page 34: Copy And Move
Page 34 – 2. Patching Copy and Move 2.3.1 Copying or moving a patched fixture Using the Copy/Move/Link button you can make a copy of an existing fixture or move it to a new button. You cannot link fixture buttons. You can copy or move multiple fixtures in one operation. -
Page 35: Advanced Options
2. Patching - Page 35 • All programming for the fixture is also deleted. You cannot undo deletion of a fixture or get the programming back by repatching a fixture to the same handle. Advanced options 2.5.1 Swap pan and tilt This allows you to make the pan channel control tilt and the tilt control pan. - Page 36 Page 36 – 2. Patching TigerTouch_Man_v3-0.doc 30/03/2010 12:17:00...
-
Page 37: Controlling Dimmers And Fixtures
3. Controlling dimmers and fixtures - Page 37 3. Controlling dimmers and fixtures This chapter contains: Selecting fixtures and dimmers for control; changing attributes of the selected fixtures; using groups. When you are programming a show, and sometimes when you are running a show, you need to manually control the fixtures and dimmers to set the intensity, position, colour, etc. -
Page 38: Setting Fixtures To A Start Position
Page 38 – 3. Controlling dimmers and fixtures • Press Clear (right of numeric keys) to deselect all fixtures and remove all changes from the programmer. See the next section for more Clear options. • Once you have changed any attribute, touching a Select button will deselect all fixtures and start the selection process again. -
Page 39: Changing Attributes Using The Wheels
Tiger Touch. The attributes available depend on the fixture type. Dimmer channels only have a dimmer Wheels attribute. - Page 40 Page 40 – 3. Controlling dimmers and fixtures You can also select attributes by touching the IPCGBES buttons on the touch screen, and modify them using the Attributes workspace window; this is described in the next section. Each attribute button controls several attributes, one on each wheel. 1>...
-
Page 41: Setting Attributes Using The Touch Screen
3. Controlling dimmers and fixtures - Page 41 • Some LED colour mixing fixtures have a Virtual Dimmer function (using the Intensity wheel) which offers intensity control by mastering the RGB levels when the fixture itself does not provide an intensity channel. 3.1.5 Setting attributes using the touch screen For attributes with fixed values such as gobos and fixed colour... -
Page 42: Setting Attributes By Number
Page 42 – 3. Controlling dimmers and fixtures For variable attributes like Dimmer, holding down the button will display a horizontal slider bar. You can then move your finger left or right to change the value. Active fixtures such as media servers will display a thumbnail of the media clip in the button. -
Page 43: Selecting Using A Pattern
When programming you will often want to select patterns of fixtures. Rather than having to individually select and deselect fixtures, the Tiger Touch has an easy way of selecting odd then even fixtures in a range of fixtures, or it can, for example, select every 4 fixture. -
Page 44: Attribute Groups - Ipcgbes
You can enter your own patterns using the numeric keypad and softkeys, for example “2” A [In] “6”. 3.1.9 Attribute groups - IPCGBES To make life a bit simpler, the Tiger Touch groups together attributes which have similar effects, using the letters IPCGBES. I-Intensity (dimmer, strobe shutter) P-Position (pan, tilt) -
Page 45: Stepping Through Selected Fixtures One At A Time
3.1.11 Stepping through selected fixtures one at a time If you have selected a range of fixtures, or a group, the Tiger Touch has functions to step through the selected fixtures one at a time. This can make it easier to program a range of fixtures because you don’t have to select each one manually. -
Page 46: Align Fixtures
Page 46 – 3. Controlling dimmers and fixtures stage. This makes it very easy to see which fixture you are controlling. The other fixtures in the selection go to a dimmed level. • Press the HiLight button to enable highlight mode. Press HiLight again to disable hilight mode. -
Page 47: Edit
3. Controlling dimmers and fixtures - Page 47 3> Select the attribute you want to Fan using the attribute bank buttons. 4> Set the amount of fan using the attribute wheels. 5> Turn off Fan by pressing the Fan button again when you have finished. -
Page 48: Advanced Options
3.3.1 The Fixture Tools / Menu Latch button When the Tiger Touch is at the top menu, the Fixture Tools / Menu Latch button opens the Moving Light Actions menu which contains options to Locate Fixture (same as the Locate button) and to run Macros on fixtures such as Lamp On, Lamp Off, Reset etc. -
Page 49: Palettes
Palette values stored as a reference The most important thing about palettes is that when you use a palette value in a cue, the Tiger Touch stores a reference to the palette, rather than the actual value. This means that if you program... -
Page 50: Storing A Palette
Page 50 – 4. Palettes In addition, palettes may be either Shared or Normal. Shared palettes are used where the same value is set for all fixtures of the same type – for example when setting colours, the “Red” palette would set the same colour values for “Red”... -
Page 51: Quick Record
4. Palettes - Page 51 buttons on the right hand edge of the console to set the mask. An attribute group is included when the softkey is inverted (like the Colour group in the picture) and when the LED is lit on the Attribute Bank button. -
Page 52: Palette Pages
You can also load the palette into some fixtures, modify the attributes and record the new information back on top of the existing palette entry. The Tiger Touch will give you options on the softkeys to Replace or Merge the palettes. If you select Merge, anything you haven’t changed will not be affected, values you have changed or... -
Page 53: Setting Legends For Palettes
4. Palettes - Page 53 • You can remove attributes from palettes using the Off function, see section 6.3.4 on page 69. • When editing a palette from a touch button, the state of the programmer will be preserved; when the modified palette is saved, your original programmer contents will be restored and the programmer will be left in the same state as when you started editing the palette. -
Page 54: Delete
Page 54 – 4. Palettes • When in Move mode, [Swap Items if Required] will attempt to reposition any existing handles which are in the way of the move. This is useful when rearranging buttons on a page which is nearly full. Delete 4.5.1 Deleting palettes... - Page 55 4. Palettes - Page 55 time. This fade time will be used for all palettes unless you manually type in a different time. This can be useful when “busking” a show with palettes. TigerTouch_Man_v3-0.doc 30/03/2010 12:17:00...
- Page 56 Page 56 – 4. Palettes TigerTouch_Man_v3-0.doc 30/03/2010 12:17:00...
-
Page 57: Shapes
In addition to position shapes, there are a large number of other shapes available in the Tiger Touch. The shapes are defined for a particular attribute such as colour, dimmer, focus and so on. Some shapes will not work with some fixtures; focus shapes, for example, can produce nice “focus pull”... -
Page 58: Playback
Page 58 – 5. Shapes Playback 5.1.1 Creating a shape To create a shape you simply pick the type of shape from a list on the softkeys, then choose the shape you want from the Shapes window. Shapes are organised using the IPCGBES attribute groups, so you can pick from a list of Dimmer shapes, or a list of... -
Page 59: Changing Size And Speed Of A Shape
Changing the phase of a shape across multiple fixtures Shapes get more interesting (and look more impressive) when you apply them to multiple fixtures. The Tiger Touch lets you control how a shape is phased across several fixtures. You can also control Spread, which is a different way of selecting the same thing. -
Page 60: Edit
Page 60 – 5. Shapes The sequence of the shape across the fixtures is controlled by the order in which you selected the fixtures when you created the shape.. 1> Press softkey E to select [Adjust Phase, Spread and Offset] 2>... -
Page 61: Reversing A Shape
5. Shapes - Page 61 1> If you are not in the Shape menu, press [Shape Generator] at the top menu. 2> Press [Edit]. 3> By the softkeys is a list of the currently running shapes. 4> Press a softkey to make the shape active. The active shape is highlighted. - Page 62 Page 62 – 5. Shapes TigerTouch_Man_v3-0.doc 30/03/2010 12:17:00...
-
Page 63: Cues
Also, you can store cues in touch buttons in the Playbacks window, provided you don’t need a fader. The cue functions on the Tiger Touch are very powerful; the first part of this section explains the basics of how the Tiger Touch uses cues. -
Page 64: Creating A Cue
Page 64 – 6. Cues Fixtures which are in the programmer are shown in mid blue on the HUD windows and on the touch buttons. Attributes in the programmer (the things you have changed) are shown in cyan on the HUD windows and attribute displays. -
Page 65: Playback
Playback Because it’s possible to play back a large number of cues at the same time, the Tiger Touch has to have rules on how it combines the output from different cues. These are called HTP and LTP rules. 6.2.1... -
Page 66: Changing Playback Pages
Page 66 – 6. Cues assign the function to all buttons of the same type. Also if you are using one of the system key profiles, which are not editable, you will need to select or create an editable key profile first. 6.2.3 Changing playback pages You change playback pages using the +1 and -1 buttons to the left of... -
Page 67: Playback And Cue View
Press [Merge] (the cue being edited is highlighted on the screen) 7> The Tiger Touch will merge the existing cue with your changes. Unchanged information is not affected. • If you want to overwrite the cue entirely, use the option [Replace] at step 6. -
Page 68: The Include Function
Page 68 – 6. Cues You can edit or remove one or more individual control values in the cue. Touch or drag over the required control values in the grid to select them – they will be highlighted in blue. The softkeys then give you available settings for that control value, or you can directly edit values by typing numeric values and pressing enter,... -
Page 69: Removing Attributes From Cues Using "Off
6. Cues - Page 69 Softkey C turns them all off and D turns them all on). Softkey E lets you include or exclude Shapes from the cue. 6> Press Enter. The selected attributes of the selected fixtures will be loaded into the programmer. 7>... -
Page 70: Delete
2 and 3 without having to keep pressing the Delete button. Press Exit to leave latched delete mode. Timing The Tiger Touch allows a wide variety of timing functions to be set. 6.6.1 Setting fade times and Overlap for a cue You can set a delay, fade in and fade out time independently for every cue. - Page 71 6. Cues - Page 71 pictures show what happens to the LTP channels when fixture overlap and attribute fade are used. The times are set like this: 1> Press [Edit Times] at the top level menu. 2> Press the Swop button of the cue. 3>...
-
Page 72: Changing Fixture Order
Page 72 – 6. Cues 7> Press Exit to get out of Edit Times mode. • You can also set independent times for the IPCGBES attribute groups, and for each individual attribute, see next section for details of this. The times you enter are affected by the cue mode which is set using the [Fade Mode] option: •... -
Page 73: Setting Attribute Fade Times For A Cue
6. Cues - Page 73 sequence number to start from using option A. 5> If you want the sequence number to increase automatically, set [Autoincrement] to On. If you want some fixtures to have the same sequence number, set it to Off. 6>... -
Page 74: Release Mask
Page 74 – 6. Cues 6.7.1 Release mask [Release Mask] lets you specify which attributes will be released to the state they were in from a previously fired playback when this playback is killed. You can also use the Attribute Bank buttons on the right side of the console to set the mask. -
Page 75: Chases
You can record shapes in a chase. If the same shape is saved in subsequent cues it will continue from step to step and if not it will stop at the end of the cue. (The Tiger Touch considers the shape to be the same if you didn’t press Clear after the previous step, and didn’t change the speed, size or phase of the... -
Page 76: Playback
Page 76 – 7. Chases shape from the previous step; or if you Included the shape from the previous step and have not modified it) • You can set a legend for the chase by pressing Set Legend, then pressing the Swop button for the chase and entering the legend, as with cues. -
Page 77: Setting Speed And Crossfade For A Chase
You can also enter a speed from the keypad as described below. The last speed you set on the wheel is always remembered, you do not have to tell the Tiger Touch to save it. Crossfade is the “slope” between cues; with a crossfade of 0, the fixtures snap instantly to the next cue, but with a crossfade of 100, the fixtures spend the whole cue time fading to the next cue. -
Page 78: Manually Controlling The Steps Of A Chase
Page 78 – 7. Chases [Tempo Units] to set the option to [Tempo Units Seconds] or [Tempo Units Beats Per Minute (BPM)]. 7.2.4 Manually controlling the steps of a chase You can pause a chase, if the chase is connected to the wheels, by pressing the Stop button next to the wheels. -
Page 79: Editing A Chase Using Unfold
7.3.2 Editing a chase using Unfold The Tiger Touch has a powerful chase editing system. The Unfold button places each cue in a chase on one of the playback faders, allowing you to fire and edit each cue individually as if it was a stand- alone cue. -
Page 80: Copy, Move And Link
Page 80 – 7. Chases Copy, Move and Link 7.4.1 Copying or moving a chase Using the Copy/Move/Link button you can make a copy of an existing chase, move it to a new playback, or create a new playback which is linked to the existing playback. -
Page 81: Timing
7. Chases - Page 81 3> The steps in the chase are listed on the screen. Use the left hand wheel to select the step you want to delete, or type in the number of the step to be deleted. 4>... -
Page 82: Individual Cue Times In Chases
Page 82 – 7. Chases • Press [Fixture Overlap] then enter 0-100 on the keypad to change how fixtures overlap in the cue. 100% (the normal setting) means all fixtures fade together. 0% means that the first fixture will finish its fade before the next one starts giving a “rolling”... -
Page 83: Setting Attribute Fade Times For A Cue In A Chase
7. Chases - Page 83 want to edit. 3> Use the softkey options to change the times or settings. 4> Repeat from 2 to change other times or settings. • You can change a range of cues all at once by dragging across the grid to select multiple cells, or you can use wheel B to select multiple cells for editing. -
Page 84: Advanced Options
Page 84 – 7. Chases Advanced options To set options for a chase, press [Playback Options] on the root menu, then press the swop button of the playback to be edited. The same options are available as for Cues (see section 6.7 on page 73), with some additional options for Chases. -
Page 85: Cue Lists
8. Cue Lists - Page 85 8. Cue Lists This chapter contains: Programming a cue list; running a cue list; editing, copying and deleting cue lists; setting fade times; cue list options. Cue Lists allow you to record a sequence of cues, each of which can have its own timings and can be triggered by the Go button or run automatically to the next cue. -
Page 86: Create
Page 86 – 8. Cue Lists Create 8.1.1 Programming a cue-list Programming a cue list is similar to recording a chase. You need to set up the look on the stage for each cue and then add it to the cue list. If you want to set fade times, you can either set them while saving the cues or later. -
Page 87: Changing Legends For Cues In A Cue List
8. Cue Lists - Page 87 8.1.2 Changing legends for cues in a cue list You can set a legend for each cue, which is shown on the screen when running the cue list and can be helpful for keeping track of where you are. -
Page 88: Playback
Page 88 – 8. Cue Lists For a chase or cue list, softkey B lets you select whether to load the playback from the start, to start at a specific cue, or to press Go on the target playback. Playback 8.2.1 Running a cue list Raise the fader of the cue list... -
Page 89: Edit
8. Cue Lists - Page 89 Edit 8.3.1 Editing a cue list using Unfold The Unfold button places each cue of the cue list on one of the playback faders. This allows you to fire and edit each step individually as if it was a stand-alone cue. -
Page 90: Editing A Cue List While Recording
1> Press [Cue Number=x] and type the cue number to be edited. 2> The Tiger Touch will jump to the cue and show the output. 3> Make the changes that you want to the programming of the current step, or to the timings using [Edit Cue x Times]. -
Page 91: Delete
8. Cue Lists - Page 91 2> Select [Copy], [Move] or [Link]. Pressing the Copy/Move/Link button again will also toggle these options. 3> Press the Swop button of the cue list you want to copy/move/link. You can select a range of cue lists by holding the first button while pressing the last in the range. -
Page 92: Timing
Page 92 – 8. Cue Lists Timing 8.6.1 Time and fade options for Cue Lists Time settings are independent for each cue in the cue list. The display shows which cue you are working with. You can select which cue is active using Wheel A or softkey A of the Edit Cue List Cue Times menu. -
Page 93: Individual Attribute Fade Times
8. Cue Lists - Page 93 These options allow you to create complex self timed sequences by building up simple steps. For example if you wanted the following effect: • Go is pressed, Fixture one starts fading up over 20s •... -
Page 94: Fixture Overlap
Fixture overlap For each cue you can set a (linked together) fixture overlap, which causes the Tiger Touch to apply the settings in the cue to each fixture sequentially giving a “rolling” change across the fixtures in the cue. This can create some great effects without much programming on your part. -
Page 95: Running A Cue List To Timecode
8.6.5 Running a cue list to timecode The Tiger Touch can run a cue list automatically to a timecode. This is very useful for complex performances which must be exactly the same time after time, or for unattended operation. Each step in the cue list is assigned a time at which it will run. -
Page 96: Fader Mode
Page 96 – 8. Cue Lists right side of the console to set the mask. The default setting is to not release any attributes. 8.7.2 Fader mode This option sets how the cue list fader behaves. If set to [Fader Mode Intensity Kill With Off], the fader masters the overall HTP level and the cue list remains active (connected) even when the fader is lowered to zero. -
Page 97: Running The Show
9. Running the show - Page 97 9. Running the show This chapter contains: Operating modes, master faders, manual control during a show, setting up workspaces Playback 9.1.1 Back up the show At regular intervals while you are programming, and when you have finished programming (or you’ve run out of time) and it’s showtime, the most important thing is to back up the show to USB pen drive or the internal disk (see section 1.3.6 on page 24 for instructions). -
Page 98: Playback Priority
This is sometimes called “busking”, and is where the fun starts! You can create instant variations by recalling palette values to modify your existing cues. The Tiger Touch can fade to the palette values for added effect. 1>... -
Page 99: Workspaces On Touch Screen And Vdu
[Open Workspace Window] allows you to open and close all the possible windows. 9.2.2 Tiger Touch Titan application window The View menu on the Tiger Touch Titan application window lets you show various useful displays. Some of the options do nothing in this version of the software. Organising the console... - Page 100 Page 100 – 9. Running the show 3> Press or touch the select key of the destination. When moving a range, it is possible to select a range containing different types of items, and there can be gaps between them. In this case, you can set option B to [Bunch Up] to have all of the gaps in the range removed.
-
Page 101: 10. Remote Control
Connect an Ethernet cable from the back of the Expert to the access point. 5> Set the IP address of the Tiger Touch: Switch to System, select [Network Settings], press [Local Area Connection], then press [IP Address] and change the IP address to 192.168.0.2. -
Page 102: Console Setup
Connect to the console from the iPod by opening Safari and typing in the address: http://192.168.0.2/Remote/ (where “192.168.0.2” is the IP address of the Tiger Touch which you set earlier). Choose a user name and type that into the box on the iPod and press Create. -
Page 103: Operating The Remote
10. Remote control - Page 103 10.2 Operating the remote To connect to the console, open the Safari browser and type in the address of the console; if set up as described above this will be: http://192.168.0.2/Remote/ The remote screen always shows a header with a view selector, to choose which options to view, and a clear button. -
Page 104: Fixture List
Page 104 – 10. Remote control would press 1 Thru 10 More Macro Reset 10.2.2 Fixture List The fixture list view shows you all the fixtures in a familiar spreadsheet style, including the user number, fixture type, DMX address and legend. A drop down “Action”... -
Page 105: Settings Screen
10. Remote control - Page 105 Again you can sort and filter the playbacks using the Filter box to filter by legend, or the column headers. The “Back” and “Go” buttons are used for CueLists which will be enabled in a future software release. 10.2.4 Settings screen The Settings screen allows you to configure... - Page 106 Page 106 – 10. Remote control TigerTouch_Man_v3-0.doc 30/03/2010 12:17:00...
-
Page 107: 11. User Settings And Other Options
Setting the Tiger Touch options using the VDU menu; the Utilities menu; Curves; upgrading the software. The Tiger Touch has a large number of options to help you set it up just the way you like it. Commonly used options can be set from the User Settings softkey;... -
Page 108: Saving Workspaces
Compatibility view This workspace shows the “blue and grey handle” view which was used in version 2.x of the Tiger Touch software, and which also allows you to access the preset fader handles in shows which have been programmed on the Pearl Expert. -
Page 109: Configuring An External Monitor
11.1.5 Configuring an external monitor For extra workspace you can connect an external monitor to the VGA port on the Tiger Touch. • The external VDU is disabled by default and will show a “disabled” message. To enable it, switch to System mode and select [Display Setup] then press [External Display Disconnected]. - Page 110 Page 110 – 11. User Settings and other options should be used unless it’s necessary (using the menu or Display Setting where possible). Once any of these keyboard shortcuts has been used, power off and restart the console to complete the changes.
-
Page 111: Key Profiles
11. User Settings and other options - Page 111 11.2 Key Profiles The Tiger Touch allows you to reconfigure how the front panel buttons work to suit your method of working. You can save your settings as a Key Profile. Different profiles can be selected for different users or to enhance the operation of the console for a particular use. -
Page 112: Selecting A Key Profile
11.3 The System menu The Tiger Touch System menu is accessed by switching the mode switch to System. The options in this menu are separated from the other options on the console because you would normally only change them occasionally, or because they can have serious effects on the way the console works and you wouldn’t want to change them... -
Page 113: Key Profiles
11.2. • [LED Levels] sets the behaviour of the LEDs in the Select buttons. This option has no effect on the Tiger Touch. • [Handle Buttons] lets you set the size of the touch buttons to [Small], [Normal], [Large] or [Super Size]. -
Page 114: Display Setup
11.4 VDU Tools menu Some “system” options on the Tiger Touch can also be set from the Tools menu on the Tiger Touch Titan application. Use the “Switch Task” command on the Tools menu to bring the Titan application to the front. -
Page 115: General Tab
“off” and “on” mode information. • Show file format allows you to change the file format to enable compatibility with earlier software versions. • Compress show file will cause the Tiger Touch to compress the file before saving. TigerTouch_Man_v3-0.doc 30/03/2010 12:17:00... -
Page 116: Factory Settings
Show heartbeat on LED: No effect on this console • Log panel keypresses: All keypresses are logged to a file on the hard disk. This enables Avolites to reconstruct what you’ve done, should a problem occur. • DMX Properties..: Allows you to modify the timing of the DMX generated by the console, if you have problematic devices which need specific timings. -
Page 117: Exchange Fixture
11. User Settings and other options - Page 117 11.4.5 Exchange fixture The Tiger Touch allows you to exchange fixtures in your show for entirely different fixtures while retaining the show programming. This feature is described in section 2.2.4 on page 32. - Page 118 Page 118 – 11. User Settings and other options (also called Relay) TigerTouch_Man_v3-0.doc 30/03/2010 12:17:00...
- Page 119 11. User Settings and other options - Page 119 TigerTouch_Man_v3-0.doc 30/03/2010 12:17:00...
- Page 120 Page 120 – 11. User Settings and other options TigerTouch_Man_v3-0.doc 30/03/2010 12:17:00...
-
Page 121: Upgrading The Software
Restart Software button to start the new version. 11.7 Recovering/reinstalling the system The Tiger Touch runs on an embedded PC system, and like all computers, there is a possibility of system failure. If it becomes necessary to reinstall the operating system, this is how you do it. -
Page 122: Installation Instructions
Please read to the bottom of the licence agreement then touch Agree to accept. 4> On the next screen type in the serial number of the Tiger Touch (using the numeric keypad) - this is the number following the “TT-” written on the back of the console. - Page 123 11. User Settings and other options - Page 123 Record Cue: Record Chase or List: Record Macro: Copy/Move/Link: Record Palette: BACKSPACE Delete: TigerTouch_Man_v3-0.doc 30/03/2010 12:17:00...
- Page 124 Page 124 – 12. Working with Fixture Personalities TigerTouch_Man_v3-0.doc 30/03/2010 12:17:00...
-
Page 125: 12. Working With Fixture Personalities
12. Working with Fixture Personalities - Page 125 12. Working with Fixture Personalities For each type of fixture, the Tiger Touch has a “personality” file which tells it how to control the fixture, which channel is the dimmer (HTP) channel, and a large amount of other fixture-specific information. -
Page 126: Updating The Personality Cache On The Console
Page 126 – 12. Working with Fixture Personalities If there is a personality listed for your fixture on the Tiger Touch, download it by clicking on the Disk icon. This will download a copy of the complete personality cache. 12.1.2... - Page 127 1=R 2=G 3=B 4=Dim VDim + 4xRGB 4xRGB. VDim is a virtual overall dimmer channel for fixtures without a DMX dimmer control. When you use the Dimmer attribute the Tiger Touch will adjust the RGB levels accordingly. TigerTouch_Man_v3-0.doc 30/03/2010 12:17:00...
- Page 128 Page 128 – 13. Networking TigerTouch_Man_v3-0.doc 30/03/2010 12:17:00...
-
Page 129: 13. Networking
13.2 Setting up DMX outputs The Tiger Touch has 12 DMX lines which can be routed to the DMX sockets on the rear of the console and can be sent out over the Tiger Touch’s Ethernet socket. You need an external VDU connected to access these settings. -
Page 130: Setup Dmx Outputs Screen
Setup DMX outputs screen On the left hand side of the screen, the 12 DMX lines generated by the Tiger Touch are shown. On the right hand side is a list of nodes where the DMX can be routed to. -
Page 131: Artnet
A simple ArtNet system In the following diagram, an Art Net compliant Console (such as the Tiger Touch) is connected via a network hub to an Art Net compatible dimmer and 2 DMX conversion boxes. Once the system is connected together, the different outputs (or Nodes) can be configured. -
Page 132: Setting Up An Artnet System
Line C to Box 2 universe 2 and the dimmer rack 13.3.2 Setting up an ArtNet system For this example, it is assumed that you will connect the Tiger Touch to an Art Net DMX output box (such as an Artistic License Net-Lynx) via a network hub. -
Page 133: Additional Artnet Resources
13. Networking - Page 133 1> Ensure the Tiger Touch has an IP in the 2.x.x.x range as described at the start of the chapter. 2> On the Tiger Touch VDU, click on Tools, Setup DMX outputs. 3> Click on settings 4>... - Page 134 Finally, start the Tiger Touch, and open or create the theatre file. (See the Visualiser manual for more information on this) Once ready to connect to the Tiger Touch, go to run mode in the Visualiser, and select simulator under DMX.
-
Page 135: Module Setup
Tiger Touch over the network using the AvoTalk protocol. These thumbnails, for example, can then be used in the wheel view on the Tiger Touch to provide a preview of the media selected on a particular media layer. -
Page 136: Example Avotalk Setup
Now run the Stage application on the Hippotizer. DO NOT CLOSE THE PLUGIN. 10> Finally, on the Tiger Touch, go to Setup DMX Outputs and you will see the Hippotizer appear as a Node. Add this to the TigerTouch_Man_v3-0.doc 30/03/2010 12:17:00... -
Page 137: All About Ip Addressing
13.7.1 Setting your IP address The Tiger Touch has a setup function to quickly set its IP address as described on page 129 You can also set your IP address in the same you would on a Windows XP computer. -
Page 138: Subnet Masks
IP address on the Tiger Touch you will have to do it on any tracking backup you are using and any ArtNet fixtures. -
Page 139: Automatically Assigning Ip Addresses (Dhcp)
Tiger Touch 10.100.100.100 255.0.0.0 ArtNet Fixtures 10.x.y.z 255.0.0.0 Where a combination of x, y and z are unique for these fixtures. Tiger Touch and ShowSafe outputting over ArtNet (and DMX). IP Address Subnet Mask Tiger Touch 2.100.100.100 255.0.0.0 ShowSafe 2.100.100.101 255.0.0.0... - Page 140 Page 140 – 13. Networking repair the network connection. This is a simple windows function that can be accessed by doing the following: 1> Go to the control panel from the Tools menu. 2> Double Click on Network Connections 3> Double Click on the Network Connection you would like to repair 4>...
-
Page 141: 14. Tiger Touch For Avolites Users
14. Tiger Touch for Avolites users - Page 141 14. Tiger Touch for Avolites users If you are used to other Avolites consoles, this section will help you to make the move to the touchscreen and Titan operating system used on the Tiger Touch. -
Page 142: New Programming Features
Page 142 – 14. Tiger Touch for Avolites users Macro buttons 10 buttons are provided in which you can store frequently used button sequences. Any sequence of button presses can be stored in each of these buttons making those repetitive programming tasks a thing of the past. - Page 143 14. Tiger Touch for Avolites users - Page 143 This is useful if, for example, you’ve programmed looks using all your fixtures, then you decide you want a couple of them to spotlight a singer. If you set the Spotlight playback to be high priority, then while it is active no other playback will affect the spotlight fixtures.
- Page 144 Page 144 – 14. Tiger Touch for Avolites users TigerTouch_Man_v3-0.doc 30/03/2010 12:17:00...
-
Page 145: 15. Release Notes
There is no upgrade path from previous version and so the software must be installed by running a recovery disk. You can download a recovery disk containing this software from Avolites download Please follow the instructions given when downloading the recovery disk to install this version. - Page 146 Page 146 – 15. Release notes playback you want to open or taping the playbacks display on the title of the playback. • Lists each cue in the playback. • Provides viewing and editting of the playback times. • Provides viewing and editting of the playback options. •...
- Page 147 • Screen - moves the window between the available screens. When using a tiger touch or an expert wing these controls appear as hard keys but they are also available from the [Window Options] menu under the [View] button. You may also want to see the hotkey controls.
- Page 148 Macros. It allows you to store as many macros as you wish. The first ten macros will appear on the dedicated macro buttons on the Tiger Touch and Expert Touch. Fixtures Window: A handle window has been added to store fixtures.
- Page 149 Avo and pressing View. You can then give the workspace a name and select which windows you wish to record. Then press a workspace button on a Tiger Touch or an Expert Touch or a grey palette button on an Expert. Pressing that button subsequently will set all the windows to the positions you recorded.
-
Page 150: Improvements In V3.0
We recommend always using at least one external screen with the Pearl Expert, either a monitor or a wing, on the Tiger Touch the external screen is sometimes helpful. For best performance disable any screens that are not attached. - Page 151 Now it always shows the button function and as much legend as will fit. Warning Icons: The Tiger Touch now has the ability to show warnings in the softkeys in line with the Expert. Warning icons will be shown if a function is currently unavailable, to warn that you may have made a mistake or to warn of possibly unexpected side effects.
-
Page 152: Changes In V3.0
And, Thro And @ Buttons: In the Channel menu the grey keys now act as And, Thro, and @ buttons as shown on the Tiger Touch and new Expert laminate. 15.1.4 Changes in v3.0... -
Page 153: Bugs Fixed In V3.0
Editing Handle Nunmbers in Fixture Patch View: Found in version: 2.0 - An issue with manually assigning handle numbers in the fixture patch view has been resolved. On Tiger Touch if you entered a handle number the page assigned would be 1 more than the page displayed. - Page 154 Page 154 – 15. Release notes Clear Button Fails To Clear Locate Intenstity: Found in version: 2.0 - Ocasionally Clear could fail to clear fixture intesity. If you located a fixture so the light came on, edited an indivdual attribute then cleared that individual attribute the Clear function would no longer clear the fixture's locate values unless you selected the fixture again.
-
Page 155: 16. Glossary Of Terms
16. Glossary of terms - Page 155 16. Glossary of terms ADDRESSES The DMX Channels occupied by individual Fixtures. The first Channel occupied is usually encoded onto the Fixture somehow (often by switches or using a menu) and called its ADDRESS. ALIGN A means of copying Attribute characteristics from the first Fixture selected to other selected Fixtures,... - Page 156 Pan and Tilt positions for each point on stage, and FLIP will alternate between them. FOCUS What Palettes are called on other Avolites consoles. See PALETTE. May also be used in connection with moving fixtures to focus (set the sharpness) of a gobo projection.
- Page 157 They can allow you to reset the Fixture for example. The DMX command sequences are defined within the Personality File. Also used on the Tiger Touch to refer to a stored sequence of button presses. MEMORY The name for a Cue on other Avolites consoles.
- Page 158 Also a cue list function which allows one cue to preload the LTP channels in another cue. PRESET FOCUS What Palettes are called on other Avolites consoles. See PALETTE. PROGRAMMER The part of the console which contains Channel information which has been changed by the user, prior to recording.
- Page 159 A process which clears all the previous programming out of the desk, but does not touch the System Software. WHEEL Wheels are used on the Tiger Touch to set Fixture Attributes and to control chases and cue lists (see FUNCTION WHEEL). TigerTouch_Man_v3-0.doc 30/03/2010 12:17:00...
- Page 160 Page 160 – 16. Glossary of terms TigerTouch_Man_v3-0.doc 30/03/2010 12:17:00...
- Page 161 16. Glossary of terms - Page 161 Index Softkey Menu items are indicated with capital letters (for example “Activate A Timecode Cuelist”) speed and crossfade · 77 tap tempo · 81 temporary speed · 77 clear button · 38 Clear button · 63 clearing the console ·...
- Page 162 Page 162 - Index displaying for fixture · 28 setting for fixture · 29 DMX nodes · 130 DMX outputs · 16 Include button · 68 Insert (in unfold mode) · 89 Insert (rec chase) · 78 insert chase step · 79 Invert attributes ·...
- Page 163 16. Glossary of terms - Page 163 Moving fixture · 34 quick record · 19 Multi-DMX fixture · 126 palette · 51 random chase · 78 network connection · 17 Rec Step button · 89 New Show · 26 Rec Times button · 89 Record (in unfold mode) ·...
- Page 164 Page 164 - Index touch button size · 113 view menu · 99 touch keyboard · 22 viewing key profiles · 111 transparent lock · 74, 96 virtual dimmer · 41 Visualiser · 23 Visualiser auto patch · 30 unfold cue list ·...
- Page 165 8200-3000 Price £30 Additional copies of this manual, together with other useful spares etc. can be purchased through the Avolites On line shop. Visit http://www.avolites.com then navigate to Avo Shop from the links on the left hand side.
Need help?
Do you have a question about the Tiger Touch and is the answer not in the manual?
Questions and answers