Avolites Tiger Touch Operator's Manual
Hide thumbs
Also See for Tiger Touch:
- Operator's manual (229 pages) ,
- Operator's manual (165 pages) ,
- Operator's manual (261 pages)
Table of Contents
Advertisement
Quick Links
Download this manual
See also:
Operator's Manual
Advertisement
Table of Contents

Related Manuals for Avolites Tiger Touch


Summary of Contents for Avolites Tiger Touch
- Page 1 Tiger Touch Operator’s Manual Version 5.0...
- Page 2 TitanUniversal_Man_v5-0_TT.doc 23 September 2011...
- Page 3 Avolites Ltd. has been advised of the possibility of such damages. Because some jurisdictions do not allow the exclusion or limitation of liability for consequential or incidental damages, the above limitation may not apply to you.
- Page 4 This manual was written by Tim Mitchell, Sabre Technology Ltd http://www.sabretechnology.co.uk TitanUniversal_Man_v5-0_TT.doc 23 September 2011...
- Page 5 11. REMOTE CONTROL 12. USER SETTINGS AND OTHER OPTIONS 13. WORKING WITH FIXTURE PERSONALITIES 14. NETWORKING THE CONSOLE 15. USING DIFFERENT AVOLITES CONSOLES 16. RELEASE NOTES 17. GLOSSARY OF TERMS This icon shows important information which you should know about to avoid damage to your console or loss of important data.
- Page 6 Page 6 – Reference Manual Contents TitanUniversal_Man_v5-0_TT.doc 23 September 2011...
-
Page 7: Table Of Contents
Controlling fixtures ..............13 Programming cues and chases..........14 Programming palettes ............14 DMX / network setup ............. 15 Setting up and using the console Guide to the Tiger Touch ............17 Connecting up............... 21 2.2.1 Cautions .................... 21 2.2.2 Connecting mains power .............. -
Page 8: Contents
Page 8 – Reference Manual Contents 4.1.4 Changing attributes using the wheels ............ 52 4.1.5 Setting attributes using the touch screen ..........53 4.1.6 Setting attributes from the softkeys ............56 4.1.7 Selecting fixtures and dimmers by number (Channel) ......56 4.1.8 Selecting using a pattern .............. -
Page 9: Contents
Reference Manual Contents - Page 9 7.1.1 How the Tiger Touch works when programming ........109 7.1.2 Creating a cue ...................110 7.1.3 Quick Build cues ................111 7.1.4 Using shapes in cues ................111 7.1.5 Blind mode..................111 Using a cue................. 112 7.2.1 HTP and LTP..................112 7.2.2... -
Page 10: Contents
Page 10 – Reference Manual Contents Editing cue lists ..............137 9.3.1 Editing a cue list using Unfold ..............137 9.3.2 Using Update to change tracked cues ...........138 9.3.3 Editing a cue list which is running ............138 9.3.4 Editing a cue list while recording ............139 Copying, moving, linking and deleting ........ -
Page 11: Contents
Downloading fixture personalities from Avolites........175 13.1.2 Updating the personality library on the console ........176 13.1.3 Requesting a new fixture personality ..........176 13.1.4 Reporting a personality bug to Avolites ..........176 13.1.5 In an emergency................176 14. Networking the console 14.1 Controlling fixtures over a network......... 179 14.1.1... -
Page 12: Contents
Page 12 – Reference Manual Contents TitanUniversal_Man_v5-0_TT.doc 23 September 2011... -
Page 13: Quick Start
1. Quick Start - Page 13 1. Quick Start This section is a quick guide on how to do most things on the Tiger Touch. Each section has a link to take you to the appropriate manual section for more details. Softkeys are shown in square brackets like [This]. -
Page 14: Programming Cues And Chases
Page 14 – 1. Quick Start Use the wheels and [Adjust Speed, Size and Phase]/[Adjust Phase, Spread and Offset] to configure the shape. Fixture Groups Fixtures may be grouped for quick selection, press Group, [Record Group], select fixtures for group, set legend using [Provide a legend], press [Store]. -
Page 15: Dmx / Network Setup
1. Quick Start - Page 15 Use [Set Mask] to choose attributes to record/exclude. Press a grey palette button to store, or press a button in one of the Colours/Positions/Gobos windows. (Section 5.1.2, p70). To recall palette, select fixtures, select recall mask using Attribute Bank buttons, press palette button. - Page 16 Page 16 – 2. Setting up and using the console TitanUniversal_Man_v5-0_TT.doc 23 September 2011...
-
Page 17: Setting Up And Using The Console
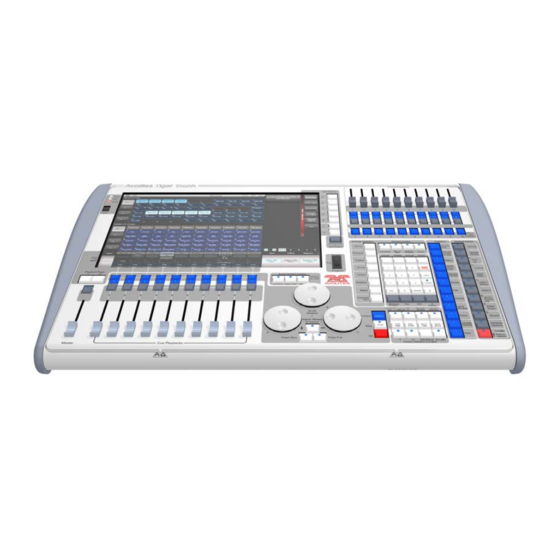
2. Setting up and using the console - Page 17 2. Setting up and using the console Welcome to the Tiger Touch from Avolites. This manual is a reference guide to all the functions of the console. We explain things in the order you’re most likely to use them, so we start with how to set up the console, then look at patching lights, controlling lights and how to program cues. - Page 18 Page 18 – 2. Setting up and using the console System display Preset playbacks Macro buttons and menu softkeys Workspace windows with Attribute display touch buttons Power switch Playback legends and info Playback page select buttons DBO (blackout) button Numeric Attribute Mode Control...
- Page 19 2. Setting up and using the console - Page 19 The Playback faders are used to store and play back cues or chases. The Page Select buttons let you change to a different page of playbacks. The touch screen above the faders shows information about each playback.
- Page 20 Page 20 – 2. Setting up and using the console TitanUniversal_Man_v5-0_TT.doc 23 September 2011...
-
Page 21: Connecting Up
2.2.2 Connecting mains power You can safely connect the Tiger Touch to any voltage from 80 to 260V. We recommend that you run the console from a computer UPS (uninterruptible power supply) . If the console unexpectedly loses power, you can lose data (up to the last Autosave) and the console may want to check its disks on startup which can cause delays. -
Page 22: Connecting A Monitor
Ethernet systems to allow connection to remote DMX Ethernet nodes, media servers, and so on. When you patch a dimmer or fixture you tell the Tiger Touch which of the 12 DMX universes it is on. Each universe can be configured to... -
Page 23: Using The Touch Screen And Monitor
Suitable lamps are available from Avolites. The lamps are 12 volt, wired from pins 1 and 2 of the XLR. Using the touch screen and monitor The heart of the Tiger Touch is its large touch screen. 2.3.1 Workspace windows The main area of the screen contains the workspace windows. - Page 24 Page 24 – 2. Setting up and using the console Selecting and positioning workspace windows You select which workspace windows you want to see using the [Open Workspace Window] menu command on the root menu. , or by pressing the Window Selection buttons just to the right of the touch screen.
-
Page 25: Saving Workspaces
2. Setting up and using the console - Page 25 Workspace window options You can change the window sizes and positions by clicking the small ‘i’ button in the top right corner of the window. These options also allow you to set the button size and the text size of the window. Saving workspaces You can save different workspace setups to the Workspaces touch buttons (to the left of the menu) by pressing View then [Record... - Page 26 Page 26 – 2. Setting up and using the console Touch Keyboard At the right hand end of the toolbar is the keyboard popup button which will open the touch keyboard. Keyboard button The touch keyboard can be switched between large and small size using the Max/Min button and you close it using the large X button in the top right hand corner.
-
Page 27: The Menu Area Of The Touch Screen
2. Setting up and using the console - Page 27 2.3.2 The menu area of the touch screen The right hand side of the touch screen is used for the operating menu display. Information window Menu softkeys Workspace selection buttons Attribute groups Current... -
Page 28: The Toolbar
Page 28 – 2. Setting up and using the console settings which are available on the fixtures. Above the roller image a legend shows which attributes are being controlled by each wheel and the centre of the roller shows the current attribute. If a chase is being controlled, information about the chase is shown here. -
Page 29: The Heads-Up Display (Hud)
Centre Close Additional Programs allows you to run some diagnostic programs which might help Avolites Support find problems you’re having. Restart and Shutdown Software restarts and closes the Titan software. You would normally only use these when upgrading the software. -
Page 30: Visualiser
2.3.5 Visualiser The console runs Avolites Visualiser internally. This allows you to view the output of the console if you can’t use the real lights, enabling you to make changes to your show at home or in your hotel. It can also be used in Blind mode for programming during a show. -
Page 31: Undo/Redo
2. Setting up and using the console - Page 31 operation of the console for a particular use. See section 12.2 on page 162 for details. 2.3.7 Undo/Redo You can undo and redo up to 20 actions by pressing Avo shift and the Undo or Redo buttons below the numeric keypad (on black Pearl Expert consoles these are the Left arrow (Undo) and Right arrow (Redo) buttons). -
Page 32: Keyboard Shortcuts
Page 32 – 2. Setting up and using the console 4> Press the sequence of buttons you want to record. 5> Press Record Macro to finish recording. To play back the macro, just press or touch the button where you recorded the macro. -
Page 33: Locking The Console
Simply download and run the installer from the Avolites Download website. The first time you run Simulator you will need to license the software with the Avolites website. For this you will need an account set up on the Download site, which you should go and create now if you don’t already have one. -
Page 34: Running Titan Simulator
You can save any number of different shows on a USB drive or the console’s internal hard disk. The console will also autosave the show periodically. Shows created on the Tiger Touch can be loaded into any other Avolites Titan console, but not to non-Titan consoles as the showfile format is different. -
Page 35: Autosave
5> Press Exit to leave Disk mode. You can save any number of different shows on the Tiger Touch’s internal hard disk. 2.5.2 Autosave The console will automatically save your show to its internal hard disk when you shut it down. -
Page 36: Clearing The Console
Page 36 – 2. Setting up and using the console Clearing the console When you start a new show on the Tiger Touch it is usually a good idea to clear the console. All programming and patching is deleted, but user options are not changed. -
Page 37: Patching
3. Patching - Page 37 3. Patching Patching is the process where you tell the Tiger Touch • What type of lighting units you have connected to it • What DMX addresses they are operating at • Which DMX line (universe) each unit is connected to (there are •... -
Page 38: Patching Dimmers
Page 38 – 3. Patching You can allocate fixtures and dimmers to Groups, which allows you to quickly select a set of fixtures with one button. Groups are described in the next chapter. 3.1.2 Patching dimmers Each fixture button can control single or multiple dimmer channels. 1>... -
Page 39: Patching Moving Light Fixtures
Avolites consoles use a “personality” system to control fixtures. This means you don’t have to know how each fixture works, you just tell the Tiger Touch what you want to do and it will send the right control commands. The console has built-in personalities for most types of fixture, which tell it what attributes are available and how to control them. - Page 40 Page 40 – 3. Patching can enter the address as [line].[address], e.g. 2.45 would set address 45 on line 2. 7> Press a Fixture Select button to patch the selected fixture. 8> The Select button turns dark blue and shows fixture details when it is patched.
-
Page 41: Visualiser Auto Patch
The Sub fixtures feature requires an updated personality file. If sub fixtures does not work on your fixture you may need to obtain the latest fixture personality from Avolites. Changing the patch 3.2.1 Changing the DMX address of a fixture You can re-patch a fixture to a different DMX address or a different DMX output line. -
Page 42: Setting Legends
Page 42 – 3. Patching 7> Repeat from step 3 if you want to change other fixtures. • You can “Park” the fixture using [Park]. This removes the fixture from the DMX output map, but all programming is retained. • If the new DMX address already has another fixture or dimmer patched on it, the console will warn you (unless this is disabled in User Options, see section 12.3.3 on page 165). -
Page 43: Dmx View Window
3. Patching - Page 43 on the touch screen showing all your fixtures. The list of fixtures can be filtered by typing in a search term on the keyboard. You can also use the wheels to scroll around the list and select different fixtures, or touch the list or one of the fixture buttons. -
Page 44: Fixture Exchange
Page 44 – 3. Patching The buttons on the left let you select the different output lines from the console. Scrolling the window to the right shows more information about each DMX channel. 3.2.5 Fixture Exchange The Fixture Exchange function enables you to repatch fixtures in your show using alternative fixtures, retaining important elements such as cue times, shapes and legends. -
Page 45: Update Personalities
3. Patching - Page 45 The pan, tilt and dimmer will always be preserved from one fixture type to the next, as will times, shapes and legends for recorded items. Links from the palettes to groups, cues, chases and cue lists will also be preserved, so the show can be easily recreated by updating your palettes as normal. -
Page 46: Using Copied Fixtures
Page 46 – 3. Patching Move is useful for tidying up the console. 1> Press the Copy/Move/Link button. 2> Select [Copy] or [Move]. Pressing the Copy button again will also toggle through these options. 3> Press the Select button of the fixture you want to copy/move. You can select multiple fixtures. -
Page 47: Advanced Options
3. Patching - Page 47 Advanced options 3.4.1 Swap pan and tilt This allows you to make the pan channel control tilt and the tilt control pan. This can be useful for fixtures rigged in strange orientations. 1> Press Patch. 2>... -
Page 48: Freeze Fixtures Or Attributes
When you save changes, your show will be updated with the edited personality. Your changes are also saved to the fixture library on the console. • A separate user guide for Personality Builder is available from the Avolites website. TitanUniversal_Man_v5-0_TT.doc 23 September 2011... -
Page 49: Controlling Dimmers And Fixtures
4. Controlling dimmers and fixtures - Page 49 4. Controlling dimmers and fixtures When you are programming a show, and sometimes when you are running a show, you need to manually control the fixtures and dimmers to set the intensity, position, colour, etc. To do this you first select the fixtures you want to change using the select buttons, then you set the attributes of those fixtures using the Wheels and Attribute buttons. -
Page 50: Setting Fixtures To A Start Position (Locate)
Page 50 – 4. Controlling dimmers and fixtures • Once you have changed any attribute, pressing a Select button will deselect all fixtures and start the selection process again. All previously selected fixtures (since you last pressed Clear) stay in the programmer. Once a fixture has been edited, the button shows a darker blue (also on the HUD). -
Page 51: Clearing Selection
4. Controlling dimmers and fixtures - Page 51 cues you store. If the option is set to “Clear” then the Located attributes will not be stored in the Programmer unless you modify them using the wheels. This is useful if for example you want to program a cue which sets the position of fixtures, but does not turn them on. -
Page 52: Titanuniversal_Man_V5-0_Tt.doc 23 September
Page 52 – 4. Controlling dimmers and fixtures To Playback Values] the channels will go back to how they are set in the current playback. For example: you have an active playback making some lights green, then you select the lights and change them to red. -
Page 53: Setting Attributes Using The Touch Screen
4. Controlling dimmers and fixtures - Page 53 3> Repeat from 1 to change other attributes of the selected fixtures. Some other things to know about attributes: • If an attribute is in the programmer, it is highlighted (as shown with the “Green”... - Page 54 Page 54 – 4. Controlling dimmers and fixtures Touch here to change attribute bank Touch here to open attribute editor Touch here to change attribute values up and down Press View then [Open Workspace Window] then [Attribute Editor] to show it. As a shortcut you can also show it by touching the attribute name text just below the IPCGBES buttons (for example Colour Func in the above picture).
- Page 55 4. Controlling dimmers and fixtures - Page 55 For variable attributes like Dimmer, holding down the button will display a horizontal slider bar. You can then move your finger left or right to change the value. Active fixtures such as media servers will display a thumbnail of the media clip in the button.
-
Page 56: Setting Attributes From The Softkeys
Page 56 – 4. Controlling dimmers and fixtures Updated personality files may be required to support the keystone/blade functions. 4.1.6 Setting attributes from the softkeys You can directly enter a numeric value for the attributes which are live on the wheels. You must be at the main Program menu to do this (keep pressing Exit until the vertical menu bar shows “Program Menu”). -
Page 57: Selecting Using A Pattern
When programming you will often want to select patterns of fixtures. Rather than having to individually select and deselect fixtures, the Tiger Touch has an easy way of selecting odd then even fixtures in a fixture. range of fixtures, or it can, for example, select every 4 1>... -
Page 58: Selecting Fixtures Which Are In A Palette Or Playback
Page 58 – 4. Controlling dimmers and fixtures 3> Select a pattern from the softkeys. Your selection is modified so you will only be controlling, say, the odd fixtures. 4> Press the white “Next” button to change the selection to the next stage of the pattern. -
Page 59: Using Fixture Groups
4. Controlling dimmers and fixtures - Page 59 I-Intensity (dimmer, strobe shutter) P-Position (pan, tilt) C-Colour (colour wheel, CMY mixing) G-Gobo (gobo wheels, gobo rotate, gobo position) B-Beam (iris, focus, zoom, beam shaper) E-Effects (prism) S-Special (motor speeds) FX-Shapes, pixel mapper These groups are used to select which attributes you want to work with in many of the functions on the console, particularly when you are “masking off”... -
Page 60: Fixture Order And Fixture Layout In Groups
Page 60 – 4. Controlling dimmers and fixtures If the Groups window is not visible, you can show it by pressing View, Group (above numeric keys). 1> Select the fixtures/dimmers you want in the group (the order in which you select them will also be stored in the group). 2>... -
Page 61: Stepping Through Selected Fixtures One At A Time
4. Controlling dimmers and fixtures - Page 61 To change the order, select [Auto Increment] to On, then select the fixtures in the order you want. If you press a fixture twice, it will show an X indicating that it is not part of the sequence. To change fixture layout: 1>... -
Page 62: Highlighting The Selected Fixture With Prev/Next
Page 62 – 4. Controlling dimmers and fixtures 2> The Prev and Next buttons will select the fixtures in the range one at a time (in the order you selected them). 3> The ALL button will select all fixtures in the programmer (everything which has been selected since Clear was last pressed). -
Page 63: Fan Mode
4. Controlling dimmers and fixtures - Page 63 The settings used for Flip are defined in the fixture personality. If Flip doesn’t work you may need to update to the latest personality. 4.1.17 Fan mode Fan mode automatically spreads out the values on a selected range of fixtures. - Page 64 Page 64 – 4. Controlling dimmers and fixtures It’s fairly easy to accidentally leave Fan mode turned on and be very confused about why the wheels aren’t working properly, so turn it off as soon as you have completed the effect. To avoid this there is a User Setting ‘Press and hold Fan’.
- Page 65 4. Controlling dimmers and fixtures - Page 65 for colour mixing, tilt and dimmer Fan Parts When using the Fan function you can split the fan into a number of groups. Select all the fixtures, hold down Fan and type a number on the numeric keypad.
-
Page 66: Viewing And Using Numerical Values
Page 66 – 4. Controlling dimmers and fixtures Viewing and using numerical values 4.2.1 The Channel Grid window It can sometimes be useful to display and edit exactly what each fixture is doing. The Channel Grid window allows you do to that. Display it by pressing the white Channel Grid button to the right of the screen, or pressing View then [Show workspace window] then [Channel Grid]. -
Page 67: Advanced Options
4. Controlling dimmers and fixtures - Page 67 • Highlight off/changes: if set to [Highlight changes] then changing attributes will be highlighted. • Narrow/Wide columns: changes the column width on the screen. You can select fixtures by touching the fixture names on the left of the screen, or if you select any fixture values, the appropriate fixture will automatically be selected. - Page 68 Page 68 – 4. Controlling dimmers and fixtures TitanUniversal_Man_v5-0_TT.doc 23 September 2011...
-
Page 69: Palettes
5. Palettes - Page 69 5. Palettes When programming a show you will find that you frequently use certain positions, colours, etc. The console lets you store these settings so you can recall them at the touch of a button rather than having to find them on the wheels every time. -
Page 70: Creating Palettes
Page 70 – 5. Palettes Creating palettes 5.1.1 Which attributes are stored in palettes Although each palette entry can store all attributes of a fixture, it’s easier to operate the console if you create some palettes which only set positions, some for colour, some for gobo and so on. The console helps you with this by providing separate windows for Colour palettes, Position palettes, and Gobo/Beam palettes. - Page 71 5. Palettes - Page 71 6> Press an unused Palette button to store the palette. Or enter a palette number and press [Store] • The console will automatically set the palette as Shared or Normal (by checking if the values to be stored are the same across all fixtures of the same type).
-
Page 72: Quick Record
Page 72 – 5. Palettes • You can set a legend for the palette while you are saving it using [Provide a legend]. See section 5.1.4 for how to change the palette legend. • If you select a Palette button which is already used, the console offers you options to [Cancel], [Replace] or [Merge] the existing palette. -
Page 73: Recalling Palettes
5. Palettes - Page 73 The tab buttons on the top left allow you to select Keyboard entry (legend reverts to text), Draw or Library. On the right you can choose Pen or Eraser, set the pen/eraser size, set the colour (white in the above picture), clear the whole picture, and Enter the legend. -
Page 74: Palette
Page 74 – 5. Palettes • You can make palettes fade over a time when you recall them, see section 5.5.1 below. You can also recall a palette by its number by typing the number on the numeric keypad. 1> Select some fixtures 2>... -
Page 75: Changing The Content Of Palettes
5. Palettes - Page 75 To edit an attribute value, touch/click on it in the window. The softkeys will give you a list of available settings for this attribute or you can type in a numerical value. There is also a [Delete] button which allows you to remove the value from the attribute. -
Page 76: Copying, Moving And Deleting Palettes
Page 76 – 5. Palettes 1> With the cue fired, select the fixtures and change them to the settings you want to store (e.g. the right green colour). 2> Press Record Cue, [Update]. 3> The cues and palettes which can be updated are shown on the softkeys and all other buttons are greyed out. -
Page 77: Timing Palettes
5. Palettes - Page 77 • Press the Palette button above the numeric keypad and use the [Delete] option in the [Palette Utilities] menu. • Press Delete then [Palette], type the palette number, press Enter. Timing palettes 5.5.1 Fading a palette A timed palette is a very useful tool allowing easy "busking"... - Page 78 Page 78 – 5. Palettes The [Master Overlap] option similarly sets the default Overlap for palette recall. You can create macro buttons to set different palette fade times. Press Macro, Record, press a button to store your macro on. Then press Palette, [Master Time], 3 (for 3 sec), Exit, Macro.
-
Page 79: Shapes And Pixel Mapper Effects
In addition to position shapes, there are a large number of other shapes available in the Tiger Touch. The shapes are defined for a particular attribute such as colour, dimmer, focus and so on. Some shapes will not work with some fixtures;... -
Page 80: Creating Effects
Page 80 – 6. Shapes and Pixel Mapper effects Creating effects 6.1.1 Creating a shape To create a shape you simply pick the attribute of the shape from a list on the softkeys, then choose the shape you want from the Shapes window. -
Page 81: Changing Size And Speed Of A Shape
6. Shapes and Pixel Mapper effects - Page 81 • Shapes are based on the current settings of the fixture, so a position circle would move around the current pan-tilt position of the fixture. • You can change the base value of a shape (e.g. the centre of a circle) by changing the attributes using the wheels in the usual way. -
Page 82: Changing The Phase Of A Shape Across Multiple Fixtures
Page 82 – 6. Shapes and Pixel Mapper effects 1> Control the speed of the shape using the left hand wheel. 2> Control the size of the shape using the middle wheel. 3> The size and speed is shown above the wheels on the display. Other things to know about size and speed of shapes: •... -
Page 83: Creating Pixel Mapper Effects
6. Shapes and Pixel Mapper effects - Page 83 The display above the left hand wheel shows the phase in degrees. For example, 180 degrees repeats every 2 fixtures, 90 degrees repeats every 4 fixtures, 60 degrees repeats every 6 fixtures, and so The Offset function allows you to set the starting phase of the shape, when more than one shape is running. - Page 84 Page 84 – 6. Shapes and Pixel Mapper effects Click on the + button to add an effect, and choose a graphic element. Then click on the + button again and choose an animation (how your graphic element will move). The animated effect will show in the black window.
-
Page 85: Editing Running Shapes
6. Shapes and Pixel Mapper effects - Page 85 If you wish you can overlay further layers on the effect. Once you have an effect you like, you can save it to a playback. Editing running shapes 6.2.1 Selecting which shape to edit If more than one shape is running in the programmer, you can select which one is connected to the control wheels using Shape option [Edit]. -
Page 86: Removing Or Adding Fixtures
Page 86 – 6. Shapes and Pixel Mapper effects the HUD window, or in the fixture touch keys . See section 7.5.2 for details on how to set fixture order. 6.2.4 Removing or adding fixtures You can add or remove individual fixtures from a shape using the [Add/Remove Fixtures] option in the [Edit] menu. -
Page 87: Pixel Mapper Examples
6. Shapes and Pixel Mapper effects - Page 87 Pixel mapper examples 6.4.1 Randomising effects This example shows you how to use the pixel mapper to create an effect where random dimmer cells turn on. This effect will overlay any existing intensities. 1>... - Page 88 Page 88 – 6. Shapes and Pixel Mapper effects 6> Select [Layer 1], click [+] at the bottom of the screen and then choose Circle from the elements that appear. 7> Drag the 'Zoom' slider until the circle covers approximately one cell.
- Page 89 6. Shapes and Pixel Mapper effects - Page 89 9> Select [+] and this time choose Opacity animation (represented as a block fading in). The displacement acts on the opacity animation causing it to appear at random locations each time it is drawn. Drag the 'In Time' and 'Out Time' sliders to 0%.
-
Page 90: Randomising Effects
Page 90 – 6. Shapes and Pixel Mapper effects 6.4.2 Randomising effects This example shows you how to create a diagonal white wipe with a rotating red fan on top. 1> Select a group containing a fixture layout as described in previous example. - Page 91 6. Shapes and Pixel Mapper effects - Page 91 Reduce 'Spawn Rate' until only one stripe is on screen the same time. For this type of effect the value will usually need to be quite low - approximately 0.2. You might want to reduce 'Speed' slightly at this point. (Note that a higher speed was initially useful for getting the correct spawn rate above.) 5>...
-
Page 92: Creative Use Of Fixture Layouts
Page 92 – 6. Shapes and Pixel Mapper effects 8> Click on [Effect] at the top left to access the global controls. Drag 'Pre Spool' to the left until it reads 0s. (This is to ensure the wipe begins off screen where we placed it when it is fired.) 9>... - Page 93 6. Shapes and Pixel Mapper effects - Page 93 Example 1: Odd/Even 1> Select your fixtures. 2> Open the Selection Pattern menu by pressing the 'All' key. 3> Choose [Odd] from the softkey options. (This will select all the odd numbered fixtures according to fixture order.) 4>...
- Page 94 Page 94 – 6. Shapes and Pixel Mapper effects 2> Drag a marquee select across the even fixtures. 3> Drag the selected fixtures so they sit directly under the odd fixtures. 4> Select 'Crop Grid' from the Layout Editor context menu. (This will get rid of the unused pixels.) Now a block element animated to run vertically from top to bottom will run down the odd fixtures followed by the even fixtures.
- Page 95 6. Shapes and Pixel Mapper effects - Page 95 Example 2 - Pseudo random 1> Select your fixtures and create a group. 2> Open the Layout Editor. 3> Click on the vertical resize tool and drag down until the grid is at least twice the original height.
-
Page 96: Other Layout Editor Tools
Page 96 – 6. Shapes and Pixel Mapper effects 2> Open the Layout Editor. 3> Select the fixture(s) that you want to angle and use the appropriate wheel to control. (If wheels are not assigned to control the cell layout you can toggle this on/off using the context menu item 'Wheel Control'. -
Page 97: Playback Order And Priorities
6. Shapes and Pixel Mapper effects - Page 97 Context menu - 'Highlight' When enabled this will highlight selected fixtures live on stage. This can be useful to see which fixture you are positioning in the layout. Context menu - 'Arrange/Select Only' When set to 'Select Only' fixtures are locked in position on the grid and cannot be dragged around. - Page 98 Page 98 – 6. Shapes and Pixel Mapper effects Drag 'In Time' to zero and 'Out Time' to 100%. (This will make the effect start large and finish small. Alternatively the same effect can be created by making 'Start Zoom' larger than 'End Zoom'.) Increase 'End Zoom' until the element begins by filling the whole window.
- Page 99 6. Shapes and Pixel Mapper effects - Page 99 having to manually match the individual values.) 7> Record the cue. Next we will create the second effect: 1> Select the same group as used for the first effect and [Create Effect] 2>...
- Page 100 Page 100 – 6. Shapes and Pixel Mapper effects Increase 'Exponent' to around 25%. (This causes the spiral to 'expand' at a faster rate.) 4> Add a Spin animation for genuine psychedelic effect. Adjust speed until you are unable to look away from the screen. 5>...
-
Page 101: Displacement And Layer Properties
6. Shapes and Pixel Mapper effects - Page 101 • Fire the white pulse. Notice how the white takes priority over the spiral. The blue spiral only appears as the white oval fades out and gets smaller. • Kill both effects. •... - Page 102 Page 102 – 6. Shapes and Pixel Mapper effects horizontally. 5> Reduce Y until the bar disappears off the top of the grid. (This is in preparation for adding a displacement animation.) 6> Add a Displacement animation. By default this will offset the original position by anything up to 30% distance.
- Page 103 6. Shapes and Pixel Mapper effects - Page 103 Reduce 'In Time' and 'Out Time' to create a snapping effect. 8> Click on 'Displacement' in the Layer to get back to the controls for this animation again. Now increase 'Distance Random' to 100%. (This will make the bar draw at a random offset around the 'Distance' setting, in this case making it anywhere within the grid.) 9>...
-
Page 104: Spawn And Pre-Spool
Page 104 – 6. Shapes and Pixel Mapper effects Now you have a vertical bar that draws randomly using a horizontal displacement. Similarly you can use the [layer] or [effect] controls to make global changes to X/Y position and Zoom allowing quick manipulation of entire effects. - Page 105 6. Shapes and Pixel Mapper effects - Page 105 Reduce 'Zoom' so that we can fit lots of baby shurikens in the grid. 3> Add a Spin animation. Reduce 'Speed' so they are relatively harmless. 4> Add a Linear Movement animation. Slow it down so it looks like it is rolling along.
- Page 106 Page 106 – 6. Shapes and Pixel Mapper effects Increase 'Direction Random' slightly. (This will allow a random variation in the direction of travel based upon the 'Direction' value.) 8> Add a Zoom animation. Reduce 'Spawn Rate' to zero. (This is a special setting that will allow the zoom animation to run continuously during the life of a shuriken.
- Page 107 6. Shapes and Pixel Mapper effects - Page 107 9> Click on [Effect] and set 'Pre-Spool' to zero. (This is to demonstrate the purpose of the property.) 10> Store the cue. 11> Press clear, open the Pixel Mapper Preview workspace and fire the cue.
- Page 108 Page 108 – 6. Shapes and Pixel Mapper effects TitanUniversal_Man_v5-0_TT.doc 23 September 2011...
-
Page 109: Cues
Playback faders and buttons Preset playbacks The Tiger Touch has 600 playbacks, in 60 pages of 10. In addition, you can store 10 'preset' playbacks on the faders at the top right of the console. There are no page buttons for these faders, so the 10 playbacks stored there are always available. -
Page 110: Creating A Cue
Page 110 – 7. Cues fixtures is also stored, and is used with the Fixture Overlap function. When you record a cue, the contents of the Programmer are saved into the cue. When you press Clear (by the numeric keypad), the programmer and editor are emptied. -
Page 111: Quick Build Cues
This can be very useful for making changes during a live show. Your changes are still shown in the Visualiser window. To select Blind mode, hold down the Avolites button and select the [Blind] option. The option shows [Active] or [Inactive]. -
Page 112: Using A Cue
Page 112 – 7. Cues Using a cue Because it’s possible to play back a large number of cues at the same time, the console has to have rules on how it combines the output from different cues. These are called HTP and LTP rules. 7.2.1 HTP and LTP Control channels are handled in two ways:... -
Page 113: Releasing Running Playbacks
7. Cues - Page 113 • Playbacks which are fired when you change page remain active. If you want to fire a cue on a fader which is already on from a previous page, lower the fader to zero then raise it again. The cue from the previous page will stop and the cue from the new page will fire. -
Page 114: Updating Stored Values And Palettes Used In A Cue
Page 114 – 7. Cues • To speed up editing, you can set the console to “Always Merge” the cue. This is option A in the User Settings (press Avo and select User Settings). • You can also press the Swop button for the cue a second time to select the “Merge”... -
Page 115: Using Parts Of Existing Cues - The Include Function
7. Cues - Page 115 If you touch the View button at the right hand end of the row or the [View Cue] context button, the Cue View window opens, showing you details of the settings individual timings for all the fixtures in the cue. The Cue View has four different views: Levels, Palettes, Times, Shapes. -
Page 116: Removing Attributes From Cues Using "Off
Page 116 – 7. Cues information from another cue into the programmer, and build up a new cue using information from several existing cues. If you Include a chase or cue list, the screen shows you a list of the cues within it, and you select the one you want to Include using Wheel A or by touching the cue. -
Page 117: Copying, Moving, Linking And Deleting
7. Cues - Page 117 • You can merge “Off” attributes into a cue without including it first. • You can also remove attributes from palettes using the Off function. • Another way to remove attributes is from the Cue View window. See section 7.3.3 on the previous page. -
Page 118: Cue Timing
Page 118 – 7. Cues Cue timing The console allows a wide variety of timing functions to be set for each cue. 7.5.1 Setting fade times and Overlap for a cue You can set a delay, fade in and fade out time independently for every cue. - Page 119 7. Cues - Page 119 2> Press the Swop button of the cue. 3> Press [Fade Mode x] to set the cue mode. This sets how the times are used, see below. 4> Press [Delay time] to set the delay before the cue starts, [Fade time] to set the fade-in time of the cue, and [Fade out time] to set the fade-out time of the cue.
-
Page 120: Changing Fixture Order
Page 120 – 7. Cues 7.5.2 Changing fixture order You can change the order of the fixtures stored in a cue. Normally this is set to the order in which you selected the fixtures when the cue was created, but you might want to change this (for example to pair up fixtures so they move together when using Overlap). -
Page 121: Advanced Options
7. Cues - Page 121 You can take this even further and set individual fade times for each fixture. When you select the cue to be changed, you will see that all the fixtures in the cue are selected. To set attribute times for only certain fixtures, change the fixture selection using the Swop buttons. -
Page 122: Playback Priority
Page 122 – 7. Cues 7.6.5 Playback priority This option allows you to configure how playbacks will behave if you turn on two playbacks controlling the same fixture. The priority can be set to Low, Normal, High or Very High. If a fixture is being controlled by a playback and you turn on a playback of the same or higher priority, then the new playback will take over. -
Page 123: Chases
8. Chases - Page 123 8. Chases As well as being used to store static cues, the playback faders can also be used to store chases (sequences of cues). You can also store chases on touch buttons in the Playbacks window. Chases can run once or repeat continuously. -
Page 124: Creating A Chase With Quick Build
Page 124 – 8. Chases • You can set a legend for the chase by pressing Set Legend, then pressing the Swop button for the chase and entering the legend, as with cues. • There is no limit to the number of steps in a chase. 8.1.2 Creating a chase with Quick Build Quick Build mode, as the name suggests, allows you to build a chase... -
Page 125: Connecting A Chase For Control
You can also enter a speed from the keypad as described below. The last speed you set on the wheel is always remembered, you do not have to tell the Tiger Touch to save it. Crossfade is the “slope” between cues; with a crossfade of 0, the fixtures snap instantly to the next cue, but with a crossfade of 100, the fixtures spend the whole cue time fading to the next cue. -
Page 126: Manually Controlling The Steps Of A Chase
Page 126 – 8. Chases 2> To set the crossfade, press [Xfade] and type the fade from 0 – 100. 0=no fade (the chase will “snap”), 100=max fade (the chase will move continuously from step to step). 3> To set the speed, press [Speed], type the new speed, then press Enter. -
Page 127: Editing A Chase Using Unfold
8. Chases - Page 127 chase. You can then save new cues at the end by pressing the Swop button just like normal recording. To see a list of the cues in the chase, use Playback view (touch the playback display above the fader or press View then the Swop button of the playback). -
Page 128: Copying, Moving, Linking And Deleting
Page 128 – 8. Chases • To change individual times for the cue, press [Edit Times], then the Swop button for the cue (or type the cue number), then set the times. This is described in detail in the Timing section on the following page. - Page 129 8. Chases - Page 129 • To set speed, press [Speed] then type the new speed, then press Enter. The speed can be set in Beats Per Minute (BPM) or seconds depending on the user settings. • To set crossfade, press [Xfade] then type the fade from 0 – 100 and press Enter.
-
Page 130: Individual Cue Times In Chases
Page 130 – 8. Chases From v3 software, [Cue Overlap] is no longer available in chases. Instead use a Cue List set to “Link With Previous” and set the Offset as desired. 8.5.2 Individual cue times in chases You can configure each cue in a chase to have its own timing information. -
Page 131: Setting Attribute Fade Times For A Cue In A Chase
8. Chases - Page 131 • Delay • Fade (in) • Fade Out • Fixture Overlap • Linking with previous step • Attribute times (see next section) Linking can be set to [Link After Previous] (the chase will run automatically) or [Link Wait For Go] which will stop the chase until you press Go. -
Page 132: Renumber Cues
Page 132 – 8. Chases • [Always Link Steps]: The chase will run on its own using the times • [Never Link Steps]: The chase will pause after every delay/fade time for the user to press Go. • [Link according to individual steps]: Each step in the chase will obey its individual link settings which are set using the Playback View window or the Unfold function. -
Page 133: Cue Lists
9. Cue Lists - Page 133 9. Cue Lists Cue Lists allow you to record a sequence of cues, each of which can have its own timings and can be triggered by the Go button or run automatically to the next cue. This allows you to build a complete show in a single list and is ideal for theatrical shows where the show must be exactly the same each time. - Page 134 Page 134 – 9. Cue Lists You need to set up the look on the stage for each cue and then add it to the cue list. If you want to set fade times, you can either set them while saving the cues or later. 1>...
-
Page 135: Changing Legends For Cues In A Cue List
9. Cue Lists - Page 135 • There is no limit to the number of cues in a cue list. 9.1.2 Changing legends for cues in a cue list You can set a legend for each cue, which is shown on the screen when running the cue list and can be helpful for keeping track of where you are. -
Page 136: Running A Key Macro From A Cue List
Page 136 – 9. Cue Lists The Autoloaded playback will be fired when the cue starts, and killed when the cue list moves on to the next cue, unless you have also loaded the playback into the next cue. You can set options for each Autoloaded playback by pressing the softkey where the Autoloaded playback is shown. -
Page 137: Killing A Cue List
9. Cue Lists - Page 137 Also the display relating to the playback fader shows information about the cue list, including the current and next cue, fade progress of the current cue, and fade in/out times. • The HTP levels of cues in the cue list are mastered by the fader level. -
Page 138: Using Update To Change Tracked Cues
Page 138 – 9. Cue Lists 2> The first 10 cues are loaded into the playback faders. The display shows the cue numbers and legends. 3> Raise a playback fader to output the contents of that cue (fade times will operate as programmed). 4>... -
Page 139: Editing A Cue List While Recording
9. Cue Lists - Page 139 2> Use Wheel A to select the cue number you want to change then ↔ the white button above the Snap Back button to jump to it. 3> Press Clear to make sure the programmer is empty. 4>... -
Page 140: Copying, Moving, Linking And Deleting
Page 140 – 9. Cue Lists Copying, moving, linking and deleting 9.4.1 Copying or moving a cue list Cue lists can be copied or moved to a new playback, or you can create a linked copy of a playback. Move is useful for tidying up the console. -
Page 141: Cue Linking & Link Offset
9. Cue Lists - Page 141 • To set the fade in time of the cue, press [Fade In] then type a time in seconds and press Enter. Both HTP and LTP channels are affected by the fade. • The fade out time of the cue is set by default to be the same as the fade in time. -
Page 142: Individual Attribute Fade Times
Page 142 – 9. Cue Lists These options allow you to create complex self timed sequences by building up simple steps. For example if you wanted the following effect: • Go is pressed, Fixture one starts fading up over 20s •... -
Page 143: Fixture Overlap
Fixture overlap For each cue you can set a (linked together) fixture overlap, which causes the Tiger Touch to apply the settings in the cue to each fixture sequentially giving a “rolling” change across the fixtures in the cue. This can create some great effects without much programming on your part. -
Page 144: Running A Cue List To Timecode
Page 144 – 9. Cue Lists 9.5.5 Running a cue list to timecode The console can run a cue list automatically to a timecode. This is very useful for complex performances which must be exactly the same time after time, or for unattended operation. Each step in the cue list is assigned a time at which it will run. -
Page 145: Advanced Options
9. Cue Lists - Page 145 Advanced options Advanced cue list options are set from the Playback Options menu. You can enter the playback options menu by doing the following 1> At the top level menu press [Playback Options]. 2> Press the select button for the cue list you wish to edit. -
Page 146: Autoload
Page 146 – 9. Cue Lists • [Curve] allows you to set a different fade curve for the cue; this affects how the fade progresses from one cue to the other (for example you can select a fade which starts off slow, speeds up in the middle and then slows down at the end). -
Page 147: 10. Running The Show
10. Running the show - Page 147 10. Running the show So, it’s showtime. This chapter describes the functions of the console which are useful when running a show. 10.1 Playback controls 10.1.1 Back up the show At regular intervals while you are programming, and when you have finished programming (or you’ve run out of time) and it’s showtime, the most important thing is to back up the show to USB pen drive or the internal disk (see section 2.3.6 on page 30 for instructions). -
Page 148: Preset Playbacks
Page 148 – 10. Running the show spotlight cue to take priority over the colour washes. See section 7.6.5 on page 122. 10.1.6 Preset playbacks As well as the 10 playback faders across the bottom of the console, there are 10 further playbacks on the top right of the console. These always stay the same (they aren’t affected by the page buttons) and so are useful for memories you use a lot, such as par can washes, basic stage illumination or smoke machines. -
Page 149: Using Multiple On-Screen Workspaces
10. Running the show - Page 149 When programming your palettes, group all the colour palettes in one area of the console, position palettes in another area, and so on. This helps you to find them when the show is running and the pressure is If you are lighting a band, make position palettes for every person on stage so you can spotlight them for those unplanned solos. -
Page 150: Midi Or Dmx Remote Triggering
Page 150 – 10. Running the show • If there is not enough space, (there is an item in the way or there is not enough space before the end of the page) then the action will not be completed. 10.4 MIDI or DMX remote triggering You can set up the console to allow most features to be triggered by... -
Page 151: Classic Pearl Midi Triggers
10. Running the show - Page 151 triggers you can select different actions using the [Action] softkey. 5> Press [OK]. You have now set up the console action which is to be triggered. 6> Now you need to set up the external stimulus which will cause the trigger. - Page 152 Page 152 – 10. Running the show … example $Cn $02 Console changes to Page 3 Turn on a playback: note on ($9n pp ll) Note number (pp) = playback number, from 0 - 14 (decimal) Key velocity (ll) = playback level, from 0 - 127 (decimal). 127=Full example $9n $03 $40 Playback Fader 4 at 50% level.
-
Page 153: 11. Remote Control
11. Remote control - Page 153 11. Remote control With the addition of an external Wireless Access Point, the console can be remote controlled using Wi-Fi from a mobile internet device. This can be invaluable when rigging, testing and focusing. You can also run playbacks and reset fixtures from the remote. -
Page 154: Console Setup
255.255.255.0. Finally exit the settings. 10> Test that the mobile device is connected to the console: From the Avolites toolbar on the console, open Command Prompt. Type in “ping 192.168.0.3” and then press return. If it displays “Reply from 192.168.0.3”... -
Page 155: Operating The Remote
11. Remote control - Page 155 11.2 Operating the remote To connect to the console, open the web browser and type in the address of the console; if set up as described above this will be: http://192.168.0.2/Remote/ The remote screen always shows a header with a view selector, to choose which options to view, and a clear button. -
Page 156: Fixture List
Page 156 – 11. Remote control would press 1 Thru 10 More Macro Reset 11.2.2 Fixture List The fixture list view shows you all the fixtures in a familiar spreadsheet style, including the user number, fixture type, DMX address and legend. A drop down “Action”... -
Page 157: Settings Screen
11. Remote control - Page 157 Again you can sort and filter the playbacks using the Filter box to filter by legend, or the column headers. The “Back” and “Go” buttons are used for CueLists which will be enabled in a future software release. 11.2.4 Settings screen The Settings screen allows you to configure... - Page 158 Page 158 – 11. Remote control TitanUniversal_Man_v5-0_TT.doc 23 September 2011...
-
Page 159: 12. User Settings And Other Options
12. User Settings and other options - Page 159 12. User Settings and other options The console has a large number of options to help you set it up just the way you like it. Commonly used options can be set from the User Settings menu which is available on a softkey when you hold down the Avo button. -
Page 160: Compatibility View
To delete a workspace button, press View, Delete, then the workspace button to be deleted. 12.1.4 Compatibility view This workspace shows the “blue and grey handle” view which was used in version 2.x of the Tiger Touch software, and which also allows TitanUniversal_Man_v5-0_TT.doc 23 September 2011... -
Page 161: Configuring An External Monitor
12. User Settings and other options - Page 161 you to access the preset fader handles in shows which have been programmed on the Pearl Expert. When the compatibility view is opened, there is a context button option to [Move to workspace]. This will move the handles from the compatibility window to the appropriate workspace window. -
Page 162: Key Profiles
Page 162 – 12. User Settings and other options All of the above will reset the touch screen to the required resolution. The first shortcut is the preferred choice, however none of these should be used unless it’s necessary (using the menu or Display Setting where possible). - Page 163 12. User Settings and other options - Page 163 The current settings for the [blue], [grey] and (where available), [touch] buttons are shown on the left side of the screen. The groups of keys you can set are as follows. The blue or grey fixture/palette buttons only exist on the Pearl Expert, on other consoles these settings will not do anything.
-
Page 164: Selecting A Key Profile
Page 164 – 12. User Settings and other options 12.2.2 Selecting a key profile A Key profile is selected in Run mode by pressing Softkey B and selecting the desired profile from the list. In Program mode, hold the Avo Shift button and press [Select Key Profile]. 12.2.3 Individual Key profiles for playbacks Each playback can have an individual Key Profile allocated to it. -
Page 165: The System Menu
12. User Settings and other options - Page 165 12.3 The System menu The System menu is accessed byswitching the mode switch to System. The options in this menu are separated from the other options on the console because you would normally only change them occasionally, or because they can have serious effects on the way the console works and you wouldn’t want to change them accidentally. -
Page 166: Key Profiles
The Wipe menu erases the current show. This is the same as the [New Show] option on the Disk menu, but is provided here for experienced Avolites users who are used to it being on the System menu. The [Wipe Visualiser Patch] option will erase all fixtures from the visualiser without affecting the current show. -
Page 167: Display Setup
12. User Settings and other options - Page 167 12.3.6 Display Setup This option gives you a menu for enabling and disabling a second monitor. If you don’t have a monitor connected, set this option to “Disabled” to improve the performance of the console. This option does nothing on Titan Mobile. -
Page 168: Curves
Page 168 – 12. User Settings and other options To assign a node to a line, click on the arrow on the node (the node will be highlighted), then click the line you want to assign to it. To delete a node from the DMX lines, click on the X button. To delete all nodes from a line, click on the Group delete button You can show information about the DMX nodes, or the DMX lines, by clicking the i button. - Page 169 12. User Settings and other options - Page 169 (also called Relay) TitanUniversal_Man_v5-0_TT.doc 23 September 2011...
- Page 170 Page 170 – 12. User Settings and other options TitanUniversal_Man_v5-0_TT.doc 23 September 2011...
- Page 171 12. User Settings and other options - Page 171 TitanUniversal_Man_v5-0_TT.doc 23 September 2011...
-
Page 172: Upgrading The Software
Avolites team. You can always download the latest version of the software from the Avolites website: http://www.avolitesdownload.com. Software upgrades for the Tiger Touch must be installed from a USB pen drive. Having downloaded a new version of software, copy it to the media and install it on the console like this: 1>... -
Page 173: Booting From Usb Recovery Stick
Please read to the bottom of the licence agreement then touch Agree to accept. 4> On the next screen type in the serial number of the Tiger Touch (using the numeric keypad) - this is the number following the 'TT-' written on the back of the console. -
Page 174: Front Panel Button Mapping For Bios
Page 174 – 12. User Settings and other options console. Once the activation code has been entered successfully, please restart the console. 12.7.4 Front panel button mapping for BIOS Because you won’t normally have a keyboard plugged into the Tiger Touch, some of the front panel buttons have been allocated to keypresses so that you can control the BIOS if necessary. -
Page 175: 13. Working With Fixture Personalities
13.1.1 Downloading fixture personalities from Avolites The Avolites website lists all fixtures for which personalities have been created. You should look here first if the console does not contain a personality for your fixture. The address is http://www.avolitesdownload.com/personalities/... -
Page 176: Updating The Personality Library On The Console
13.1.3 Requesting a new fixture personality If a personality does not exist for your fixture, Avolites will create one for you. Click on the “Request” link on the above web page to submit your request. A list of current requests is shown, so you can check if someone else is asking for the same thing. - Page 177 13. Working with Fixture Personalities - Page 177 Multi-DMX: Has up to 10 DMX channels, all channels are LTP. You can select from 1-10 channels on the Mode screen. Press Attribute Bank and use the softkeys to select channels. Generic RGB: Allows you to control an RGB fixture such as LED colour changers.
- Page 178 Page 178 – 14. Networking the console TitanUniversal_Man_v5-0_TT.doc 23 September 2011...
-
Page 179: 14. Networking The Console
14. Networking the console - Page 179 14. Networking the console There are a number of ways for the console to communicate with lighting fixtures beyond the traditional DMX sockets, and these are described in this chapter. The console also supports communicating with a number of different simulators/visualisers over various communication methods. -
Page 180: A Simple Artnet System
Page 180 – 14. Networking the console 14.1.3 A simple ArtNet system There are various different systems for sending lighting control information over a network. One of the most widely supported is ArtNet. ArtNet is not specific to one range of products, and is recognised and implemented by a growing number of manufacturers. -
Page 181: Setting Up An Artnet System
14. Networking the console - Page 181 Here, the console assigns the following: • Line A to Box 1 universe 1 and box 2 universe 1 • Line B to Box 1 universe 2 • Line C to Box 2 universe 2 and the dimmer rack 14.1.4 Setting up an ArtNet system For this example, it is assumed that you will connect the console to... -
Page 182: Additional Artnet Resources
To find out more information about Art Net please refer to the Art Net Standard published by Artistic Licence. 14.2 Connecting to a simulator with ACDI ACDI is Avolites' Application for Interfacing Consoles and Simulators with lighting software such as Visualiser, Capture or Show designer. TitanUniversal_Man_v5-0_TT.doc 23 September 2011... -
Page 183: Acdi
14. Networking the console - Page 183 14.2.1 ACDI Computer running Titan Simulator The network link connection can be made through either a crossover cable, or through a network hub. For this example, both computers are connected together via a crossover cable. -
Page 184: Module Setup
14.4.1 Example CITP setup This example shows how to set up a Hippotizer with the Tiger Touch. 1> Connect the console and Hippotizer to the network. (You can connect the Hippotizer directly to the console, if no other devices are being connected, using a crossover patch cable). -
Page 185: All About Ip Addressing
14. Networking the console - Page 185 4> Run the Hippo system. Make sure the CITP component is running. 5> Switch the console to System mode and select [DMX Settings]. 6> On the left hand side under Art-Net you should see the Hippo with its IP address. -
Page 186: Subnet Masks
Page 186 – 14. Networking the console 4> The Local Area Connection (icon on the left) refers to your wired connection and your Wireless Network connection (icon on the right shown disconnected) refers to your wireless connection. 5> At this point you need to decide which connection you are using and therefore which connection you want to set the IP address for. -
Page 187: Automatically Assigning Ip Addresses (Dhcp)
14. Networking the console - Page 187 guaranteed to work but try them if the scenario matches your network: Titan and ShowSafe, all output is standard DMX. IP Address Subnet Mask Titan console 192.168.1.30 255.255.255.0 ShowSafe 192.168.1.31 255.255.255.0 Titan outputting over ArtNet Fixtures (and DMX). IP Address Subnet Mask Titan console... -
Page 188: Private Ip Address Ranges
Page 188 – 14. Networking the console device cannot (eg some ArtNet devices) then you must manually set all the IP addresses. 14.5.5 Private IP address ranges If your network is connected to the internet it is important to use a private IP address range. -
Page 189: 15. Using Different Avolites Consoles
15. Using different Avolites consoles - Page 189 15. Using different Avolites consoles If you are used to other Avolites consoles, this section will help you to cope with the differences between each console. Shows from a Titan console can be loaded into any... -
Page 190: Programming Features In Titan
Using Pearl Expert shows If you are using a show from a Pearl Expert, anything programmed on the preset faders won't be visible as the Tiger Touch doesn't have any preset faders. However, by using the Compatibility View on the... - Page 191 15. Using different Avolites consoles - Page 191 touring shows and venues with a high turnover of events, allowing you to cope with different house rigs or equipment availability. You can copy fixtures you already have in your show. The new copy will come complete with all the cues and palettes of the original fixture you’ve copied.
- Page 192 Page 192 – 15. Using different Avolites consoles TitanUniversal_Man_v5-0_TT.doc 23 September 2011...
-
Page 193: 16. Release Notes
Upgrading from any other version requires the running of a Titan 5.0 recovery disk. You can download the latest Titan software from Avolites download. Full instructions for upgrading both with an installer and a recovery disc are supplied with the download and can be found in the console manual. - Page 194 Page 194 – 16. Release notes record mode select [Quick Build]. You can select any palette or playback insert that item as a new step in the chase. To filter by specific fixtures just select the fixtures first and then select the palette or playback.
- Page 195 Finally you can select fixtures at particular levels by combining [Select If] and the [@] key. A full description of select if functions can be found in the manual. On the Tiger Touch and Pearl Expert consoles you will find [Select If] in the channel menu.
- Page 196 Page 196 – 16. Release notes Lock Desk: You can now lock the console with a security code to prevent layabouts fiddling with your show. When the console is locked all functions of the console are disabled except the DMX outputs and currently running playbacks.
-
Page 197: Improvements In V.5.0
This ensures that any awkward fixtures to exchange can be dealt with by adding exceptions to this hints file. The file is maintained by Avolites and distributed with the Fixture Library. This should ensure that exchange works well every time. -
Page 198: Bugs Fixed In V.5.0
Page 198 – 16. Release notes You can now press [Include] followed by an attribute bank button and then the handle to include. 1 THROUGH 10 [Highlight]: The command syntax 1 THROUGH 10 [Highlight] now works. Dongle License through Panel: The dongle license code can now be entered through the panel software and a clearer warning is given when the dongle is removed. -
Page 199: Bugs Fixed In V.4.1
16. Release notes - Page 199 Picture Legends in other Languages: Picture legends may not display correctly when the console language is set to something other than English. Deleting in channel grid does not remove fixture: When you have deleted all channels from a fixture using channel grid the fixture should be removed from the programmer. - Page 200 Page 200 – 16. Release notes TitanUniversal_Man_v5-0_TT.doc 23 September 2011...
-
Page 201: 17. Glossary Of Terms
17. Glossary of terms - Page 201 17. Glossary of terms ADDRESSES The DMX Channels occupied by individual Fixtures. The first Channel occupied is usually encoded onto the Fixture somehow (often by switches or using a menu) and called its ADDRESS. ALIGN A means of copying Attribute characteristics from the first Fixture selected to other selected Fixtures,... - Page 202 Pan and Tilt positions for each point on stage, and FLIP will alternate between them. FOCUS What Palettes are called on other Avolites consoles. See PALETTE. May also be used in connection with moving fixtures to focus (set the sharpness) of a gobo projection.
- Page 203 Personality File. Also used in Titan to refer to a stored sequence of button presses. MEMORY The name for a Cue on other Avolites consoles. MIDI Stands for Musical Instrument Digital Interface. It is the established hardware and software specification...
- Page 204 Also a cue list function which allows one cue to preload the LTP channels in another cue. PRESET FOCUS What Palettes are called on other Avolites consoles. See PALETTE. PROGRAMMER The part of the console which contains Channel information which has been changed by the user, prior to recording.
- Page 205 17. Glossary of terms - Page 205 TRAINING The process of recording points on a stage so that the console can work out the TRACKING for Moving Lights. TRIGGER POINT The level set in the User Settings which determines at which point a Playback Fader triggers the LTP Channels programmed onto it.
- Page 206 Page 206 – 17. Glossary of terms TitanUniversal_Man_v5-0_TT.doc 23 September 2011...
-
Page 207: Index
17. Glossary of terms - Page 207 Index Softkey Menu items are indicated with capital letters (for example “Activate A Timecode Cuelist”) temporary speed · 125 CITP · 184 clear button · 51 Clear button · 110 clearing the console · 36 colour picker ·... -
Page 208: Titanuniversal_Man_V5-0_Tt.doc 23 September
Page 208 - Index setting for fixture · 39 HiLight button · 62 DMX output mapping · 167 HTP and LTP, explanation of · 112 DMX outputs · 21 DMX triggering · 150 DMX workspace window · 43 Include button · 116 Insert (in unfold mode) ·... - Page 209 17. Glossary of terms - Page 209 master time (palette) · 77 picture legends · 25 media servers, setting up · 184 pixel mapper · 83 midi connections · 22 pixel mapper examples · 87 MIDI timecode options · 166 pixel mapper preview ·...
- Page 210 Page 210 - Index editing shape in a cue · 85 unlinking chase cues · 130 fading in · 86, 121 update · 75, 114, 138 fixture order · 85 update personalities · 45 phase · 83 upgrading the software · 172 reversing ·...
- Page 211 8200-3000 Price £30 Additional copies of this manual, together with other useful spares etc. can be purchased through the Avolites On line shop. Visit http://www.avolites.com then navigate to Avo Shop from the links on the left hand side.
Need help?
Do you have a question about the Tiger Touch and is the answer not in the manual?
Questions and answers