
Subscribe to Our Youtube Channel
Related Manuals for iKarus Eco16


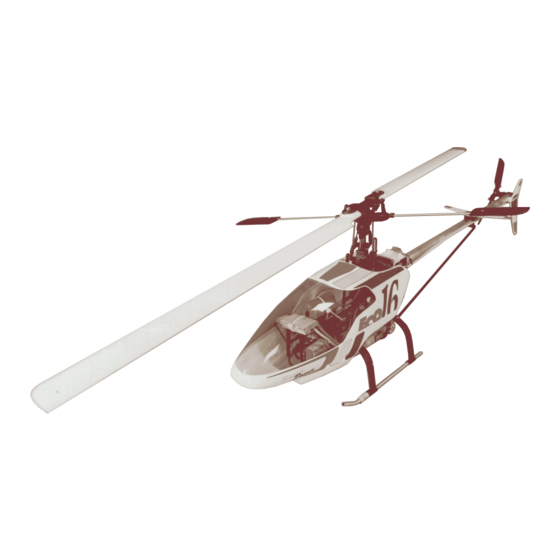
Summary of Contents for iKarus Eco16
- Page 1 Ikarus Modellflugsport, Inh. Norbert Grüntjens Im Webertal 22 · 78713 Schramberg-Waldmössingen Tel.: 0(049)7402-929190 · Fax.: 0(049)7402-929150 Email: info@ikarus-modellbau.de Internet: www.ikarus-germany.com REV03-191001-IB "...
- Page 2 - for the beginner as well as for the 3D ambitious. A wide variety of tuning parts for even less weight or more performance is available in your hobby store. Ask your dealer for IKARUS parts.
-
Page 3: Warranty
1. Many thanks ..for your purchase. This product is checked and carefully packed in our facilities. Anyhow, please check immediately at your end and make sure that this kit is complete and undamaged. You will understand that we cannot accept any claim arising to a later date. 2. -
Page 4: Materials Used
6. Materials used: To assemble this model you will need: Hobby knife Sander Screwdriver (Phillips #1 and small slotted) Hex wrench 1x1.5 mm - 2x2 mm - 1x2.5 mm Needle nose pliers Bladegauge, Order No. 603445 Nut driver 4mm - 4.5 mm - 5 mm - 5.5 mm Bowls for small parts Cyano glue Screwlock, Order No. - Page 5 Depending on the version you intend to assemble, some steps are for the mechanical mixer only, some other are necessary only if used with a 5 ch microcomputer radio. The particular steps are marked with For the mechanical mixer version only! For the microcomputer version only! You have to decide now which version you will build.
- Page 6 Tuning Parts are available for the Fasten the part numbers marked in grey. set screw on the flat. Avoid friction here! Tighten slightly. Downwards Fasten the set screw on the flat. Tighten the stopper temporarily only. It will be adjusted later. Bottom view Attention: Pin 67625 has to dis- appear completely in the...
- Page 7 67517 Frame 67603 M2x8 mm LH Screw 67602 M2x30 mm LH Screw 67582 M2 mm Nut 67629 Swashplate handle - Move the main gear upwards against the lower ball bearing. Press in the center! - Gently move the collar 67624 against the upper ball bearing.
- Page 8 Just omit the mechanical mixer if you intend to build the microcomputer controlled version. 67517 Frame 67603 M2x8 mm LH Screw 67602 M2x30 mm LH Screw 67582 M2 mm Nut 67629 Swashplate handle 67916 Undercarriage cross member 67917 Undercarriage alu skids 67915 Tube 67587...
- Page 9 The ball clips 67635 are supposed to move without play, but stilll easily. If those are difficult to move, press the clip on the top of the ball carefully with flat nosed pliers together. Please start with Collective pitch less pressure, check then the movableness ; compensator press again until you can swivel the clip easily.
- Page 10 10 mm 67610 Flybar Seesaw 20 mm 67608 Seesaw Lever 67609 Flybar 67589 Paddle 67561 M2x6 mm LH Screw 67582 M2 mm Nut Do not tighten now! 123 mm 123 mm 123 mm Mark 123 mm as shown. Use the scale at the right side. Make sure that the flybar and the seesaw move without friction.
- Page 11 67599 M2x16 mm CH Screw 67582 M2 mm Nut 67564 Ballend, short 67534 M2x8 mm Threaded rod 67565 Ballend, long M2x33 mm Threaded The lengths of the pushrods indicated in this steps are the results of trials and experience. For the beginning we strongly recommend to follow the instructions very accurately.
- Page 12 67565 Ballend, long 67533 M2x72 mm Threaded 93 mm Have a break here. Check all linkages for gentle and easy movements. Check again the exact length as indicated. Avoid friction in the pitch compensator, in the mixer levers and in the flybar. Please keep in mind: Unnecessary friction causes increased energy consumption and reduces your...
- Page 13 Please watch out for the alignment of the pushrods,while you are assembling. 67542 Blade holder Allow a small gap between the slide 67549 bush and the 67576 Ball outer slide ring. 67566 Ball bearing 2x6x3 mm 67603 M2x8 mm LK Screw 67550 Tail rotor shaft 67574...
- Page 14 70103 Motor (not included in Kit No.: 67900) 67605 M3x8 mm CH Screw 67631 Washer 3 mm 67608 Pinion 10 T 67574 M3x4 mm set screw Please keep in mind: You have to use different pinions regarding the used motor or the number of used battery cells.
- Page 15 Make sure that the belt runs straight in the tailboom. Insert the tailboom into the frame. 1x 67919 Tailpipe Twist the belt by 90° to the left! Pull the belt over the pulley. Pull the tailboom backwards, adjust the belts tension and tighten the M2 x 30 mm screws.
- Page 16 Carefully select the components of your r/c-equipment in view of quality and weight. Keep in mind: Saving 1 g of weight gives you 1 s more flight time! Using unsuitable components can cause serious damage! If you have the choice, choose the more sophisticated equipment. Connect the components as suggested by the manufacturer.
- Page 17 67530 Tie Rod M2x99 mm 67523 Quick Link 67565 67533 Tie Rod M2x72 mm 67565 Ballend, long 67533 96 mm 67565 67523 67530 67523 abt. 124 mm According to the used servos, the pipes are supposed to to get bended a bit in their centre, just to avoid friction at the View from the top.
- Page 18 67527 Tie Rod M2x12 mm 67523 Quick Link The length may vary according to the final servo position. Make 67520 Servospacer 3 or 5 mm sure that the mixer base plate is exactly in the center of the main 67564 Ballend, short frame and the 90°...
- Page 19 67527 Tie rod M2x12 mm The length may vary according to the final 67523 Quick link servo position. Make sure that the mixer 67520 Servospacer 3 or 5 mm base plate is exactly in the center of the main frame and the 90° levers are at a right 67564 Ballend, short 67582...
- Page 20 Carefully select the components of your r/c equipment in view of quality and weight. Keep in mind: Saving 1 g of weight gives you 1 s more flight time! Using unsuitable components can cause serious damage to helicopter! If you have the choice, choose the more sophisticated equipment. Connect the components as suggested by the manufacturer.
- Page 21 Shorten the 72 mm rod down to 52 mm. 67582 67576 12 mm Tie rod M2x72 mm 67533 67603 Ballend, long 67565 67565 View from the front. M2x8 mm LH Screw 67603 67531 17 mm 17 mm Ball 67576 abt. 77 mm M2 mm Nut 67582...
- Page 22 The receiver: You could possibly strip the body for even more weight reduction. Check with your warranty! We recommend, Ikarus Master Gyro Order No. 720610, Telegyro (Order No. 720611), Profi Gyro (Order No. 720613), Micro Gyro (Order No 720615) and Mini Gyro (Order No. 720654).lightweight and compact, developed especially for small helicopters.
- Page 23 Select a program for 4 x 90° swashplate steering. Depending on the R/C-System one of the servo position is not covered. 17 mm It is mostly 0° , so Aileron, right side is at 90° position Elevator, rear, is at 180° position Aileron, left side, is at 270°...
- Page 24 Use the Ikarus Rotor Blade Balancer No. 631080 to balance the blades. If necessary apply small amounts of epoxy to the tip of the lighter blade until they balance perfectly.
- Page 25 Once you become familiar with the helicopter this will not be a The IKARUS model helicopter and model plane school does exist problem anymore. since over 20 years and offers a well-balanced training programme for every level of knowledge and experience.
- Page 26 NEVER get near the helicopter with the main rotor rotating. Have a good safety distance. Ask spectators to clear the scene and have at least 35 ft distance. NEVER ignore the local regulations for operating airplanes and helicopters. They come from experience and good human thinking.
- Page 27 The full secret of flying helicopters is not only skill but practice. What normally causes a crash is the wrong command at the wrong time. Therefore, keep practicing. Fly as much as possible. Start with easy operations until you are familiar with the transmitter inputs and the helicopters reaction.
- Page 28 The target speed of the main rotor is abt. 1,300 rpm so we have to find the proper gear ratio. TOO MUCH HEAT IS A SIGN OF POOR ENERGY Various pinions are available from your IKARUS dealer. Let ECONOMICS. ENERGY TRANSFERRED TO HEAT WILL NOT BE us do some calculation:...
- Page 29 Motor type Aeromaxx 15-4 Aeromaxx 15-5 Aeromaxx 30-3 Aeromaxx30-4 Order Number 70101 70102 70103 70104 No load speed per volt 1900 1530 1280 Nominal speed per volt 1500* 1200* 1000* 760* Length without shaft Diameter in millimetre Shaft diameter in millimetre Weight (in gramme ) Optimized for number of cells (helicopter) 8 bis 12...
Need help?
Do you have a question about the Eco16 and is the answer not in the manual?
Questions and answers