Unitech PA600 Standard User Manual
Hide thumbs
Also See for PA600 Standard:
- User manual (76 pages) ,
- Getting started (50 pages) ,
- Quick reference manual (42 pages)

Related Manuals for Unitech PA600 Standard


Summary of Contents for Unitech PA600 Standard
- Page 1 PA600 Standard Unitech is a member of Oracle Embedded Software Licensing Program User’s Manual 400769G Version 1.0 Also applied to PA600 Standard, PA600 Standard 2D, PA600 FSA, and PA600 MCA...
-
Page 3: Preface
This includes electronic or mechanical means, such as photocopying, recording, or information storage and retrieval systems. The material in this manual is subject to change without notice. © Copyright 2009 Unitech Electronics Co., Ltd. All rights reserved. Unitech global website address: http://www.ute.com Bluetooth is a registered trademark of Bluetooth SIG. -
Page 4: Regulatory Compliance Statements
Regulatory Compliance Statements FCC Warning Statement This equipment has been tested and found to comply with the limits for a Class B digital device, pursuant to part 15 of the FCC rules. These limits are designed to provide reasonable protection against harmful interference in a residential installation. -
Page 5: Canadian Compliance Statement
Canadian Compliance Statement This Class B Digital apparatus meets all requirements of the Canadian Interference-Causing Equipment Regulations. Cet appareil numerique de la classe B respecte les exigences du Reglement sur le material broilleur du Canada. The device is certified to the requirements of RSS-139-1 for 2.4 GHz spread spectrum devices. -
Page 6: Laser Information
Laser Information The Unitech PA600 series is certified in the U.S. to conform to the requirements of DHHS/CDRH 21CFR Subchapter J and to the requirements of IEC 825-1. Class II and Class 2 products are not considered to be hazardous. -
Page 7: Battery Charge Notice
If the main battery is removed, the backup battery ensures the data on SDRAM is safe for up to 6 hours. To prevent data loss, do not leave the PA600 uncharged with the main battery removed for an extended period. For more details, refer to page 8, Charging the Battery. -
Page 8: Storage And Safety Notice
It is recommended to store batteries within normal room temperature ranges. Warranty The following items covered under Unitech Limited Warranty are free from defects during normal use: PA600 – 1-year limited warranty. Lithium-Ion battery – 6-month limited warranty. -
Page 9: Table Of Contents
Table of Contents Preface ......................i About This Manual..................i ............EGULATORY OMPLIANCE TATEMENTS FCC Warning Statement ..............ii FCC Label Statement................ii Canadian Compliance Statement............iii European Conformity Statement ............iii RoHS Statement ................iii Taiwan NCC Warning Statement............iii ................... ASER NFORMATION .................. - Page 10 ..................6 ETTING TARTED Installing the Battery................6 Charging the Battery ................7 Chapter 2 Using the Hardware ..................13 ..............13 EYPADS AND UNCTION UTTONS ............14 DJUSTING THE CREEN RIGHTNESS ..................14 SING THE TYLUS SD/MMC ............15 SING THE MEMORY CARD ...............16 SING THE ASER CANNER Chapter 3 Getting Connected..................19...
- Page 11 ........36 HECKING THE AIN AND ACKUP ATTERY TATUS ................37 XTENDING ATTERY ..............39 IEWING LASH EMORY ILES ...............40 ERFORMING A HARDWARE RESET Appendix I Advanced Settings..................43 Appendix II Worldwide Support ..................45...
-
Page 13: Getting Started
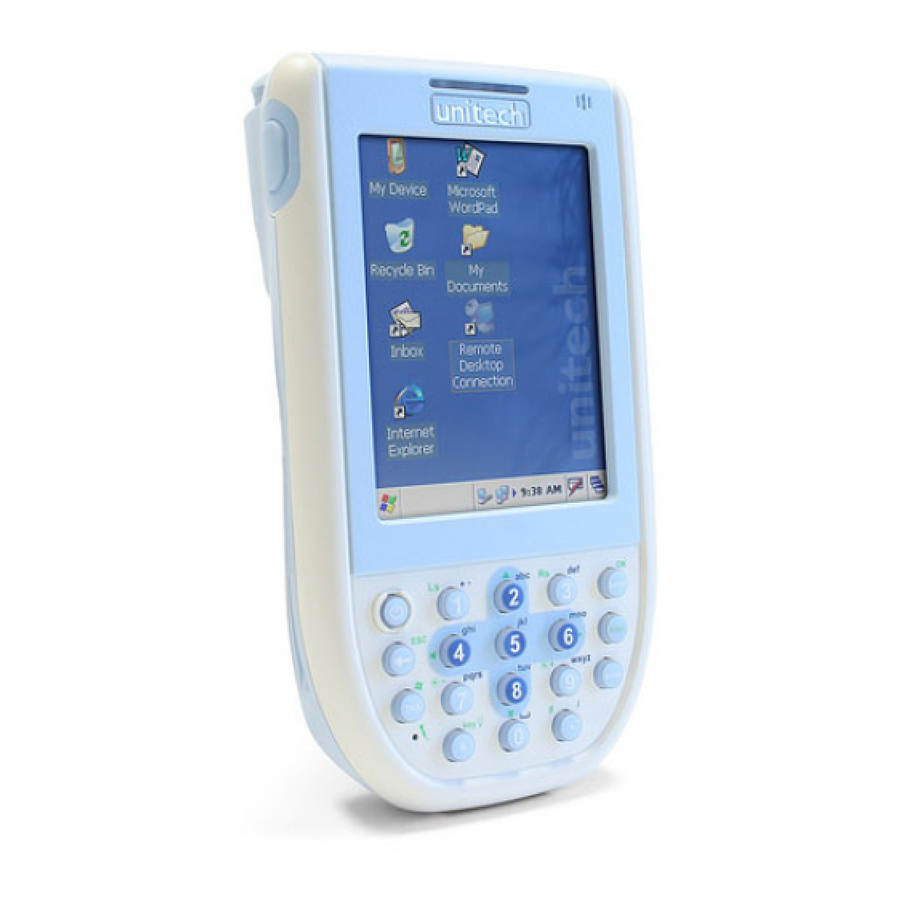
Chapter 1 Getting Started Introducing the PA600 Thank you for purchasing the PA600 PDA Barcode Scanner. The PA600 is designed for users who need a compact and durable PDA for data collection and real time transactions. The PA600 is a rugged, compact and lightweight palm-size computer using the Windows Mobile 6.1 operating system, and incorporating an integral bar code scanning laser device, color LCD with touch screen, keypad, IrDA... -
Page 14: Features
HF RFID reader (optional), supporting ISO15693, ISO14443A, and ISO14443B Communication User-friendly interface USB Host & Client Quick launch hot keys for enabling IrDA 1.2 (SIR) for PA600 standard only backlight, calibration, software GPRS (Data Only) key-board, and other device VOIP support management tasks Summit CCX4 Certified 802.11b/g WLAN... -
Page 15: Package Contents
Package Contents After opening the box, ensure the following accessories for the PA600 are present: PA600 Standard Terminal AC Adapter Battery Pack Stylus USB Charging Cables Elastic Stylus String CD-ROM Quick Reference Guide... -
Page 16: Tour Of The Pa600 Standard
Tour of the PA600 Standard The following sections describe the main components and features of the PA600 Standard. Front Left View Component Description Indicates the battery charging and barcode scanning status. Green - Battery is fully charged or barcode scanning process Status indicator is completed without error. -
Page 17: Back View
your device. This port can also support USB for devices such as a USB scanner, keyboard, or USB memory key. LCD Touch Displays the applications and data stored on your device. It is screen touch-sensitive and responds to the stylus or finger. Speaker Enables you to hear audio from the PA600. -
Page 18: Getting Started
Enables you to interact with the operating system. To use the Stylus stylus, remove it from its holder and hold it the same way you hold a pen or pencil. Right scanner Press to activate the barcode laser scanner. trigger button Infrared (IR) Uses infrared technology to transmit and receive data from port... -
Page 19: Charging The Battery
Compartment contacts Plastic battery tab Battery securing clip Position the battery pack, making sure the battery contacts are aligned with the contacts in the compartment and the battery is placed on top of the plastic tab, as shown in the following illustration. - Page 20 Charging the Battery using the USB Cable Press and hold the connector button on the USB charging cable and connect it to the PA600 (1). Plug the AC adapter cable into the power jack on the USB charging cable (2). Connect the AC adapter into an electrical outlet (3).
- Page 21 Checking the Battery Status If the battery level becomes low in the course of normal use, a status icon appears on the device screen indicating low or very low battery status. In both cases, perform an Active-Sync operation to back up your data, and then recharge your device as soon as possible.
- Page 22 The screen will be more susceptible to scratching without the film, but will be more readable. The Unitech PA600 welcome screen appears for a moment followed by the Windows Mobile screen. Calibrating the PA600 Screen To calibrate the screen at any time, follow these instructions.
- Page 23 Tap Align Screen to calibrate the screen. The align screen window appears. Tap the cross hair firmly and accurately. The cross hair moves to the next location. Continue tapping the cross hairs until the screen has been calibrated.
-
Page 25: Using The Hardware
Chapter 2 Using the Hardware Keypads and Function Buttons The keypad enables you to both enter information and interact with the PDA operating system and also operate secondary functions using the function button. When the green function button is pressed, the green icon functions on the keypad become available. -
Page 26: Adjusting The Screen Brightness
Alphanumeric 9, w, x, y, z, Enter key, OK brightness + Back space, Escape key Alpha Alphanumeric 4, g, h, i, Left key Asterisk, Illuminates keypad Alphanumeric 5, j, k, l Number 0, space Alphanumeric 6, m, n, o, Right Period, Pound Up button Down Button... -
Page 27: Using The Sd/Mmc Memory Card
Remove the stylus from its holder. Hold the stylus as you would a pencil. To make a choice from a menu, lightly tap the tip of the stylus on that choice. To write data into a field on a form, use the stylus to print the letters or numbers. -
Page 28: Using The Laser Scanner
Insert the SD card with the notched corner as shown by the icon on the case. Push the card into the slot until you feel the SD card click into place; this will signal that the card is properly seated within the slot. The card is secure when it is not protruding from the slot. - Page 29 To launch Scanner Settings, tap Start → Settings → System → Scanner Settings. The Scanner Control Panel opens. From here you can configure barcode scanner parameters such as enabling or disabling barcode symbologies, setting data transmission options, configuring magnetic and proximity reading options, and setting power management options.
- Page 30 12. Check the box labeled “Start Scan2KeyWhen Exit and tap OK at the top right. The scanner will be enabled and scans will be directed to the keyboard buffer.
-
Page 31: Getting Connected
Chapter 3 Getting Connected Establishing Device-PC Connection Installing Microsoft ActiveSync In order to exchange data between your computer and PA600, Microsoft ActiveSync must be installed on your computer. Use the USB charging cable that comes with your device to connect the device to your computer. NOTE: If you have a previous version of the Microsoft ActiveSync installed in your computer, uninstall it first before installing the latest version of... - Page 32 Click Next. You are prompted to read the End User License Agreement (EULA). Accept the license agreement terms and click Next. You are prompted for user information. Type the user name and organization and click Next. You are prompted for the destination folder. Select a drive to install the program to and click Next.
- Page 33 Click Install. The program begins installation. After the program has finished installing you see the following screen. Click Finish. You may be prompted to restart your computer. After you have installed ActiveSync and restarted your computer, the ActiveSync icon appears in your computer’s system tray as shown and ActiveSync Connection Wizard starts.
-
Page 34: Synchronizing With Your Computer
When the configuration process is complete, the ActiveSync window appears. Synchronization will be initialized and will take place if you’ve chosen to synchronize periodically or upon connection. NOTE: Your computer can create a partnership with multiple sets of PA600. Also, a PA600 can create a partnership with up to two computers. Synchronizing with Your Computer Synchronization takes place according to the options you choose while setting up ActiveSync on your computer. - Page 35 USB Connection To synchronize with your computer using a USB connection: Open ActiveSync. Connect your device to your computer using the USB charging cable. Initiate connection by tapping Start → Programs → ActiveSync. Tap Menu → Connections. Select Synchronize all PCs using this connection check box.
- Page 36 Check Allow connections to one of the following and select Infrared Port (IR) from the drop-down list. Click OK. Perform the steps below on your device: Align the IR port of your PA600 with that on your computer so that they are unobstructed and within close range.
- Page 37 Follow these instructions to set up a Bluetooth connection. Tap Start→Settings→ Connections →Bluetooth→Mode and check Turn on Bluetooth. Tap Devices→New Partnership… Select a device from the list and tap Next.
- Page 38 You are prompted for a passkey. Enter the Passkey. On the PC screen, you are prompted to enter the Bluetooth PIN Code Request.5. Enter the same Bluetooth PIN Code you entered in step 4. Select service. Check ActiveSync. Tap Finish. To preserve battery power, be sure to end the Bluetooth ActiveSync connection when synchronizing is complete.
- Page 39 Do the network settings. (For PA600 Mobile) Tap the RF icon at the bottom of the screen. A selection menu pops up. Select “Enable Wireless”. Once the RF card is detected, a dialog pops up. Select a network SSID to connect to. Select one of the networks.
-
Page 40: Synchronizing Information
Enter the network key. Tap “Connect”. Icon turns to double arrow, indicating that the RF connection is running. If you do not need the RF connection, you can repeat steps 1 ~ 2 and select “Disable Wireless”. Synchronizing Information All files created on the device are stored in My Document/PA600 My Document folder (if the designated device name is PA600). -
Page 41: Using Activesync To Exchange Files
Using ActiveSync to Exchange Files You can use ActiveSync to exchange information from your device your computer and vice versa. Changes you make to the information on one location will not affect the information on the other one. If you want to automatically update information on both your device and computer, synchronize the information instead. - Page 42 Locate the file that you want to copy on your device or computer. Do either one of the following: To copy the file to your device, right click the file and click Copy. Place the cursor in the desired folder for your device, right-click, and then click Paste.
-
Page 43: Barcode Scanner Programs
Chapter 4 Barcode Scanner Programs Scan2Key The Scan2Key application routes input from a scanner port to a keypad buffer, making all input from the scanner emulate input from the keypad. Using Scan2Key, scanned data can be directed from the scanner port to any waiting (active/focused) text editor such as MS Mobile Word or a text box in an application. -
Page 44: Barcode Symbologies (For 1D Laser Engine)
Barcode Symbologies (For 1D Laser Engine) 1D Barcode Char Check Transmit Leading Barcode Enable / / Digit Check Digit Others Symbology Disable verification Char/digit Transmit Bookland Codabar Transmit Start/Stop bits, CLSI format, *data length Code 11 * check digits, *data length Code 128 *data length Code 32... -
Page 45: Barcode Symbologies (For 2D Imager)
Char Check Transmit Leading Barcode Enable / / Digit Check Digit Others Symbology Disable verification Char/digit Transmit UPC/EAN Supplement 2, Supplement Group 5,Insert Space before supplement, most have supplement, *Add-on code try level * adjustable Scanner Control Panel, V 3.0 Barcode Symbologies (For 2D Imager) 1D Barcode Char Check... - Page 46 2D Barcode Barcode Enable / Max/Min Others Symbology Disable Length Composite UPC composite, RSS composite, Only linear code, EAN 128 EM mode Data Matrix YES Rectangle, Negative MaxiCode Mode 0~ 5, Not only primary PDF-417 Postal Code YES Australian post, Japan post, KIX, Planet, Postnet, Royal mail, UPU, USPS4CB, Decode Postnet with B and B’...
-
Page 47: Advanced Settings
Chapter 5 Advanced Settings Adjusting Settings This section describes how to adjust the settings of your device to accommodate your work habits. To access Settings, tap Start → Settings. The Settings screen appears. From here can adjust such user configurable items as the backlight, auto power off timer, system volume, and processor speed. -
Page 48: Checking The Main And Backup Battery Status
Checking the Main and Backup Battery Status This section describes how to view the power level for both the main and backup battery. To minimize power consumption, you can define settings for the auto-off function and the processor’s operation speed. To check the main and backup battery status: Open Power Properties. -
Page 49: Extending Battery Life
It is necessary to charge the battery when the battery charge reaches below 10%. If the battery does not accept a charge, contact Unitech Technical Support. Extending Battery Life You can extend the PA600 battery life by doing either of the following:... - Page 50 Adjusting Backlight Setting If the power consumption of the LCD backlight is high, turn off the backlight function if it is not necessary. If a backlight is required, set “automatically turn off the backlight” function. To change backlight settings: Tap Start → Settings → System. Tap Backlight.
-
Page 51: Viewing Flash Memory Files
In the Brightness tab, tap and drag the slider to choose a dimmer backlight when operating on battery power. Viewing Flash Memory Files The Flash Storage folder is a rewritable location for programs or data files. The benefit of this feature is that files and programs saved in Flash Storage are unaffected by the PA600 power status. -
Page 52: Performing A Hardware Reset
Performing a hardware reset You may have to perform a reset if the device freezes (i.e., device no longer responds to the buttons on the screen). A soft reset allows your device to get a fresh start, similar to rebooting a computer. - Page 53 PA600. Press and hold the reset button until you see the Unitech splash logo screen. Wait 5 seconds and then release the Func key and Backspace key.
- Page 54 PA600.Press and hold the reset button until you see the Unitech splash logo screen appear. Wait for 5 seconds and then release the TAB and Func key.
-
Page 55: Advanced Settings
Appendix I Advanced Settings PXA270 624Mhz SDRAM: 128MB (32 bits) Memory Flash ROM: 576MB (H3) Window Mobile Version 6.1 Classic Keypad 20-key Alpha-numeric keypad with backlight 240x320 QVGA, Color Transflective TFT, with Touch Screen Display & backlight, Sunlight readable LCD Laser Scan Engine, 2D imager as optional Scanner Scan rate: 104 scans/sec. - Page 56 4-Slot Multi-Bay Ethernet Cradle Accessories Extension Battery 3300mAH Vehicle Cigarette Quick Charging cable Professional Vehicle Cradle (regional available) Hostler (regional available) Microsoft Visual Studio 2005 Microsoft Windows Mobile 6 SDK for Pocket PC Software Unitech PA600 SDK Oracle Database Lite...
-
Page 57: Appendix Ii
Appendix II Worldwide Support Unitech’s professional support team is available to quickly answer questions or technical-related issues. Should an equipment problem occur, please contact the nearest Unitech regional service representative. For complete contact information please visit the Web sites listed below:...
Need help?
Do you have a question about the PA600 Standard and is the answer not in the manual?
Questions and answers