Table of Contents
Advertisement
Advertisement
Table of Contents

Related Manuals for ELNA eXcellence 730


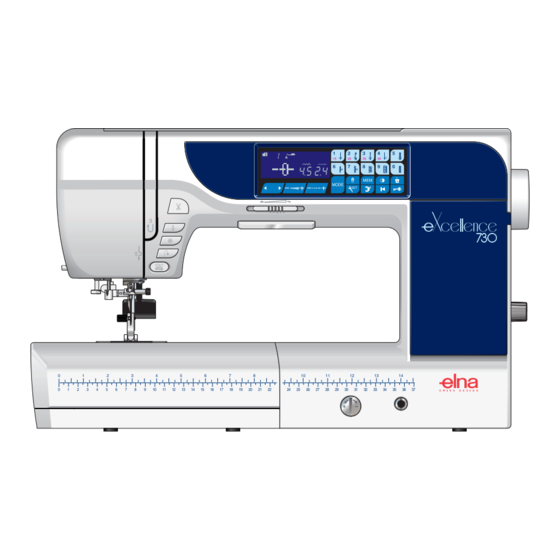
Summary of Contents for ELNA eXcellence 730
- Page 1 730 | Instruction Manual |...
-
Page 3: Important Safety Instructions
IMPORTANT SAFETY INSTRUCTIONS This appliance is not intended for use by persons (including children) with reduced physical, sensory or mental capabilities, or lack of experience and knowledge, unless they have been given supervision or instruction concerning use of the appliance by a person responsible for their safety. Children should be supervised to ensure that they do not play with the appliance. -
Page 4: Table Of Contents
TABLE OF CONTENTS NAmES OF PArTS Fringing ................. 62 Names of Parts ............... 3 Drawn Work ............. 62-63 Standard Accessories ............ 4 Smocking ..............63 Accessories Storage ............5 Fagoting ................ 64 Scallop ................64 GETTiNG rEAdy TO SEw Patchwork Piecing ............65 Connecting the Power Supply ........ -
Page 5: Names Of Parts Names Of Parts
NAMES OF PARTS Names of Parts Thread take-up lever Foot pressure dial Reference chart Top cover Foot storage compartment Bobbin thread cutter Bobbin winder spindle Hole for extra spool pin Spool holder (large) Spool pin Thread tension dial Face cover Thread cutter Extension table (accessory storage) Centimeter/inch quick measurements... -
Page 6: Standard Accessories
Standard Accessories Zigzag foot A (set on the machine) Rolled hem foot D Zipper foot E Satin stitch foot F Open-toe satin stitch foot F2 Blind hemming foot G Overcast foot M 1/4˝ seam foot O Darning foot PD-H Convertible free motion quilting foot QB-S Close-toe foot Open-toe foot Clear view foot... -
Page 7: Accessories Storage
Accessories Storage The accessories can be conveniently stored in the foot storage compartment under the top cover and in the extension table. Under top cover: q Satin stitch foot F w Button sewing foot T e 1/4˝ seam foot O r Foot holder t Touch panel stylus y Clear view foot u Open-toe foot i Close-toe foot... -
Page 8: Getting Ready To Sew Connecting The Power Supply
GETTING READY TO SEW Connecting the Power Supply z First make sure the power switch q is off. x Insert the machine plug w of the power supply cord into the machine socket e. c Insert the power supply plug r into the wall outlet t, and turn the power switch q on. -
Page 9: Machine Operating Buttons
Machine Operating Buttons q Start/stop button Press this button to start or stop the machine. The machine starts running slowly for the first few stitches, it then runs at the speed set by the speed control slider. The machine runs slowly as long as this button is pressed. -
Page 10: Extension Table
Extension Table The extension table provides an extended sewing area and can be removed for free-arm sewing. q Extension table w Free-arm To detach: Draw the table out to the left. To attach: Slide the table on the base and push the table to the right. -
Page 11: Lcd Screen And Function Keys
!1 !2 !3 !4 !5 !6 !7 !8 LCD Screen and Function Keys q LCD screen !5 Elongation key (refer to page 69) The LCD screen shows the following information when the Press this key to elongate satin stitch patterns. machine is turned on: !6 Mirror image key (refer to pages 77) w Stitch pattern... -
Page 12: Raising And Lowering The Presser Foot
raising and Lowering the Presser Foot The presser foot lifter raises and lowers the presser foot. q Presser foot lifter You can raise the presser foot higher than the normal up position. This allows for changing the needle plate, and also helps you to place thick layers of fabrics under the foot. -
Page 13: Adjusting The Foot Pressure
Adjusting the Foot Pressure The foot pressure can be adjusted with the foot pressure dial located under the top cover. The dial has 7 setting positions from 1 to 7. For ordinary sewing, set 5 at the setting mark. q Foot pressure dial w Setting mark Reduce the pressure when sewing fine synthetics and stretch fabrics. -
Page 14: Balancing Thread Tension
Balancing Thread Tension Auto-thread tension For general sewing, set the thread tension dial at AUTO, which covers a wide range of sewing conditions. q Thread tension dial NOTE: Manual thread tension adjustment may be required when the stitch width is set more than “7.0” (see below). -
Page 15: Lockout Key
Lockout Key Press this key to lockout the machine when threading the machine, replacing the accessories etc. To reduce the risk of injury, all the buttons and keys are deactivated. To unlock the machine, press this key again. Changing the Presser Foot CAUTION: Always make sure to press the lockout key to lockout the machine or turn the power switch off before... -
Page 16: Removing And Attaching The Foot Holder
Removing and Attaching the Foot Holder CAUTION: Always make sure to press the lockout key to lockout the machine or turn the power switch off before replacing the presser foot. Removing the foot holder Raise the presser foot and loosen the setscrew. Remove the foot holder. -
Page 17: Dual Feed Foot
c Attach the dual feed foot holder to the presser bar. Tighten the setscrew lightly with your finger. t Dual feed link y Dual feed foot holder u Upper feed drive i Dual feed foot v Push the dual feed link to engage it with upper feed drive. -
Page 18: Replacing The Needle Plate
Replacing the Needle Plate Use the straight stitch needle plate when sewing fine fabrics or sewing with the dual feed foot. CAUTION: Always make sure to press the lockout key to lockout the machine or turn the power switch off before replacing the needle plate. -
Page 19: Changing Needles
Changing Needles CAUTION: Always make sure to press the lockout key to lockout the machine or turn the power switch off before changing the needle. Raise the needle by pressing the needle up/down button and lower the presser foot. Turn the power switch off. Loosen the needle clamp screw and remove the needle from the clamp. -
Page 20: Needle Definitions
Needle Definitions The illustration identifies the main parts of a sewing machine needle. q Body w Shaft e Long groove (round side of needle) r Short groove (flat side of needle) t Eye y Point Universal – an all-purpose needle that handles most woven and knit fabrics. -
Page 21: Winding The Bobbin
Winding the Bobbin Removing the Bobbin Slide the hook cover release button to the right, and remove the hook cover plate. q Hook cover release button w Hook cover plate Lift out the bobbin from the bobbin holder. e Bobbin NOTE: Use the plastic bobbins for horizontal hook (marked with “J”... - Page 22 Winding the bobbin z Pull the thread from the spool. Hold the thread with both hands and pass the thread into the guide slot. q Guide slot x Draw the thread to the left and forward around the thread guide. Draw the thread to the rear and to the right around under the guide plate.
-
Page 23: Inserting The Bobbin
Inserting the Bobbin z Place the bobbin in the bobbin holder with the thread running off counterclockwise. CAUTION: Always make sure to press the lockout key to lockout the machine or turn the power switch off before threading the machine. x Guide the thread into the front notch on the bobbin holder. -
Page 24: Threading The Machine
Threading the Machine Raise the presser foot lifter to raise the presser foot. Turn the power switch on. Press the needle up/down button to raise the take-up lever to the highest position. Press the lockout key or turn the power switch off. Pass the thread in the order from z to m. -
Page 25: Built-In Needle Threader
Built-in Needle Threader NOTES: • The needle threader can be used with a #11 to #16 needle. Thread size 50 to 90 is recommended. • The needle threader cannot be used with the twin needle. CAUTION: Always make sure to press the lockout key to lockout the machine or turn the power switch off before using the built-in needle threader. -
Page 26: Drawing Up The Bobbin Thread
Drawing up the Bobbin Thread z Raise the presser foot lifter. Hold the needle thread with your finger. q Needle thread x Press the needle up/down button twice to draw up the bobbin thread. w Needle up/down button c Pull the needle thread to bring up the loop of bobbin thread. -
Page 27: Selecting The Patterns
Selecting the Patterns Mode 1 You can select the following stitch patterns directly by pressing the pattern keys. q Pattern keys (Number keys) Example: To select stitch pattern 4 in mode 1 When the power switch is turned on, the direct stitch pattern selection (mode 1) is set automatically. -
Page 28: Customizing Machine Settings
Customizing Machine Settings You can customize the machine settings to your preference. Press the set key q and LCD screen will show the setting mode. Press the mode key w to select the desired setting. In this mode, you can set the following machine functions. e Buzzer sound setting r Needle stop position setting t Start up speed setting... - Page 29 Needle stop position setting The machine always stops with the needle in the down position except when sewing buttonholes, specialty stitches, monograms, etc. However you can select the needle stop position to up or down. Enter the setting mode. Press the mode key to enter the needle stop position setting.
- Page 30 Key position calibration If the function keys seem out of alignment, calibrate the key position as follows. z Enter the setting mode. Press the mode key 4 times to enter the key position calibration. x Press the start/stop button q. (t2) (t3) (t4)
-
Page 31: Traditional Sewing Straight Stitch
TRADITIONAL SEWING Straight Stitch Machine settings q Pattern: MODE 1: 1, 1S MODE 2: 01 w Thread tension: AUTO e Presser foot: Zigzag foot A or Dual feed foot AD r Foot pressure: Starting to sew Raise the presser foot and position the fabric edge next to a seam guide on the needle plate. - Page 32 Cutting threads To cut the threads after finishing sewing, press the thread cutter button. The needle bar will automatically go up after trimming the threads. q Thread cutter button NOTES: The thread cutter button does not function when the presser foot is up. Use the thread cutter on the face cover to cut specialized or thick threads if the auto thread cutter does not work well.
- Page 33 Adjusting the needle drop position The needle drop position of the straight stitches can be altered by pressing the stitch width adjusting key. The needle drop position can be adjusted for following straight stitch patterns: Mode 1: Mode 2: Mode 3: Press the “+”...
-
Page 34: Sewing With The Dual Feed Device
Sewing with the Dual Feed Device The following stitch patterns can be sewn with the dual feed device. Mode 1 Mode 1: 1, 2, 3, 4, 1S, 2S, 3S, 4S Mode 2: 01, 02, 03, 04 Mode 3: 01, 02, 03, 04 Mode 2 Mode 3 The dual feed device is extremely effective for sewing... -
Page 35: Needle Plate For Straight Stitch
Needle Plate for Straight Stitch The stitch patterns 1, 2, 3, 4 (mode 1) can be sewn with the needle plate for straight stitch. Mode 1: Replace the needle plate with the needle plate for straight stitch (refer to page 16). “S”... -
Page 36: Straight Stitch With Left Needle Position
Straight Stitch with Left Needle Position Machine settings q Pattern: MODE 1: 4, 4S MODE 2: 04 w Thread tension: AUTO e Presser foot: Zigzag foot A or Dual feed foot AD r Foot pressure: Use this stitch to seam the edge of fabrics. Triple Stretch Stitch Machine settings q Pattern:... -
Page 37: Zipper Sewing
Zipper Sewing Machine settings q Pattern: MODE 1: 1 MODE 2: 01 w Thread tension: AUTO e Presser foot: Zipper foot E Zigzag foot A r Foot pressure: NOTE: The needle drop position should be adjusted when sewing with the zipper foot E. Fabric preparation Add 1 cm (3/8“) to the zipper size. - Page 38 Sewing z Fold back the left seam allowance. Turn the right seam allowance under to form a 0.2 to 0.3 cm (1/8˝) margin. Place the zipper teeth next to the fold and pin in place. Set the stitch length and thread tension back to the original setting.
- Page 39 v Close the zipper and spread the fabric open flat with the right side facing up. Attach the Zigzag foot A. Adjust the stitch length to 5.0, stitch width to 4.5 (default value) and thread tension dial to 1. Baste the opened fabric and zipper tape together. i Basting o Zipper tape b Attach the zipper foot E.
-
Page 40: Rolled Hem
Rolled Hem Machine settings q Pattern: MODE 1: 1 MODE 2: 01 w Thread tension: AUTO e Presser foot: Rolled hem foot D r Foot pressure: Sewing z Fold the edge of the fabric twice, 6 cm (2 - 3/8˝) in length and 0.3 cm (1/8˝) in width. -
Page 41: Gathering
Gathering Machine settings q Pattern: MODE 1: 1 MODE 2: 01 w Thread tension: e Presser foot: Zigzag foot A r Foot pressure: Loosen the thread tension to “1” and increase the stitch 0.6 cm length to 5.0. NOTE: Pull up the bobbin thread and draw a 10 cm (4˝) thread tail to the back before starting to sew. -
Page 42: Zigzag Stitch
Zigzag Stitch Machine settings q Pattern: MODE 1: 7 MODE 2: 07, 12 w Thread tension: AUTO e Presser foot: Zigzag foot A r Foot pressure: Zigzag stitch is used for various sewing needs including overcasting. It can be used on most woven fabrics. A dense zigzag stitch can also be used for applique. -
Page 43: Multiple Zigzag Stitch (Tricot Stitch)
Multiple Zigzag Stitch (Tricot stitch) Machine settings q Pattern: MODE 1: 8 MODE 2: 08 w Thread tension: AUTO e Presser foot: Zigzag foot A r Foot pressure: This stitch is used to finish a raw edge of synthetics and other stretch fabrics that tend to pucker. -
Page 44: Knit Stitch
Knit Stitch Machine settings q Pattern: MODE 2: 10 w Thread tension: AUTO e Presser foot: Overcast foot M r Foot pressure: This stitch is recommended for sewing such fabrics as synthetic knits and stretch velour as it provides the greatest amount of elasticity and strength. -
Page 45: Super Overlock Stitch
Apply ribbing to knits and garment retains its shape. Elna invented this stitch in 1982. Place the fabric edges together under the presser foot next to the right side edge of the presser foot. - Page 46 Changing the needle drop position Press the stitch width adjusting key. The LCD screen shows the distance between the left needle position and the guide in millimeters r. Press the “–” sign to move the needle to the right. Press the “+” sign to move the needle to the left. q Left needle drop position w Right needle drop position e Guide on foot...
-
Page 47: Shell Tuck
Shell Tuck Machine settings q Pattern: MODE 2: 16 w Thread tension: 6−8 e Presser foot: Satin stitch foot F r Foot pressure: Use a light weight fabric (tricot, for example). Fold the fabric as shown and stitch on the fold. Allow the needle to just clear the folded edge to create a shelled edge. -
Page 48: Lingerie Stitch
Lingerie Stitch Machine settings q Pattern: MODE 2: 18 w Thread tension: AUTO e Presser foot: Satin stitch foot F r Foot pressure: Sew a fine seam in lingerie and lightweight knits. The small seam size stretches and is comfortable to wear. Select 18 (mode 2). - Page 49 Square Buttonhole Machine settings q Pattern: MODE 1: 0 MODE 2: 20 w Thread tension: AUTO e Presser foot: Automatic buttonhole foot R r Foot pressure: The size of a buttonhole is automatically set by placing a button in the rear of automatic buttonhole foot R. The button holder of the foot takes a button size of 1 cm (3/8˝) to 2.5 cm (1˝) in diameter.
- Page 50 v Mark the buttonhole position on the fabric and place it under the buttonhole foot. Lower the needle at the starting point by turning the hand wheel. t Starting point NOTE: Make sure there is no gap between the slider and front stopper, otherwise the buttonhole will be out of position or there will be a sewing gap.
- Page 51 n The buttonhole is sewn automatically in the sequence shown. When the buttonhole is finished, the machine will stop automatically with the needle in the up position. Press the thread cutter button and remove the fabric. NOTE: If you start sewing without pulling down the buttonhole lever, the LCD screen will show a warning and the machine will stop after a few stitches.
- Page 52 Manual settings The buttonhole width can be adjusted by pressing the stitch width adjusting key. Press the “+” sign on the stitch width adjusting key to increase the buttonhole width. Press the “–” sign on the stitch width adjusting key to decrease the buttonhole width.
-
Page 53: Fine Fabric Buttonhole
Fine Fabric Buttonhole Machine settings q Pattern: MODE 2: 21 w Thread tension: AUTO e Presser foot: Automatic buttonhole foot R r Foot pressure: The sewing procedure is the same as the square buttonhole (refer to pages 47-49). The machine will sew a buttonhole in the order shown. q Starting point NOTE: The buttonhole width can be adjusted from 2.5 to 5.5. -
Page 54: Stretch Buttonholes
Stretch Buttonholes Machine settings q Pattern: MODE 2: 23, 25 w Thread tension: AUTO e Presser foot: Automatic buttonhole foot R r Foot pressure: The sewing procedure is the same as the square buttonhole (refer to pages 47-49). The machine will sew a buttonhole in the order shown. q Starting point NOTE: The buttonhole width can be adjusted from 2.5 to 7.0. -
Page 55: Corded Buttonhole
Corded Buttonhole Machine settings q Pattern: MODE 2: 23, 24 w Thread tension: AUTO e Presser foot: Automatic buttonhole foot R r Foot pressure: With the automatic buttonhole foot R raised, hook the filler cord on the spur at the front of the buttonhole foot. q Spur Bring the ends of the cord to the rear under the buttonhole foot clearing the front end. -
Page 56: Welted Buttonhole
Welted Buttonhole Machine settings q Pattern: MODE 2: 26 w Thread tension: AUTO e Presser foot: Automatic buttonhole foot R r Foot pressure: A welted buttonhole is made by stitching a strip or patch of fabric to the buttonhole. Welted buttonholes are particularly suitable for tailored garments, but are not recommended for sheer or delicate fabrics where the patch might show through or add bulk. - Page 57 m Fold over the length of the garment fabric, sew back and forth beside the original seam to secure flaps of the patch. r Wrong side of garment fabric t Sew back and forth , Fold over the end of fabric and sew back and forth three times over the triangular end.
-
Page 58: Button Sewing
Button Sewing Machine settings q Pattern: MODE 2: 27 w Thread tension: AUTO e Presser foot: Button sewing foot T r Foot pressure: t Feed dog: Lowered Attaching the button sewing foot T Insert the rear pin on the foot into the rear groove of the foot holder. -
Page 59: Darning
Darning Machine settings q Pattern: MODE 2: 28 w Thread tension: AUTO e Presser foot: Automatic buttonhole foot R r Foot pressure: z x c z Attach the automatic buttonhole foot R and pull the button holder all the way out. Place the fabric under the foot, and lower the needle at the starting point. - Page 60 To adjust the evenness of darning stitches You can correct unevenness of darning stitches by pressing the “–” or “+” key of the stitch length adjusting key. If the left corner is lower than the right side, press the “–” key to correct it, and vice versa.
-
Page 61: Tacking
Tacking Machine settings q Pattern: MODE 2: 29 w Thread tension: AUTO e Presser foot: Satin stitch foot F r Foot pressure: Tacking is used to reinforce pockets, crotch seams and belt carriers where extra strength is needed. Sewing Lower the needle at the starting point. Lower the foot and sew until the machine stops automatically. -
Page 62: Eyelet
Eyelet Machine settings q Pattern: MODE 2: 30 w Thread tension: AUTO e Presser foot: Satin stitch foot F r Foot pressure: The eyelet is used for belt holes etc. Sewing Sew until the machine stops automatically. Open the eyelet with an eyelet puncher or pointed scissors. -
Page 63: Applique
Applique Machine settings – q Pattern: MODE 3: 05-09 w Thread tension: AUTO e Presser foot: Satin stitch foot F or Open-toe satin stitch foot F2 r Foot pressure: Place an applique on the fabric and baste it in place or use a fusible web to secure the applique in place. -
Page 64: Fringing
Fringing Machine settings q Pattern: MODE 3: 05 w Thread tension: AUTO e Presser foot: Satin stitch foot F r Foot pressure: Fringing adds a special touch on table linens and shawls. Choose a firm, woven fabric like linen where threads can be removed easily. -
Page 65: Smocking
x Sew down the left side, guiding the fabric so the right hand stitches fall in open space. After finishing the left side, press the mirror image key. Sew down the other side (refer to page 77 for mirror image sewing). q Mirror image key c Remove the yarn or fabric threads between the stitching. -
Page 66: Fagoting
Fagoting Machine settings q Pattern: MODE 3: 21 w Thread tension: AUTO e Presser foot: Satin stitch foot F r Foot pressure: * Stitch pattern (mode 3) can also be used. Use this stitch to join two pieces of fabric to create an open work appearance and add design interest. -
Page 67: Patchwork Piecing
Patchwork Piecing Machine settings q Pattern: MODE 3: 01, 02, 03 w Thread tension: AUTO e Presser foot: 1/4˝ seam foot O or Zigzag foot A or Dual feed foot AD r Foot pressure: • Patchwork piecing Select pattern 02 (mode 3). Place the patchwork pieces right sides together. -
Page 68: Quilting
Quilting Machine settings q Pattern: MODE 1: 1, 1S MODE 2: 01 w Thread tension: AUTO e Presser foot: Zigzag foot A or Dual feed foot AD r Foot pressure: t Quilter Attaching the quilting guide bar The quilting guide bar is helpful when sewing parallel, evenly spaced rows of stitching. -
Page 69: Stippling
Stippling Machine settings q Pattern: MODE 3: 33 w Thread tension: AUTO e Presser foot: Satin stitch foot F or Open-toe satin stitch foot F2 r Foot pressure: * Stitch patterns (mode 3) can also be used. A pre-programmed stippling stitch is a fast and easy method to quilt small areas. -
Page 70: Free Motion Quilting (2)
Changing the foot This foot is comes with the closed-toe foot attached, however, it is convertible to the open-toe foot and clear view foot. To change the foot, raise the foot and turn the round nut to bring the foot to the lowest position. Remove the setscrew and remove the closed-toe foot. -
Page 71: Elongation Ratio
Satin Stitches Machine settings − q Pattern: MODE 3: 56 – 64 w Thread tension: AUTO e Presser foot: Satin stitch foot F r Foot pressure: Patterns 56–64 can be elongated up to 5 times their original length while the stitch density remains the same. Elongation ratio Example: Pattern number 58 (mode 3) Select pattern number 58 (mode 3). -
Page 72: Cording (3-Strand Cording)
Cording (3-strand cording) Machine settings q Pattern: MODE 3: 57 w Thread tension: AUTO e Presser foot: Cording foot H r Foot pressure: Insert 3 strands of cording under the spring of the foot and draw them under the foot to the rear. q Spring Hold the three strands parallel for even sewing and be sure to sew over the strands... -
Page 73: Circular Sewing
Circular Sewing The circular pivot pin is inserted into free arm and provides a pivot point to sew perfect curves or circles for doilies or large scallops. Select a desired decorative stitch. Fold fabric into quarters to determine center. Pierce center of fabric with pivot pin. -
Page 74: Twin Needle Sewing
Twin Needle Sewing The utility stitches and decorative stitches shown on the Mode 1 left can be sewn with a twin needle. Replace the needle with the twin needle supplied with the standard accessories. Mode 2 CAUTION: Turn the power switch off or press the lockout key before changing the needle. - Page 75 NOTES: • When you sew patterns with the twin needle, test the stitches first before you sew on the garment. • Use the zigzag foot A or satin stitch foot F for twin needle sewing. • When changing the sewing direction, raise the needle and presser foot then turn the fabric.
-
Page 76: Programming A Pattern Combination Pattern Combination
PROGRAMMING A PATTERN COMBINATION Pattern Combination Example: Programming patterns 61 and 62 (mode 3). NOTES: • Patterns in the different groups, letters and numbers can also be programmed. • Check tension balance by test sewing. Manual tension adjustment may be required when sewing a pattern combination. -
Page 77: Programming Auto-Lock Stitch
Programming Auto-lock Stitch Example: Programming patterns 58 (mode 3) and auto- lock stitch. The machine will sew the pattern, auto-lock stitch, and stop automatically. z Select pattern 58 (mode 3). x Press the memory key. c Select pattern 92 (mode 3). Press the memory key. -
Page 78: Programming Automatic Thread Cutting
Programming Automatic Thread Cutting To cut the threads automatically after sewing the pattern combination, press and hold the thread cutter button after programming the pattern combination. The cutter sign will be indicated on the LCD screen and blinks. q Cutter sign z Select pattern 61 (mode 3). -
Page 79: Pattern Combination With A Mirror Image
Pattern Combination with a Mirror Image Example: Pattern 61 (mode 3) and its mirror image z Select pattern 61 (mode 3). x Press the memory key. c Select pattern 61 (mode 3). Press the mirror image key. The mirror sign will appear on the LCD screen. q Mirror sign v Press the memory key. -
Page 80: Resuming A Pattern From The Beginning
Resuming a Pattern from the Beginning If you have to stop sewing in the middle of a pattern and wish to sew it over again, press the startover key to sew the pattern from the beginning. Example: Pattern 58 (mode 3) z Select pattern 58 (mode 3). -
Page 81: Bridge Stitches
Bridge Stitches Stitch patterns number 51 to 55 (mode 3) are bridge stitches, which are used to insert straight stitches after a stitch pattern. Example: Combination of pattern 10 and pattern 53 in mode 3 z Select pattern 10 (mode 3). x Press the memory key. - Page 82 Use the stitch pattern 91 (blank space) in mode 3 if you wish to insert a space between stitch patterns. w Blank space...
-
Page 83: Monogramming
Monogramming Selecting a character In mode 4, 5 and 6, you can program text by entering the number and alphabets. Mode 4: Alphabets/number/symbol Mode 5: European accented letters Mode 6: 9 mm monogram (capital letter/number only) Programming a monogram Example: To program “R&B” z Press the mode key 3 times to enter mode 4. - Page 84 Spacing To enter the space in monogramming, select the stitch pattern 97, 98 or 99 in mode 4, 5 or 6. q Pattern 97: Small-size space (2.5 mm) w Pattern 98: Medium-size space (3.5 mm) e Pattern 99: Large-size space (5.0 mm) Monogram size The stitch width of monogramming does not indicate the actual size of character.
-
Page 85: Editing A Pattern Combination
Editing a Pattern Combination Viewing a long combination The LCD screen only shows one pattern at a time. If the entire combination is not displayed, press the cursor key to view the rest of the combination. Press the right arrow q “ ”... -
Page 86: Deleting And Inserting A Pattern
Deleting and Inserting a Pattern Example: Deleting pattern “B” and inserting “W” from “ABC”. z Press the cursor key to shift the cursor under pattern “B”. x Press the clear key. Pattern “B” will be deleted. c Enter “W”. Pattern “W” will be inserted between “A” and “C”. v Press the memory key to memorize the new pattern combination. -
Page 87: Uniform Stitch Adjustment
Uniform Stitch Adjustment The stitch width and length of the programmed patterns can be uniformly adjusted. Example 1: Adjusting the stitch width of the programmed pattern 68 (mode 3) and its mirror image Shift the cursor to the right of the last programmed pattern. -
Page 88: Individual Stitch Adjustment
Individual Stitch Adjustment The stitch width and length can be individually adjusted for each pattern in a programmed combination. Example: Changing the stitch width of the one pattern in the combination z Select pattern 58 (mode 3). Press the memory key. x Press the memory key again. -
Page 89: Correcting Distorted Stitch Patterns
Correcting Distorted Stitch Patterns The sewing results of the stitch patterns may vary depending upon sewing conditions, such as sewing speed, type of the fabric, number of layers etc. Always test sew on a scrap piece of the fabric that you wish to use. -
Page 90: Care And Maintenance
CARE AND MAINTENANCE WARNING: Turn the power switch off and unplug the machine before cleaning. Cleaning the Hook Area Clean the hook area at least once a month. Turn the power switch off and unplug the machine. Remove the needle plate (refer to page 16). Remove the needle and presser foot. -
Page 91: Cleaning The Inside Of The Thread Guide
Cleaning the Inside of the Thread Guide Clean the inside of the thread guide plate under the top cover at least once a month. z Remove the needle thread and remove the thread guide plate by pulling it up. q Thread guide plate x Remove lint and dust from the brush on the underside of the thread guide plate using a lint brush. -
Page 92: Problems And Warning Signals
Problems and Warning Signals If a buzzer sounds and the LCD screen shows a warning sign, follow the guidance below. Warning Sign Try this Cause The start/stop button is pressed with the foot control Disconnect the foot control. connected. The machine is started without lowering the presser Lower the presser foot and foot. - Page 93 Warning Sign Cause Try this The selected stitch patter cannot be flipped. Select the other stitch pattern for a mirror image. (E1-E7) The machine does not work properly due to a Contact the service center or the problem in the control circuit. store from whom the machine was purchased.
-
Page 94: Troubleshooting
Troubleshooting Cause Condition Reference 1. The needle thread is not threaded properly. The needle thread Page 22 2. The needle thread tension is too tight. breaks Page 12 3. The needle is bent or blunt. Page 17 4. The needle is incorrectly inserted. Page 17 5. - Page 96 858-800-780 (EN)