Table of Contents
Advertisement
Advertisement
Table of Contents

Subscribe to Our Youtube Channel
Related Manuals for Blaupunkt Palm Beach C51


Summary of Contents for Blaupunkt Palm Beach C51
- Page 1 Radio / Cassette Palm Beach C51 Operating instructions...
- Page 2 Bitte aufklappen Open here Ouvrir s.v.p. Aprite la pagina Hier openslaan a.u.b. Öppna Por favor, abrir Favor abrir...
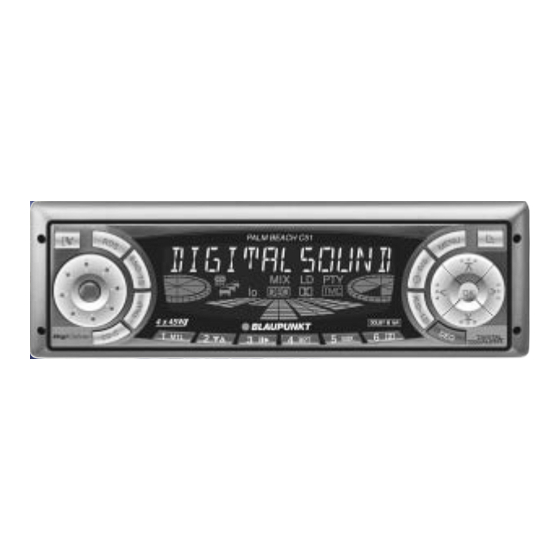
- Page 4 CONTROLS - button for unlatching the re- - button for opening the flip- movable release panel release panel Volume control Arrow keys Button for switching the device OK - button, for confirmation of on and off and for muting the de- menu entries and for starting the vice scan function...
-
Page 5: Table Of Contents
TABLE OF CONTENTS Switching the Radio Monitor Notes and accessories ..33 On and Off ........45 Road Safety ........33 Skipping Blank Tape ...... 46 Fitting ..........33 Choosing the Tape Type ....46 Accessories ........33 Dolby* B Noise Suppression ..46 Release Panel ...... -
Page 6: Notes And Accessories
Only make adjustments to your car IDC A 09. radio when the traffic conditions al- The use of an adapter cable (Blaupunkt low. Familiarise yourself with the de- no. 7 607 889 093) also allows the CDC vice before you start driving. -
Page 7: Release Panel
RELEASE PANEL button, 1. Release Panel Press the The panel is unlatched. Theft Protection Pull the panel off the device, first Your device has a removable flip-release straight forward and then to the left. panel to protect it from theft. When the release panel has been The radio is of no value to a thief with- separated from the device, it... -
Page 8: Switching On And Off
SWITCHING ON AND OFF Switching On and Off Switching on by means of cassette insertion The following methods are available for If there is no cassette in the deck when switching the device on or off: the device is switched off, Switching On and Off with the button, 9. -
Page 9: Adjusting The Volume
OK, ;. gation system to be connected to the car radio as described in the fitting in- structions. Your Blaupunkt dealer can tell you which navigation systems can be used with your car radio. - Page 10 ADJUSTING THE VOLUME Press the MENU button, 8. If a traffic announcement is received during a telephone call, or while the button, :, as Press the navigation system is providing speech often as is necessary for “AUTO output, the traffic announcement is not SOUND”...
-
Page 11: Radio Operation
RADIO OPERATION Radio Operation Switching REG on and off Press the MENU button, 8. This device is equipped with an RDS radio receiver. Many of the FM stations button, :, as Press the that can be received transmit a signal often as is necessary for “REG”... -
Page 12: Setting The Station
RADIO OPERATION Setting the Station Adjusting the Sensitivity of the Station Search There are a number of ways to set the station. You can choose whether to search only for stations with strong signals, or wheth- Automatic station search er weak stations should be included. button, :. -
Page 13: Saving A Station Automatically (Travelstore)
RADIO OPERATION Saving a Station Automatically Stop the SCAN, continue listening to a station (Travelstore) Press the OK button, ;. You can also save the six strongest sta- tions in the area automatically (FM only). The scanning process is stopped, and This is done in the FMT memory level. - Page 14 RADIO OPERATION PTY-EON Selecting the program type and starting the search When the program type has been se- button, :. lected and the search started, the de- Press the vice changes from the current station The current program type is shown on to one with the selected program type.
-
Page 15: Optimising Radio Reception
RADIO OPERATION button, :, in or- Optimising Radio Reception Press the der to switch SHARX on or off. Treble cut in the presence of “SHARX OFF” means that the function interference (HICUT) is not active, while “SHARX ON” means The HICUT function improves the sound that the automatic bandwidth selection when radio reception is poor (FM only). -
Page 16: Traffic Information
TRAFFIC INFORMATION Traffic Information Adjusting the Volume for Traffic Announcements This device is equipped with an RDS Press the MENU button, 8. EON receiver. EON means Enhanced Other Network. button, :, until Press the Whenever a traffic announcement (TA) “TA VOLUME” appears in the dis- is made, the radio switches automati- play. -
Page 17: Cassette Operation
CASSETTE OPERATION Cassette Operation Skipping Tracks (S-CPS) In order to change to a later track, Cassette Play button, :, one or press the If there is no cassette in the device more times. button, 9. press the “CPS FF” and the number of tracks to be skipped appear on the display. -
Page 18: Changing The Display
CASSETTE OPERATION The track that is currently being sam- Stopping the fast wind pled will continue to be played. Press the OK button, ;. Note: Play continues. The duration of the samples can be Note: adjusted. Refer to the section on While the tape is being fast wound, “Adjusting the Sample Time”... -
Page 19: Skipping Blank Tape
CASSETTE OPERATION Skipping Blank Tape Traffic Information with Cassette Operation You can automatically jump over regions of blank tape that are longer than 10 The “TRAFFIC” function, which gives seconds. This requires the blank skip priority to traffic announcements, ena- function to be activated. -
Page 20: Cd Changer Operation
CD CHANGER OPERATION number and CD name, press the CD Changer Operation / DIS button, 7, one or more Note: times for longer than two sec- The operating instructions for onds, until the desired display your CD changer will provide in- type appears. -
Page 21: Sampling All Tracks On All Cds (Scan)
CD CHANGER OPERATION Note: Continuing after the pause The CDC A 08 and the IDC A 09 , >, during the Press button 3 will make random selections from pause. all the CDs in the changer. All oth- Play continues. er changers will first play through all the tracks of one CD at random Naming CDs... -
Page 22: Clock - Time
CD CHANGER OPERATION CLOCK - TIME Deleting a CD name CLOCK - Time Listen to the CD whose name is to Briefly Displaying the Clock be deleted. Time Press the MENU button, 8. In order to display the time, press button, :, to se- Use the / DIS button, 7. - Page 23 CLOCK - TIME Setting the time manually Having the time displayed constantly when the device is In order to adjust the time, press the MENU button, 8. switched off but the ignition on button, :, as If you want the time to be dis- Press the played when the device is often as is necessary for...
-
Page 24: Tone And Volume Distribution
TONE AND VOLUME DISTRIBUTION Tone and Volume Adjusting the Left/Right Volume Balance Distribution In order to adjust the left/right vol- Separate adjustments of tone and vol- ume balance, press the AUD/LD ume distribution can be made for each button, =. audio source (radio, cassette, CD- changer, AUX and traffic announce- “BASS”... -
Page 25: Loudness
LOUDNESS EQUALIZER Switching the Loudness On Equalizer and Off This device has a parametric digital equalizer. In this case, parametric Loudness refers to boosting the bass means that in each of the five filters, and treble at low volume levels to one individual frequency can be em- match the ear's sensitivity. - Page 26 EQUALIZER Settings for these styles have already Switching the Equalizer On and been programmed. Press the DEQ button, <. To switch the equalizer on, hold down the DEQ button, <, until EQ button, :, as Press the is illuminated on the display and often as is necessary for “SOUND “EQ ON”...
- Page 27 EQUALIZER Adjusting the Level Indicator Selecting the spectrometer type Press the MENU button, 8. The level indicator, or spectrometer, on your display temporarily provides a sym- “MENU” appears in the display. bolic indication of the volume, the tone button, :, as often Press the control settings and the equalizer set- as is necessary for “EQ DISPLAY”...
-
Page 28: External Audio Sources
Blaupunkt navigation systems. The AUX input must be switched on in Your Blaupunkt dealer can tell you which the menu. navigation systems can be used with You need an adapter cable to connect your car radio. -
Page 29: Technical Data
If the statutory minimum guarantee pe- riod in your country is less than 12 Tuner months, Blaupunkt provide a 12 month Wavebands: manufacturer's guarantee. Damage VHF (FM) : 87.5 – 108 MHz caused by wear, incorrect use or use 531 –... - Page 30 026 130 04 41 026 130 05 14 800-266 25 28 708-681 71 88 Singapore 006 535 054 47 006 535 053 12 Slovensko 042 175 873 212 042 175 873 229 Blaupunkt GmbH 01/01 TRO K7/VKD 8 622 402 726...
Need help?
Do you have a question about the Palm Beach C51 and is the answer not in the manual?
Questions and answers