
Related Manuals for JUKI MP-200N Series


Summary of Contents for JUKI MP-200N Series
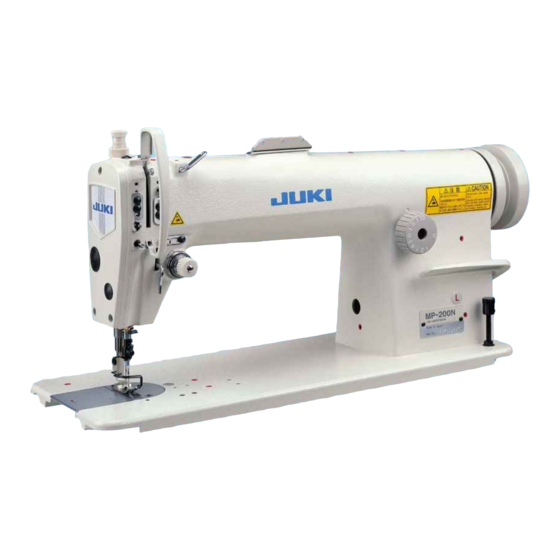
- Page 1 Special 2-needle Pin-point Saddle Stitch Machine MP-200N Series ENGINEER’S MANUAL 29337300 No.E332-01...
- Page 2 PREFACE This Engineer’s Manual is written for the technical personnel who are responsible for the service and maintenance of the machine. The Instruction Manual for these machines intended for the maintenance personnel and operators at an apparel factory contains operating instructions in detail. And this manual describes “Standard Adjustment”, “Adjustment Procedures”, “Results of Improper Adjustment”, and other important information which are not covered by the Instruction Manual.
-
Page 3: Table Of Contents
CONTENTS 1. SPECIFICATIONS ..................... 1 2. STITCHES OF PIN-POINT SADDLE STITCHING ..........2 3. CAUTIONS ON SEWING .................. 2 4. CORNER STITCHING ..................2 5. STANDARD ADJUSTMENT ................3 (1) Adjusting the position of the feed dog ................3 1) Adjusting the longitudinal position ......................3 2) Adjusting the lateral position ........................ -
Page 4: Specifications
1. SPECIFICATIONS (1) MP-200N SERIES Model name Specifications MP-200NS MP-200NL Item Machine type Pin-point saddle stitch For pin-point stitching of gents’ suits, For pin-point stitching for ladies’ suits, Application etc. (Light-weight to medium-weight etc. (Light-weight to medium-weight materials) materials) Max. 2,000 rpm Max. -
Page 5: Stitches Of Pin-Point Saddle Stitching
2. STITCHES OF PIN-POINT SADDLE STITCHING Pin-point saddle stitching is a stitching method that performs handsewn feeling with a single piece of thread. Imitation hand-stitch decorative stitching at low cost and with high productivity can be performed in the process where stitches of the wrong side such as decorative stitches of lapel on gents’ coat or the like do not appear. -
Page 6: Standard Adjustment
5. STANDARD ADJUSTMENT (1) Adjusting the position of the feed dog Standard Adjustment 1) Adjusting the longitudinal position A = B (equal) Adjust feed dog 2 so that it is longitudinally equal in terms of the groove for the feed dog of throat plate 6. - Page 7 Adjustment Procedures Results of Improper Adjustment 1) Adjusting the longitudinal position 1. Loosen two setscrews 2 in the feed dog, move feed dog 2 longitudinally (direction of the arrow mark), and adjust so that A is equal to B. 2. Set the stitch dial to the maximum 10 mm and check that throat plate 6 and feed dog 2 do not interfere with each other.
-
Page 8: Adjusting The Height Of The Feed Dog
(2) Adjusting the height of the feed dog Standard Adjustment Conditions : Stitch dial scale : “0” : Turn handwheel to bring needle bar to its upper dead point. ™ MP-200NS 0.4 to 0.5 mm ™ MP-200NL 0.6 to 0.7 mm (3) Adjusting the vertical movement of the feed Standard Adjustment... - Page 9 Adjustment Procedures Results of Improper Adjustment 1. Loosen setscrew 2 in feed driving fork end 1, move feed driving fork end 1 in the direction of rotation, and adjust the height of the feed dog. ™ MP-200NS : 0.4 to 0.5 mm ™...
-
Page 10: Feed Cam Timing
(4) Feed cam timing Standard Adjustment Bottom end of metal is aligned with 4th engraved marker line. 2 (Screw No. 2) 6 (Screw No. 1) Standard : 2 and 6 are almost aligned with each other. Top surface of feed dog is aligned with top surface of throat plate. - Page 11 Adjustment Procedures Results of Improper Adjustment 1. Adjust the timing of feed rock triangle cam 1 to the position where the feed dog does not move even moving the reverse feed lever up or down when the 4th engraved marker line (lowest marker line) is aligned with the bottom end of the metal when the needle bar comes down.
-
Page 12: Height Of The Needle Bar
(5) Height of the needle bar Standard Adjustment 1st engraved marker line 3rd engraved marker line 2nd engraved marker line ™MP-200NS ™MP-200NL To be parallel To be parallel (6) Looper crank timing Standard Adjustment The timing of looper crank 1 located at the top end of the hook driving shaft should be fixed at the position where setscrew No. - Page 13 Adjustment Procedures Results of Improper Adjustment 1. Height of needle bar 3 is adjusted to the position where the 1st engraved marker line located at the top on needle bar 3 has come to the bottom end of needle bar lower metal 2 when the needle bar is in its lower dead point.
-
Page 14: Position Of The Loop Guide
(7) Position of the loop guide Standard Adjustment ™MP-200NL ™MP-200NS Slight contact 0 to 0.05mm 0 to 0.05mm (Caution) Figures above are those as observed from the underside of machine bed. (8) Adjusting the needle and the looper Standard Adjustment ™MP-200NS ™MP-200NL NS : 2mm... - Page 15 Adjustment Procedures Results of Improper Adjustment 1. Loosen setscrews 9 in the loop guide and adjust loop guide ™ If the clearance is excessively 8 to the position on the just side of sewing needle 5. large, stitch skipping will occur, ™...
-
Page 16: Adjusting The Stroke Of The Spreader
(9) Adjusting the stroke of the spreader Standard Adjustment Fulcrum position of spreader arm 1 can change the stroke of spreader 3 by changing the position of hexagon nut 2. The standard position is the center of slot. (10) Adjusting the needle and the spreader Standard Adjustment Most advanced position of spreader 0 to 0.05 mm... - Page 17 Adjustment Procedures Results of Improper Adjustment 1. Fulcrum shaft can be moved by loosening hexagon nut 2. ™ If the stroke is excessively large, ™ Lower the position downward to increase the stroke of the the spreader arm will come in spreader, or lift it to upward to decrease the stroke.
-
Page 18: Timing Of Relationship Among The Needle, Looper And Spreader
(11) Timing of relationship among the needle, looper and spreader Standard Adjustment 1. Perform the adjustment while carefully confirming whether components come in contact with one another. 2. Sew by turning by hand the actual sewing product with the thread actually used, and confirm the result to adjust. - Page 19 Adjustment Procedures Results of Improper Adjustment Stretch thread between section A of spreader 1 and section B ™ Stitch skipping will occur when of the looper, and hook thread on hook needle 2. Turn by hand the loop at the needle top is large the sewing machine to perform two to three stitches, and confirm or small.
-
Page 20: Adjusting The Backlash Of The Spreader Gear
(13) Adjusting the backlash of the spreader gear Standard Adjustment A backlash of approximately 1˚ between hook driving shaft gear 3 and spreader gaer 2 should be kept. (14) Adjuting the height of the spreader Standard Adjustment Height of spreader 3 can be adjusted by turning spreader eccentric shaft 2. Standard : Slot is almost level. - Page 21 Adjustment Procedures Results of Improper Adjustment 1. Loosen setscrews 1 in the spreader crank shaft case and ™ If the backlash is small, main move the case to adjust the backlash. Move the case near the shaft torque will increase. hook driving shaft to decrease the backlash and move it away ™...
-
Page 22: Position Of The Looper Link Eccentric Pin
(15) Position of the looper link eccentric pin Standard Adjustment Position of looper link eccentric pin 2 is adjusted to the maximum stroke of the looper (stroke is large) at the time of delivery from the factory. (16) Adjusting the thread take-up thread guide Standard Adjustment ™MP-200NS Screws No. - Page 23 Adjustment Procedures Results of Improper Adjustment 1. Loosen screw 1 and turn looper link eccentric pin 2 to change ™ If the looper stroke is excessively the stroke of the looper. small, return of the looper is 2. The stroke is increased when the pin is near the shaft center retarded and defective stitching of looper link 3, and the stroke is decreased when the pin is will occur.
-
Page 24: Adjustment To Adapt To The Overlapped Section Of The Heavy-Weight Materials
(17) Adjustment to adapt to the overlapped section of the heavy-weight materials Standard Adjustment 3 (Spring is hooked to this pin.) B o t t o m e n d o f metal is aligned with 4th engraved marker line. Adjust the timing of feed rock triangle cam 4 to the position where the feed dog does not move even moving the lever up or down when the 4th engraved marker... - Page 25 Adjustment Procedures Results of Improper Adjustment 1. Loosen eight setscrews 2 in window plate 1 located on the rear side and remove window plate 1. (Caution) After the adjustment, hook the knee lifter link arm spring on knee lifter link arm spring hook shaft 3 (installed inside) of window plate 1 and install window plate 1.
-
Page 26: Replacing The Needle Bar Crank (Optional Component)
(18) Replacing the needle bar crank (optional component) Disassembling/assembling procedure... - Page 27 Disassembling/assembling procedure 1. Loosen and remove three setscrews 1 in the face plate. 2. Bring the needle bar to its upper dead point, loosen and remove needle clamp screw 2. Then loosen and remove the needle clamp bracket (with the needle clamp bracket hook in case of needle gauge of 3 mm or more).
-
Page 28: Motor Pulley And V Belt
6. MOTOR PULLEY AND V BELT Model No. of revolutions Effective diameter of No. of poles Frequency No. of revolutions Effective diameter V belt of sewing machine handwheel of motor of motor of motor pulley size MP-200NS 2,000 rpm 50Hz 1,430 rpm 90 mm 60Hz... - Page 29 3) Gauge replacement parts list MP-200N Remarks Standard parts for S and L types (without set setting) Basic type before changing needle gauge S type (1.6 mm standard) L type (5.0 mm standard) Parts which are necessary to purchase when Needle gauge to be changed (mm) size is changed (included in set).
-
Page 30: Troubles And Corrective Measures
8. TROUBLES AND CORRECTIVE MEASURES Corresponding Troubles Causes Corrective measures page Thread breakage Thread path, looper point or Polish the scratch using a fine emery Thread hangnail spreader point has a scratch. paper or the like. Replace the parts with new ones. Looper, spreader, bottom surface Readjust the timing or the clearance. - Page 31 Corresponding Troubles Causes Corrective measures page T h r e a d t e n s i o n Loop on the right side of cloth is Increase the thread tension. defect too large. Move to upside the thread take-up thread P.
-
Page 33: Drawing Of The Table
Thickness : 1.5 (on the reverse side) (Install at the time of set-up.) (Drill a hole at the time of set-up.) 2 JUKI logotype 7 ø18 drilled hole 3 4-ø3.4 on the bottom surface depth 10 8 3-ø3.5 depth 4 Installing hole for thread winder 9 2-ø3.5 depth 4... - Page 34 FAX : (81)3-3430-4909 • 4914 • 4984 The description covered in this engineer's manual is subject to change for improvement of the TELEX : J22967 commodity without notice. Copyright c 2003 JUKI CORPORATION. All rights reserved throughout the world. 03 · 03 Printed in Japan (E)
Need help?
Do you have a question about the MP-200N Series and is the answer not in the manual?
Questions and answers