Table of Contents

Subscribe to Our Youtube Channel
Related Manuals for Danfoss 3020P


Summary of Contents for Danfoss 3020P
- Page 1 3020P electro-mechanical 24 hour timeswitch with auxiliary heating switch Installation & User Instructions This product complies with the following EC Directives: Electro-Magnetic Compatibility Directive. (EMC) (2004/108/EC) Low Voltage Directive. (LVD) (2006/95/EC)
-
Page 2: Table Of Contents
Index Installation Product specification Installation Wiring User Your timeswitch Programming the unit Setting the clock Using the timeswitch Contact details... -
Page 3: Product Specification
Installation Instructions Please Note: This product should only be installed by a qualified electrician or competent heating installer, and should be in accordance with the current edition of the IEEE wiring regulations. Product specification Specification Power supply 230 ± 15% Vac, 50/60Hz Switch action 1 x SPST, type 1B Switch rating Max 264 Vac, 50/60Hz, 3(1) A Timing accuracy... -
Page 4: Installation
Installation 1. Unscrew fixings rings from selector switches, move all four tappets to top of dial and remove outer case. 2. Slacken the two screws securing the plug-in module to backplate and separate module from backplate by pulling upwards. 3. Fix backplate to wall (3 hole fixing). 4. Referring to wiring diagrams on pages 5 and 6 make electrical connections as shown (as applicable). 5. Secure cables under cable clamp. 6. Ensure all dust and debris has been cleared away from the area then plug in timeswitch module and re- tighten the 2 retaining screws - do not overtighten. 7. Remove cut out from bottom of outer case as required. Refit outer case and selector switch fixing rings. Check that outer case sits squarely on body and is not distorted by an uneven wall surface. 8. Rotate dial clockwise through at least one complete revolution and check that all four tappets are clear of outer case aperture. 9. Switch on mains, turn main selector switch to ‘ON’ and light boiler according to manufacturer’s instructions. Operate Heating Switch to check pump/fan. 10. Turn main selector switch to ‘TIMED’ and rotate dial clockwise manually through at least one complete revolution to check that each tappet strikes the index wheel cleanly and operates the boiler/pump correctly according to the times set on the dial. -
Page 5: Wiring
Wiring Terminals 3 and 5 are not internally connected to the programmer and may therefore be used as spare wiring terminals if required. - Page 6 Danfoss ATC Cylinder Stat Randall RMT230 Room Stat 2 core + 3 core 3 core 2 core Danfoss Randall WB12 12-way junction box Flying lead Flying 3 or 4 core lead Danfoss Randall Danfoss Randall HP22 or HP28 HP22 or HP28...
-
Page 7: User Instructions
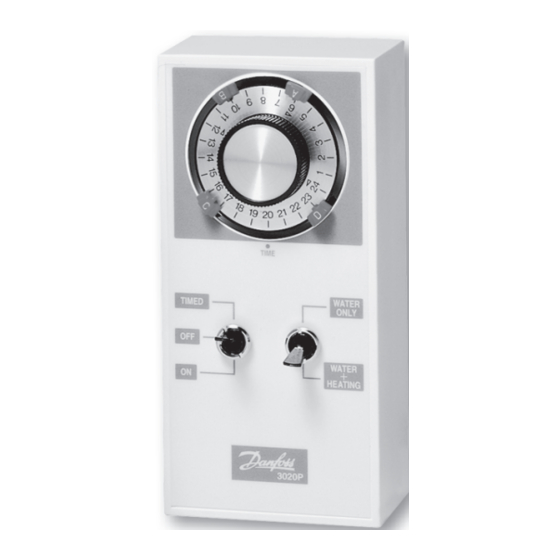
User Instructions Your timeswitch The 3020P timeswitch allows you to switch your hot water and heating on and off at times that suit you. Four tappets on the timing dial let you decide when you want your hot water and heating to come on and go off each day. The timeswitch provides 2 ON times and 2 OFF times per day. Using two simple switches you can run the system at the set times, constantly ON or constantly OFF. During the summer the central heating can be turned off, whilst still controlling the hot water at the set times. Programming the unit There are four TAPPETS on your timing dial, two red and two blue: o the red tappets are the ON switches o the blue tappets are the OFF switches 1. Hold the central black & silver knob with one hand and move the red tappet marked ‘A’ clockwise to the time you want your HEATING/HOT WATER to switch on in the morning. NB. you may find the tappets quite stiff, so you may have to push them quite firmly to move them. -
Page 8: Setting The Clock
Still holding the central knob, move the blue tappet marked ‘B’ to the time you want your HEATING/HOT WATER to switch off in the morning. You can set your other two tappets in the same w ay to set your HEATING/HOT WATER for the afternoon or evening. EXAMPLE (NB. Clock is in 24 hour mode) If you want your heating and hot water ON between 7am and 10am and ON again between 5pm and 11pm, set tappets as follows: A at 1st ON time = 7 B at 1st OFF time = 10 C at 2nd ON time = 17 D at 2nd OFF time = 23 Setting the Clock o Turn the dial clockwise until the correct time is lined up with the dot labelled TIME NB. clock is in 24 hour mode REMEMBER You will have to reset the time after a power... -
Page 9: Using The Timeswitch
Using the Timeswitch The 2 switches are used to select how the 3020P controls your hot water and heating. The heating and hot water can be operated together or the water can be controlled on its own (i.e. during the summer when only hot water is required). -
Page 12: Contact Details
Email our technical department: ukheating.technical@danfoss.com Call our technical department 0845 121 7505 (8.45-5.00 Mon-Thurs, 8.45-4.30 Fri) For a large print version of these instructions please contact the Marketing Services Department on 0845 121 7400. Danfoss Ltd Ampthill Road Bedford MK42 9ER Tel: 01234 364621 Fax: 01234 219705 Part No. 7487v03 06/08...
Need help?
Do you have a question about the 3020P and is the answer not in the manual?
Questions and answers