Table of Contents
Advertisement
INSTALLATION
INSTRUCTION
CONTENTS
GENERAL . . . . . . . . . . . . . . . . . . . . . . . . . . . . . . . . . . . . . . . . . . . 2
. . . . . . . . . . . . . . . . . . . . . . . . . . . . . . . . . . . . . . 2
. . . . . . . . . . . . . . . . . . . . . . . . . . . . . . . . . . 2
. . . . . . . . . . . . . . . . . . . . . . . . . . . . . . . . . 2
. . . . . . . . . . . . . . . . . . . . . . . . . . . . . . . . . . 2
V
. . . . . . . . . . . . . . . . . . . . . . . . . . . . . . . . . . . . . . 2
SAFETY . . . . . . . . . . . . . . . . . . . . . . . . . . . . . . . . . . . . . . . . . . . . . 2
INSPECTION . . . . . . . . . . . . . . . . . . . . . . . . . . . . . . . . . . . . . . . . . 2
LIMITATIONS . . . . . . . . . . . . . . . . . . . . . . . . . . . . . . . . . . . . . . . . . 2
UNIT INSTALLATION . . . . . . . . . . . . . . . . . . . . . . . . . . . . . . . . . . 3
LOCATION . . . . . . . . . . . . . . . . . . . . . . . . . . . . . . . . . . . . . . . . . 3
GROUND INSTALLATION . . . . . . . . . . . . . . . . . . . . . . . . . . . . . 3
ROOF INSTALLATION . . . . . . . . . . . . . . . . . . . . . . . . . . . . . . . . 3
UNIT PLACEMENT . . . . . . . . . . . . . . . . . . . . . . . . . . . . . . . . . . . 3
DISCHARGE LINE FILTER-DRIER . . . . . . . . . . . . . . . . . . . . . . 4
PIPING CONNECTIONS . . . . . . . . . . . . . . . . . . . . . . . . . . . . . . 4
PRECAUTIONS DURING LINE INSTALLATION . . . . . . . . . . . . 4
PRECAUTIONS DURING BRAZING OF LINES . . . . . . . . . . . . 5
PRECAUTIONS DURING BRAZING ANGLE VALVE . . . . . . . . 5
ORIFICE SELECTION . . . . . . . . . . . . . . . . . . . . . . . . . . . . . . . . . . 7
ELECTRICAL CONNECTIONS . . . . . . . . . . . . . . . . . . . . . . . . . . . 7
GENERAL INFORMATION & GROUNDING . . . . . . . . . . . . . . . 7
POWER WIRING . . . . . . . . . . . . . . . . . . . . . . . . . . . . . . . . . . . . 7
ACCESSORY WIRING . . . . . . . . . . . . . . . . . . . . . . . . . . . . . . . . 7
THERMOSTAT MOUNTING / WIRING . . . . . . . . . . . . . . . . . . . 7
EVACUATION . . . . . . . . . . . . . . . . . . . . . . . . . . . . . . . . . . . . . . . . 9
SYSTEM CHARGE . . . . . . . . . . . . . . . . . . . . . . . . . . . . . . . . . . . . 9
REFRIGERANT LINE CHARGES . . . . . . . . . . . . . . . . . . . . . . . . . 9
. . . . . . . . . . . . . . . . . . . . . . . . . . . . . . . . 9
SYSTEM START-UP . . . . . . . . . . . . . . . . . . . . . . . . . . . . . . . . . . 10
ENERGIZE CRANKCASE HEATER . . . . . . . . . . . . . . . . . . . . . 10
SYSTEM OPERATION. . . . . . . . . . . . . . . . . . . . . . . . . . . . . . . . . 10
SEQUENCE OF OPERATION COOLING: . . . . . . . . . . . . . . . . . 10
HEATING: . . . . . . . . . . . . . . . . . . . . . . . . . . . . . . . . . . . . . . . . . 10
EMERGENCY HEAT: . . . . . . . . . . . . . . . . . . . . . . . . . . . . . . . . 11
DEFROST: . . . . . . . . . . . . . . . . . . . . . . . . . . . . . . . . . . . . . . . . 11
TEST PIN: . . . . . . . . . . . . . . . . . . . . . . . . . . . . . . . . . . . . . . . . . 11
INSTRUCTING THE OWNER . . . . . . . . . . . . . . . . . . . . . . . . . . . 12
INDICATIONS OF PROPER OPERATION . . . . . . . . . . . . . . . . . 12
COOLING . . . . . . . . . . . . . . . . . . . . . . . . . . . . . . . . . . . . . . . . . 12
HEATING . . . . . . . . . . . . . . . . . . . . . . . . . . . . . . . . . . . . . . . . . 13
MAINTENANCE . . . . . . . . . . . . . . . . . . . . . . . . . . . . . . . . . . . . 13
CAUTION:READ ALL SAFETY GUIDES BEFORE
YOU BEGIN TO INSTALL YOUR UNIT.
SAVE THIS MANUAL
. . . . . . . . . . . . . . . . . . . . . . . . . . . . 2
. . . . . . . . . . . . . . . . . . . . . . . . 2
. . . . . . . . . . . . . . . . . . . . . . . . . 10
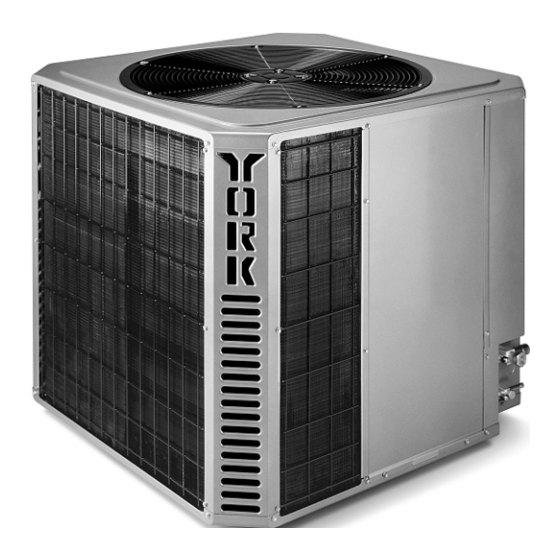
STELLAR
OUTDOOR
SPLIT-SYSTEM HEAT PUMP
MODELS:
10 SEER
1 PH 208/230 V
3 PH 208/230 V
3 PH 460 V
E4FD018 - 60
E4FD036 - 60
E4FD036 - 60
035-17421-000 REV B (700)
Advertisement
Table of Contents

Related Manuals for York E4FD018-60


Summary of Contents for York E4FD018-60
-
Page 1: Table Of Contents
INSTALLATION INSTRUCTION STELLAR OUTDOOR SPLIT-SYSTEM HEAT PUMP CONTENTS GENERAL ......... . . 2 . -
Page 2: General
® GENERAL The outdoor units are designed to be connected to a match- ing indoor coil with sweat connect lines. Sweat connect units are factory charged with refrigerant for a matching indoor coil This product must be installed in strict compliance plus 15 feet of field supplied lines. -
Page 3: Unit Installation
® 035-17421-000 Rev B (700) WEATHERPROOF THERMOSTAT BLOWER DISCONNECT 48” OVERHEAD MOTOR SWITCH CLEARANCE TO POWER 12” REAR RELAY REQUIRED SUPPLY AND SIDES CLEARANCE NEC CLASS 1 REQUIRED WIRING Sit unit on rubber NEC CLASS 2 elevator WIRING grommets to reduce COIL noise and allow for... -
Page 4: Discharge Line Filter-Drier
® Remove the shipping carton and inspect for possible damage. Compressor tie-down bolts should remain tightened. Position the unit on the base provided. Failure to do so or using a substitute drier or a granular type may result in damage to the equipment. Sit unit on the (4) rubber elevating grommets provided with the unit. -
Page 5: Precautions During Brazing Of Lines
® 035-17421-000 Rev B (700) Total line lengths are limited to 75 feet due to the storage capacity of the accumulator. Systems with total line lengths over 50 feet must be provided with a low voltage start kit. Elevation differences are limited to: Dry nitrogen should always be supplied through the Indoor Above Outdoor 50 ft. - Page 6 ® Evacuate the vapor line, evaporator and the liquid line, to 500 microns or less. Leak test all refrigerant piping connections including the service port flare caps to be sure they are leak tight. DO NOT OVERTIGHTEN (between 40 and 60 inch - lbs. maximum).
-
Page 7: Orifice Selection
® 035-17421-000 Rev B (700) ORIFICE SELECTION POWER WIRING Install the proper size weatherproof disconnect switch YORKMATE FLOW CONTROL COILS outdoors and within sight of the unit. NOTE: The proper orifice must be installed in the indoor coil liq- uid connection prior to the connection of the refrigerant Run power wiring from the disconnect switch to the unit. -
Page 8: Indoor Unit
® ALL WIRING TO BE IN ACCORDANCE WITH NATIONAL ELECTRIC CODE AND/OR LOCAL CODES THERMOSTAT INDOOR UNIT OUTDOOR UNIT LOW VOLTAGE TERMINAL BLOCK DEFROST IN AIR HANDLER WITH ELECTRIC HEAT CONTROL 7 WIRES B or C GRD. SCREW CONTACTOR L or X FIELD INSTALLED JUMPER... -
Page 9: Evacuation
® 035-17421-000 Rev B (700) After the thermostat is mounted, route the 24-volt control wir- REFRIGERANT LINE CHARGES ing (NEC Class 2) from the thermostat to the indoor air han- The outdoor condensing unit may be connected to the indoor dler and outdoor unit. -
Page 10: Superheat Charging Method
® Superheat Charging Method door coil which is the condenser. The indoor coil is the evaporator. NOTE: Use this method only during system maintenance and repair. If fan switch is in “ON” position, a circuit is made through blower relay to provide continuous blower operation. Operate system until temperatures and pressures stabi- When thermostat cooling contact closes, a circuit is lize (minimum of 10 minutes). -
Page 11: Emergency Heat
® 035-17421-000 Rev B (700) FIELD CONNECTED LINE INDOOR COIL OUTDOOR COIL 4-WAY REVERSING VALVE* F I L T E R D R Y E R ( s o l i d c o r e ) . SUCTION COMPRESSOR ACCUMULATOR... -
Page 12: Instructing The Owner
® RUN TIME TEST RUN TIME Time Selection Test Pin W1/66 PRESSURE DEST SWITCH T’STAT VALVE Reversing Pressure Contactor Defrost Valve Switch Thermostat Coil FIGURE 10 : TIME / TEMPERATURE DEFROST BOARD below approximately 31F. If the room thermostat opens dur- terminals must be held for at least 10 seconds). -
Page 13: Heating
® 035-17421-000 Rev B (700) tioning unit. The indoor coil drain pan should be inspected and cleaned regularly to prevent odors and assure proper The outdoor fan should be running, with warm air being drainage. discharged from the top of the unit. The indoor blower (furnace or air handler) will be operat- ing, discharging cool air from the ducts. - Page 14 ® Table 3: - Superheat Value °F I N D O O R O U T D O O R W B °F Evaporator Entering Air °F Table 4: Temperature and Pressure SUCTION PRES- SUCTION SERVICE VALVE SUPERHEAT SURE PSIG (Service Port) 61.5 64.2...
- Page 15 ® 035-17421-000 Rev B (700) Table 5: Freon 22 Saturation Properties TEMP PRESSURE TEMP PRESSURE TEMP PRESSURE TEMP PRESSURE TEMP PRESSURE °F °F °F °F °F PSIG PSIG PSIG PSIG PSIG 76.023 101.62 132.22 168.40 210.75 77.584 103.49 134.45 171.02 213.81 79.165 105.39...
- Page 16 H e a t i n g a n d A i r C o n d i t i o n i n g Unitary Products Group 5005 York Drive, Norman, Oklahoma 73069 Subject to change without notice. Printed in U.S.A.
Need help?
Do you have a question about the E4FD018-60 and is the answer not in the manual?
Questions and answers