Table of Contents
Advertisement
Quick Links
Installation and Operation Instructions
Ultra-High Efficiency Commercial Water Heaters
PLACE THESE INSTRUCTIONS ADJACENT TO HEATER AND NOTIFY OWNER TO KEEP FOR FUTURE REFERENCE
®
LAARS
U.H.E.
-
- WHAT TO DO IF YOU SMELL GAS
-
TM
WARNING: If the information in
these instructions is not followed
exactly, a fire or explosion may
result causing property damage,
personal injury or death
Do not store or use gasoline or other
flammable vapors and liquids in the
vicinity of this or any other appliance
• Do not try to light any appliance.
• Do not touch any electrical switch; do
not use any phone in your building.
• Immediately call your gas supplier
from a neighbor's phone. Follow the
gas supplier's instructions.
• If you cannot reach your gas supplier,
call the fire department.
Installation and service must be
performed by a qualified installer, service
agency or gas supplier
Document 11036
Advertisement
Table of Contents

Related Manuals for Laars U.H.E


Summary of Contents for Laars U.H.E
- Page 1 Installation and Operation Instructions Document 11036 ® LAARS U.H.E. Ultra-High Efficiency Commercial Water Heaters WARNING: If the information in these instructions is not followed exactly, a fire or explosion may result causing property damage, personal injury or death Do not store or use gasoline or other...
-
Page 2: Table Of Contents
SECTION I: IMPORTANT INFORMATION READ CAREFULLY This gas-fired water heater is design certified by CSA International under the American National Standard, Z21.10.3 (as indicated on the rating plate) and CAN/CGA 4.3-M (as indicated on the rating plate) available from CSA Standards Association, 178 Rexdale Blvd., Etobicoke, Ontario, Canada M9W 1R3. - Page 3 DANGER DO NOT store or use gasoline or other flammable, combustible, or corrosive vapors and/or liquids in the vicinity of this or any other appliance. DO NOT install any damaged venting system components. If damage is evident then please contact the supplier where the water heater was purchased or the manufacturer listed on the rating plate for replacement parts.
- Page 4 WARNING This water heater needs fresh air for safe operation and must be installed so there are provisions for adequate combustion and ventilation air. Insufficient air supply will cause a recirculation of combustion products resulting in contamination that may be hazardous to life. This will result in carboning or sooting of the combustion chamber, burners, and flue tubes and creates a risk of asphyxiation.
-
Page 5: Specifications
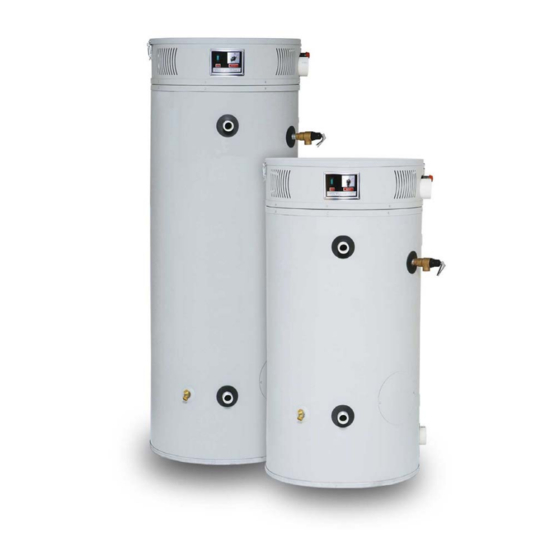
SECTION II: SPECIFICATIONS Figure 1. Dimensional Layout Recovery GPH DIMENSIONS ( INCHES ) At Degree Rise 1st Hr. Del. Storage Gal. Stg. Flr to Flr to Fl. to Front Space Volume Input Cap. Therm. Flr to Inlet T&P Outlet Fl. to Wtr. -
Page 6: General Information
SECTION III: GENERAL INFORMATION FEATURES This water heater contains the following features: MAIN POWER ON/OFF SWITCH – The front panel of this water heater has a lighted ON/OFF switch, which is illuminated when the main power is turned on to indicate power to the water heater. COMBUSTION SYSTEM –This water heater is equipped with a self-compensating negative pressure pre-mix combustion system. - Page 7 TEMPERATURE AND PRESSURE RELIEF VALVE – WARNING Keep clear of the combination temperature and pressure relief valve discharge line outlet. The discharge may be hot enough to cause scald injury. The water is under pressure and may splash. For protection against excessive temperatures and pressure, install temperature and pressure protective equipment required by local codes, but not less than a combination temperature and pressure relief valve certified by a nationally recognized testing laboratory that maintains periodic inspection of production of listed equipment or materials as meeting the requirements of the Standard for Relief...
-
Page 8: Dishwashing Machine Requirements
Figure 2. Condensate Elbow With Trap CLEANOUT – All models are equipped with a cleanout opening to aid in removal of hard water deposits from the tank bottom. If this water heater operates under hard water conditions, the following should be performed at least every 3 months: Turn off water supply and drain the water heater. -
Page 9: Installation Instructions
SECTION IV: INSTALLATION INSTRUCTIONS WARNING INSTALLATION OF THIS WATER HEATER REQUIRES ABILITY EQUIVALENT TO THAT OF A LICENSED TRADESMAN IN THE FIELD INVOLVED. PLUMBING, AIR SUPPLY, VENTING, GAS SUPPLY AND ELECTRICAL WORK ARE REQUIRED. DO NOT ATTEMPT TO LIGHT ANY GAS APPLIANCE IF YOU ARE NOT CERTAIN OF THE FOLLOWING: •... - Page 10 UNPACKING INSPECT SHIPMENT carefully for any signs of damage. All equipment is carefully manufactured, inspected and packed. Any claims for damage or shortage in shipment must be filed immediately with manufacturer and noted on the Bill of Lading. Remove all venting components from the combustion assembly compartment by removing the latches. NOTICE The vent terminals and the condensate elbow that is supplied with this water heater are stored at the top in the Combustion Assembly Compartment.
- Page 11 Figure 3b. Recommended Minimum Clearances For Service Access REMOVE CRATE Remove all banding and pry off crate sides carefully so as not to damage the water heater. Carefully roll/lift the water heater from the crate base. CAUTION Do not drop water heater. Do not bump water heater jacket against floor. Do not bump exhaust vent pipe against crate or other objects.
- Page 12 DANGER Temperature setting should not exceed safe temperature at fixtures. See water temperature control warning on page 16. If higher preheat temperatures are necessary to obtain adequate booster output, add an anti-scald valve for hot water supplied to fixtures. LOCATION KEEP APPLIANCE AREA CLEAR AND FREE OF COMBUSTIBLE MATERIALS, GASOLINE AND OTHER FLAMMABLE VAPORS AND LIQUIDS.
- Page 13 If the water heater is installed as a direct vent (outside air piped directly to the water heater), then additional opening, other than the opening for the air intake, are not required. However, adequate ventilation air must be provided in all cases to prevent increased room temperature. CHEMICAL VAPOR CORROSION Corrosion of the flue ways and vent system will occur if air for combustion contains certain chemical vapors.
- Page 14 Figure 6. Typical Two Water Heater Connection Figure 7. Typical Three Water Heater Connection Figure 8. Typical Four Water Heater Connection...
-
Page 15: Water Connections
SECTION V: WATER CONNECTIONS WARNING Failure to install and maintain a new, listed temperature and pressure relief valve will release the manufacturer from any claim, which might result from excessive temperature and pressures. Hydrogen gas can be produced in an operating water heater that has not had water drawn from the tank for a long period of time (generally two weeks or more). - Page 16 The following chart details the relationship of water temperature and time with regard to scald injury and may be used as a guide in determining the safest water temperature for your applications. Approximate Time/Temperature Scald Chart APPROXIMATE TIME/TEMPERATURE RELATIONSHIPS IN SCALDS 120°F More than 5 minutes 125°F...
-
Page 17: Venting
Figure 11. Typical Plumbing Schematic for Zoned Heating SECTION VI: VENTING WARNING The vent system must be properly installed. Failure to properly install the vent system could result in property damage, personal injury, or death. DO NOT install damaged venting system components. If damage is evident then please contact the supplier where the water heater was purchased or the manufacturer listed on the rating plate for replacement parts. - Page 18 CAUTION Check to make sure flue gases do not recirculate into the air intake terminal when using direct venting. If the water heater is having service issues, flue recirculation may be a contributing factor. Even when the minimum vent terminal separation distances are followed, recirculation may still occur depending upon the location outside the building, the distance from other buildings, proximity to corners, weather conditions, wind patterns, and snow depth.
- Page 19 Figure 12a. Vent Terminal Clearances (Other than Direct Vent or “Power Vented” Installations) Canadian US Installations Canadian US Installations Installations Installations Clearance above 12 inches 12 inches Clearance to each side 3 feet (91 cm) within a grade, veranda, (30 cm) (30 cm) of center line extended height 15 feet (4.6 m)
- Page 20 Figure 12b. Direct Vent Terminal Clearances Canadian Canadian US Installations Installations Installations Installations Clearance above grade, 12 inches (30 12 inches Clearance to each side 3 feet (91 cm) within a veranda, porch, deck or (30 cm) of center line extended height 15 feet (4.6 m) balcony above meter/regulator...
- Page 21 The vent system must terminate so that proper clearances are maintained as cited in local codes or the latest edition of the National Fuel Gas Code, ANSI Z223.1.73.4e and 7.8a, b as follows: Do not terminate near soffit vents or crawl space or other area where condensate or vapor could create a nuisance or hazard or cause property damage.
- Page 22 2. Use the proper PVC cement to secure the 90° exhaust vent and air intake terminals provided with the water heater to the plastic pipes. The distance between the back edge of the 90° exhaust vent terminal and the exterior wall (see Figure 13) must be 6 inches (12.7 cm) more for the exhaust vent terminal than the air intake terminal.
- Page 23 Figure 14. Typical Vertical Direct Vent System Installation Through The Wall Venting With Low Ground Clearance: When venting cannot exit through the wall at a height greater than or equal to 12” (30.5 cm) (and above expected snow level) from the ground, then the installation must be modified as shown below (see Figure 15). Figure 15.
- Page 24 Maximum Vent Length: Direct Vent Maximum Vent Length (Combined Maximum Length for Intake and Exhaust) Storage Capacity Rated Input Max Vent Length (feet) Max Vent Length (feet) (Gallons) (BTU/HR) 3" PVC, CPVC, or ABS 4" PVC, CPVC, or ABS 125,000 150,000 199,000 150,000...
- Page 25 NOTICE This unit can be vented using only PVC (Class 160, ASTM D-2241 Schedule 40, ASTM D-1785; or Cellular Core Schedule 40 DWV, ASTM F-891), Schedule 40 CPVC (ASTM F-411), or ABS (ASTM D-2661) pipe. The fittings, other than the TERMINATIONS should be equivalent to PVC- DWV fittings meeting ASTM F-2665.
- Page 26 Figure 16. Typical Horizontal Power Vent System Vertical Installation: Vertical venting must be supported every 5 feet of vertical run and every 3 feet of horizontal run of vent pipe length. Stress levels in the pipe and fittings can be significantly increased by improper installation. If rigid pipe clamps are used to hold the pipe in place, or if the pipe cannot move freely through a wall penetration, the pipe may be directly stressed, or high thermal stresses may be formed when the pipe heats up and expands.
- Page 27 Follow the following procedure to vent through the roof: 1. Cut the necessary holes through the roof and ceiling 2. Install the exhaust vent and air intake plastic pipes as shown in Figure 17. Make sure that the installation meets the local codes and/or The National Fuel Gas Code ANSI Z223.1 (Latest Edition) or CGA/CAN B149 Installation Code.
- Page 28 Figure 18. Vent Terminal (Low Ground Clearance) Maximum Vent Length Determination Power Vent Maximum Vent Length Storage Capacity Rated Input Max Vent Length (feet) Max Vent Length (feet) (Gallons) (BTU/HR) 3" PVC, CPVC, or ABS 4" PVC, CPVC, or ABS 125,000 150,000 199,999...
- Page 29 MULTIPLE INTAKE/EXHAUST TERMINAL SEPARATION DISTANCES Note: When installing multiple intake/exhaust terminals on the same wall of a building, the nearest intake terminal must be at least 5 feet from the nearest exhaust terminal.
- Page 30 CONCENTRIC VENT TERMINAL INSTALLATION PROCEDURE WARNING Improper installation, adjustment, service, or maintenance can cause property damage, personal injury, or death. Consult a qualified installer, service agency, or the gas supplier for information or assistance. This kit must be used only for terminating this water heater. Do not use this termination kit for any other appliance. Using this kit on other appliances and/or water heaters can result in property damage, personal injury, or death.
- Page 31 Figure 21. Rain Cap to Small Vent Pipe Ass’y 5. Install concentric Y fitting and pipe assembly through the structure’s hole and field-supplied roof boot/flashing. Do not allow insulation or other materials to accumulate inside pipe assembly when installing through the hole. 6.
-
Page 32: Vent Pipe Preparation
NOTICE Position termination where vent vapors will not damage plants/shrubs or air conditioning equipment. Position termination where vent vapors will not be adversely affected by wind condition. Position termination where it will not be damaged or be subjected to foreign objects. Position termination where vapors will not be objectionable. -
Page 33: Gas Connections
INITIAL PREPARATION Make sure the solvent cement you are planning to use is designed for the specific application you are attempting. Know the physical and chemical characteristics and limitations of the PVC, PVC cellular core, ABS or CPVC piping materials that you are about to use. Know the reputation of your pipe and cement manufacturer and their products. - Page 34 CAUTION The water heater and individual shutoff valve must be disconnected from the gas supply piping system during any pressure testing of the system at test pressures in excess of ½ psi (3.5 kPa). The water heater must be isolated from the gas supply piping system by closing its manual shutoff valve during any pressure testing of the gas supply system at test pressures equal to or less than ½...
-
Page 35: Electrical Connections
SECTION VIII: ELECTRICAL CONNECTIONS WARNING Turn off or disconnect the electrical power supply to the water heater before servicing. Label all wires prior to disconnection when servicing controls. Wiring errors can cause improper and dangerous operation. Verify proper operation after servicing. All electrical wiring must be installed and grounded in accordance with local codes, or in the absence of local codes, the National Electrical Code, ANSI/NFPA 70 and/or CSA C22.2 Electrical Code. -
Page 36: Operating Instructions
SECTION IX: OPERATING INSTRUCTIONS WARNING Water heaters are heat-producing appliances. To avoid damage or injury there must be no materials stored against the water heater or direct vent system, and proper care must be taken to avoid unnecessary contact (especially by children) with the water heater and direct vent system. - Page 37 LIGHTING INSTRUCTIONS Figure 26. Lighting Instruction Label TEMPERATURE ADJUSTMENT The temperature selector knob of the thermostat has been adjusted to 120°F when shipped from the factory. NOTICE The lower the temperature setting, the greater the energy efficiency, both to heat the water and to maintain the storage temperature during standby periods.
- Page 38 Condensation does not mean your tank is leaking. Most of reported tank leaks on installation are proven to be condensation. To avoid unnecessary inconvenience and expense, make sure the tank is leaking before calling an independent servicing contractor or qualified service professional. DANGER Hotter water increases the risk of scald injury.
-
Page 39: Maintenance
SECTION X: MAINTENANCE DANGER DO NOT ATTEMPT TO REPAIR GAS VALVE. DO NOT ATTEMPT TO REPAIR IGNITION MODULE. DO NOT ATTEMPT TO REPAIR VENTURI. DO NOT ATTEMPT TO REPAIR THERMOSTAT BOARD. DO NOT ATTEMPT TO REPAIR TRANSFORMER. DO NOT ATTEMPT TO REPAIR PRESSURE SWITCH. GENERAL KEEP APPLIANCE AREA CLEAR AND FREE FROM COMBUSTIBLE MATERIALS, GASOLINE AND OTHER FLAMMABLE VAPORS AND LIQUIDS. - Page 40 DRAINING WATER HEATER The water heater must be drained if it is to be shut down and exposed to freezing temperatures. Maintenance and service procedures may also require draining the water heater. 1. Turn off the water heater electrical disconnect switch. 2.
- Page 41 ANODE INSPECTION AND REPLACEMENT This water heater is equipped with multiple sacrificial anodes. Anodes protect the glass-lined tank from corrosion by sacrificing themselves through electrolysis. When the anode material is consumed, there is no more protection and corrosion of the tank accelerates. Inspection of the anode every 6 months allows you to identify the rate of anode degradation.
- Page 42 Figure 28. Powered Anode locations DRAIN VALVE AND TANK ACCESS PANEL The water heaters are equipped with a ¾ inch drain valve. An access panel covers the cleanout opening in the tank, which is sealed by a gasket and cover. RELIEF VALVE At least twice a year, the temperature and pressure relief valve should be checked to ensure that it is in operating condition.
-
Page 43: Trouble Shooting Guide
COMBUSTION SYSTEM INSPECTION Inspect the operation of the combustion system monthly. Use the following procedure to inspect the combustion system. 1. Turn off the main power switch of the water heater. 2. Adjust the thermostat to the Min. setting. 3. Remove the top of the combustion surround by unlatching it. 4. -
Page 44: Parts List
SECTION XII: PARTS LIST Ultra High Efficiency Water Heater 1 Combustion Surround Ass'y 2 Burner Ass'y (Specify Model) 3 2nd Pass Top Collector Cover 4 Screw 10-16 x 3/4 5 Vent Termination Elbow 6 Thermostat Sensor Probe 7 Baffle 4” Flue (Specify Model) 8a Mag. - Page 45 Combustion Surround Ass'y AA Keeper Latch & Catch BB Screw 8-32 x 1/2 RHCR CC Ignition Control Ass'y DD Jacket Head 28 1/4" Grey EE Switch Main Power FF Potentiometer GG Combustion Surround Surround Bas/Jacket Head Customer must specify complete model number and serial number when ordering service parts.
- Page 46 2 Combustion Ass'y (pictured previous page) 1A Combustion Ass’y (Specify Model) 15A Gasket Blower Transition (Specify Model) 2A Blower/Gas Valve Ass’y (Specify Model) 16A Screw 8 -32 x 1/4 RHCR 3A Burner Ass’y 17A Gasket Flame Sensor 4A Blower – EBM 18A Flame Sensor 5A Silicone Hose 19A Transition Tube...
- Page 47 NOTES...
- Page 48 800.900.9276 • Fax 800.559.1583 (Customer Service, Service Advisors) 20 Industrial Way, Rochester, NH 03867 • 603.335.6300 • Fax 603.335.3355 1869 Sismet Road, Mississauga, Ontario, Canada L4W 1W8 • 905.238.0100 • Fax 905.366.0130 www.Laars.com Litho in U.S.A. © Laars Heating Systems 0806 Document 11036...
Need help?
Do you have a question about the U.H.E and is the answer not in the manual?
Questions and answers