Table of Contents
Advertisement
Quick Links
Advertisement
Table of Contents

Related Manuals for Xineron XIN-VCL-0510


Summary of Contents for Xineron XIN-VCL-0510
- Page 1 INSTALLATION MANUAL...
-
Page 2: Disclaimer
DISCLAIMER While every effort has been made to ensure that the information contained in this guide is accurate and complete, no liability can be accepted for any errors or omissions. We reserve the right to change the specifications of the hardware and software described herein at any time without prior notice. -
Page 3: Warning And Caution
WARNING AND CAUTION WARNING TO REDUCE THE RISK OF FIRE OR ELECTRIC SHOCK, DO NOT EXPOSE THIS PRODUCT TO RAIN OR MOISTURE. DO NOT INSERT ANY METALLIC OBJECTS THROUGH THE VENTILATION GRILLS OR OPENINGS ON THE EQUIPMENT. CAUTION The lightning flash with arrowhead symbol, within an equilateral triangle, is intended to alert the user to the presence of uninsulated “dangerous voltage”... -
Page 4: Fcc Compliance Statement
FCC COMPLIANCE STATEMENT FCC INFORMATION: THIS EQUIPMENT HAS BEEN TESTED AND FOUND TO COMPLY WITH THE LIMITS FOR A CLASS A DIGITAL DEVICE, PURSUANT TO PART 15 OF THE FCC RULES. THESE LIMITS ARE DESIGNED TO PROVIDE REASONABLE PROTECTION AGAINST HARMFUL INTERFERENCE WHEN THE EQUIPMENT IS OPERATED IN A COMMERCIAL ENVIRONMENT. -
Page 5: Important Safeguards
IMPORTANT SAFEGUARDS 1. Read these instructions. 2. Heed all warnings. 3. Follow all instructions. 4. Do not use this equipment near water. 5. Clean only with dry cloth. 6. Do not block any ventilation openings. Install in accordance with the manufacturer's instructions. -
Page 6: Table Of Contents
TABLE OF CONTENTS DISCLAIMER ..........................2 WARNING AND CAUTION ......................3 FCC COMPLIANCE STATEMENT ....................4 CE COMPLIANCE STATEMENT ....................4 IMPORTANT SAFEGUARDS ......................5 INTRODUCTION..........................7 CONTENT VERIFICATION ......................8 DIMENSIONS ..........................8 ADJUSTING THE 3-AXIS BRACKET ................... 9 WIRING DIAGRAM ........................ -
Page 7: Introduction
INTRODUCTION Features The ZOOMMATIC Cameras feature high resolution 1/4” Interlace transfer CCD Imager for enhanced lowlight sensitivity. User-friendly, on-screen pull-down menus and short-cuts make it easy to setup and program functions. Super Resolution – 550 TV Lines True Night Shot function with ICR Day/Night function ... -
Page 8: Content Verification
CONTENT VERIFICATION Before installing the camera, please make sure that the following items are included in the box: 1. Integrated Camera 2. Sunshield 3. Remote Controller(Optional) 4. Instruction Manual 5. Mounting Hardware If any of these materials are missing, please contact the vendor customer service department immediately. -
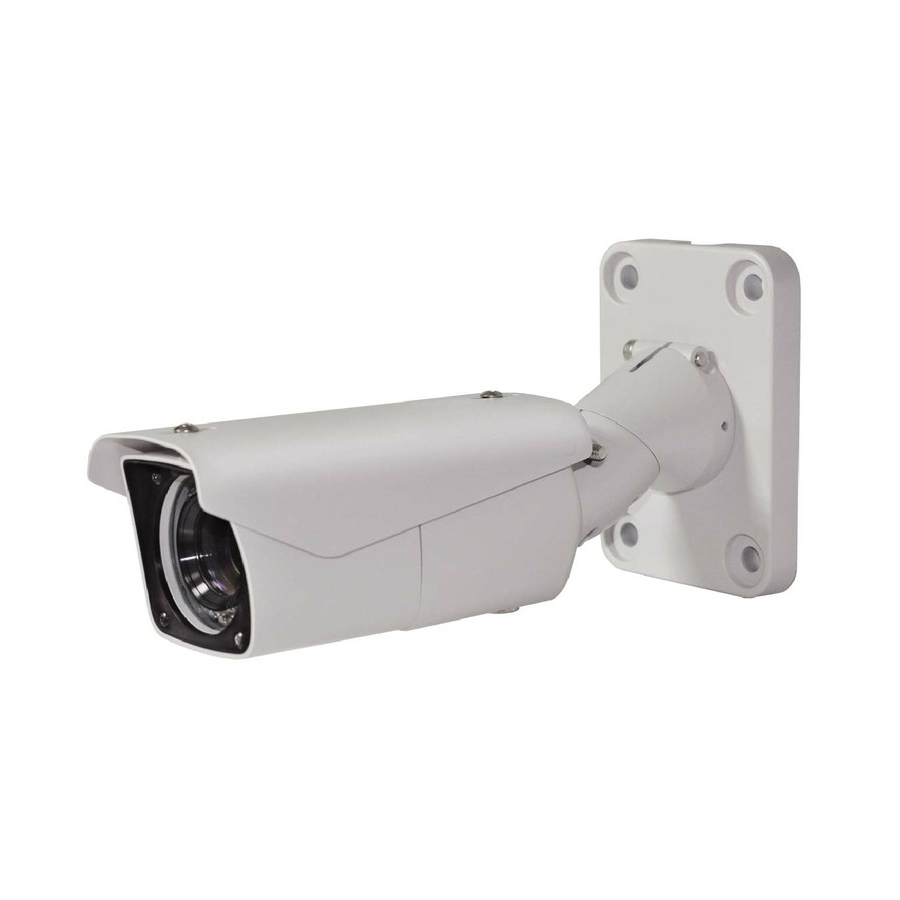
Page 9: Adjusting The 3-Axis Bracket
ADJUSTING THE 3-AXIS BRACKET Loosen the corresponding screws before attempting to make Pan, Tilt and Rotation adjustments. 9... -
Page 10: Wiring Diagram
WIRING DIAGRAM GENERAL OVERVIEW Use minimum of 12VDC 5A / 24VAC 2.5A power source. Connect the VIDEO-OUT jack to the VIDEO-INPUT of the device. As the connecting method varies with the equipment, refer to the manual supplied with the equipment. - Page 11 WIRING DIAGRAM: CONNECTING TO THE CONTROLLER CONNECTING TO THE DVR 11...
-
Page 12: Remote Controller Keys & Descriptions
REMOTE CONTROLLER KEYS & DESCRIPTIONS Loosen the corresponding screws before attempting to make Pan, Tilt and Rotation adjustments. ① POWER – Not used ② NUMBERS – Use Numbers when changing the ID of the remote controller. They are also used to save or recall presets. -
Page 13: Adjusting The Lens & Setup Menu
ADJUSTING THE LENS & SETUP MENU VIA IR REMOTE CONTROL Point the Remote Controller to the Camera to control the zoom. You can also use the remote controller to enter and make changes in the OSD Setup Menu. VIA CONTROLLER Use the controller to adjust the zoom by twisting the joystick. -
Page 14: Osd Menu Controls & Navigation
OSD MENU CONTROLS & NAVIGATION Menu Key - Used to access menu mode. Up / Down Key - Used to scroll through the desired menu selection and to move the cursor up or down during the OSD menu. Left / Right Key - Used to adjust the desired sub-menu selection, and to move the cursor left or right during the OSD menu. -
Page 15: Focus
FOCUS This camera can be set up to automatically focus to the changing environment or just once at a preset field of view. (e.g.,a man walking across the monitored area closer to the camera.) Important: Continuous use of the Auto Focus feature under heavy movement conditions will significantly shorten the lifespan of the lens. -
Page 16: Wb Setup (White Balance Setup)
WB SETUP (WHITE BALANCE SETUP) The WB SETUP is used to control the white balance under different illumination sources. Adjust this setting to calibrate the camera for correct color rendering. MODE: The five white balance control modes are as follows: ... -
Page 17: Ae Setup (Auto Exposure Setup)
AE SETUP (AUTO EXPOSURE SETUP) The AE Control function is used to manually control the Brightness, IRIS, Shutter, AGC, DNR, and DSS. It can also be set to “AUTO” (recommended) or one of 3 pre-configured settings (SHTFIX, IRISFIX, GAINFIX). MODE: AUTO, SHTFIX(SHUTTER FIXED), IRISFIX(IRIS FIXED),GAINFIX(GAIN FIXED),MANUAL It is composed of five modes according to circumstantial illuminance. - Page 18 BLC SETUP (BACK LIGHT COMPENSATION) The BLC MODE is used to control the various Back Light Compensation modes available in the camera. BLC can assist in compensating for exposure problem associated with very bright backgrounds causing subjects to bloom or silhouette. The factory default is ‘OFF.’ BLC SETUP MODE LEVEL...
-
Page 19: Blc Setup (Back Light Compensation)
BLC SETUP (BACK LIGHT COMPENSATION) 1. Select the BMB mode, then scroll down to AREA SEL and press the LEFT/RIGHT key. 2. A blue grid with 16 squares will appear. Choose the desired area by the highlighted specific square using arrow keys and press the MENU key to change the color. (Orange: active, Green: inactive). -
Page 20: Special
SPECIAL The Special Setup is used to control the DAY/NIGHT, SENSING, SHARPNESS, COMMUNICATION,ACCESS CONTROL, and FACTORY DEFAULT of the camera. SPECIAL SETUP DAY/NIGHT AUTO-L SENSING SHARPNESS COMMUNICATION ACCESS CONTROL FACTORY DEFAULT RETURN SAVE AND EXIT DAY/NIGHT: Select from COLOR, BW or AUTO modes. ... - Page 21 SPECIAL The Special Setup is used to control the DAY/NIGHT, SENSING, SHARPNESS, COMMUNICATION,ACCESS CONTROL, and FACTORY DEFAULT of the camera. ACCESS CONTROL: Use this mode to limit access to the Remote Controller AC C ESS CO NTRO L R EM O C O N PW C HEC K O FF C H ANG E PW...
-
Page 22: Display
DISPLAY DISPLAY CAMERA TITLE EDIT TITLE CAMERA ID FUNC.NAME. ZOOM MAG. FOCUS RETURN SAVE AND EXIT CAMERA TITLE: Use this feature to designate a name for the camera, which will display on the monitor screen. T IT LE :C A M E R A A B C D E F G H I J K L M N O PQ R S T U V W X Y Z 01 23 4 5 6 7 8 9 ! ? #... -
Page 23: Function
FUNCTION D-ZOOM: When this feature is set to ON, it will digitally magnify images after the optical magnification has reached its limit. HOME PRESET: The HOME function invokes predefined Preset function after the remote controller or the controller has been idle for programmed time. HOME PRESET FUNCTION: Set the preset number for the home. - Page 24 FUNCTION ALARM: Magnetic, PIR or other external sensor devices can be used to signal the camera reacting to an event. ALARM SETUP INPUT: Use this feature to designate dry contact relays (OFF, N/O and N/C) for alarm input. INPUT OUTPUT: Set to ON to activate the relay output for OUTPUT alarm.
- Page 25 FUNCTION PRIVACY MASK: Mask privacy area using this feature. ZONE NO.: Select zone number for privacy mask PRIVACY MASK (1~8). ENABLE: Use this feature to enable on/off. ZONE NO. MASK TONE: Use this feature to designate mask ENABLE tone for mask privacy. Configure mask tone from MASK TONE 0~15 using this feature.
-
Page 26: Ir Radiator
IR RADIATOR Use this feature to adjust IR brightness. LEVEL-1 control brightness of the wide degree IR LED and LEVEL-2 control brightness of the narrow degree IR LED. 0 means that IR is turned off and 10 is the at IR’s brightest mode. For best result, please adjust the IR LEDs intensity levels while viewing the changes on a monitor starting from the most intense and decreasing each level accordingly. -
Page 27: Technical Specification
TECHNICAL SPECIFICATION Video Format NTSC Image Sensor 1/4" CCD 1/4" CCD Sync System Internal Internal Effective Pixels 768(H) x 494(V) 752(H) x 582(V) Scanning system 525, 2:1 Interlace 625, 2:1 Interlace Electronic Shutter 1/60 ~1/100000 sec 1/50 ~1/100000 sec Video Output 1.0 Vp-p Composite, 75 ohm Horizontal Resolution 550 TV Lines... - Page 28 000000000000...
Need help?
Do you have a question about the XIN-VCL-0510 and is the answer not in the manual?
Questions and answers