Table of Contents
Advertisement
Quick Links
Advertisement
Table of Contents

Related Manuals for Leica D-LUX


Summary of Contents for Leica D-LUX
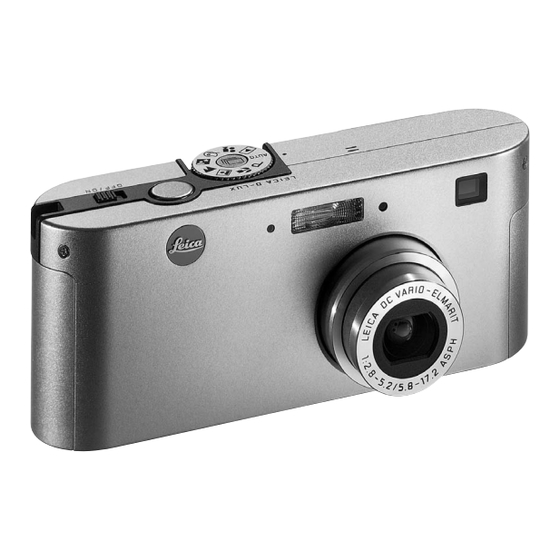
- Page 1 LEICA D-LUX Instructions Illustrations inside front and rear covers...
-
Page 2: Warning Notices
Warning notices • You should use exclusively the recommended accessories to prevent faults, short circuits or electric shock. • Do not expose the device to moisture or rain. • Do not attempt to remove parts of the housing (covering); specialist repairs can only be carried out in authorized service centers. - Page 3 Part 15 of the FCC Rules. These limits are designed to Support contact: Leica Camera Inc. environment, it may cause radio interference. provide reasonable protection against harmful interfer- 156 Ludlow Avenue Install and use the equipment according to the ence in a residential installation.
-
Page 4: Table Of Contents
Contents Warning notices ......98 Displays Displays in the LCD monitor Scope of delivery ......103 In record modes . - Page 5 Quick guide Detailed guide Record mode Presets ........117 Basic functions Taking photographs/videoing .
- Page 6 Formatting the memory card b FORMAT ..160 Playback on a television set 1 VIDEO OUT ..178 Taking photographs with the automatic exposure bracketing mode r ..145 Print order (DPOF) settings on the Transferring data to a computer .
-
Page 7: Scope Of Delivery
Scope of delivery Before using your LEICA D-LUX for the first time, please check that the accessories supplied are complete. A. 64 MB SD memory card (with yellow antistatic cover) B. 2 batteries C. Mains/charging unit with D. mains lead and E. -
Page 8: Designation Of Parts
Optical viewfinder viewing window 1.23 Zoom rocker Cover over A/V OUT and USB sockets 1.24 Monitor mode selection button (DISPLAY) 1.7 a LEICA DC VARIO-ELMARIT 5.8–17.4mm f/2.8- 1.25 Menu system on/off and entry confirmation 4.9 ASPH. lens button (MENU) b Lens cover (with camera turned off) 1.26 Direction pad for navigation in the... - Page 9 Bottom view Mains charging unit 1.28 Tripod mount thread 1.31 AC IN socket for mains lead 1.32 DC OUT socket for connecting lead to camera Left view with open cover 1.33 Charging bay for battery 1.29 A/V OUT socket (for connection to TV and 1.34 Green (CHARGE) LED to indicate charging computers with A/V input sockets) 1.35 Red (POWER) LED to indicate mains connection...
-
Page 10: Displays
Displays Displays in the LCD monitor (1.18) In record modes 2.1.1 2.1.2 2.1.3 2.1.4 2.1.6 2.1.7 2.1.8 In AUTO exposure mode 2.1.7 Resolution / Picture data compression rate a w 2048 x 1536 2.1.1 Exposure mode and low compression rate b t 1280 x 960 2.1.2 Flash mode 2.1.9... - Page 11 2.1.13 Saving data to card (only appears briefly after taking the picture) 2.1.14 Date and time (only appears briefly after turning on the camera/ monitor and after setting the date) Displays / 107...
-
Page 12: In All Other Record Modes
2.2.1 2.2.2 2.2.3 2.2.4 2.2.5 2.2.6 2.2.7 In all other record modes 2.2.3 White balance (P/+/4/9/8/ a No display: automatic setting b $ daylight 2.2.8 2.2.9 c % cloudy conditions 2.2.1 Exposure mode 2.2.24 2.2.10 d & halogen lighting a P Normal program mode 2.2.11 2.2.23 b + For macro pictures... - Page 13 2.2.8 Sound recording on 2.2.15 Date and time 2.2.23 Chosen coloring mode (only appears briefly after turning on the camera/monitor (only appears in exposure mode 2.2.1 f) 2.2.9 Risk of camera shake and after setting the date) 2.2.24 Exposure series function on (only appears in flash modes 2.2.2 d/e, with shutter re- (Symbol crossed out and flashing in red when shutter Alternatively:...
-
Page 14: After Setting The Mode For Pictures With Cooler
After setting the mode for pictures with 2.3.1 cooler or warmer colors or for black/white pictures ( 2.3.2 2.3.1 Mode 2.3.2 Adjustable colors or picture type a COOL Cooler (bluish) colors b WARM Warmer (reddish) colors c B/W Black/white pictures Displays / 110... -
Page 15: In Review Mode J
2.4.1 2.4.2 2.4.4 2.4.5 2.4.6 2.4.7 2.4.9 In review mode (J) 2.4.12 Information for picture shown (only if activated, see page 124) a Record mode 2.4.1 Review mode on (see points 2.1.1 and 2.2.1) 2.4.10 b Aperture and shutter speed 2.4.2 Picture with DPOF marking c ISO sensitivity setting 2.4.11... -
Page 16: Menu Items / 112
Menu items In the main record mode menus a REC In video mode K In all record modes P/+/4/9/8/ (except AUTO and video K ) a REC a REC page) page) i D. ZOOM W. BALANCE White balance SENSITIVITY ISO sensitivity Digital zoom Ö... -
Page 17: In The Record Mode Setup Menus H Setup
In the record mode setup menus h SETUP In AUTO mode (without header) In all modes P/+/4/9/8/ (except AUTO) h SETUP h SETUP page) page) c PICT. MODE 3.13 $ MONITOR 3.15 F NO. RESET Change picture number Resolution/compression Monitor brightness 3.10 o AUTO REVIEW Automatic review of last 3.16 h RESET rate... -
Page 18: In The Main Review Mode Menu J Play
In the main review mode menu J PLAY J PLAY J PLAY page) page) 3.18 M PROTECT 3.23 n TRIMMING Changing the trimming after Protection 3.19 v DPOF PRINT Print order settings recording 3.20 p SLIDE SHOW Automatic review of all 3.24 b FORMAT Formatting the memory card pictures... -
Page 19: In The Review Mode Setup Menu H Setup
In the review mode setup menu h SETUP h SETUP h SETUP page) page) 3.13 $ MONITOR 3.12 f CLOCK SET Date and time Monitor brightness 3.25 Ä VOLUME 3.17 Z LANGUAGE Menu language Volume of sound playback 3.11 ä BEEP 3.26 1 VIDEO OUT TV standard Key acknowledgement (response) tones... -
Page 21: Quick Guide
Quick guide You will need the following items: Viewing pictures • Camera For quick viewing within the record modes: • One of the batteries (B) 1. Press the bottom of the direction pad (1.26) to • Memory card (A) view the last picture taken. •... -
Page 22: Detailed Guide
Detailed guide Charging the battery 2. Place a battery in the charging bay (1.33) on the The LEICA D-LUX is powered by a powerful and fast- mains/charging unit in the direction of the arrow charging lithium ion battery (B). and with its contacts pointing downwards until it Preparation locks into place - after slight pressure. -
Page 23: Inserting The Battery In The Camera/Removing The Battery From The Camera
• Lithium ion batteries such as that used in the 2. Open the locking cover (1.1) on the right-hand side LEICA D-LUX do not develop any “memory effect”. of the camera by pressing/pulling it slightly back- They can therefore be charged at any time regard- wards in the direction of the arrow. -
Page 24: Charge Level Displays
Charge level displays (2.1.8 / 2.2.7) Mains operation The charge level of the battery is displayed in the You can also operate the camera from the mains monitor (1.18) (not if the mains/charging unit is using the mains/charging unit, so that you will not be connected). -
Page 25: Inserting And Removing The Memory Card
Inserting and removing the memory card Notes: The LEICA D-LUX saves the picture data on an ex- • To protect them, memory cards should only ever be tremely compact SD (secure digital) card. Alternatively, stored in the yellow antistatic cover supplied (even MultiMedia cards can be used. -
Page 26: The Most Important Settings/Controls
To remove the memory card, follow these instructions • As electromagnetic fields, electrostatic charge, as The most important settings/controls in reverse order. To unlock the card, it must first of all well as defects on the camera or the card can lead be pushed a little further in –... -
Page 27: The Optical Viewfinder
The optical viewfinder (1.5/1.19) Markings LED displays The LEICA D-LUX has a optical viewfinder which, as on There are 2 groups of locating marks in the optical The LEDS (Light Emitting Diodes) act as status and traditional cameras, can be used for picture composi- viewfinder: warning displays. -
Page 28: Switching The Monitor Displays
• If automatic review of the last picture o AUTO The monitor display selection button DISPLAY (1.23) Many of the LEICA D-LUX modes and functions are can be used to turn the monitor screen on or off or to REVIEW (3.10, see p. 135) is turned on, the monitor... - Page 29 1. Press the MENU button (1.25) to open the menu You can exit this menu again by pressing the left side system. of the direction pad. • In record modes, the relevant record menus then appear, or the review menu in review mode (see p.
- Page 30 in an endless loop, which means you can reach them Note: – only the flashing yellow arrow appears alongside in either direction. • In the record menus, some menu items have sub- the menu item menus. The additional settings for these are 4.
-
Page 31: Setting The Menu Language Z Language
Setting the menu language Z LANGUAGE Setting the date and time f CLOCK SET If the menu language has been accidentally set to The default setting for the language used in the menu Japanese The date can be set anywhere between 2003 and system is English. -
Page 32: The Dial For Record And Review Modes
3. Set the desired figure by pressing the lower or 5. Check that the date and time have been set correct- The dial for record and review modes (1.9) upper side of the direction pad. Pressing the upper side increases the value, pressing the lower side decreases it. -
Page 33: The Shutter Release Button
Macro setting (see p. 141) Video recordings (see p. 133) The shutter release button with a shortest possible image distance of 10 In this mode, you can record scenes of The shutter release button (1.11) works in two stages. or 30 cm (with maximum wide-angle or tele- various lengths (depending on the capacity Pressing it lightly (to the pressure point) activates photo setting on the lens). -
Page 34: Record Mode
The LEICA DC VARIO-ELMARIT 5.8–17.4mm f/2.8-4.9 • The digital zoom function is not available in AUTO ASPH. in the LEICA D-LUX is a high-performance 3 x exposure mode. zoom lens. Its range of focal lengths corresponds to •... -
Page 35: Autofocus
The distance, and therefore the focus, is metered and where subjects are not normally photographed at very section “Using the optical zoom”. set automatically by the LEICA D-LUX’s autofocus close range, limiting the distance range contributes to • However, the zoom scale in the monitor is extend- system. -
Page 36: Automatic Exposure Control
Automatic exposure control Notes: Taking photographs with AUTO mode In all record modes, the LEICA D-LUX automatically • Spot exposure metering is only available in conjunc- For fast, fully automatic photography. In this mode, all sets the shutter speed/aperture combination neces- tion with autofocus spot metering, i.e. -
Page 37: Video Recordings K
Video recordings K Setting and using the mode 1. Set the mode dial (1.9) to AUTO. You can also use the LEICA D-LUX to produce video • The displays for the flash mode (2.1.2), resolution recordings. The possible duration of your recording and image data compression rate (2.1.7) and bat-... - Page 38 2. Aim the autofocus metering field at your subject 3. Press the shutter release button all the way down Notes: – with the cross hairs if using the optical viewfinder to start recording. • In this mode, in terms of the function variants (1.19) This also starts sound recording.
-
Page 39: Using Automatic Image Replay Function
Using automatic image replay function o AUTO Viewing pictures with the VIEW function • The last picture taken is then shown on the moni- REVIEW In contrast to the AUTO REVIEW function described tor for around 5 s. In addition, the header con- If the automatic review of the last picture is activated, in the previous section, which you have to activate in tains:... -
Page 40: Deleting The Picture During Viewing
Note: Deleting the picture during viewing In review mode J (see p. 153) the picture can While a picture is shown in the monitor using this func- be enlarged up to 16 x. tion, you can take this opportunity to delete it if you wish to do so. -
Page 41: Taking Photographs With The Built-In Flash Unit
Taking photographs with the built-in flash unit Flash modes Depending on the record mode, up to five flash modes Record modes display are available to cover a complete range of photo- AUTO – – graphic situations (see table). no display (Automatic flash activation) This is the default mode. -
Page 42: Taking Photographs With The Self-Timer
Taking photographs with the self-timer Setting the function The picture can be cancelled at any time during self- The self-timer allows you to take a picture with a delay 1. By repeatedly pressing the left side of the direction timer count-down by pressing the left side of the of either 2 or 10 s. -
Page 43: Additional Functions
Series exposures pressing the exposure series button. a maximum of 5 s, for example accompanying sound You can not only use the LEICA D-LUX to take single • The monitor (1.18) shows the corresponding or commentary on the picture. symbol Ü/g/G (2.1.3/2.2.24 a/b) pictures but also to produce sequences of pictures. -
Page 44: Taking Photographs With The Normal Program Mode P
4. Press the shutter release button (1.11) all the way Taking photographs with the normal program Notes: down to take the photograph. mode P • As this mode is normally used for subjects that are • The large microphone symbol in the center of the As in AUTO mode (see p. -
Page 45: Taking Photographs With The Macro Setting
Taking photographs with the portrait setting 4 picture. ground as large as possible. For the same reason, it With this mode, the LEICA D-LUX allows you to auto- The smallest possible object field measures 80 x is advantageous to use the telephoto lens setting. -
Page 46: Taking Photographs With The Landscape Setting 9
Taking photographs with the twilight setting 8 • As this mode is normally used for subjects that are With this mode, the LEICA D-LUX allows you to auto- further away, the close-up range is eliminated, i.e. With this mode, and with poorly lit subjects, the matically keep more extensive subjects, e.g. -
Page 47: Taking Photographs With The Settings For Cooler Or Warmer Colors Or B/W Pictures
1. Set the mode dial (1.9) to typical subjects in these kinds of situations. With With this mode, the LEICA D-LUX allows the deliberate • The corresponding menu (2.3.1/2) appears in the the flash turned on it is 1–3m, and with the flash production of pictures with “cold”... -
Page 48: Metering Memory-Lock
• Exposure compensation is not possible for video recordings K and in AUTO mode. In such cases, in all record modes, the LEICA D-LUX’s (2.1.4/2.2.12). metering memory-lock function allows you to first of • Depending on the available shutter speed/aperture all measure the main subject and then to retain this 2. -
Page 49: Taking Photographs With The Automatic Exposure Bracketing Mode R
Note: Taking photographs with the automatic exposure Setting the function bracketing mode r The automatic exposure bracketing function is also 1. Press the upper side of the direction pad (r 1.26) opened by pressing the upper side of the direction Many attractive subjects are very rich in contrast, i.e. -
Page 50: Using Spot Metering For Exposure And Autofocus B Spot Mode
3. Set the desired exposure graduation between the Using spot metering for exposure and autofocus Setting the function 1. In the main record menu a REC B SPOT MODE individual pictures by pressing the right or the left (see p.124/112) select the menu item B SPOT MODE (3.4). -
Page 51: Setting The Resolution C Pict.mode/ C Pict.size
Setting the resolution c PICT.MODE / Possible resolution/compression rate combinations c PICT.SIZE and the resulting number of pictures The picture data can be recorded at four (three in c PICT.MODE in AUTO mode Resolution Compression rate Number of pictures AUTO mode) different pixel settings, i.e. resolutions. w / ENLARGE 2048 x 1536 This allows you to adjust it precisely to the intended... -
Page 52: Setting The Compression Rate Y Quality
Setting the compression rate y QUALITY Notes: subject, as very fine structures result in higher data Picture data can be recorded at two different com- • The compression rate for video recordings cannot volumes, homogenous surfaces in lower volumes. pression rates. While these rates are automatically set be changed. -
Page 53: Setting The White Balance
(3.1). particular color as white. the left or right side of the direction pad: y – Y With the LEICA D-LUX, you can choose from five 2. Select the desired option by pressing the left or different settings: 3. Confirm your setting by pressing the MENU button right side of the direction pad: •... -
Page 54: Setting The Iso Sensitivity
(1.25). brightness. • The original monitor screen appears again. If a The ISO setting on the LEICA D-LUX also allows the value (and not AUTO) has been set, it is also shutter speed/aperture value to be adjusted to meet the requirements of the relevant situation, in 4 steps. -
Page 55: Review Mode J
3. Confirm your setting by pressing the MENU button (1.25). Notes: • The LEICA D-LUX saves pictures according to the DCF standard (Design Rule for Camera File System). • This camera reproduces picture data exclusively in 2. You can open the other saved pictures using the JPEG format, although there are JPEG data files that direction pad (1.26). -
Page 56: Reviewing Single Pictures With Sound
• During playback, PLAY AUDIO disappears. to go with your pictures if you wish. The LEICA D-LUX can play back this sound along with the corresponding Notes: pictures. It can then be used later, for example as part •... - Page 57 Reviewing several single pictures Enlarging the picture and selecting the trimming Setting the function/Selecting pictures Notes: 1. The size of the picture currently being viewed is • It is not possible to enlarge the pictures or select reduced by pressing the left side of the zoom the trimming for video recordings.
-
Page 58: Reviewing Video Recordings
• See “Reviewing single pictures with sound”, p. 152 the card. for details of setting the volume for the sound The LEICA D-LUX also offers you the option of deleting recording. single pictures, or several or all pictures at the same time, as required. -
Page 59: Deleting Single Pictures
Notes: If you selected NO in the previous step, return to • It is also possible to delete pictures when viewing normal review mode in the same way. them using the VIEW function (see p. 135). The pro- • The last picture activated and the normal dis- cedure is exactly the same as that described below. - Page 60 marked and the corresponding symbol , flashes 4. Press the right side of the direction pad. 8. By pressing the left side of the direction pad, select • The picture and menu displays in the monitor dis- in red for a short time instead. YES, if you want to delete the marked pictures, appear, and are replaced by .
-
Page 61: Deleting All Pictures On The Memory Card
Protecting pictures M PROTECT Deleting all pictures on the 7. All the pictures are deleted by pressing the lower memory card ALL DELETE side of the direction pad. The pictures saved on the memory card can be pro- 3. Press the DELETE button again. •... -
Page 62: Protecting Single Pictures/Removing Protection
2. In the main review menu J PLAY Protecting single pictures/Removing To remove protection, you also press the lower side of (see p. 124/114) select the menu item M PROTECT protection SINGLE the direction pad. • The symbol m disappears. 4. -
Page 63: Removing Protection For All Pictures
You can remove protection by pressing the bottom of the direction pad again. • The symbol m on the picture disappears again. 8. Press the MENU button (1.25) once to confirm your setting and return to the previous menu level, or twice to exit the menu system. -
Page 64: Formatting The Memory Card B Format
• If the memory card cannot be formatted, you should ask your dealer or Leica for advice. • When formatting the memory card, even protected pictures (see p. 157) are deleted. -
Page 65: Print Order (Dpof) Settings On The
NO if you do not want to format the card in order to them yourself using compatible printers. preserve the saved picture data. With your LEICA D-LUX you can prepare this kind of (3.19). printing job in advance, by defining how many of 5. -
Page 66: Print Order Settings For One Picture
Print order settings for one picture SINGLE 5. If you want more than one copy, set the number for Print order settings for multiple pictures MULTI 4. Open the associated sub-menu by pressing the the picture currently shown by pressing the lower 4. -
Page 67: Deleting All Print Order Settings
7. For each picture selected, individually set the de- Deleting all print order settings CANCEL 6. By pressing the left side of the direction pad, select sired number of copies by pressing the upper and/or 4. Select CANCEL by pressing the lower side of the YES, if you want to remove all DPOF settings, lower sides of the direction pad, direction pad if you want to delete all existing DPOF... -
Page 68: Print Order Settings For An Index Print
YES. With the LEICA D-LUX, you can add up to 10 s of format. They make it easier to order additional copies sound recording to each picture at a later date, e.g. as and can be used as a simple form of archiving. - Page 69 3. Sound recording is activated by pressing the right 4. Press the lower side of the direction pad. 6. To start the sound recording, press the lower side side of the direction pad (1.26). • The sub-menu for adding a sound recording of the direction pad.
-
Page 70: Resize
Reducing the resolution x Note: 3. Open the associated monitor screen by pressing If there is insufficient memory capacity on the card You can reduce the resolution of a picture you have the right side of the direction pad (1.26). •... - Page 71 4. In such cases, select one of the other pictures, for 6. Select the desired resolution by pressing the left 8. By pressing the left side of the direction pad, select which you want to reduce the resolution, by pres- and/or right sides of the direction pad.
-
Page 72: Trimming
3. Open the associated monitor screen by pressing • The picture and displays disappear for a short With the LEICA D-LUX you can change the trimming of the right side of the direction pad (1.26). • If it is possible to change the trimming, n time, the monitor screen goes blue and PLEASE pictures you have already saved at a later date. - Page 73 The following step is only necessary if it is not possi- 6. Use the zoom rocker (1.23) to select the desired Notes: ble to change the trimming. Otherwise, you can con- trimming size. Pressing the right side (telephoto) • Enlarging the trimmed area is only possible after tinue as described in point 5 onwards.
- Page 74 • If, when moving, you reach one or two of these 9. By pressing the left side of the direction pad, If you previously selected NO edges, the relevant arrows disappear. select • The picture and displays disappear for a short YES if you want to replace the original picture file time, the monitor screen goes blue and PLEASE with the new one with the changed trimming...
-
Page 75: Resetting All Individual Menu Settings
Resetting all individual menu settings ( RESET 4. By pressing the left side of the direction pad, select 6. By pressing the left side of the direction pad, select With this function, you can reset all the settings you YES if you want to reset all of the settings you have YES if you want to reset all of the settings you have have previously made in the menu system, e.g. -
Page 76: Creating New Folder Numbers F No.reset
YES if you want to increase the original folder num- the memory card in ascending order. Initially, the cor- ber by 1 and start picture numbering again (from With the LEICA D-LUX you can automatically play back responding files are all stored in one folder. However, 0001) -
Page 77: Presentation Of All Pictures On The Memory Card
Setting the function Presentation of all pictures on the 5. Press the lower side of the direction pad to select 1. Set the mode dial (1.9) to review J. memory card ALL DURATION. 4. Open the corresponding sub-menu by pressing the •... -
Page 78: Presentation Of Marked Pictures
7. Press the lower side of the direction pad to select Presentation of marked pictures DPOF AUDIO. 4. Press the lower side of the direction pad to select • The 2 possible alternatives appear in the menu DPOF. line. 5. Open the corresponding sub-menu by pressing the right side of the direction pad. - Page 79 7. By pressing the left and/or right sides of the direc- Note: 5. Press the right side of the direction pad. tion pad, open up each of the pictures that you For pictures with existing print order settings • The sub-menu for removing all DPOF markings want to mark for presentation.
-
Page 80: Setting The Lcd Monitor Brightness $ Monitor
Setting the LCD monitor brightness $ MONITOR tion (see p. 135) The brightness of the LCD monitor on the LEICA D-LUX b Shutter sound when taking a picture can be set so that you can adjust it optimally for any situation, i.e. -
Page 81: Setting Automatic Switch Off A Power Save
Setting automatic switch off A POWER SAVE Setting the tones in the other record modes The following steps 4–5 are only required if you want P/+/4/9/8/ to change the shutter sound. Otherwise, you can con- This function switches the camera to standby mode 1. -
Page 82: Playback On A Television Set 1 Video Out
1. Set the mode dial (1.9) to review J. and to exit the menu system. The LEICA D-LUX allows you to view or present your pictures on a TV or computer monitor, and therefore 2. In the setup menu h SETUP Note: on a large screen. -
Page 83: Transferring Data To A Computer
TV. 6. Set the LEICA D-LUX to review mode (not record mode!). 7. Connect the LEICA DLUX to a free USB port on your Transferring data to a computer computer using the USB lead supplied (F). The The LEICA D-LUX is compatible with the following... - Page 84 For Mac OS 9 and Mac OS X For other computers 1. Connect the LEICA DLUX to a free USB port on your 1. Connect the LEICA DLUX to a free USB port on your The picture files can be transferred to these comput- computer using the USB lead supplied.
-
Page 85: Epson Pim (Print Image Matching) Format
Epson PIM (Print Image Matching) format Print Image Matching II mode allows you to transfer Installation of the included software (ACDSee Print Image Matching allows print style commands to the PIM II data along with the images to a computer or Power Pack, Foto Slate, and QuickTime) be integrated into each digital image. -
Page 86: Miscellaneous
Miscellaneous Storing the camera • The magnetic fields from microprocessors can If you are not using the camera for a longer period of interfere with sound and picture recordings. time, we recommend that you: • If the camera does not work correctly as a result of 1. - Page 87 0.01 % remain dark or are always light. However, perature for around an hour. Once the camera temper- The LEICA D-LUX is designed exclusively for private this is not a malfunction and does not impair the ature has adjusted to room temperature, the conden- use.
-
Page 88: Maintenance Instructions
Maintenance instructions • Always keep the battery contacts clean and freely For the mains/charging unit accessible. Protect the contacts from metal objects • If the batteries are warm, the charging process For the camera such as paper clips or pieces of jewellery, which takes longer. -
Page 89: Storage
For memory cards Storage Data structure on the memory card • Whilst a picture is being stored or the memory card • Always remove the battery and memory card when If the data saved on a card is transferred to a compu- is being read, it should not be removed, the camera storing the camera. -
Page 90: Warning Messages / 186
Warning messages READ ERROR CAN’T BE SET ON THIS PICTURE/CAN’T BE SET ON The data on the memory card cannot be read. Open SOME PICTURES NO MEMORY CARD the desired picture again. The pictures on the memory card are not compatible Insert a memory card with the DCF standard, therefore it is not possible to WRITE ERROR... -
Page 91: Malfunctions And Troubleshooting
Malfunctions and troubleshooting The monitor is too bright or too dark. The date and time are incorrect. The camera does not respond when I turn it on. Set your preferred monitor brightness. The camera has not been used for a long period, 1-1. -
Page 92: Technical Data / 188
EV increments. light, cloud and halogen light or manual setting. Automatic exposure bracketing 3 exposures with Lens LEICA DC VARIO-ELMARIT 5.8–17.4 mm , or 1 EV graduations. f/2.8–4.9 ASPH. with 7 lenses in 6 groups, 3 aspheri- Shutter speed range Mechanical leaf shutter, 1 to cal surfaces (corresponds to 35–105 mm for 35 mm... - Page 93 0.01 % defective pixels. Housing External housing made of anodised alumi- Self-timer Delay optionally 2 or 10 s, indicated by num in Leica design. Side attachment for carrying flashing LED on front of camera and corresponding strap. symbol in monitor.
Need help?
Do you have a question about the D-LUX and is the answer not in the manual?
Questions and answers