Table of Contents
Advertisement
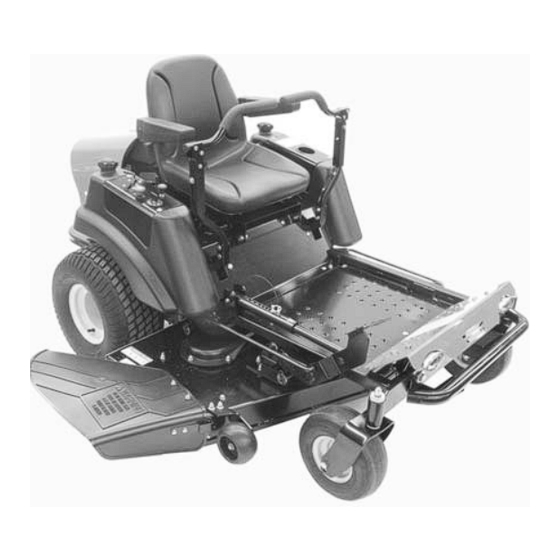
ZOOM
Owner/Operator Manual
Models
915055 - 1944
915057 - 2148
915059 - 2352
915065 - 1540
915067 - 1740
915501 - 1844
915502 - 1540
Transfer
model &
serial number
label from
Transferir aquí la etiqueta del
product reg-
istration here.
Coller l'autocollant du
modèle et du numéro de
série dans cet encadré.
modelo y número de serie
del registro del producto.
ENGLISH
FRANÇAIS
ESPAÑOL
00367300B 8/05
Printed in USA
Advertisement
Table of Contents

Related Manuals for Ariens ZOOM 915055-1944


Summary of Contents for Ariens ZOOM 915055-1944
- Page 1 ZOOM Owner/Operator Manual Models 915055 - 1944 915057 - 2148 915059 - 2352 915065 - 1540 915067 - 1740 915501 - 1844 915502 - 1540 ENGLISH FRANÇAIS ESPAÑOL Transfer Coller l’autocollant du model & modèle et du numéro de serial number série dans cet encadré.
- Page 2 – Nosotros, los abajo firmantes, ARIENS COMPANY, certificamos que: – Undertegnede, ARIENS COMPANY, bekrefter at: – Undertecknad, ARIENS COMPANY, intygar att: – Allekirjoittanut, ARIENS COMPANY, vakuuttaa, että: – My, niżej podpisani, ARIENS COMPANY, oświadczamy, że: – Nós, abaixo assinados, certificamos em nome da ARIENS COMPANY, que:...
- Page 3 (Dépositaire de la fiche technique) – Manager Dato – Data – Qualitätssicherung und Konformität (Archivar der Fecha – Dato – Ariens Company technischen Akte) – Kwaliteits- en normalisatiemanager Datum – Päiväys – (Beheerder van technische bestand) – Chef for kvalitet og Brillion, WI 54110-0157 USA Data –...
-
Page 4: Table Of Contents
INTRODUCTION THE MANUAL PRODUCT REGISTRATION Before operation of unit, carefully and The Ariens dealer must register the product completely read your manuals. The contents at the time of purchase. Registering the will provide you with an understanding of product will help the company process... -
Page 5: Safety
Before Attempting To Operate Your 5. Review Limited Warranty Policy. Unit: 6. Fill out a product registration card and return the card to the Ariens Company or 1. Make sure all assembly has been go to www.ariens.com. properly completed. 2. Understand all Safety Precautions DISCLAIMER provided in the manuals. - Page 6 077541 OE0050 Figure 2 2. Danger! NO STEP! Always keep feet away from rotating parts. Avoid injury - Stay clear of rotating parts. OL1813 OL1816 4. Warning! 3. Danger! Always stand clear of discharge area. Always keep feet and hands OL1814 away from rotating parts.
-
Page 7: Safety Rules
Never direct discharge toward Fill fuel tanks to 2-1/2 in. other people. Thrown objects (6.35 cm) below bottom of filler can cause injury. OL1803 neck. Look down and behind before • Never fill fuel tank when engine is and while backing. running, hot or unit is indoors. - Page 8 Only trained adults may operate unit. Training Know the weight of loads. Limit loads to those includes being familiar with controls and you can safely control and the unit can safely actual operation. handle. NEVER operate unit after or during the use of ALWAYS keep protective structures, guards medication, drugs or alcohol.
- Page 9 ALWAYS turn off power to attachment and Reverse connections may result in sparks shut off fuel when transporting unit. which can cause serious injury. Always connect positive (+) lead of charger to Keep unit free of grass clippings, leaves, and positive (+) terminal, and negative (-) lead to other debris.
-
Page 10: Assembly
ASSEMBLY WARNING: AVOID INJURY. Read Check Safety Interlock System and understand the entire Safety section before proceeding. WARNING: Safety interlock failure and improper operation of unit can Tools Required result in death or serious injury. Check • Adjustable wrench system before each use to make sure it is functioning properly. -
Page 11: Controls And Features
See figure 4 for all controls and features locations. Perform the following tests to ensure the safety interlock system is working properly. If the unit does not perform as stated contact your Ariens dealer for repairs. Test Steering Lever Parking Brake Engine... - Page 12 Test Steering Lever Parking Brake Engine * Test with engine running. + Operator lifts off seat. Ignition Switch Power Take-Off (PTO) Switch Operate ignition switch with a removable key. Engages (2) and Ignition switch has four disengages (1) mower positions: Stop (1), blades.
-
Page 13: Filling Fuel Tanks
NOTE: To stop, return both steering levers to If a pivoting front axle is needed: Remove neutral. axle lock hardware from lockout position and install axle lock hardware in pivoting position NOTE: The steering levers must be in the on both sides of front axle. neutral position to start the engine. -
Page 14: Moving Unit Manually
MOVING UNIT MANUALLY WARNING: DO NOT disengage or bypass transmission and coast downhill. Disengage (2) transmission bypass levers to drive unit and engage (1) transmission bypass levers to push unit manually (figure 8). Models 915065 and 502 Models 915055, 057, 059, 067, and 1. -
Page 15: Maintenance Schedule
(see Safety Interlock System on page 11). Check Engage parking brake and engage transmission bypass lever Parking (see on page 15). Push unit. If unit rolls, contact your Ariens Brake Dealer. Each Use Clean Unit Clean engine, battery, seat, mower deck, etc. -
Page 16: Service And Adjustments
Interval Task Action Follow Perform scheduled Engine engine maintenance. Manual Refer to Engine Maintenance Manual for detailed Schedule instructions. NOTE: To drain the oil, use the oil drain petcock (1) supplied with unit, not the Each Use drain plug that is shown in the Engine Manual. -
Page 17: Level Mower Deck
LEVELLING AND ADJUSTING PITCH OF MOWER DECK Adjust on a level surface, with the tires inflated to the correct air pressure (see SPECIFICATIONS on page 27). Level Mower Deck 1. Install adjustment pin in the fourth adjustment hole (figure 11). 1. -
Page 18: Removing Mower Deck
6. Install rear trunnion and rear lift link on 2. Measure from front edge of right and left mower deck and mower lift (figure 13). mower blades to the ground. 7. Check that the mower deck is level: 3. Subtract front blade cutting height measurement from rear blade cutting a.Rotate right and left mower blades to height measurement (figure 12). -
Page 19: Sharpening Mower Blade
REPLACING MOWER BLADE on 2. Install rear lift link, rear trunnion, front lift page 19). link, and front trunnion on mower deck Ariens recommends having mower blades and mower lift. sharpened by a professional. Contact your Ariens dealer. 3. Install guide arm on front mount bracket. - Page 20 ADJUSTING ANTI-SCALP Models 915065 and 502 ROLLER NOTE: The anti-scalp rollers are intended to prevent lawn scalping, not to control cutting height. All anti-scalp rollers should be set at the same height. See figure 16 for anti-scalp locations on models 915067, 055, 057, 059, 501. See figure 17 for anti-scalp locations on models 915065 and 502.
-
Page 21: Adjusting Steering Levers
5. Install battery on unit (see Battery Removal and Installation on page 20). Jump-Starting Ariens does not recommend jump-starting your unit. Jump-starting can damage engine and electrical system components. See your engine manual for more detailed information. ADJUSTING STEERING LEVERS... -
Page 22: Replacing Pto Belt
• The unit turns to the right or left when both steering levers are pulled back as far rearward as possible. NOTE: The side the unit turns toward indicates that the wheel on that side is turning slower than the other wheel. Either the wheel that is turning faster needs to slow down or the wheel that is turning slower needs to be sped up to allow the unit to travel in a straight... -
Page 23: Storage
3. Hook a puller into idler hole and pull idler 2. Disconnect electric clutch connector. arm towards outside of unit until tension 3. Remove clutch stop. is removed from PTO belt. CAUTION: Use care when releasing idler spring tension. Keep body parts well away from idler when performing this operation. -
Page 24: Troubleshooting
6. Connect spark plug wire(s) or plug(s) faulty. replace spark plug(s). Refer to Engine Manual for detailed instructions. 7. Faulty electrical system. 7. Contact your Ariens Dealer. 8. Faulty engine. 8. Contact your Ariens Dealer. 1. Choke engaged. 1. Disengage choke. Engine 2. - Page 25 PROBLEM PROBABLE CAUSE CORRECTION Unit moves 1. The parking brake needs 1. Contact your Ariens Dealer. with engine adjustment. off and 2. Faulty parking brake. 2. Contact your Ariens Dealer. parking brake engaged. Hour meter 1. Ignition key is in the run position 1.
-
Page 26: Service Parts
SERVICE PARTS ACCESSORIES Be sure to always use genuine Ariens parts See your authorized Ariens dealer to add to keep your unit running like new. these optional accessories to your unit. Part No. Description Part no. Description 03498400 40-Inch Mower Blade... -
Page 27: Specifications
SPECIFICATIONS Model Number 915065 915502 915067 915055 915501 915057 915059 Model 1540 1540 1740 1944 1844 2148 2352 Engine Twin Twin Twin Cylinder Single Single Twin Cylinder Cylinder Kohler Type Cylinder Cylinder Cylinder Kawasa Kawasa Kohler Kohler Kohler Engine Power – HP (kW) at Governed 15 (11.2) 15 (11.2) 16 (11.9) 19 (14.2) 18 (13.4) 21 (15.7) 23 (17.2) Max Governed RPM... - Page 28 GB - 28...
- Page 29 GB - 29...
- Page 30 (90) days hours of use, whichever comes first, if any following the date of purchase. product is rented or leased. Ariens Company • 655 W. Ryan St, P.O. Box 157 • ALW2-62905 Brillion, WI 54110-0157• (920) 756-2141 • www.ariens.com...
-
Page 31: Warranty
(12) months after the date of purchase. Ariens may from time to time change the design of its products. Nothing contained in this warranty shall be construed as obligating Ariens to incorporate such design changes into previously manufactured products, nor shall such changes be construed as an admission that previous designs were defective. - Page 32 Ariens Company 655 West Ryan Street P.O. Box 157 Brillion, WI 54110-0157 Phone: 920-756-2141 Fax: 920-756-2407 www.ariens.com...
Need help?
Do you have a question about the ZOOM 915055-1944 and is the answer not in the manual?
Questions and answers
Replacement belt size zoom 2352
The replacement belt size for the Ariens Zoom 2352 with part number 915055-1944 is 44 inches, with the belt part number 07242900.
This answer is automatically generated