
Related Manuals for Cerwin-Vega P1000X


Summary of Contents for Cerwin-Vega P1000X
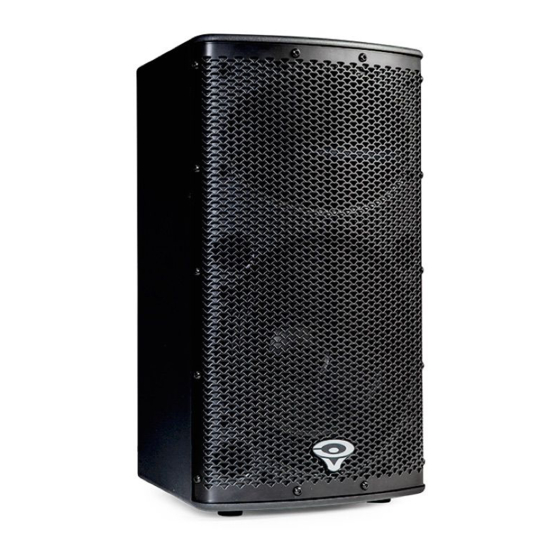
- Page 1 P-SER RIES M ANUA P100 00X, P 1500X X & P18 800SX owered d Loud dspeak kers Instruc ction Manual (English)
-
Page 2: Table Of Contents
Application #3 – Adding Subwoofers (Adjusting HPF & LPF Filters continued) ..............20 Application #4 – Daisy-Chain ..............................21 Application #5 – Adding a P1000X or P1500X as a Stage Monitor ..................22 Application #6 – Large Venue/Front of House ........................23 Protective Grill .................................. -
Page 3: Important Safety Instructions
CERWIN -VEGA! PROF ESSIONAL PORTANT T SAFETY I NSTRUCTI IONS CAUTION: The e lightning fla ash with an a arrowhead sy ymbol within an equilatera al triangle is i ntended to a alert the user to the presence of u un-insulated d angerous volt tage within th... - Page 4 CERWIN -VEGA! PROF ESSIONAL IMPO ORTANT SAF ETY INSTRUC CTIONS (con tinued) 1. The unit an nd power supp ply should only y be connecte ed to a power outlet that m atches the vo oltage and freq quency as mar rked on the rear of the e unit and pow...
-
Page 5: Regulatory Certification
CERWIN -VEGA! PROF ESSIONAL REGULAT TORY CERT TIFICATIO Cerw win-Vega decla ares under ou ur sole respon nsibility that t this product, to which this s declaration relates, is in conformity w with the follow wing standard Declarations of Conformit ty can be obt tained from Gibson Europ... -
Page 6: Introduction
Some Cerwin-Vega! speakers include a receptacle cup to allow mounting of a satellite speaker on top of the subwoofer using a standard speaker pole shaft. When using a standard speaker pole shaft, be sure to observe the following precautions: ... -
Page 7: Quick Start
CERWIN-VEGA! PROFESSIONAL Quick Start The steps below provide a quick reference on how to setup and use a single loudspeaker. A typical setup will follow the same basic steps. Make sure the loudspeaker is unplugged. Be sure the master switch is to set to the ‘OFF’ position. -
Page 8: P1000X And P1500X Mixer - Rear Panel
CERWIN -VEGA! PROF ESSIONAL 000X and d P1500X X Mixer - Rear Pan P1000X and P1500X pow wered loudsp peaker has a an assortmen nt of mixer c controls and connections that cover s several appl lications. It is s suggested... - Page 9 2) The LIMITER indicator (yellow) will illuminate when the P1000/P1500X automatically reduces the sound output to prevent damage to the speaker. While the P1000X/P1500X is producing sound, it is suggested to reduce the volume level so the LIMITER indicator does not illuminate. Continuing use of the P1000X/P1500X while this indicator is illuminated may result in a protect condition where no sound can be produced.
- Page 10 FRONT LIMITER LIGHT SWITCH Setting the FRONT LIMITER LIGHT switch to ‘ON’ will enable the limiter indicator light on the front of the P1000X/P1500X. This allows the user to see when the limiter is engaged in situations where it needs to be visible such as during a sound...
-
Page 11: P1800Sx Mixer - Rear Panel
P1800SX Mixer - Rear Panel The P1800SX powered subwoofer features an assortment of controls and connections similar to the P1000X/P1500X but unique to the needs of this subwoofer. It is suggested to review the P1800SX mixer, as listed below, to take full advantage of the product features. - Page 12 1) A low pass filter will attenuate frequencies above 80Hz for the P1800SX subwoofer. 2) A high pass filter will attenuate frequencies below 80Hz on the THRU 1 & 2 outputs. This is recommended when using the subwoofer in combination with other speakers such as the P1000X/P1500X. FRONT LIMITER LIGHT Setting the FRONT LIMITER LIGHT switch to ‘ON’...
-
Page 13: P1000X, P1500X And P1800Sx Power Connections - Rear Panel
ESSIONAL 000X, P1 500X and d P1800S SX Power r Connect tions - Re ear Panel P1000X, P15 500X and P1 800SX powe er connection ns are locate ed on the rea ar panel. It i s suggested to understa... -
Page 14: Using The P1000X And P1500X As A Floor/Stage Monitor
ESSIONAL ing the P1 1000X an nd P1500 0X as a flo oor/stage e monito P1000X and d P1500X can n be used as s a floor mo onitor by lay ying the cabi net on its si ide at a fixe... -
Page 15: Using The Pole Mount - P1500X Only
CERWIN -VEGA! PROF ESSIONAL ing the po ole moun nt – P150 00X only P1500X has s two differe ent pole mo ounting angl es: level and d 7.5 degre es down. Th allow ws the louds peaker to be e adjusted to an angle tha at provides o... -
Page 16: Using The Suspension Points
CERWIN -VEGA! PROF ESSIONAL ing the su uspensio n points P1000X and d P1500X su uspension po oints are M 10 threads with h a depth of 2 25mm. On t the P1000X, two suspen sion points a are located... -
Page 17: Application #1 - Single P1000X Or P1500X
CERWIN -VEGA! PROF ESSIONAL plication # #1 – Single e P1000X o or P1500X A sin ngle P1000X or P1500X powered spe eaker can be e used to rei inforce soun nd for a wide e variety of performance es. The... -
Page 18: Application #2 - Adding A Second P1000X Or P1500X
CERWIN -VEGA! PROF ESSIONAL plication # #2 – Addin ng a secon nd P1000X X or P1500 A se cond P1000X X or P1500X loudspeaker r can easily b be added usin ng a standard d XLR/mic ca able as in the e example be elow. -
Page 19: Application #3 - Adding Subwoofers
In the diagram below, an audio source is connected to INPUT 1 on each P1800SX subwoofer and then the signal is linked to the P1000X/P1500X speakers by using the P1800SX THRU 1 outputs. The P1000X/P1500X and P1800SX also have CUSTOM FEATURES that allow them to work together efficiently which is covered on the next page. -
Page 20: Application #3 - Adding Subwoofers (Adjusting Hpf & Lpf Filters Continued)
HIGH P PASS FILTER switch on t he P1000X/P P1500X and t the HPF THR RU & LPF SUB B switch on t the P1800SX X so that bot... -
Page 21: Application #4 - Daisy-Chain
Some events may require several P1000X/P1500X speakers spread across a long distance or a large stage front to provide adequate sound reinforcement for the entire audience. Since there are multiple sources, the loop out from the mix output should be used to daisy-chain to the next P1000X/P1500X and then use the thru-out from the second speaker onward. -
Page 22: Application #5 - Adding A P1000X Or P1500X As A Stage Monitor
P10 00X/P1500X used as a st tage monito r for the per rformer plus s two P1000X X/P1500X sp peakers (dais sy-chained) f for the audi ence. The p performer(s) ) may have a... -
Page 23: Application #6 - Large Venue/Front Of House
In larger venues the Front of House engineer has control of the entire sound reinforcement system using the console mixer. The diagram below shows how a console mixer interfaces with the performers’ on-stage audio equipment with several P1000X/P1500X speakers directed towards the audience. -
Page 24: Protective Grill
CERWIN -VEGA! PROF ESSIONAL otective G Grill P1000X, P15 500X and P18 800SX are sh hipped with t the grill atta ched. It is re ecommended d to leave th e grill in plac ce as it will prevent any... -
Page 25: System Block Diagram (P1000X And 1500X Full-Range Loudspeaker)
CERWIN -VEGA! PROF ESSIONAL stem Bloc ck Diagra am (P100 00X and 1 1500X fu ll-range l l oudspea a ker) stem Bloc ck Diagra am (P180 00SX subw woofer) -
Page 26: Troubleshooting
CERWIN-VEGA! PROFESSIONAL Troubleshooting Problem Cause Solution No Sound Loudspeaker is not Verify the loudspeaker is indeed connected to an active AC power source. connected to active Various outlets may need to be switched ‘on’. Use a lamp as another way to be AC power sure the AC power source is active. - Page 27 If the signal sources are plugged directly into the P1000X/P1500X make sure that the input level knobs are not turned up too high. If the signal indicator LED is turning RED on any channel that means the input on that channel is clipping and the input level needs to be lowered.
-
Page 28: Care And Maintenance
CERWIN-VEGA! PROFESSIONAL Care and Maintenance Before any cleaning or maintenance, be sure the loudspeaker is unplugged, turned off, and that all cables are removed. Be sure to avoid any moisture coming into the openings of the speaker. The loudspeaker can be maintained cosmetically using a dry cloth. Avoid using cleaning chemicals as they may harm the finish of the loudspeaker. - Page 29 CERWIN-VEGA! PROFESSIONAL REMOTE DEVICE REMOTE SIDE OF CABLE DESCRIPTION CABLE (Connector Type) Hot (positive) Cold (negative) A. XLR** Shield/GND (XLR) Floating or Balanced low impedance: most professional equipment line in and line out, microphones. Hot (positive) Cold (negative) B. TRS PHONE...
-
Page 30: Warranty
CERWIN-VEGA! PROFESSIONAL Warranty Thank you for choosing one of Gibson Pro Audio’s brands (Stanton, KRK, or Cerwin Vega!). Your satisfaction is extremely important to us. We proudly stand behind the quality of our work and appreciate that you put your trust in us. Registering your merchandise will help us guarantee that you are kept up to date on our latest advances. - Page 31 CERWIN-VEGA! PROFESSIONAL THIS WARRANTY IS EXTENDED TO THE ORIGINAL RETAIL PURCHASER ONLY AND MAY NOT BE TRANSFERRED OR ASSIGNED TO SUBSEQUENT OWNERS. IN ORDER TO VALIDATE YOUR WARRANTY, AND AS A CONDITION PRECEDENT TO WARRANTY COVERAGE HEREUNDER, YOU MUST REGISTER YOUR WARRANTY WITHIN FIFTEEN (15) DAYS FOLLOWING THE ORIGINAL DATE OF PURCHASE.YOUR PROOF OF PURCHASE OR SALES RECEIPT MUST ACCOMPANY ALL REQUESTS...
-
Page 32: How To Obtain Warranty Service
CERWIN-VEGA! PROFESSIONAL How to Obtain Warranty Service Warranty Service outside the United States: To initiate a warranty repair, please contact the Authorized Gibson Pro Audio distributor from whom you purchased your merchandise, and follow the distributor’s return/warranty policy. Warranty Service for Merchandise Purchased from an Authorized Gibson Pro Audio Dealer in the U.S: In the event of malfunction of your Gibson Pro Audio merchandise, the Dealer or Owner must call Customer Service @ 1-800-4GIBSON (1-800-444-2766) and obtain a Return Authorization number from the customer service agent.
Need help?
Do you have a question about the P1000X and is the answer not in the manual?
Questions and answers