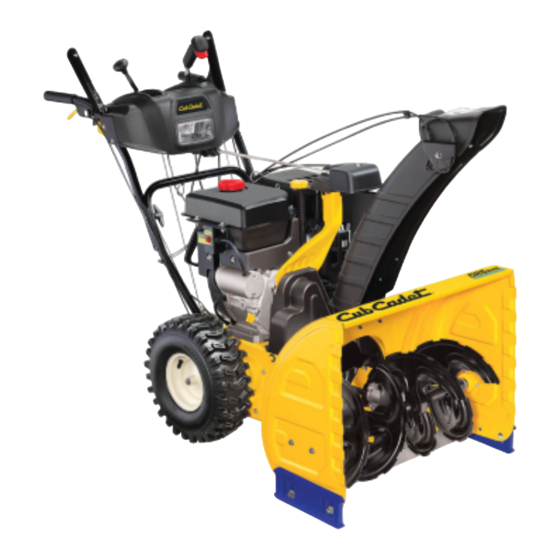
Cub Cadet 528 SWE Operator's Manual
Two-stage snow thrower
Hide thumbs
Also See for 528 SWE:
- Operator's manual (28 pages) ,
- Illustrated parts list (12 pages) ,
- Specifications (2 pages)
Table of Contents
Advertisement
Safety • Assembly • Operation • Adjustments • Maintenance • Troubleshooting • Parts Lists • Warranty
OPERATOR'S MANUAL
Two-Stage Snow Thrower — Model 528 SWE
IMPORTANT
READ SAFETY RULES AND INSTRUCTIONS CAREFULLY BEFORE OPERATION
Warning: This unit is equipped with an internal combustion engine and should not be used on or near any unimproved forest-covered, brush-
covered or grass-covered land unless the engine's exhaust system is equipped with a spark arrester meeting applicable local or state laws (if any).
If a spark arrester is used, it should be maintained in effective working order by the operator. In the State of California the above is required by law
(Section 4442 of the California Public Resources Code). Other states may have similar laws. Federal laws apply on federal lands. A spark arrester
for the muffler is available through your nearest engine authorized service dealer or contact the service department, P.O. Box 361131 Cleveland,
Ohio 44136-0019.
CUB CADET LLC, P.O. BOX 361131 CLEVELAND, OHIO 44136-0019
FORM NO. 769-01790
PRINTED IN U.S.A.
08/11/2005
Advertisement
Table of Contents

Related Manuals for Cub Cadet 528 SWE


Summary of Contents for Cub Cadet 528 SWE
- Page 1 (Section 4442 of the California Public Resources Code). Other states may have similar laws. Federal laws apply on federal lands. A spark arrester for the muffler is available through your nearest engine authorized service dealer or contact the service department, P.O. Box 361131 Cleveland, Ohio 44136-0019. CUB CADET LLC, P.O. BOX 361131 CLEVELAND, OHIO 44136-0019 FORM NO. 769-01790 PRINTED IN U.S.A.
-
Page 2: Table Of Contents
You can locate the model plate by standing at the operating position and looking down at the rear of the snow thrower. This information will be necessary to use the manufacturer’s web CUB CADET LLC site and/or obtain assistance from an authorized Cub Cadet P. O. BOX 361131 dealer. www.cubcadet.com... -
Page 3: Safety Labels
������ ������ �� ���� ���� ���� �������� �������� ��� ������ ������� ���� �������� �� ����� ��� �������� ����� ��� ����� ��� ��������� ���� �� ������ Safety �� ��������� ������ ��������� ������ ������� ���� ������� �� Labels ��� ������ ������ ������� ����� ��� ������... -
Page 4: Safe Operation Practices
WARNING: Engine Exhaust, some of its constituents, and certain vehicle compo- nents contain or emit chemicals known to State of California to cause cancer and birth defects or other reproductive harm. DANGER: This machine was built to be operated according to the rules for safe operation in this manual. - Page 5 Operation Maintenance & Storage 1. Do not put hands or feet near rotating parts, in the 1. Never tamper with safety devices. Check their proper auger/impeller housing or chute assembly. Contact with the operation regularly. Refer to the maintenance and adjust- rotating parts can amputate hands and feet.
-
Page 6: Setting Up Your Snow Thrower
IMPORTANT: Two replacement auger shear pins are included with this manual (or stowed in the plastic handle panel). Refer to Augers on page 18 for more information regarding shear pin replacement. 1. Observe the lower area of the snow thrower to be Setting Up sure both cables are aligned with roller guides before pivoting handle upward. - Page 7 5. Remove the flat washer and hairpin clip from the end of the chute directional control. � a. Insert the end of the chute directional control into the lower bracket. b. Secure with the flat washer and hairpin clip just Setting Up removed.
- Page 8 Drift Cutters Drift cutters should be used when operating the snow thrower in heavy drift conditions. • The drift cutters are assembled to the auger housing inverted. See Figure 8. Setting Up • Remove the carriage bolts by unthreading the hex nuts which secure them, and reinstall the drift cutters Your Snow facing forward before operating the snow thrower.
- Page 9 Chute Clean-Out Tool The clean-out tool is conveniently fastened to the rear of the auger housing with a mounting clip. See Figure 11. ����� ��������� ���� 1. Release both the auger control and the drive/auger control lock. Setting Up 2. Stop the engine by moving the throttle to the stop position.
-
Page 10: Operating Your Snow Thrower
Know Your Snow Thrower ����� ������� ����� ����� ������� ����� �������� ������ ������� ������ ����� ������� Operating ��������� ����� �������� Your Snow ������� �������� ����� ������ Thrower ��� ��� ����� ����������� ��� ���� ������� ������ �������� ������ ������� ������ �������� ������� ������ ������... -
Page 11: Auger Control
Auger Control • To change the angle/distance which snow is thrown, pivot the joy-stick forward or backward. ����� Chute Directional Control ������� The chute directional control is located on the left side of the snow thrower. • To change the direction in which snow is thrown, Operating crank clockwise to discharge to the left and counter- clockwise to discharge to the right. -
Page 12: Stopping The Engine
Gas & Oil Fill-Up 6. As the engine warms, slowly rotate the choke control to the OFF position. If the engine falters, quickly rotate Service the engine with gasoline and oil as instructed in the choke control back to FULL and then slowly into the Tecumseh Engines manual packed separately with the OFF position again. - Page 13 3. When disconnecting the extension cord, always 3. Release the auger control; the interlock mechanism unplug the end at the three-prong wall outlet before should keep the auger control engaged until the drive unplugging the opposite end from the snow thrower. control is released.
-
Page 14: Making Adjustments
Shift Cable If the full range of speeds (forward and reverse) cannot be achieved, refer to the figure to the left and adjust the shift cable as follows: 1. Place the shift lever in the fastest forward speed Making position. 2. - Page 15 4. If any of the above tests failed, the drive cable is in need of adjustment. Proceed as follows: 5. Loosen the lower hex nut on the drive cable bracket. See Figure 16. 6. Position the bracket upward to provide more slack (or downward to increase cable tension).
-
Page 16: Maintaining Your Snow Thrower
3. Some adjustments will have to be made periodically to maintain your unit properly. 4. Periodically check all fasteners and make sure these are tight. ����� ��� ������� ������� Engine Refer to the separate Tecumseh Engines manual packed Maintaining with your unit for all engine maintenance. Your Snow Lubrication 1. -
Page 17: Replacing Belt
2. Replace the pins if needed. Two replacement shear pins and cotter pins have been provided with the snow thrower. Spray an oil lubricant into shaft before inserting new pins and securing with new cotter pins. See Figure 19. Shave Plate and Skid Shoes Maintaining The shave plate and skid shoes on the bottom of the snow thrower are subject to wear. - Page 18 Auger Belt 1. Roll auger belt off the pulley as shown in Figure 23. 2. a. Turn the shoulder screw a half a turn and slide it out of the mounting bracket. See Figure 24. b. Unhook spring to release tension on the auger belt. See Figure 24.
-
Page 19: Drive Belt
Cadet Service Dealer if your friction wheel rubber needs to be replaced or phone Customer Support as instructed on page 2 for information on ordering a Cub Cadet Service Manual. Also, refer to the Drive Control adjustment in the “Mak- ing Adjustments”... -
Page 20: Off-Season Storage
If the snow thrower will not be used for 30 days or longer, 1. Remove all gasoline from the carburetor and the fuel or if it is the end of the snow season when the last pos- tank to prevent gum deposits from forming on these sibility of snow is gone, the equipment needs to be stored parts and harming the engine. -
Page 21: Troubleshooting
3. Drain fuel tank. Refill with 3. Water or dirt in fuel system. addresses minor service fresh fuel. issues. For further 4. Contact Cub Cadet Service Dealer. 4. Carburetor out of adjustment. details, contact your nearest Cub Cadet service dealer or call Engine overheats 1. -
Page 22: Illustrated Parts List
Model 528 SWE � � �� � �� � �� � �� �� � �� � �� � �� �� �� �� �� �� �� �� �� �� � �� �� �� �� �� �� �� �� �� �� ��... -
Page 23: Parts List
731-2643 Clean-Out Tool 31. 741-0663 Flange Bearing 712-04065 Flange Lock Nut 32. 710-0642 TT Screw, 1/4-20 x 0.75 756-0981A Flat Idler Pulley 33. 790-00087A Bearing Housing 710-0347 Hex Bolt, 3/8-16 x 1.75 34. 721-0325 Plug 790-00080 Auger Idler Bracket 35. 736-3084 Flat Washer Parts List 736-0174... - Page 24 Model 528 SWE �� �� � �� � �� � �� � � �� �� � �� � �� � �� � �� �� �� �� �� �� �� �� �� �� �� �� �� �� �� �� �� ��...
- Page 25 684-04106A Handle Engagement Assembly RH 36. 684-04117 2-Way Chute Control™ Assembly 747-04263 Eye Bolt 37. 749-04191 Upper Handle LH 731-04894A Lock Plate 38. 710-04326 Screw, #8-16 x 0.50 711-04287 Pivot Rod 39. 732-04219 Clutch Lock Spring 735-0199A Rubber Bumper 40. 731-04954 Steering Control Parts List 710-04354...
- Page 26 Model 528 SWE �� �� �� �� �� �� �� �� �� �� �� �� � � �� �� �� �� �� �� �� �� �� � �� �� �� �� �� �� �� �� � � �� �� ��...
- Page 27 710-1652 AB Screw, 1/4-20 x 0.625 39. 738-04184 Shoulder Screw 731-04792A Belt Cover 40. 790-00226 Frame Cover 732-0705 Cable Guide 41. 656-04025 Friction Wheel Disc Assembly 711-1268B Actuator Shaft 42. 618-04283 Drive Shaft Assembly 746-04229 Drive Clutch Cable 43. 684-04159 Friction Wheel Assembly Parts List 732-0209...
- Page 28 NOTES: Use this page to make notes and write down important information.
- Page 29 NOTES: Use this page to make notes and write down important information.
- Page 30 NOTES: Use this page to make notes and write down important information.
-
Page 31: Warranty
MANUFACTURER’S LIMITED COMMERCIAL WARRANTY FOR: The limited warranty set forth below is given by Cub Cadet LLC with re- Routine maintenance items such as lubricants, filters, blade spect to new merchandise used for commercial purposes and purchased sharpening, tune-ups, brake adjustments, clutch adjustments,... -
Page 32: Cub Cadet Llc
MANUFACTURER’S LIMITED WARRANTY FOR The limited warranty set forth below is given by Cub Cadet LLC with Routine maintenance items such as lubricants, filters, blade respect to new merchandise purchased and used in the United States, its sharpening, tune-ups, brake adjustments, clutch adjustments,...
Need help?
Do you have a question about the 528 SWE and is the answer not in the manual?
Questions and answers
Как поменять масло в двигателе