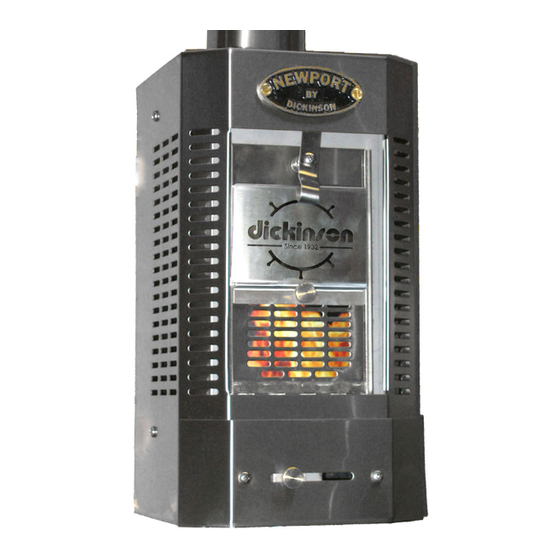
Dickinson Newport Operating And Installation Instruction Manual
Solid fuel heater
Hide thumbs
Also See for Newport:
- Installation & operating instructions manual (53 pages) ,
- Operating instructions manual (19 pages) ,
- Operating and installation instruction manual (41 pages)
Table of Contents
Advertisement
Quick Links
Advertisement
Table of Contents

Summary of Contents for Dickinson Newport
- Page 1 Natural Draft Solid Fuel Heater Operating and Installation Instruction Manual Newport Solid Fuel Heater ** Please read from beginning to end before installing and operating. Quality Controlled by- Doug & Don Form#7.2-230 Issue#1 April 23, 2010...
-
Page 2: Table Of Contents
Table of Contents Table of Contents… Pg. 2 Warnings… Pg. 3 1. About a Natural Draft Solid Fuel Heater… Pg. 3 2. Important Notes... Pg. 3 3. Ventilation… Pg. 4 4. How does the Chimney affect the Heater… Pg. 4 - Testing your Draft…... -
Page 3: Warnings
2. Important Notes Here are some important notes to remember when planning and/or installing a Dickinson Marine solid fuel heater: • Mounting & location, minimum 4ft and a maximum 10ft of chimney, and the location of hole for the chimney. -
Page 4: Ventilation
• Unrestricted permanent fresh air inlet required to draw in outside air needed for correct operation. • A barometric damper must be installed to help regulate the draft. A barometric gives you more control in the “fuel to air” mixture needed for correct combustion. - Page 5 combustion into the appliance. This movement of combustion air and exhaust is called draft. In essence, it is the difference in pressure between the air inside the chimney flue and the outside air that creates this movement. Warmer, lighter gasses in the flue tend to move upward.
-
Page 6: Testing Your Draft
appliances it serves. This involves correct sizing, adequate height, and proper construction. See the “Chimney Pipe” section on pg. 7. Since the chimney draft is affected by so many factors, draft problems can be complicated to find. Testing the Draft To find where the air is being drawn, twist a paper towel into a wick, light it and blow it out to create smoke. -
Page 7: Location Diagrams
take into consideration stack configuration and insure that the chimney above deck is clear of any obstruction. Chimney Pipe The location and configuration of the chimney stack is very important to the operation of the heater. A long, straight chimney stack will ensure a strong draft for correct operation. -
Page 8: Barometric Damper
Barometric Damper Install the barometric tee pipe with the front flap facing fore and aft. In order for the barometric to work efficiently it must be installed between 12” and 24” from the top of the heater. We have 2 options for installing the barometric damper into your chimney. You can either have the barometric attached to a 22”... -
Page 9: Deck Fitting
Exhaust Cap The Dickinson DP or H style exhaust caps are most recommended. The exhaust cap will fit over the crimp on the deck fitting or flue pipe. The location of the exhaust cap above deck must be clear of any immediate obstruction that may cause unusual air movement or turbulence. -
Page 10: Heater Installation Diagram
Heater Install Diagram 45 Degree Elbows Maximum Sliding Door Panel Ash Drawer Safety Clip Damper Adjustment Drawer Fresh Air Inlet... -
Page 11: Heater Operation
6. Heater Operation Fuel Combustion options for this appliance are wood, charcoal briquettes or similar solid fuels that can be burned. Slow burning fuels are recommended. Care must be taken not to overfill the combustion chamber as this can damage the heater. The heater is rated for approximately 8000 btu’s. This will be equal to a small handful of briquettes, 1 or 2 slices of presto logs at 1”... -
Page 12: Warranty
7. Warranty Policy We at Dickinson Marine wish to maintain a reasonable and easy system for returns, warranty, returns and exchanges. To accomplish this, we would like to inform you of some helpful guidelines and procedures to use and follow when sending back product to the Dickinson Marine. - Page 13 Dickinson Marine offers to replace said parts free of charge, provided, however, that such parts have not been improperly repaired, altered or tampered with or subjected to misuse, abuse or exposed to corrosive conditions.
- Page 14 CLAIM PROCEDURE: In the event of a defect, problem or that a breach of this warranty is discovered, in order to protect any warranty rights you must promptly notify Dickinson Marine. Give name, address, and model name, location of unit, description of problem and where you can be reached during business hours.
-
Page 15: Registering Your Warranty
8. Register your Warranty….. Please register your warranty with Dickinson Marine. Fill out and send back the warranty registration below. No warranty will be extended for improper installations. Use of any unapproved materials, equipment, or installation procedures will result in a voided warranty. - Page 16 All rights reserved. No part of this manual may be reproduced without permission in writing from Dickinson Marine. Dickinson also reserves the right to modify or change without notice, any materials, applications, equipment, accessories, and/or prices. All measurements and weights are approximate.


Need help?
Do you have a question about the Newport and is the answer not in the manual?
Questions and answers