Table of Contents
Advertisement
Quick Links
CAUTION!
Please read this entire manual before
you install and use your new room
heater. Failure to follow instructions
may result in property damage,
bodily injury or even death.
THIS MANUAL WILL HELP YOU TO OBTAIN EFFICIENT, DEPENDABLE SERVICE FROM THE HEATER, AND ENABLE YOU
TO ORDER REPAIR PARTS CORRECTLY. KEEP IN A SAFE PLACE FOR FUTURE REFERENCE.
Owners Manual
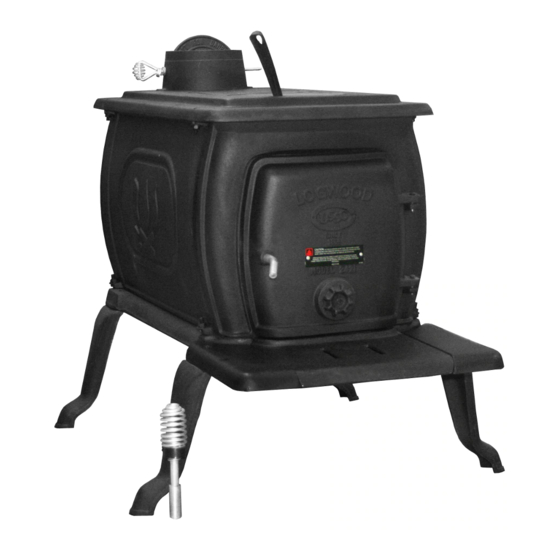
Logwood 2421
EPA EXEMPT PER
METHOD 28A
CONFORMS TO
UL 1482
SAVE THIS MANUAL FOR FUTURE REFERENCE
UNITED STATES STOVE COMPANY
227 Industrial Park Road
P.O. Box 151
South Pittsburg, TN 37380
(423) 837-2100
DO NOT USE THIS HEATER
IN A MOBILE HOME OR TRAILER
851094E
Advertisement
Table of Contents

Related Manuals for United States Stove Company Logwood 2421


Summary of Contents for United States Stove Company Logwood 2421
-
Page 1: Owners Manual
THIS MANUAL WILL HELP YOU TO OBTAIN EFFICIENT, DEPENDABLE SERVICE FROM THE HEATER, AND ENABLE YOU TO ORDER REPAIR PARTS CORRECTLY. KEEP IN A SAFE PLACE FOR FUTURE REFERENCE. UNITED STATES STOVE COMPANY 227 Industrial Park Road P.O. Box 151... -
Page 2: Tools And Materials Needed
CONGRATULATIONS! You've purchased a heater from North America's oldest manufacturer of wood burning products. By heating with wood you're helping to CONSERVE ENERGY! Wood is our only Renewable Energy Resource. Please do your part to preserve our wood supply. Plant at least one tree each year. Future generations will thank you. Tools and Materials Needed MATERIALS TOOLS... -
Page 3: Safety Rules
Safety Rules SAFETY NOTICE: If this heater is not properly installed a house fi re may result. For your safety, follow the installation directions. Contact local building or fi re offi cials about restrictions and installation inspection requirements in your area. Read these rules and the instructions carefully. -
Page 4: Installation
MINIMUM CLEARANCE Installation TO COMBUSTIBLE WALLS Place the heater on solid masonry or solid concrete. When the heater is used on a combustible fl oor, use an Underwriters Listed 18" fl oor protector. Th e fl oor protector must comply with UL Standards 458mm and have an R-value of 2.0. -
Page 5: Chimney Connection
Operation of the Heater BE SURE TO PUT A LAYER OF SAND OR FIREBRICK AP- PROXIMATELY 1 1/2" THICK IN THE BOTTOM OF THE FLUE CONNECTION-NON-COMBUSTIBLE WALL STOVE BEFORE STARTING FIRE. Burn wood or wood products only. Th e wood should be air dried for at least six months prior to use for maximum effi ciency. - Page 6 CONNECTION OF CHIMNEY CONNECTOR TO A MASONRY CHIMNEY THROUGH A COMBUSTIBLE WALL Figure 8 shows how to connect the chimney connector of a heater to a masonry chimney through a combustible wall. Th ere are fi ve allowable ways that a chimney connector can be connected to a masonry chimney by passing through a combustible wall.
- Page 7 PART A, FIGURE 8 MINIMUM CHIMNEY CLEARANCE TO (FIGURE 8 CONTINUED ON NEXT PAGE) BRICK AND COMBUSTIBLES IS 2 IN. MINIMUM CLEARANCES 12 IN. OF BRICK ALL AROUND CHIMNEY CONNECTOR TO HEATER FIRE CLAY LINER MINIMUM 12 IN. (5/8" MIN. WALL THICKNESS) TO COMBUSTIBLES MASONRY CHIMNEY CONSTRUCTED TO...
- Page 8 PART B MINIMUM CHIMNEY CLEARANCES FROM MASONRY TO FIGURE 8 - SHEET STEEL SUPPORTS AND COMBUSTIBLES 2 IN. (FIGURE 8 CONTINUED) FACTORY-BUILT MINIMUM CLEARANCE CHIMNEY LENGTH 9 IN. ALL AROUND NONSOLUBLE CHIMNEY CONNECTOR REFACTORY TO HEATER CEMENT CHIMNEY LENGTH FLUSH WITH INSIDE USE CHIMNEY MFRS.
-
Page 9: Service Hints
WARNING! CAUTION! NEVER STORE FLAMMABLE LIQUIDS, NEVER USE GASOLINE, GASOLINE-TYPE ESPECIALLY GASOLINE. IN THE LANTERN FUEL, KEROSENE, CHARCOAL VICINITY OF THE HEATER. LIGHTER FLUID, OR SIMILAR LIQUIDS TO START OR "FRESHEN UP" A FIRE IN THE HEATER. KEEP ALL SUCH LIQUIDS CAUTION! WELL AWAY FROM THE HEATER WHILE IT IS IN OVERFIRING THE APPLIANCE MAY... -
Page 10: Repair Parts
Model 2421 Repair Parts PART NO. DESCRIPTION QNTY. 40319 REAR LEG 40319 FRONT LEG I N O R D E R T O M A I N T A I N 40320 MAIN BOTTOM WARRANTY, COMPONENTS 40321 MAIN SIDE MUST BE REPLACED USING... -
Page 11: Floor Protector
FLOOR PROTECTOR The stove must be placed on solid concrete, solid masonry, or when installed on a combustible fl oor, on a Type 2 fl oor protector listed to standard UL 1618 with a minimum R value of 3.0 and a minimum thickness of 1” or equivalent. The fl oor protector is required to provide heat, live ember, and ash protection and must be of a non-combustible, continuous solid surface to protect against infi... -
Page 12: How To Order Repair Parts
WHEN ORDERING REPAIR PARTS, ALWAYS GIVE THE FOLLOWING INFORMATION AS SHOWN IN THIS LIST: 1. Th e PART NUMBER 2. Th e PART DESCRIPTION 3. Th e MODEL NUMBER: 2421 4. Th e SERIAL NUMBER: UNITED STATES STOVE COMPANY 227 Industrial Park Road P.O.
Need help?
Do you have a question about the Logwood 2421 and is the answer not in the manual?
Questions and answers