Table of Contents
Advertisement
Quick Links
Advertisement
Table of Contents

Subscribe to Our Youtube Channel
Related Manuals for Ssl SD364B


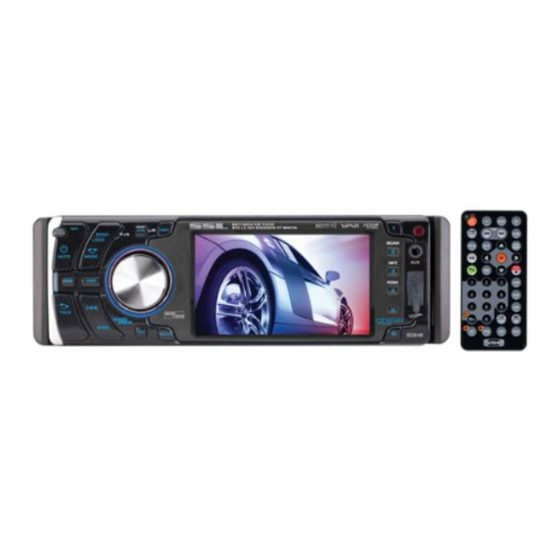
Summary of Contents for Ssl SD364B
- Page 2 3.6” Bluetooth-Enabled In-Dash DVD/MP3/CD Receiver with USB, SD Memory Card Ports and Front Panel AV Input...
-
Page 3: Handling Compact Discs
1. HANDLING COMPACT DISCS MOISTURE CONDENSATION On a rainy day or in a very damp area, moisture may condense on the lenses inside the unit. Should this occur, the unit will not operate properly. In such a case, remove the disc and wait for about an hour until the moisture has evaporated. -
Page 4: Installation
2. INSTALLATION Before finally installing the unit, connect the wiring temporarily and make sure it is all connected up properly and the unit and system work properly. Use only the parts included with the unit to ensure proper installation. The use of unauthorized parts can cause malfunctions. -
Page 5: Din Rear-Mount (Method B)
DIN REAR-MOUNT (METHOD B) Installation using the screw holes on the sides of the unit. Fastening the unit to the factory radio mounting bracket. 1. Select a position where the screw holes of the bracket and the screw holes of the main unit become aligned (are fitted) and tighten the screws at 2 places on each side. -
Page 6: Detachable Control Panel (D.c.p .)
3. DETACHABLE CONTROL PANEL (D.C.P .) Attaching the Detachable Control panel (D.C.P .) 1. Attach the panel at the Left side first, with point B on the main unit touching point A on the D.C.P (As shown on the diagram). 2. - Page 7 CAUTION DO NOT insert the D.C.P from the right side. Doing so may damage it. The D.C.P can easily be damaged by shocks. After removing it, place it in a protective case and be careful not to drop it or subject it to strong shocks. When the open button is pressed and the D.C.P is unlocked, the car's vibrations may cause it to fall.
-
Page 8: Electrical Connection
4. ELECTRICAL CONNECTION a. Make sure your car battery is a 12 volt (6 filler caps) negative ground system (if not, a converter will be necessary). b. Before starting wiring connections, disconnect the power supply by removing the fuse from the fuse box. - Page 9 APL/ DSP/ NTSC/ POWER/ LEFT/ INFRARED PANEL BAND/ FUNCTION RIGHT OPEN MUTE LOUDNESS SELECT RANDOM REPEAT SCAN PAUSE REMOTE BUTTON BUTTON BUTTON BUTTON BUTTON BUTTON SENSOR BUTTON BUTTON BUTTON BUTTON TALK TUNING / LOCAL/ SCAN BUTTON BUTTON SEEK BUTTON UP/DOWN NEXT/BACK BUTTON HANG UP/...
- Page 10 B. FUNCTION OF REMOTE E - 8...
-
Page 11: Basic Operation
6. BASIC OPERATION PANEL RELEASE BUTTON Press this button to remove the control panel. POWER BUTTON Press power button to turn on/off the unit. DISPLAY BUTTON(DISP) Press this button briefly,the LCD will display the clock for about 5 seconds, then return to previous display mode. -
Page 12: Radio Operation
8. RADIO OPERATION FM MONO / STEREO BUTTON (MONO) Use this control to select stereo or mono reception for FM radio stations. You can sometimes improve reception of distant stations by selecting mono mode. LOCAL / DX BUTTON (LOC) This control can be used to change between Local and Distant (-DX) tuning mode. Local mode improves reception in some areas where the signal is too strong. - Page 13 9. Blue Tooth Hand Free Panel / Remote Control Function Key Matrix HANG UP/MODE BUTTON (Short Press) TALK BUTTON TALK BUTTON HANG UP/STOP (short press) NUMBERIC KEY FOR TEL DIALING BUTTONS Panel Function Button Blue Tooth Hand Free Function Please refer to the page E-16 Item 1 & 2. TALK 1.
-
Page 14: Bluetooth Mode Operation
BLUETOOTH MODE OPERATION INSTRUCTION FOR HANDSFREE FUNCTION 1. PAIR IT WITH YOUR PHONE (PAIRING) Before you use your Car HANDSFREE System,you need to pair it with your mobile phone. 1. The Bluetooth set system on the head unit will automatically go into pairing mode when the Ignition is being turned on and the Bluetooth symbol indicator on the display will Flash every 1 second. - Page 15 4. BLUETOOTH NOTICE Before you start to use our Bluetooth HEAD UNIT , Please pair the unit with your mobile phone completely. Please refer to the section of “PAIRING” To ensure the best reception for Pairing & Re-connection, please make sure the phone Battery is fully charged when making the pairing or Re-connection.
- Page 16 Specifications for Blue tooth BLUE TOOTH 200mA Max. Power Consumption 0 dBm (Class II) Output Power 2.4GHz ~ 2.4835GHz ISM Band Frequency Band 3 meters (free space) Range Bluetooth specification Standard Specifications subject to change without notice. Remark: Our Bluetooth Handsfree System adapts to the Bluetooth spec V2.0 and higher. It is compatible with profiles such as Handsfree profile and Head Set profile.
-
Page 17: Play/Pause Button
10. CD/MULTI-MEDIA FILE LOADING THE CD Press the Panel Open Button to fold down the front panel, insert the disc through CD slot, the disc will be automatically loaded and playback will also start. CD EJECT BUTTON Press this button to eject the CD. Since this button is located behind the front panel, fold down the panel before accessing this button. -
Page 18: Stop Button
MULTI-MEDIA FILE OR FOLDER SEARCHING Selecting a Track to Play Use the UP/DOWN/LEFT/RIGHT direction buttons to move to different file/folder Numbers. Press OK on a file number, and that file will begin to play, or by direct numeric input, Enter a file number with the numeric buttons (0-9) and +10 button to play the input Files Number. - Page 19 PROGRAM BUTTON (PROG) Press PROG button the screen will display the following message. PROG 1 0002 5 ---- 9 ---- 13 ---- 2 0004 6 ---- 10 ---- 14 ---- 3 ---- 7 ---- 11 ---- 15 ---- 4 ---- 8 ---- 12 ---- 16 ----...
- Page 20 11. PLAY MULTI-MEDIA FILES OPERATION Place a disc into the player, and the player will auto search the directories saved files. After searching, it will auto go to the first directory saved files (to the disc containing both Music and photo files;...
- Page 21 12. MMC/SD CARD & USB DEVICE OPERATIONS START THE USB DEVICE MODE P .1 1.The USB socket is accessible as indicated in picture USB SOCKET 1.(P .1) 2.Plug in the USB drive / device completely as indicated in picture 2(P .2) and display will show “USB” to indicate that the USB drive / device is being plugged in correctly &...
-
Page 22: Start The Sd/Mmc Mode
START THE SD/MMC MODE P .4 1. Press the panel open button,the D.C.P will drop down. 2. Push the D.C.P in the left direction until the point D at the right side of D.C.P disconnects from the DCP (As shown on the diagram). D.C.P . - Page 23 VIDEO DISC OPERATIONS PLAY BUTTON ( Press this button briefly to pause disc play, press again to resume play. STOP BUTTON( Stop the current disc playback. Briefly press the STOP button to stop the unit playback,when the PLAY button is pressed,normal playback will continue.
- Page 24 ZOOM BUTTON(ZOOM) The ZOOM feature allows you to magnify a certain area of the images recorded on the Video disc and other image discs. the screen will display the following message: ZOOM X2 ZOOM X3 ZOOM X4 ZOOM OFF A. Press ZOOM button to enlarge the image by X2. B.
- Page 25 PROGRAM BUTTON (PROG) The PROGRAM feature, select TITLE/CHAPTER to edit. A. Use numeric buttons to enter highlight PROGRAM title/chapter,for example: press numeric button title 2,chapter 4,PROGRAM T02/C04 appears it means Title 2,chapter 4 will be played first then press numeric button title 3,chapter 5 and PROGRAM T03/C05 appears, press the different numeric button to select the corresponding title/chapter and then you can program title/chapter to your need.if you want to complete program setting press PLAY button to play chapters in programmed order.
-
Page 26: Setup Menu Operation
14. SET UP MENU OPERATION General Steps of Setup Menu 1) Press the Setup button, the main setup menu appears. When the main menu displayed, the Video system will auto pause. 2) Press the Left and Right arrow buttons to highlight the icon of the desired page, then press the Down or Right arrow button to activate that page;... -
Page 27: System Setup
4) Press the Arrow buttons to highlight the Exit Setup option, then press Enter or Setup again to exit Setup Menu. NOTE: When setup, the pressing setup buttons will turn off the setup menu, while the choices that have been changed will be saved. Setup Items Introduction 1) SYSTEM SETUP The system setup options are illustrated below:... -
Page 28: Language Setup
TV TYPE 16 : 9 (Wide Screen): Choose this setting if your Multi-Media player is connected to a wide screen TV. If you choose this setting and you don't have a wide screen TV, the images on the screen may appear distorted due to vertical compression. 4 : 3 LB (Letter Box): Choosing this setting if your Multi-Media player is connected to a normal ratio TV. - Page 29 OSD LANGUAGE Highlight the OSD LANGUAGE option, and press the Arrow buttons to choose the OSD language you prefer. Press Enter to confirm, and it will display OSD in that language. AUDIO LANG Highlight the AUDIO LANG option, and press the Arrow buttons to choose the audio language you prefer.
-
Page 30: Specifications
15. SPECIFICATIONS CD PLAYER System Compact disc audio system Usable disc Compact disc, CD-R, CD-RW Sampling frequency 44.1KHz No of quantization bits 1bit Frequency 5-20,000Hz Number of channels 2 stereo S/N Ration 70dB RADIO SECTION Frequency Range 87.5 -107.9 MHz (USA) 87.5 -108 MHz (EURO) Intermediate Frequency 10.7 MHz...
Need help?
Do you have a question about the SD364B and is the answer not in the manual?
Questions and answers