Table of Contents
Advertisement
Quick Links
Advertisement
Table of Contents

Related Manuals for MFJ MFJ-993


Summary of Contents for MFJ MFJ-993
- Page 1 IntelliTuner Automatic Antenna Tuner Model MFJ-993 INSTRUCTION MANUAL CAUTION: Read All Instructions Before Operating Equipment MFJ ENTERPRISES, INC. 300 Industrial Park Road Starkville, MS 39759 USA Tel: 662-323-5869 Fax: 662-323-6551 COPYRIGHT 2004 MFJ ENTERPRISES, INC. VERSION 1C...
-
Page 3: Table Of Contents
MFJ-993 IntelliTuner Automatic Antenna Tuner Instruction Manual Contents THE BASICS Introduction............................1 Features............................2 Specifications........................... 2 Fast Start ............................3 Front Panel............................4 SWR/Wattmeter........................4 LCD Display ........................4 LCD Contrast Control......................4 ANT Button ........................4 MODE Button........................4 C-UP and C-DN Buttons .................... - Page 4 Circuit Block Diagram........................28 FIGURES Figure 1. Installation Block Diagram....................3 Figure 2. MFJ-993 Front Panel....................... 4 Figure 3. MFJ-993 Back Panel ....................... 6 Figure 4. Alinco Interface Cable..................... 7 Figure 5. Icom Interface Cable ....................... 7 Figure 6. SWR/Wattmeter ......................8...
- Page 5 Figure 9. Mode Button Flow Chart and Button Action ..............11 Figure 10. Main Mode Menus Display ..................12 Figure 11. Power-On Operations ....................21 Figure 12. MFJ-993 Circuit Block Diagram................. 28 TABLES Table 1. Memory Resolution ......................14 Table 2. Meter Needle Stationary Codes ..................17 Table 3.
- Page 6 MFJ-993 IntelliTuner Automatic Antenna Tuner Instruction Manual THIS PAGE IS LEFT BLANK INTENTIONALLY © 2003-2004 MFJ Enterprises, Inc.
-
Page 7: The Basics
If so, tuning is instantaneous and you’re ready to operate. If not, MFJ’s IntelliTune algorithm (based on MFJ’s famous SWR Analyzer technology) kicks in. It measures the complex impedance of your antenna. -
Page 8: Features
MFJ-993 IntelliTuner Automatic Antenna Tuner Instruction Manual Features • Automatically matches antennas from 6 to 1600 ohms impedance • Handles 300 watts PEP SSB, 150 watts CW • Tune in less than 15 seconds, usually less than 5 seconds •... -
Page 9: Fast Start
4. Connect your ground connection to the GROUND post. 5. Press the [POWER] button to turn on the MFJ-993 tuner. Place the [ANT] button in the out position to select antenna 1. Press the [AUTO] button in to select semi-automatic mode. -
Page 10: Front Panel
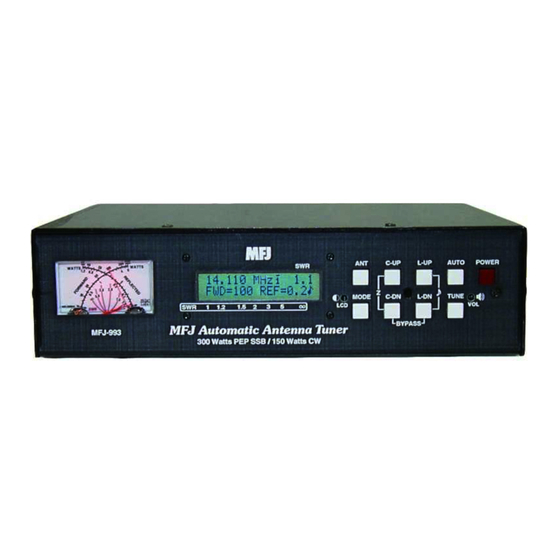
MFJ-993 IntelliTuner Automatic Antenna Tuner Instruction Manual Front Panel C-UP L-UP AUTO POWER 14.100 MHz 3.0 2.0 FWD=100 REF=0.5 MODE C-DN L-DN TUNE Hi x1 Lo x.1 400-3083 MFJ IntelliTuner BYPASS 300 / 30 MODEL WATTS AUTOMATIC ANTENNA TUNER MFJ-993... -
Page 11: L-Up And L-Dn Buttons
MFJ-993 IntelliTuner Automatic Antenna Tuner Instruction Manual • L-UP and L-DN Buttons: Used to manually increase or decrease the inductance of the L-network matching circuit. The inductance range is 0 to 24.86 µH (microhenries). The upper limit of inductance, dependent on frequency, is used to limit the maximum voltage and current across the tuner’s components. -
Page 12: Back Panel
WARNING: Make sure the +13.8 volts connection on the radio’s tuner port is capable of supplying at least 1 amp of current, since the MFJ-993 uses up to 1 amp. © 2003-2004 MFJ Enterprises, Inc. -
Page 13: Transmitter
MFJ-993 IntelliTuner Automatic Antenna Tuner Instruction Manual Interface cables for Alinco and Icom radios are available from MFJ Enterprises, Inc. Interface cables for compatible Kenwood and Yaesu radios will be available in the future. The MFJ-5124A interface cable provides power and control between an Alinco radio and the MFJ automatic tuner. Supported Alinco radios are DX-70, DX-77, and any Alinco radio that supports the Alinco EDX-2 tuner. -
Page 14: Installation
MFJ-993 IntelliTuner Automatic Antenna Tuner Instruction Manual Installation WARNING ● Never operate the tuner with its cover removed. Contact with the components inside the tuner while transmitting will result in painful RF burns. ● Locate the tuner so that the rear terminals are not accessible during operation. The single wire and balanced line connection may have high voltage while transmitting. -
Page 15: The Menus
The meter also indicates various operational states of the tuner. Refer to “Meter Codes and Audible Beeps” on page 16 for more details. The MFJ-993 also includes an SWR bar meter and an aural SWR indicator, selectable by pressing [L-UP] and [L-DN] buttons simultaneously. It also has bar meters for forward and reflected power. -
Page 16: Power Bar Meter Menu
MFJ-993 IntelliTuner Automatic Antenna Tuner Instruction Manual Power Bar Meter Menu Shows the frequency, SWR, and bar meters for forward and reflected power. The top bar meter is the forward power and the bottom bar meter is the reflected power. The numeric reading of forward power appears at the end of the bar meters. -
Page 17: Figure 9. Mode Button Flow Chart And Button Action
MFJ-993 IntelliTuner Automatic Antenna Tuner Instruction Manual MODE BUTTON FLOW CHART MAIN MODES SETUP MODES 14.100 MHz Digital TARGET SWR FWD=100 REF=0.5 Wattmeter AUTO TUNE SWR MODE 14.100 MHz METER RANGE Power For 2 sec. Bar Meter MEMORY MODE 14.100 MHz... -
Page 18: Figure 10. Main Mode Menus Display
MFJ-993 IntelliTuner Automatic Antenna Tuner Instruction Manual Frequency Indicators: Antenna, Memory, IntelliTune Indicators: Auto/Semi, StickyTune Forward power in watts Reflected power in watts Indicators: SWR Beep, LC Limit, Meter Range Forward power bar meter Reflected power bar meter Forward power in watts... -
Page 19: Tuner Indicators
Setup Mode Menus The setup mode menus allow you to set up how the MFJ-993 works and behaves. There are ten setup mode menus arranged in a “wrap-around” structure. To access these setup menus, press and hold the [MODE] button for two seconds. -
Page 20: Auto Tune Swr Menu
MFJ-993 IntelliTuner Automatic Antenna Tuner Instruction Manual Shortcut: Press both [TUNE] and [C-UP] buttons simultaneously to toggle the target SWR between 1.5 and 2.0, which is indicated by the meter SWR scale. Refer to Table 2 for meter code. Auto Tune SWR Menu Allows you to set the SWR threshold in the range 0.5 to 1.5. -
Page 21: Intellitune Menu
MFJ-993 IntelliTuner Automatic Antenna Tuner Instruction Manual The memory resolution for non-amateur frequency bands between 160 and 10 meters is approximately one percent of the lower frequency of that band. There are over a thousand memory locations for each antenna. Tuner settings are stored in memory separately for Antenna 1 and Antenna 2 (settings for balanced line or single-wire antennas are stored as Antenna 1). -
Page 22: Operation
MFJ-993 IntelliTuner Automatic Antenna Tuner Instruction Manual increased only to these limits. When a selected capacitance or inductance is higher than its allowed limit, and the frequency is changed, that selection is automatically reduced to the value of its limit. These limits are used to prevent matching of extreme load impedance outside the tuner’s specification, which may... -
Page 23: Table 2. Meter Needle Stationary Codes
MFJ-993 IntelliTuner Automatic Antenna Tuner Instruction Manual Meter Needle Stationary Codes (Meter needles stay at the indicated mark until buttons are released.) Forward 30 Watts Mark 100 Watts Mark 300 Watts Mark [TUNE] + [L-DN] Meter Range 30 Watts Not Used... -
Page 24: Grounding Hints
For operator safety, a good outside earth ground or water pipe ground should always be installed and connected to the case of the MFJ-993. Make certain the safety ground also connects to the transmitter and other station accessories. A wing-nut post marked GROUND is provided for ground connections. -
Page 25: Antenna System Hints
MFJ-993 IntelliTuner Automatic Antenna Tuner Instruction Manual work (especially if they are connected together with multiple wires), but the best RF grounds are radial systems or multi-wire counterpoises. Radials and counterpoises provide large, low resistance surfaces for RF energy. RF and lightning travel on the surface of conductors. Braided or woven conductors have high surface resistance to lightning and RF. - Page 26 MFJ-993 IntelliTuner Automatic Antenna Tuner Instruction Manual • Never try to load a G5RV or center fed dipole on a band below the half-wave design frequency. If you want to operate an 80-meter antenna on 160 meters, feed either or both conductors as a longwire against the station ground.
-
Page 27: Appendices
MFJ-993 IntelliTuner Automatic Antenna Tuner Instruction Manual Appendices POWER-ON OPERATIONS (Press and hold buttons while turning on the power.) Press and hold to get the firmware version number. C-UP POWER Press and hold L-UP POWER to start the self test. -
Page 28: Delete Antenna Memory
This test can also be used to test the optional MFJ-993RC Remote Control. Make sure to press both [ANT] and [AUTO] buttons on the MFJ-993 tuner to the in position before starting the self-test, and press the buttons on the MFJ-993RC instead of the front-panel buttons when prompted. -
Page 29: Power Down Circuit Test
2. Unplug the radio interface cable, if one is connected, from the tuner. 3. If testing the MFJ-993RC Remote Control, connect it to the Remote Port and make sure both [ANT] and [AUTO] buttons on the tuner are pressed to the in position. -
Page 30: Relay Test
MFJ-993 IntelliTuner Automatic Antenna Tuner Instruction Manual Here is the test procedure: 1. Make sure power to the tuner is off. 2. If the tuner has been reset to factory defaults, skip to step 6; otherwise continue with step 3. -
Page 31: Wattmeter Calibration
To calibrate the meter needles, you will need a Phillips screwdriver and a tuning tool or small flat blade screwdriver. WARNING: Never operate the MFJ-993 with its cover removed; dangerous voltages and currents can be present during operation. Never exceed tuner specifications. -
Page 32: Frequency Counter Calibration
WARNING: Do not touch anything inside the tuner during operation! Serious, painful RF burns can result. WARNING: Never operate the MFJ-993 with its cover removed; dangerous voltages and currents can be present during operation. Never exceed tuner specifications. 1. Turn off the power to the tuner and the transmitter. -
Page 33: In Case Of Difficulty
If you have any problem with this unit first check the appropriate section of this manual. If the manual does not reference your problem or your problem is not solved by reading the manual, you may call MFJ Technical Service at 662-323-0549 or the MFJ Factory at 662-323-5869. You will be best helped if you have your unit, manual and all information on your station handy so you can answer any questions the technicians may ask. -
Page 34: Circuit Block Diagram
MFJ-993 IntelliTuner Automatic Antenna Tuner Instruction Manual © 2003-2004 MFJ Enterprises, Inc. - Page 35 MFJ Enterprises, Inc. warrants to the original owner of this product, if manufactured by MFJ Enterprises, Inc. and purchased from an authorized dealer or directly from MFJ Enterprises, Inc. to be free from defects in material and workmanship for a period of 12 months from date of purchase provided the following terms of this warranty are satisfied.
- Page 36 MFJ ENTERPRISES, INC. MFJ-993 Manual 300 Industrial Park Road Version 1C Starkville, MS 39759 Printed In U.S.A. 03/2004...
Need help?
Do you have a question about the MFJ-993 and is the answer not in the manual?
Questions and answers