
Related Manuals for Targa DR-5200x


Summary of Contents for Targa DR-5200x
-
Page 1: Dvd Recorder
Operating instructions DVD Recorder DR-5200x Before first use, read the operating instructions carefully and keep them for future reference. -
Page 2: Table Of Contents
Contents Pro Logic Setting ................2 3 Getting Started Speaker Test ................24 Important Safeguards ..........3 Important Notes ............4 Recording Functions Important Safety Instructions ........5 Precautions ................. 5 2-1 Before Recording ..........25 About This Manual .............6 2-2 Recording ............... -
Page 3: Important Safeguards
Important Safeguards For your own safety read following instructions carefully before attempting to connect this recorder to the mains. Mains Supply: 230V ~ 50Hz - AC only This unit is designed to operate on a 230V~50Hz supply only. Connecting it to other power sources may damage it. Ensure that the supply corresponds to the information on the rating label at the rear of the recorder. -
Page 4: Important Notes
Important Notes Hearing is very important to you and to us so please take care when operating this equipment. It is strongly recommended that you follow the listed guidelines in order to prevent possible damage or loss of hearing. ESTABLISH A SAFE SOUND LEVEL Over time your hearing will adapt to continuous loud sounds and will give the impression that the volume has in fact been reduced. -
Page 5: Important Safety Instructions
Important Safety Instructions Since it is usual for DVD movies to be released at different WARNING: To reduce the risk of fire or electric shock, do not times in different regions of the world, all players have region expose this apparatus to rain or moisture. The apparatus codes and disc can have an optional region code. -
Page 6: About This Manual
About This Manual Thank you for purchasing this DVD Recorder. We sincerely hope you can enjoy the pleasure of recording and playing back pictures through this quality unit with only certain simple operations to follow. Through this DVD Recorder, you can watch DVDs, play audio CDs, or watch TV shows through external devices. -
Page 7: Importtant Instructions
Important Instructions 1 Read these instructions. 17 This appliance shall not be exposed to dripping or splashing water and that no object filled with liquid such 2 Keep these instructions. as vases shall be placed on the apparatus. 3 Heed all warning. 18 Power Lines - An outdoor antenna should be located 4 Follow all instructions. -
Page 8: General Information
General Information Features Chapter (DVD) Built-in Dolby Digital decorder, supporting Dolby Pro Logic, Sections of a picture or a music piece that are smaller than titles. Virtual Surround A title is composed of several chapters. Each chapter is assigned 5.1 Channel audio out a chapter number enabling you to locate the chapter you want. -
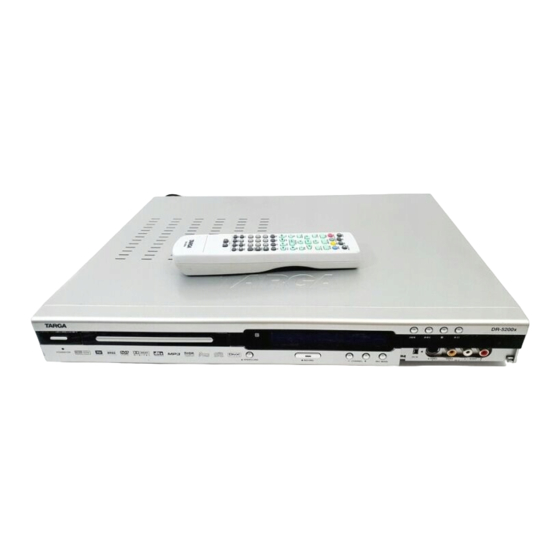
Page 9: Function Overview
Function Overview Front panel 5 6 7 10 1112 13 14 15 16 1- STANDBY/ON 9- RECORD To switch the unit to standby and power on mode Press to record 2- DVD Door(Disc Tray) 10- CHANNEL (-) 3- FL Press to select previous TV channel Fluorescent Display 11- CHANNEL (+) 4- PREV... -
Page 10: Remote Control
Function Overview 7. Timer/V+ : press to start timer recording or enter video plus. Remote control 8. Directional arrow buttons : select the item you want. 9. Disc Menu : press to select the root menu and PBC ON/OFF. 10. Record : press to start record. 11. -
Page 11: Basic Connection
Basic Connection IMPORTANT ! If your TV set have the S-Video socket , connect your TV with a S-Video cable .(Configuration B+D+E) Before connecting the AC power to the wall outlet, ensure 1. Insert ANTENNA cable into ANTENNA socket at the back of the that all other connections have been made. - Page 12 Basic Connection(continued) ¡ï Connect your DVD recorder to additional ¡ï Connect your DVD recorder to addi- devices, using Video socket (Configuration tional devices, using second Scart socket B/C ) (Configuration A ) You can connect additioanl devises such as decorders, You can connect additional devises such as decorders,DVD camcorders,etc.
-
Page 13: Connect Your Dvd Recorder To Vcr Or A Similar Recording Equipment
Basic Connection(continued) 4. Connect to a camcorder etc. by a video/s-video/DV IN. ¡ï Connect your DVD recorder to VCR or To copy camcorder recordings, you can use the front sockets .These a similar recording equipment scokets are located behind the flap on the left hand side . You can use this unit as the source player or as the recording deck. - Page 14 Basic Connection(continued) Connection for recording from other equipment Connect a VCR or similar recording equipment to the OUT jacks. 1. Connect to Video IN by a video cable.(configuration A+D) 2. Connect to S-video IN by a s-video cable.(configuration B+D) 3. Connect with component video cable.(configuration C+D)
-
Page 15: Initial Setting
1-1 Initial Setting Turn on your TV then turn on the recorder. The TV should show the EASY SETUP guide. If this does not show then press the AV button on your TV until the Picture shown below is seen. Select Language 1. -
Page 16: Channel Setup
1-2 Channel Setup (Channel ---> Auto Scan, Channel List & Fine Tune) 1. Press Channel , “Channel ”screen appears on the TV screen. 2. Press Enter or , “Auto Scan ”is highlighted. 3. Press repeatedly to select the item. Note: The recorder will auto enter into TV mode after auto scanning all channels. -
Page 17: Fine Tune Setting
1-3 Record/Disc Setup Channel Setup ( continued ) The Record/Disc Setting OSD will vary when a disc is not inserted, a 3/4/5/6 4. Select “CH Swap ”and press Enter, then press DVD+/-R,or a DVD+/-RW disc. to select your desired position and press Enter to confim.The previous channel will be moved to the new position. -
Page 18: Auto Chapter Setting
1-3 Record/Disc Setup (continued) The record time may differ depending on the recording conditi- ons. - Recording a program with poor reception, or a program or v- ideo source of low picture quality - Recording on a disc that has already been edited - Recording only a still picture or just sound 3. -
Page 19: Rename Disc Setting
1-3 Record/Disc Setup (continued) Finalize Disc Setting (DVD+/-R) Rename Disc Setting (DVD+/-RW & DVD+/-R) After you finalize the disc, you can play the disc on other DVD You can enter up to 10 characters for a disc name. players. It can be used as DVD-Video disc. But it is not guaranteed. 1. -
Page 20: Video Setup
1-4 Video Setup (Video ---> OSD Menu,TV Type, TV Display, Video Output & 2. Press Enter or to select the sub menu, then press select the appropriate setting for your TV screen size. Angle Mark, Progressive Scan) ¡ï4:3 (Pan Scan) 1. -
Page 21: Video Output Setting
1-4 Video Setup (continued) ¡ïNTSC Select this if the connected TV set is NTSC system. It will change the video signal of a PAL video disc and output to NTSC system. ¡ïPAL Select this if the connected TV set is PAL system. It will change the video signal of an NTSC disc and output to PAL format. -
Page 22: System Setup
1-5 System Setup (System ---> Set Clock, Rating, Factory Defaults, DivX (R) 2. Press Enter or to enter sub menu. Registration, Down Mix, Pro Logic & Speaker Test) 3. Use number buttons to enter the password and press Enter. 1. Press System , “System ”screen appears on the TV screen. Parental Control 2. -
Page 23: Choose Rating
1-5 System Setup (continued) Choose Rating 1. Select “Choose Rating ”. 2. Press Enter or to select the sub menu, then press select the parental lock level. 3. Press to return to “Factory Defaults ”. Note : After selecting “Confirm ”, this DVD Recorder will reset every setup item in the setup menu. -
Page 24: Pro Logic Setting
1-5 System Setup (continued) 2. Press ENTER or to select the sub menu, then press select the desired item. Speaker Test 3. Press ENTER, “ ” appears, the disc down mix is set. ¡Ì 4. Press to return to “Down Mix ”. 1. -
Page 25: Before Recording
The REC indicator lights. 1. Press Standby to turn the unit on. “Targa ”logo appears on the TV screen. Recording continues until you stop the recording or the disc is “POWER ON ” ---> “LOADING ” ---> “NO DISC ” appears full. -
Page 26: Timer Recording
2-2 Recording (continued) Timer Recording The program timer switches the unit on and off to record a TV prog- ram at a preset time. Use programmed recording to automatically start and stop recording at a later date. The DVD recorder will switch to the right program number and begin recording at the correct time. -
Page 27: Setting Vps/Pdc
2-2 Recording (continued) Setting Channel Timer Recording ( continued ) 1. Select “Channel ”. Setting VPS/PDC 2. Press Enter , the Channel screen appears. 1. Select “VPS/PDC ”. 2. Press Enter , the VPS/PDC screen appears. 3. Press to select your desired channel. 3. -
Page 28: Setting Title
2-2 Recording (continued) Setting Title Timer Recording ( continued ) 1. Select “Title ”. 2. Press Enter , title screen appears. ¡î If the list is correct: Press Timer/V+ to exit. ¡î If you want to edit it: Press to select the item you want to edit. 3. -
Page 29: Video Plus
2-2 Recording (continued) Video Plus Recording from an External Source All the information needed by the DVD recorder for programing is Preparations: contained in the video plus numbers. This 9-digit video plus number is found in most TV listing magazines. Pls follow the steps below: Please connect this DVD Recorder to your TV, and connect outer equipment to this DVD Recorder. -
Page 30: Editing
2-3 Editing Edit function can ONLY work on DVD+/-RW or DVD+/-R discs. Once you insert a DVD+/-RW or DVD+/-R disc, a title menu appears on the screen. All the video clips you have recorded will be shown on this menu as different titles. Name of the recording. -
Page 31: Playback Features
3 Playback Features Preparations fast forword : FF2X, FF 4X, FF 6X, FF 8X(4 steps). fast reverse : FR 2X, FR 4X, FR 6X, FR 8X(4 steps). 1. When you complete all the connections, plug the AC power cord of the player. For VCD / CD discs 2. -
Page 32: A-B Repeat Playback
3 Playback Features (continued) A-B Repeat Playback 3. Use numeric key (0~9) to input the specific title, chapter or elapsed playing time at which you want to begin playback. 4. Press Enter. This function can play a specific section in a chapter/track repeatedly. 1. -
Page 33: Audio
3 Playback Features (continued) This operation works only with discs on which multiple subtitle be marked. languages are recorded. For these discs, the same scenes can viewed from each of the Press Subtitle repeatedly during playback to select the different different angles. -
Page 34: Jpeg Cd Playback
3 Playback Features (continued) MP3 CD Playback After the last picture has been displayed, the thumbnail pictures appear on the TV screen. 1. Load the disc with the label facing up on the disc tray. To start the slide show from the thumbnail pictures File list screen appears. -
Page 35: Divx / Nero Digital Playback
3 Playback Features (continued) DivX / Nero Digital Playback 1. Load the disc with the label facing up on the disc tray. Stopping Playback File list screen appears. Press n during playback. “Stop ”appears briefly on the TV screen. Pause Press /ll during playback. -
Page 36: Troubleshooting Guide
4-1 Troubleshooting Guide If you experience any of the following difficulties while using the The system is in pause mode or in slow-motion play mode, or system, use this troubleshooting guide to help you remedy the fast forward or fast reverse is performed. Press PLAY/PAUSE problem. -
Page 37: Disc Handling And Maintenance
4-2 Disc Handling and Maintenance Handling Precautions Hold the disc by the edges so the surface will not be soiled with fi ngerprints. (A) Fingerprints, dirt and scratches can cause skipping and distortion. Do not write on the label side with a ball-point pen or other writing utensils. Do not use record cleaning sprays, benzine, thinner, static electricity prevention liquids or any other solvent. -
Page 38: Definition Of Terms
4-3 Definition of Terms Angle Recorded onto some DVD discs are scenes which have been simultaneously shot from a number of different angles (the same scene is shot from the front, from the left side, from the right side, etc.). With such discs, the ANGLE button can be used to view the scene from different angles. -
Page 39: Specifications
4-4 Specifications Note: Specifications subject to change without prior notice Timer 1 year/15-event programmable Playable discs Outputs DVD+/-RW DVD+/-R COMPONENT VIDEO OUT : DVD-VIDEO VIDEO CD Y: 1.0 Vp-p (75 .) Audio CD (CD-DA) PB: 0.7 Vp-p (75 .) MP3 CD PR: 0.7 Vp-p (75 .) DivX/MPEG4 VIDEO: 1.0 Vp-p (75 .) - Page 40 Targa GmbH Lange Wende 41 D-59494 Soest www.targa-online.com...
Need help?
Do you have a question about the DR-5200x and is the answer not in the manual?
Questions and answers