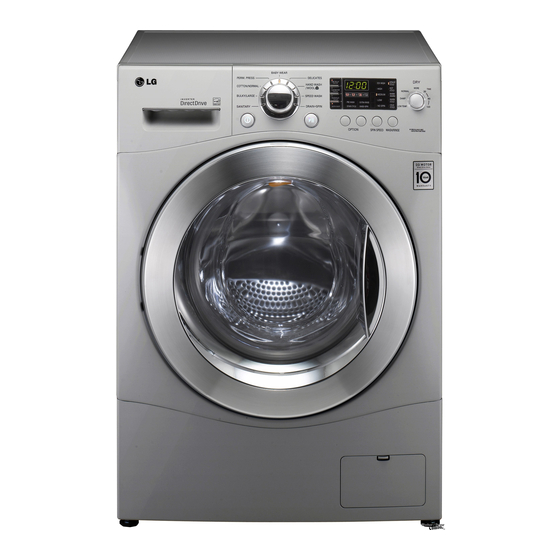
LG WM3455H Series User's Manual & Installation Instructions
Front loading combo
Hide thumbs
Also See for WM3455H Series:
- User's manual & installation instructions (108 pages) ,
- User's manual & installation instructions (109 pages) ,
- Service manual (51 pages)
Table of Contents
Advertisement
Fro nt L oadi ng Comb o
INSTA L L AT I ON I N ST RU C T I O N S
Before beginning installation, read these instructions
carefully. This wll simplify installation and ensure that the
washer is installed correctly and safely. Leave these instructions
near the washer after installation for future reference.
Lavado ra d e Carga
G U Í A DE L U SUA R I O E
INST RU C C I ON ES D E I N STA LAC I Ó N
Antes de comenzar la instalación, lea atentamente estas
instrucciones. Esto simplificará la instalación y asegurará que
la lavadora está instalada en forma correcta y segura. Conserve
estas instrucciones cerca de la lavadora luego de la instalación
Lave-li nge e t
c hargem ent front al
G UI DE DE L' U T I L I SATE U R E T
DIRECT I V ES D'I NS TA L L AT I O N
Avant de commencer à installer votre machine à laver, lisez at-
tentivement ces instructions. Cela simplifiera votre installation
et assurera que la machine à laver est installée correctement et
en toute sécurité. Conservez ces instructions à proximité de la
machine à laver après son installation, pour référence future.
M od e l / M o d e l o/ M odèle
Designed specially to use only
HE (High-Efficiency) detergent
Diseñada específicamente para usar con
el detergente tipo HE (Alta eficiencia)
Spécialement conçu pour
utilisation avec un détergent haute ef-
ficacité uniquement
P/No.: MFL63288611
U SE R' S G U I D E &
Frontal
para futuras consultas.
WM3455H*
To contact LG Electronics, 24 hours a day,
7 days a week:
1-800-243-0000
Or visit us on the Web at: us.lge.com
Número telefónico de LG Electronics, las 24
horas del día, 7 días a la semana:
1-800-243-0000
O visítenos en la Web en: us.lge.com
To contact LG Electronics, 24 hours a day,
7 days a week:
1-888-LGCANADA
Or visit us on the Web at: ca.lge.com
Pour contacter LG Electronics, 24 heures par
jour, 7 jours par semaine :
1-888-LGCANADA
Ou visitez notre site Web à l'adresse : ca.lge.com
Advertisement
Table of Contents

Related Manuals for LG WM3455H Series


Summary of Contents for LG WM3455H Series
- Page 1 To contact LG Electronics, 24 hours a day, 7 days a week: 1-800-243-0000 Or visit us on the Web at: us.lge.com Número telefónico de LG Electronics, las 24 horas del día, 7 días a la semana: 1-800-243-0000 Fro nt L oadi ng Comb o O visítenos en la Web en: us.lge.com...
-
Page 2: Table Of Contents
THANK YOU! PARTS AND FEATURES Special Features ............. 7 Congratulations on your purchase INSTALLATION INSTRUCTIONS and welcome to the LG family. Choose the Proper Location ........8 Your new LG washing machine Clearances ............. 8 Flooring ..............9 Unpacking ............10 combines the most advanced Connecting the Water Lines ......... -
Page 3: Important Safety Instructions
I M P O RTA N T S A F E T Y I N S T R U C T I O N S READ ALL INSTRUCTIONS BEFORE USE wWARNING For your safety, the information in this manual must be followed to minimize the risk of fire or explosion, electric shock, or to prevent property damage, personal injury, or loss of life. -
Page 4: Basic Safety Precautions
I M P O RTA N T S A F E T Y I N S T R U C T I O N S READ ALL INSTRUCTIONS BEFORE USE wWARNING For your safety, the information in this manual must be followed to minimize the risk of fi re or explosion, electric shock, or to prevent property damage, personal injury, or loss of life. -
Page 5: Safety Instructions For Installation
I M P O RTA N T S A F E T Y I N S T R U C T I O N S READ ALL INSTRUCTIONS BEFORE USE wWARNING For your safety, the information in this manual must be followed to minimize the risk of fire or explosion, electric shock, or to prevent property damage, personal injury, or loss of life. -
Page 6: Save These Instructions
I M P O RTA N T S A F E T Y I N S T R U C T I O N S READ ALL INSTRUCTIONS BEFORE USE wWARNING For your safety, the information in this manual must be followed to minimize the risk of fi re or explosion, electric shock, or to prevent property damage, personal injury, or loss of life. -
Page 7: Parts And Features
PA RT S A N D F E AT U R E S SpECIAL FEATURES DETERgENT DISpENSER DRAwER This three-compartment drawer provides separate dispensers for prewash and main wash detergent, and liquid fabric softener. CONTROL pANEL wITh LED DISpLAY Simple electronic controls are user-friendly. The LED display indicates cycle options and cycle time during operation. -
Page 8: Installation Instructions
I N S TA L L AT I O N I N S T R U C T I O N S ChOOSE ThE pROpER LOCATION • Do not remove ground prong. Do not use wWARNING an adapter or extension cord. Plug into a •... -
Page 9: Flooring
I N S TA L L AT I O N I N S T R U C T I O N S FLOORINg • To minimize noise and vibration, the washer NOTE: Before installing the MUST be installed on a solidly constructed floor. washer, make sure the floor is See the NOTE at right. -
Page 10: Unpacking
I N S TA L L AT I O N I N S T R U C T I O N S UNpACkINg If you must lay the washer down to remove the base packaging materials, always lay it carefully on its side. -
Page 11: Connecting The Water Lines
(to water inlet on washer) • IMPORTANT: Use ONLY the inlet hoses provided by LG with this laundry product. Aftermarket hoses are not guaranteed to fit or function correctly. Other hoses may not tighten correctly and could cause leaks. Subsequent damage to product or property will not be covered under the terms of LG's warranty. -
Page 12: Connecting The Drain Line
I N S TA L L AT I O N I N S T R U C T I O N S CONNECTINg ThE DRAIN LINE Option 1: Standpipe • The drain hose should always be properly secured. Failure to properly secure the drain hose can result in fl ooding and property Elbow damage. -
Page 13: Leveling The Washer
I N S TA L L AT I O N I N S T R U C T I O N S LEVELINg ThE wAShER The drum of your new washer spins at very high • All four leveling feet must rest solidly on the speeds, up to 1,300 RPM. -
Page 14: How To Use
H O W TO U S E SORTINg wASh LOADS Fabric Care Labels grouping Similar Items Most articles of clothing feature fabric care labels For best results, sort clothes into loads that can that include instructions for proper care. be washed with the same wash cycle. Different fabrics have different care requirements. -
Page 15: Selecting Detergent
H O W TO U S E SELECTINg DETERgENT IMPORTANT: Your washing machine is IMPORTANT: Do not place or store laundry designed for use with only High-Efficiency products, such as detergent, bleach, or liquid (HE) detergents. HE detergents are formulated fabric softener, on top of your washer or dryer. -
Page 16: Loading The Dispenser
H O W TO U S E LOADINg ThE DISpENSER prewash Detergent Compartment Fabric Softener Compartment Add liquid or powdered detergent to this This compartment holds liquid fabric softener, compartment when using the Prewash option. which will be automatically dispensed during the Always use HE (High-Efficiency) detergent with final rinse cycle. -
Page 17: Control Panel Features
H O W TO U S E CONTROL pANEL FEATURES pOwER ON/OFF BUTTON CYCLE SETTINg BUTTONS Press to turn the washer ON. Use these buttons to select the desired cycle Press again to turn the washer OFF. options for the selected cycle. Press the button for that setting until the indicator light for the NOTE: Pressing the ON/OFF button during a desired value is lit. -
Page 18: Cycle Guide
H O W TO U S E CYCLE GUIDE The cycle guide below shows the options and recommended fabric types for each cycle. = Available option = Cycle default settings Stain Pre- Rinse+ Extra Water Wash/Rinse Cycle Fabric type Spin Cycle Wash Spin... -
Page 19: The Led Display
H O W TO U S E ThE LED DISpLAY The LED display shows the settings, estimated time remaining, options, and status messages for your washer. When the washer is turned on, the display will illuminate. DOOR LOCk INDICATOR CYCLE COmpLETION INDICATOR Indicates that the door is locked. -
Page 20: Operating The Washer
H O W TO U S E OpERATINg ThE wAShER Once you have loaded the washer and added Press the START/PAUSE button laundry products (detergent, bleach, and/or to begin the cycle. The door will fabric softener): latch, the display will change, and the washer will calculate the Press the ON/OFF button to turn on the estimated time remaining. -
Page 21: Cycle Setting Buttons
H O W TO U S E CYCLE SETTINg BUTTONS SpIN SpEED Each cycle has preset settings that are selected automatically. You may also customize the The washer drum spins at up to 1,300 settings using the cycle setting buttons. RPM. - Page 22 H O W TO U S E CYCLE SETTINg BUTTONS (cont.) Drying guide–Automatic Dry Electronic sensors measure the temperature of the Drying options are easily exhaust to increase or decrease the drying temperature selected with the DRY button. for faster reaction time and tighter temperature control. For most even drying, make Recommended DRY settings by fabric type: sure all articles in the clothes...
-
Page 23: Cycle Option Buttons
H O W TO U S E CYCLE OpTION BUTTONS RINSE + SpIN Your washing machine features several additional cycle options to customize cycles to meet your Select this option to rinse individual needs. Certain option buttons also and spin a load separately feature a special function (see the following page from a regular cycle. -
Page 24: Special Functions
H O W TO U S E SpECIAL FUNCTIONS hAND wASh/wOOL The option buttons also activate special functions, including CHILD LOCK, and TUB • Only woolen items that are designated as CLEAN. Press and hold the option button Machine-Washable should be washed in this marked with the special function for 3 seconds to washing machine activate. -
Page 25: Care And Cleaning
C A R E A N D C L E A N I N G REgULAR CLEANINg wWARNING: • Unplug the washer before cleaning to avoid the risk of electric shock. Failure to follow this warning can cause serious injury, fire, electrical shock, or death. •... -
Page 26: Cleaning The Washer
C A R E A N D C L E A N I N G REgULAR CLEANINg (cont.) Storing the washer To remove the antifreeze from the washer after storage, run washer through a complete If the washer will not be used for an extended cycle using detergent. -
Page 27: Maintenance
Cleaning the water Inlet Filters IMPORTANTE: Use ONLY the inlet hoses provided by LG with this laundry product. If the washer detects that water is not entering Aftermarket hoses are not guaranteed to fit or the dispenser, an error message will show on the function correctly. -
Page 28: Cleaning The Drain Pump Filter
C A R E A N D C L E A N I N G mAINTENANCE (cont.) Cleaning the Drain pump Filter Lint and other objects may accumulate and clog the drain pump filter. If the washer fails to drain properly, unplug the washer and allow the water to cool, if necessary, before proceeding. -
Page 29: Troubleshooting
T RO U B L E S H O OT I N G NORmAL SOUNDS YOU mAY hEAR The following sounds may be heard while the washer is operating. They are normal. Humming or gurgling Clicking Drain pump pumping water from the washer at Door lock relay when the door locks and unlocks. - Page 30 T RO U B L E S H O OT I N G BEFORE CALLINg FOR SERVICE (cont.) problem possible Causes Solutions Wrinkling • Washer not unloaded • Always remove items from the washer as soon as the cycle promptly. is completed.
- Page 31 T RO U B L E S H O OT I N G BEFORE CALLINg FOR SERVICE (cont.) problem possible Causes Solutions The display shows: • Load is too small. • Add 1 or 2 similar items to help balance the load. •...
-
Page 32: Specification
S P E C I F I C AT I O N S kEY DImENSIONS AND SpECIFICATIONS The appearance and specifi cations listed in this guide may vary due to constant product improvements. model wm1355h* Description Front-Loading Washer Electrical Requirements 120 VAC @ 60 Hz. -
Page 33: Warranty
LG WASHING MACHINE LIMITED WARRANTY - USA Your LG Washing Machine will be will repaired or replaced, at LG’s option, if it proves to be defective in material or work- manship under normal use, during the warranty period (“Warranty Period”) set forth below, effective from the date (“Date of Purchase”) of original consumer purchase of the product. - Page 34 WARRANTY: Should your LG Washer (“Product”) fail due to a defect in material or workmanship under normal home use during the warranty period set forth below, LG Canada will at its option repair or replace the Product upon receipt of proof of original retail purchase. This warranty is valid only to the original retail purchaser of the product and applies only to a Product distributed in Canada by LG Canada or an authorized Canadian distributor thereof.
Need help?
Do you have a question about the WM3455H Series and is the answer not in the manual?
Questions and answers