
Related Manuals for BURY CL 1010


Summary of Contents for BURY CL 1010
-
Page 1: Table Of Contents
1. General 2. Security guidelines Installation of the system 3. Scope of supply 4. Positioning and mounting 5. Establishing the power supply 6. Installation instructions for the fuses Operating guidelines 7. Functions of the CL 1010 Time Further Information 8. Service... -
Page 2: Introductory Information
Dear customer, Congratulation on purchasing a BURY product. You have chosen a high quality product that is extremely easy to use. All aspects of BURY pro- duction through to sales and service are subject to strict quality ma- nagement according to DIN EN ISO 9001. All BURY products meet CE and e1 security standards. - Page 3 Faults Do not commission the device if you detect or assume a defect. In this case, contact a BURY specialised dealer or our hotline. Improper repair efforts can be dangerous for you. Therefore, only skilled personnel may perform inspections.
-
Page 4: Installation Of The System
Installation of the system 3. Scope of supply 150 cm... -
Page 5: Positioning And Mounting
Also make sure that the CL 1010 Time is able to receive GPS data opti- mally. The installation pad should therefore be attached to the dash- board in a way which is as level as possible. - Page 6 Important: When positioning the monitor please take care that the CL 1010 Time does not impair the view onto the road, that it will not be installed in the impact zone of the passenger compartment (amongst others in the airbag inflation zones) and that cables may be laid without any problems.
- Page 7 To release the CL 1010 Time from the installation pad, please press in the two clips on each of the sides. The attachment is then released and you can remove the CL 1010 Time. Example of installation:...
- Page 8 Installation of the system Step 2: Please lay the cables in a way that they do not lie/hang unsecured in the vehicle and that they may not influence the conducting of the vehi- cle. When laying a cable, please take care that it is not under traction stress but that it has some tolerance.
-
Page 9: Establishing The Power Supply
5. Establishing the power supply The power supply of the system is established via a 3-core cable. Con- nect the black (clamp 31 – minus), the red (clamp 30 – steady plus) and the blue cable (clamp 15 – ignition plus) to the power supply of your radio (where required via the cigarette lighter or the fuse box). -
Page 10: Operating Guidelines
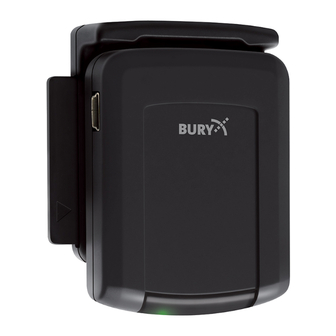
7. Functions of the CL 1010 Time The CL 1010 Time is a system which serves the purpose of displaying the vehicle positions with the use of GPS coordinates. Using road map data, these coordinates can then display a specific route along which the vehicle has travelled. - Page 11 If the CL 1010 Time is attached to a PC, the red LED will light up. As soon as the data are read out, the green LED flashes. Subsequent to the conclusion of the read-out procedure, the green LED then lights up on a constant basis.
-
Page 12: Further Information
8. Service In case of general or technical queries, suggestions and comments, please do not hesitate to contact our team at any time. Suggestions and feedback are always welcomed: BURY GmbH & Co. KG Robert-Koch-Straße 1-7 32584 Löhne Hotline: +49(0)180 5 - 842 468*...
Need help?
Do you have a question about the CL 1010 and is the answer not in the manual?
Questions and answers