Table of Contents
Advertisement
Advertisement
Table of Contents

Related Manuals for Kenmore 795.7130-K


Summary of Contents for Kenmore 795.7130-K
- Page 1 BOTTOM FREEZER REFRIGERATOR REFRIGERADOR CON CONGELADOR INFERIOR CONGI_LATEUR INFI_RIEUR RI_FRIGI_RATEUR Models / Modelos / Modeles 795.7130-k "k = color number MF_e_9_Te_ Sears Brands Printed in Mexico Management Corporation, Hoffman Estates, IL 60179 U.S.A. "1" I"" www.sears.com...
-
Page 2: Table Of Contents
English Version Spanish Version French Version Kenmore Warranty Protection Agreements Safety Instructions Grounding Requirements Parts and Features Refrigerator Installation Unpacking your refrigerator Installation Base Grille How to remove door handle Removing and Replacing Your refrigerator doors Pull out drawer Leveling and door alignment... - Page 3 Kenmore Appliance Warranty _One Year Limited Warranty When installed, operated and maintained according to all instructions supplied with the product, if this appliance fails due to a defect in material or workmanship within one year from the date of purchase, call 1-800-4-MY-HOME free repair.
-
Page 4: Protection Agreements
In the space below, record the date of purchase, model and serial number of your product. You will find the model and serial number printed on an identification label located on the right-hand side of the refrigerator compartment. Have these items of information available whenever you contact Sears concerning your product. -
Page 5: Safety Instructions
• DO NOT store or use gasoline or other flammable vapors and liquids in the vicinity of this or any other appliance. • DO NOT allow children to climb, stand or hang on the refrigerator doors or shelves in the refrigerator. They could damage the refrigerator and seriously injure themselves. -
Page 6: Recommended Grounding Method
Use of an extension cord will increase the clearance needed for the back of the refrigerator. If the supply cord is damaged, it must be replaced by the manufacturer or its service agent or a similarly qualified person in order to avoid any hazard. -
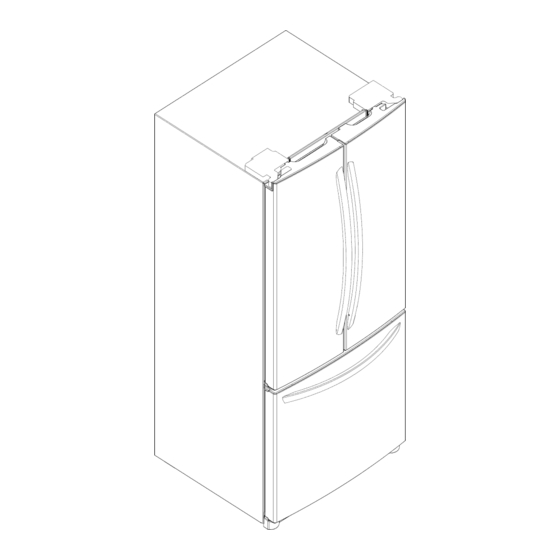
Page 7: Parts And Features
Usethissection to become morefamiliar w iththepartsandfeatures. NOTE: This guide covers several different models. The refrigerator you have purchased may have some or all of the items listed below. The locations of the features shown below may not match your model. -
Page 8: Refrigerator Installation
They are packed together to prevent possible damage during shipment. Let your refrigerator run for 2 or 3 hours before store food in it. Check the flow of cold air in the freezer compartment is now ready for use. -
Page 9: How To Remove Door Handle
10 mm Hex head socket wrench NOTE: It is always recommended that the doors be removed when it is necessary to move the refrigerator through a narrow opening. If it is necessary to remove the handles follow the directions below. -
Page 10: Refrigerator Door
REFRIGERATOR 1. Removing Refrigerator Door NOTE: Handle appearance may vary. IMPORTANT: Before you begin, turn the refrigerator OFF and unplug it. Remove food and any bins from doors. • Left Door • Loosen the cover screws (1). • Disconnect door switch wire (2). - Page 11 2. Replacing Refrigerator Door • Right Door • Lower the door onto the middle hinge pin (7). • Make sure the door is aligned with the cabinet. • Replace the top hinge (4) installing hinge screws (3) to secure it.
-
Page 12: Pull Out Drawer
HOW TO REMOVE AND INSTALL THE PULL OUT DRAWER 1. Removing Pull out Drawer IMPORTANT: To avoid possible injury, product or property damage, you will need two persons to perform the following instructions. • Pull the drawer open to full lower extension. Remove the durabase by lifting it from rail system. - Page 13 HOW TO REMOVE AND INSTALL THE PULL OUT DRAWER (cont.) 2. Installing Pull out Drawer IMPORTANT: To avoid possible injury, product or property damage, you will need two people to perform the following instructions• • With both hands, hold the center of the bar and pull it out to let both rails out to full extension simultaneously.
-
Page 14: Leveling And Door Alignment
AND DOOR ALIGNMENT Leveling Your refrigerator has two front leveling screws, one on the right and one on the left. If your refrigerator seems unsteady or you want the doors to close easier, adjust the refrigerator's tilt using the instructions below: 1. -
Page 15: Using Your Refrigerator
Then adjust the compartment temperature as desired. I_ Identify your control type • Refrigerator control: 32 °F to 47 °F or 0 °C to 8 °C The lower the number setting, the colder the refrigerator compartment will become. H FR/G/RATOR... -
Page 16: Adjusting Control Settings
Colder the number setting, the longer the compressor will run to keep the temperature colder. The freezer control adjusts the cold air flow from the freezer to the refrigerator. Setting the freezer control to a lower temperature keeps more cold air in the freezer compartment to make it colder. -
Page 17: Storing Frozen Food
Fruit Wash, let dry, and store in refrigerator in plastic bags or in the crisper. Do not wash or hull berries until you are ready to use them. Sort and keep berries in their original container in a crisper, or store in a loosely closed paper bag on a refrigerator shelf. -
Page 18: Refrigerator Section
REFRIGERATOR SECTION REFRIGERATOR SHELVES The shelves in your refrigerator are adjustable to meet your individual storage needs. These units are all glass shelves. IMPORTANT: Do not clean glass shelves with warm water when they are cold. Shelves may break if exposed to sudden temperature changes or impact, such as bumping. -
Page 19: Pantry
PANTRY (on some models) Adjust the control to desired temperature COLD to COLDER, Pull forward to open, Lift slightly and pull it out to remove, CRISPER HUMIDITY CONTROL (on some models) You can control the amount of humidity in the moisture- sealed crispers, Adjust the control to any setting between "FRUIT"... -
Page 20: Crisper Cover With Lattice On Inner Surface
To remove the crisper: 1. Slide crisper straight out to the stop. 2. Lift the front of the crisper, then pull it out to remove. 3. Replace the crisper by sliding it back in fully past the drawer sto ). CRISPER COVER WITH LATTICE SURFACE... -
Page 21: Dairy Bin
DAIRY BIN 1. To remove the dairy bin, simply lift it and pull straight out. 2. To replace the dairy bin, slide it in above the desired location and push down until it stops. EGG BOX (Some models) Store the Egg Box on interior shelf, not on door shelf. [] CAUTION: Do not use the egg box as an ice storage bin in the freezer compartment. -
Page 22: Tilting Door
DURABASE DIVIDER (on some The Durabase divider allows you to organize the durabase area into sections, W_WARNING: There is enough open space in it for children to climb inside. [] WARNING: To prevent accidental child and pet entrapment or suffocation risk. DO NOT allow them to play inside of the drawer. -
Page 23: Care And Cleaning
INSIDE WALLS (allow freezer to warm up so cloth will not stick) To help remove odors, you can wash the inside of the refrigerator with a mixture of baking soda and warm water. Mix 2 tablespoons baking soda to 1 quart of water (26 g soda to 1 liter water). -
Page 24: Power Interruptions
This stops odor and mold from building up. WHEN YOU MOVE When you are moving your refrigerator to a new home, follow these steps to prepare it for the move. Remove all food from the refrigerator and pack all frozen food in dry ice. -
Page 25: Normal Sounds You May Hear
• When the water supply will be shut off for several hours. • When the ice storage bin is removed for more than a minute or two. • When the refrigerator will not be used for several days. NORMAL • The icemaker water valve will buzz as the icemaker fills with water. -
Page 26: Before You Begin
(available at plumbing supply stores) to connect the water line to the refrigerator OR you can cut system is connected off the flared fitting with a tube cutterand then use a compression fitting. -
Page 27: Installation Instructions
NOTE: Be sure there is sufficient extra tubing (about 8 feet coiled into 3 turns of about 10 inches in diameter) to allow the refrigerator to move out from the wall after installation. 7. CONNECT... -
Page 28: Plug In The Refrigerator
• If your refrigerator does not have a water filter, we recommend installing one. If your water supply has sand or particles that could clog the screen of the refrigerator's water valve. -
Page 29: Sounds You May Hear
Firmly plug the cord into a live outlet with proper voltage. Replace the fuse or reset the circuit breaker. If word OFF is in the Freezer and Refrigerator Display, hold COLDER key on refrigerator over 3 sec. Wait about 30 minutes for defrost cycle to end. - Page 30 Adding food and opening the door warms the refrigerator. It is normal for the refrigerator to run longer in order to cool the refrigerator back down. Adding a large amount of food warms the refrigerator. See the Food Storage Guide Section.
- Page 31 When you open the door, warmer air enters the refrigerator. As the warm air cools, it can create a vacuum. If the door is hard to open, wait 5 minutes to allow the air pressure to equalize, then see if it opens more easily.
Need help?
Do you have a question about the 795.7130-K and is the answer not in the manual?
Questions and answers
Where do I find the part for the top ****
The document does not provide specific information about where to find the part for the Kenmore 795.7130-K top. However, it references Sears Brands Management Corporation and includes a website: www.sears.com. You may be able to find the part there.
This answer is automatically generated