Table of Contents
Advertisement
Available languages
Available languages
Quick Links
Advertisement
Table of Contents

Related Manuals for Olympus FL-300R


Summary of Contents for Olympus FL-300R
- Page 1 Electronic Flash FL-300R...
- Page 2 Instructions Mode d’emploi Instrucciones 使⽤说明书 使⽤說明書...
- Page 4 F no. 1.3~14 0.9~10 0.6~7 0.6~5 0.6~3.5 0.6~2.5 0.6~1.7 0.6~1.3 0.6~0.9 1.8~20 1.3~14 0.9~10 0.6~7 0.6~5 0.6~3.5 0.6~2.5 0.6~1.7 0.6~1.3 2.5~28 1.8~20 1.3~14 0.9~10 0.6~7 0.6~5 0.6~3.5 0.6~2.5 0.6~1.7 3.6~40 2.5~28 1.8~20 1.3~14 0.9~10 0.6~7 0.6~5 0.6~3.5 0.6~2.5 1600 5.1~56 3.6~40 2.5~28 1.8~20 1.3~14 0.9~10 0.6~7 0.6~5 0.6~3.5 3200 7.1~80 5.1~56 3.6~40 2.5~28 1.8~20 1.3~14 0.9~10...
-
Page 5: Information For Your Safety
Information for Your Safety IMPORTANT SAFETY INSTRUCTIONS When using your photographic equipment, basic safety precautions should always be followed, including the following: Read and understand all instructions before using. Close supervision is necessary when any fl ash is used by or near children. - Page 6 Do not operate if the fl ash has been dropped or damaged - until it has been examined by qualifi ed service personnel. Let fl ash cool completely before putting away. To reduce the risk of electric shock, do not immerse this fl ash in water or other liquids.
- Page 7 AUTO CHECK ON/OFF TEST CHARGE...
-
Page 9: Auto Check
ON/OFF ON/OFF CHARGE TEST ON/OFF ON/OFF TEST TEST CHARGE CHARGE CHARGE CHARGE AUTO CHECK ON/OFF... - Page 10 TTL-AUTO MANUAL MANUAL TTL-AUTO AUTO CHECK MANUAL No. ISO100 1600 3200 6400 0.71...
- Page 11 14mm...
- Page 12 A B 2 [On] A Mode A Mode +5.0 +5.0 [HI] [MID] [HI] [MID] – – MANUAL MANUAL [LO] [LO] +3.0 +3.0 250 F5.6 0.0 250 F5.6 0.0...
- Page 16 MODEL NO. FL-300R 20 ISO100 12 ISO100 14mm 28mm 18mm TTL-AUTO MANUAL RC 1/20000 1/500 CHARGE –10 42 C 90 % 56.4mm 89.2 mm 26.9 mm...
-
Page 17: Continuous Fi Ring
Thank you for purchasing this Olympus product. To ensure your safety, please read this instruction manual before use, and keep it handy for future reference. Names of parts (Fig. Names of parts (Fig. p. 3) p. 3) Notes AAA (R03) manganese batteries cannot be used. -
Page 18: Attaching To The Camera
Attaching to the camera Attaching to the camera Notes Confi rm that both the camera and electronic fl ash are off. Attaching or removing the electronic fl ash while either the fl ash or the camera is on may result in malfunction. Remove the camera hot shoe cover and slide the fl... - Page 19 Turning on the electronic fl ash Turning on the electronic fl ash Attach an electronic fl ash to the camera, and then turn the camera on. Press and hold the ON/OFF button until any lamp lights. • Press the ON/OFF button again to turn the power off. •...
- Page 20 Shooting Shooting According to the fl ash mode setting of the camera, shooting in TTL-AUTO mode or MANUAL mode is available with this fl ash. Set the RC switch to “OFF”. In accordance with the intended use, set the fl ash mode of the camera.
- Page 21 Wide angle Wide angle Use the wide panel for shooting when the lens focal length is wider than 9 mm to 14 mm. Slide the W knob to the W side. Folding Folding This fl ash can be bent approx. 30 degrees in front ( ) and 60 degrees in rear ( It also can be folded in front to make it easier to carry the camera with the fl...
- Page 22 Wireless remote control fl ash photography Wireless remote control fl ash photography Set the RC switch to A or B. • A and B are the group settings. Set the fl ash control mode, etc. to each groups and control them wirelessly. Set [# RC Mode] to [On] in the menu of the camera to make the fl...
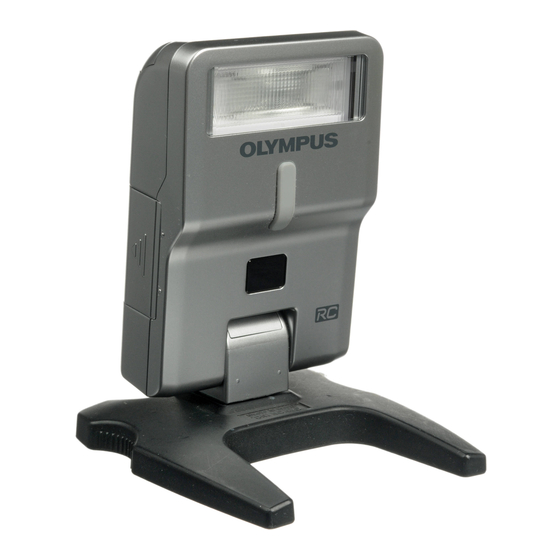
- Page 23 Positioning Positioning Since the communication is performed with the fl ash emission of the camera, the fl ash positioning range varies with camera. Attach the stand provided. • Slide the fl ash securely into the stand until it clicks into place ( ).
-
Page 24: Safety Precautions
Contact your dealer or consult an Olympus Authorized Service Station. • To prevent a traffi c accident, do not direct the fl ash at a person operating a motor vehicle. - Page 25 E-Mail : e-slrpro@olympus.com device. Otherwise a fi re or burn may result. Remove the batteries carefully to avoid burning yourself, and contact your dealer or consult an Olympus Authorized Service Station. • Do not operate with wet hands. This may...
-
Page 26: Specifications
Weight : 97 g (3.4 oz.) (excluding batteries) * Measurements obtained from in-house tests at Olympus. Actual fi gures may vary depending on shooting conditions. Specifi cations are subject to change without any notice or obligation on the part of the manufacturer. - Page 27 For customers in USA For customers in USA FCC Notice This device complies with part 15 of the FCC rules. Operation is subject to the following two conditions: (1) This device may not cause harmful interference, and (2) this device must accept any interference received, including interference that may cause undesired operation.
- Page 28 MEMO...
-
Page 29: Mise En Place Des Piles
Merci d’avoir acheté ce produit Olympus. Pour garantir votre sécurité, veuillez lire ce manuel d’instructions avant utilisation et le conserver à portée de main pour consultation ultérieure. Liste des pièces Liste des pièces (Fig. (Fig. p. 3) p. 3) Remarques Ne pas utiliser de piles manganèse AAA (R03). - Page 30 Fixation à l’appareil photo Fixation à l’appareil photo Remarques S’assurer que l’appareil photo et le fl ash électronique sont tous les deux éteints. Monter ou démonter le fl ash électronique lorsqu’il est allumé ou que l’appareil photo est en marche peut entraîner un dysfonctionnement. Retirer la protection du sabot fl...
-
Page 31: Mise En Marche Du Fl Ash Électronique
Mise en marche du fl ash électronique Mise en marche du fl ash électronique Fixer un fl ash électronique sur l’appareil photo, puis mettre l’appareil photo et le fl ash en marche. Appuyer sur la touche ON/OFF et la maintenir enfoncée jusqu’à... - Page 32 Prise de vue Prise de vue En fonction du réglage du mode de fl ash sur l’appareil photo, la prise de vue en mode TTL- AUTO ou MANUAL est disponible avec ce fl ash. Régler le bouton RC sur « OFF ». Régler le mode de fl...
- Page 33 Grand angle Grand angle Utiliser le diffuseur grand angle pour la prise de vue lorsque la longueur focale de l’objectif est supérieure à la plage allant de 9 mm à 14 mm. Placer le bouton W sur le côté W. Repli du fl...
- Page 34 Prise de vue avec fl ash à l’aide de la télécommande sans fi l Prise de vue avec fl ash à l’aide de la télécommande sans fi l Régler le bouton RC sur A ou B. • A et B sont les réglages de groupe. Régler le mode de commande de fl ash, etc. sur chaque groupe et les contrôler sans fi...
- Page 35 Positionnement Positionnement La communication étant établie avec l’émission du fl ash de l’appareil photo, la plage de positionnement du fl ash varie en fonction de l’appareil photo. Fixer le support fourni. • Glisser le fl ash dans le support jusqu’à ce qu’il soit fermement en place ( ).
-
Page 36: Précautions De Sécurité
étrangères à l’intérieur, couper immédiatement l’alimentation et retirer les piles avec précaution. Contacter votre revendeur ou un centre de services Olympus agréé. • Pour éviter un accident de la circulation, ne pas diriger la lumière du fl ash vers toute personne se trouvant au volant d’un véhicule à... - Page 37 Tél. 1-800-260-1625 (appel gratuit) Notre centre d’appels clients est ouvert de Le non respect des 9h à 21 heures (du lundi au vendredi) ET précautions indiquées Email : e-slrpro@olympus.com par ce symbole peut ATTENTION entraîner des blessures ou des dommages matériels.
-
Page 38: Caractéristiques
: 56,4 (L) × 89,2 (H) × 26,9 (E) mm (sans les protubérances) Poids : 97 g (sans piles) * Mesures obtenues lors de tests Olympus internes. Les chiffres réels peuvent varier en fonction des conditions de prise de vue. Caractéristiques modifi ables sans préavis, ni obligation de la part du fabricant. - Page 39 Pour les utilisateurs aux Etas-Unis Pour les utilisateurs aux Etas-Unis Notice FCC Cet appareil est conforme aux normes de la Section 15 des directives FCC. Son utilisation est soumise aux deux conditions suivantes: (1) Cet appareil ne doit pas causer de brouillage radioélectrique, et (2) cet appareil doit pouvoir résister à toutes les interférences, y compris celles susceptibles d’entraver son bon fonctionnement.
- Page 40 MEMO...
-
Page 41: Disparo Continuo
Gracias por adquirir un producto Olympus. Para garantizar su seguridad, le rogamos que lea este manual de instrucciones antes de utilizar el producto, y que lo guarde en un lugar accesible para poder realizar consultas en el futuro. Nombre de las piezas Nombre de las piezas •... - Page 42 Fijación en la cámara Fijación en la cámara Notas Compruebe que la cámara y el fl ash electrónico están apagados. El montaje y desmontaje del fl ash electrónico mientras el fl ash o la cámara se encuentran encendidos puede ocasionar fallos de funcionamiento. Retire la tapa de la zapata de contacto y deslice el fl...
- Page 43 Encendido del fl ash electrónico Encendido del fl ash electrónico Acople un fl ash electrónico a la cámara y, a continuación, encienda la cámara con el fl ash. Mantenga pulsado el botón ON/OFF hasta que se ilumine cualquier piloto. • Pulse de nuevo el botón ON/OFF para apagar la cámara.
- Page 44 Fotografi ado Fotografi ado Dependiendo del modo de fl ash ajustado en la cámara, la toma fotográfi ca en el modo TTL-AUTO o el modo MANUAL está disponible con este fl ash. Ponga el interruptor RC en “OFF”. Ajuste el modo de fl ash de la cámara de acuerdo con el uso previsto.
- Page 45 Gran angular Gran angular Utilice el panel gran angular cuando la distancia focal del objetivo se ajusta a una posición más amplia de 9 a 14 mm. Deslice el botón W hacia el lado W. Plegado Plegado Este fl ash puede plegarse aproximadamente 30 grados hacia delante ( ) y 60 grados hacia atrás ( También puede plegarse hacia adelante para facilitar el transporte de la cámara con el fl...
- Page 46 Fotografi ado con fl ash mediante control remoto inalámbrico Fotografi ado con fl ash mediante control remoto inalámbrico Ajuste el interruptor RC a A o B. • A y B son los ajustes de grupo. Ajuste el modo de control del fl ash, etc. para cada grupo y contrólelos de forma inalámbrica.
- Page 47 Posición Posición Puesto que la comunicación se realiza con la emisión del fl ash de la cámara, el rango de posiciones del fl ash varía con la cámara. Monte el soporte suministrado. • Deslice el fl ash con cuidado en el soporte hasta que encaje en su lugar con un ruido ( ).
-
Page 48: Precauciones De Seguridad
Póngase en contacto con su distribuidor o consulte a un punto de servicio autorizado Olympus. • Para evitar un accidente de tráfi co, no emita un destello de fl ash a un conductor de un vehículo a motor. - Page 49 No conecte sustancias como metal a las Nuestro teléfono de atención al cliente esta polaridades (+) o (–) de las pilas. disponible de 9 am a 9 pm (de lunes a viernes) Correo electrónico: e-slrpro@olympus.com El incumplimiento de las precauciones marcadas con este símbolo podría PRECAUCIÓN ocasionar lesiones o daños en el producto.
-
Page 50: Especificaciones
Peso : 97 g (sin incluir las pilas) * Mediciones obtenidas en pruebas internas de Olympus. Las cifras reales pueden variar según las condiciones de fotografi ado. Las especifi caciones están sujetas a cambio sin ningún aviso ni obligación por parte del fabricante. - Page 51 Para clientes en Estados Unidos Para clientes en Estados Unidos Aviso FCC Este dispositivo cumple con la parte 15 de los reglamentos FCC. La operación está sujeta a las siguientes dos condiciones: (1) Este dispositivo no puede ocasionar interferencias que ocasionen daños, y (2) este dispositivo puede aceptar cualquier interferencia, incluyendo interferencia que pueda ocasionar una operación indeseada.
- Page 52 MEMO...
- Page 53 • •...
- Page 54 •...
- Page 55 ON/OFF • ON/OFF • CHARGE TEST ON/OFF TEST CHARGE • CHARGE • CHARGE AUTO CHECK • ON/OFF...
- Page 56 • • • •...
- Page 58 • • • A Mode +5.0 • – +3.0 250 F5.6 0.0 •...
- Page 59 • •...
- Page 60 • • • • • • • • •...
- Page 61 • •...
- Page 62 CHARGE °...
- Page 63 感谢您购买奥林巴斯产品。为了确保您的安全,请在使⽤之前仔细阅读本使⽤说明书,并将其 妥善保存,以供需要时参考。 各部位名称 各部位名称 注 (图 (图 第 3 页) 第 3 页) 不能使⽤ AAA(R03)锰电池。 1 发光区 5 AUTO CHECK 指⽰灯 装⼊电池 装⼊电池 2 解除锁定按钮 6 ON/OFF 按钮 3 锁销 7 W 滑块 打开电池舱盖。 4 TEST 按钮/ 8 RC 开关 对正...
- Page 64 安装到照相机 安装到照相机 注 确认照相机和电⼦闪光灯均关闭。在闪光灯或照相机开启时安装或卸下电⼦闪光灯,可能导致 故障。 卸下照相机热靴盖并将闪光灯平稳地滑⼊热靴直到其 卡定到位( )。 请勿在内置闪光灯抬起时安装此闪光灯,否则可能弄坏 内置闪光灯。 在按住解除锁定按钮的同时卸下闪光灯( )。 • 如果照相机具备外部闪光灯接⼝,其可连接闪光灯托架和托架 连接线(另售)。...
- Page 65 开启电⼦闪光灯 开启电⼦闪光灯 请先将电⼦闪光灯装上照相机,然后再开启照相机和电⼦闪光灯。 按住 ON/OFF 按钮直⾄任⼀指⽰灯点亮。 再按⼀下 ON/OFF 按钮关闭电源。 • 当 CHARGE 指⽰灯点亮时,按下 TEST 按钮测试闪 • 光灯。 TEST 按钮/ ON/OFF CHARGE 指⽰灯 按钮 如果 CHARGE 指⽰灯在超过下列时间后仍没有点亮,请更换电池: • 30 秒(碱性电池) 10 秒(NiMH 电池) 如果 CHARGE 表⽰灯和 AUTO CHECK 指⽰灯同时闪烁,表⽰电池电量低。在这种情况 • 下,请更换电池。 如果约...
- Page 66 拍摄 拍摄 根据照相机的闪光灯模式设置,此闪光灯可在 TTL-AUTO 模式或 MANUAL 模式下拍摄。 将 RC 开关设为 “OFF”。 根据使⽤⽬的,设置照相机的闪光灯模式。 有关详情,请参阅照相机的使⽤说明书。 某些照相机没有 MANUAL 模式。 RC 开关 在 TTL-AUTO 模式中:当正确进⾏了闪光灯启动时,拍摄之后 AUTO CHECK 指⽰灯将闪烁约 • 5 秒。 在 MANUAL 模式中:根据与被摄对象的距离调整照相机设置(ISO 感光度和光圈值)然后拍 • 摄。 拍摄距离 (⽶) = 引导号 (ISO100) ISO 感光度系数 ÷ 光圈值 ×...
- Page 67 ⼴⾓ ⼴⾓ 当镜头焦距宽于 9 毫⽶⾄ 14 毫⽶时,使⽤宽屏拍摄。 将 W 滑块滑到 W 侧。 折叠 折叠 此闪光灯可向前弯曲约 30 度( ),向后弯曲约 60 度( )。 它还可被折到前⾯以⽅便携带附着闪光灯的照相机( )。 折到前⾯时,闪光灯不会闪光。 向前约 30 度:⽤于微距拍摄。 向后约 60 度:⽤于弹射拍摄。...
- Page 68 ⽆线遥控闪光拍摄 ⽆线遥控闪光拍摄 将 RC 开关设为 A 或 B。 A 和 B 是组设置。将闪光控制模式等设到各组并进⾏⽆线控制。 • 在照相机的菜单中设置 [# RC 模式] 为 [开] 使照相机上的闪光灯做好闪光准 备。 在照相机上的 A 和 B 各组中设置闪光控制模式等。 标准闪光/Super FP闪光 闪光补正值 分组 超级 FP 闪光灯不兼容。 • 选择闪光控制模式 • 并单独调整闪光强 度。选择⼿动闪光 A Mode 通信光级别...
- Page 69 定位 定位 因为是通过照相机发出闪光来进⾏通讯,闪光灯定位范围根据照相机⽽异。 安装附带的⽀架。 将闪光灯平稳地滑⼊⽀架直到其卡定到位( )。 • 按下热靴锁定解除按钮卸下闪光灯。 当⽤于弹射拍摄时,注意勿掉落⽀架( )。 朝所要的⽅向定位闪光灯。 除了使⽤⽀架以外,您也可只握住闪光灯来拍摄。 • 注 在 RC 模式中,内置闪光灯不能⽤作光源。 • 建议您使⽤最多三个遥控闪光灯的单⼀组。 • 因照相机和对象之间的⾓度或距离,闪光灯可能不闪光。 • 在定位之后,请进⾏拍摄测试。...
- Page 70 安全防范须知 安全防范须知 请仔细阅读警告和注意以确保安全使⽤。这些安全防范须知可以保护使⽤者和其他⼈以及避免 财产损坏。 警告 如果不遵守本符号表⽰的防范指⽰,则可能会导致伤害或死亡。 请勿在空⽓中存在易燃性或爆炸性⽓体的场所使⽤本产品,否则可能造成起⽕、爆炸等事 • 故。 请勿直接焊接本产品或对其改造、重组或拆解。 • 请勿⽤⼿覆盖闪光灯的发光区,也不要在连续闪光后触摸发光区,否则可能烫伤您的⽪肤。 • 请勿使该设备进⽔或沾上异物,否则可能引发⽕灾或触电。万⼀被⽔溅湿或落于⽔中,或其 • 内部沾上异物,请⽴即关闭电源并⼩⼼地取出电池,并与经销商或 Olympus 维修中⼼联系。 不可对着驾驶员使⽤本产品闪光,否则可能酿成交通事故。 • 请勿在接近拍摄对象眼睛的地⽅使⽤闪光灯;对⼉童进⾏拍摄时须尤其注意。请将闪光灯放 • 置在⼉童接触不到的地⽅。闪光灯的闪光可能造成失明。 请勿使⽤本产品指定以外的电池。 • 请勿将新旧电池、不同⼚家⽣产的电池混⽤。 • 请勿将⾦属等物品连接⾄电池的正负极。 •...
- Page 71 注意 如果不遵守本符号表⽰的防范指⽰,则可能会导致伤害或财产损失。 如果发现有异味、异常声⾳或者冒烟等异常现象,请⽴即停⽌使⽤,否则可能造成⽕灾或烫 • 伤。请⼩⼼地取出电池,注意不要被烫伤,并与经销商或 Olympus 维修中⼼联系。 请勿⽤湿⼿操作本产品,否则可能导致故障和触电。 •...
- Page 73 规格 规格 型号 : FL-300R 类型 : 数码照相机专⽤外置电⼦闪光灯 闪光指数 : 20(ISO 100),12 (ISO100, 使⽤宽屏) 发光⾓度 : 包括 14mm 镜头(相当于 135mm 照相机的 28mm)的图像⾓度 包括 9mm 镜头(相当于 135mm 照相机的 18mm)的图像⾓度: 使⽤宽屏 闪光模式 : TTL-AUTO,MANUAL, RC 闪光时间 : 约 1/20000 秒⾄ 1/500 秒...
- Page 74 根据中华⼈民共和国 [ 电⼦信息产品污染控制管理办法 ] 需显⽰的内容 环保使⽤期限 有毒有害物质或元素 部件名称 铅 汞 镉 六价铬 多溴联苯 多溴⼆苯醚 (Pb) (Hg) (Cd) (PBB) (PBDE) × ○ ○ ○ ○ ○ 机体外壳 × ○ ○ ○ ○ ○ 电器零件 ○:有毒有害物质含量在限度量以下 ×:有毒有害物质含量在限度量以上 以上限度量根据 SJ/T 11363-2006 标准...
- Page 75 感謝您購買奧林巴斯產品。為了確保您的安全,請在使⽤之前仔細閱讀本使⽤說明書,並將其妥 善保存,以供需要時參考。 各部位名稱 各部位名稱 註 (圖 (圖 第 3 ⾴) 第 3 ⾴) 不能使⽤ AAA(R03)錳電池。 1 發光區 5 AUTO CHECK 指⽰燈 2 解除鎖定按鈕 6 ON/OFF 按鈕 裝⼊電池 裝⼊電池 3 鎖銷 7 W 滑塊 打開電池艙蓋。 4 TEST 按鈕/ 8 RC 開關 CHARGE 指⽰燈...
- Page 76 安裝到照相機 安裝到照相機 註 確認照相機和電⼦閃光燈均關閉。在閃光燈或照相機開啟時安裝或卸下電⼦閃光燈,可能導致 故障。 卸下照相機熱靴蓋並將閃光燈平穩地滑⼊熱靴中,直 到卡定到位 。 ( ) 請勿在內置閃光燈抬起時安裝此閃光燈,否則可能弄壞 內置閃光燈。 在按住解除鎖定按鈕的同時卸下閃光燈( )。 • 如果照相機具備外部閃光燈接⼝,其可連接閃光燈托架和托架 連接線(另⾏銷售)。...
- Page 77 開啟電⼦閃光燈 開啟電⼦閃光燈 請先將電⼦閃光燈裝上照相機,然後再開啟照相機和電⼦閃光燈。 按住 ON/OFF 按鈕直⾄任⼀指⽰燈點亮。 再按⼀下 ON/OFF 按鈕關閉電源。 • 當 CHARGE 指⽰燈點亮時,按下 TEST 按鈕進⾏閃 • 光測試。 TEST 按鈕/ ON/OFF CHARGE 指⽰燈 按鈕 如果 CHARGE 指⽰燈在超過下列時間後仍沒有點亮,請更換電池: • 30 秒(鹼性電池) 10 秒(NiMH 電池) 如果 CHARGE 指⽰燈和 AUTO CHECK 指⽰燈同時閃爍,表⽰電池電量低。在這種情況 • 下,請更換電池。 如果約...
- Page 78 拍攝 拍攝 根據照相機的閃光燈模式設定,此閃光燈可在 TTL-AUTO 模式或 MANUAL 模式中拍攝。 將 RC 開關設為 “OFF”。 根據使⽤⽬的,設定照相機的閃光模式。 有關詳情,請參閱照相機的使⽤說明書。 某些照相機沒有 MANUAL 模式。 RC 開關 在 TTL-AUTO 模式中:當正確進⾏了閃光燈啟動時,拍攝之後 AUTO CHECK 指⽰燈將閃爍 • 約 5 秒。 在 MANUAL 模式中:根據與拍攝對象的距離調整照相機設定(ISO 感光度和光圈值)然後拍 • 攝。 拍攝距離 (⽶) = 引導號 (ISO100) ISO 感光度係數 ÷ 光圈值 ×...
- Page 79 廣⾓ 廣⾓ 當鏡頭焦距寬於 9 毫⽶⾄ 14 毫⽶時,使⽤寬屏拍攝。 將 W 滑塊滑到 W 側。 折疊 折疊 此閃光燈可向前彎曲約 30 度( ),向後彎曲約 60 度( )。 它還可被折到前⾯以⽅便攜帶附著閃光燈的照相機( )。折到前⾯時,閃光燈不會閃光。 向前約 30 度:⽤於微距拍攝。 向後約 60 度:⽤於彈射拍攝。...
- Page 80 無線遙控閃光拍攝 無線遙控閃光拍攝 將 RC 開關設為 A 或 B。 A 和 B 是組設定。將閃光控制模式等設到各組並進⾏無線控制。 • 在照相機的菜單中設定 [# RC模式] 為 [開] 使照相機上的閃光燈做好閃光準備。 在照相機上的 A 和 B 各組中設定閃光控制模式等。 閃光補正值 標準閃光/Super FP閃光 超級 FP 閃光燈不相容。 • 分組 選擇閃光控制模式並 • A Mode 通信光級別 單獨調整閃光強度。 +5.0 將通信光級別設為[HI]、[MID] 或 •...
- Page 81 定位 定位 因為是通過照相機發出閃光來進⾏通訊,閃光燈定位範圍根據照相機⽽異。 安裝附帶的托架。 將閃光燈平穩地滑⼊托架,直到卡定到位( )。 • 按下熱靴鎖定解除按鈕卸下閃光燈。 當⽤於彈射拍攝時,注意勿掉落托架( )。 朝所要的⽅向定位閃光燈。 除了使⽤托架以外,您也可只握住閃光燈來拍攝。 • 註 在 RC 模式中,內置閃光燈不能⽤作光源。 • 建議您使⽤最多三個遙控閃光燈的單⼀組。 • 因照相機和對象之間的⾓度或距離,閃光燈可能不閃光。 • 在定位之後,請進⾏拍攝測試。...
- Page 82 安全防範須知 安全防範須知 請仔細閱讀警告和注意以確保安全使⽤。這些安全防範須知可以保護使⽤者和其他⼈以及避免 財產損壞。 警告 如果不遵守本符號表⽰的防範指⽰,則可能會導致傷害或死亡。 請勿在空氣中存在易燃性或爆炸性氣體的場所使⽤本產品,否則可能造成起⽕、爆炸等事 • 故。 請勿直接焊接本產品或對其改造、重組或拆解。 • 請勿⽤⼿覆蓋閃光燈的發光區,也不要在連續閃光後觸摸發光區,否則可能燙傷您的⽪膚。 • 請勿使該設備進⽔或沾上異物,否則可能引發⽕災或觸電。萬⼀被⽔濺濕或落于⽔中,或其 • 內部沾上異物,請⽴即關閉電源並⼩⼼地取出電池,並與經銷商或 Olympus 維修中⼼聯繫。 不可對著駕駛員使⽤本產品閃光,否則可能釀成交通事故。 • 請勿在接近拍攝對象眼睛的地⽅使⽤閃光燈;對兒童進⾏拍攝時須尤其注意。請將閃光燈放 • 置在兒童接觸不到的地⽅。閃光燈的閃光可能造成失明。 請勿使⽤本產品指定以外的電池。 • 請勿將新舊電池、不同廠家⽣產的電池混⽤。 • 請勿將⾦屬等物品連接⾄電池的正負極。 •...
- Page 83 如果不遵守本符號表⽰的 注意 防範指⽰,則可能會導致 傷害或財產損失。 如果發現有異味、異常聲⾳或者冒煙等異常 • 現象,請⽴即停⽌使⽤,否則可能造成⽕災 或燙傷。請⼩⼼地取出電池,注意不要被燙 傷,並與經銷商或 Olympus 維修中⼼聯繫。 請勿⽤濕⼿操作本產品,否則可能導致故障 • 和觸電。...
- Page 84 規格 規格 型號 : FL-300R 類型 : 數碼照相機專⽤外置電⼦閃光燈 閃光指數 : 20(ISO 100),12 (ISO100, 使⽤寬屏) 發光⾓度 : 包括 14mm 鏡頭(相當於 135mm 照相機的 28mm)的影像⾓度 包括 9mm 鏡頭(相當於 135mm 照相機的 18mm)的影像⾓度: 使⽤寬屏 閃光模式 : TTL-AUTO,MANUAL, RC 閃光時間 : 約 1/20000 秒⾄ 1/500 秒...
- Page 85 MEMO...
- Page 86 VR516301 © 2011 Printed in China...
Need help?
Do you have a question about the FL-300R and is the answer not in the manual?
Questions and answers