Table of Contents
Advertisement
O O p p e e r r a a t t o o r r s s M M a a n n u u a a l l
O O p p e e r r a a t t o o r r s s M M a a n n u u a a l l
C C o o v v e e r r s s I I n n s s t t a a n n t t , , F F r r e e s s h h b b r r e e w w
& & E E s s p p r r e e s s s s o o ( ( B B
C C ) ) M M a a c c h h i i n n e e s s
2 2
Part No. PR10350001
Issue F 01/08
Advertisement
Table of Contents

Related Manuals for Genesis Instant


Summary of Contents for Genesis Instant
- Page 1 O O p p e e r r a a t t o o r r s s M M a a n n u u a a l l O O p p e e r r a a t t o o r r s s M M a a n n u u a a l l C C o o v v e e r r s s I I n n s s t t a a n n t t , , F F r r e e s s h h b b r r e e w w &...
- Page 2 The following symbol is used throughout this Operators Manual: Safety First! Take care, risk of personal injury. Crane Merchandising Systems (CMS) accepts no responsibility for damage caused to the equipment through misinterpretation or misuse of the information contained in this manual. Copyright 2008 Crane Merchandising Systems ©...
-
Page 3: Table Of Contents
Internal Features ......... .3 Drinks Choice - Instant Models ......4 Drinks Choice - Freshbrew Models . - Page 4 Section 8 - Dispense Pipe Lengths ........60 Instant - Option 1 Machines ....... .61 Instant - Option 2 Machines .
-
Page 5: Introduction
Introduction This manual provides a guide to the installation, daily operation, basic cleaning and maintenance tasks for the Genesis range of table top beverage vending machines and indicates when the operator should call a qualified service engineer for assistance. It is recommended that this equipment is serviced by a trained Service Technician. -
Page 6: Section 1 - Machine Specifications
2.8 kg - 1075 cups Water Filter Genesis machines fitted with a paperless freshbrew brewer or CoEx® espresso brewer must be connected to the water supply via a scale inhibiting water filter. CMS recommend and supply the Brita AquaQuell Compact water filter. -
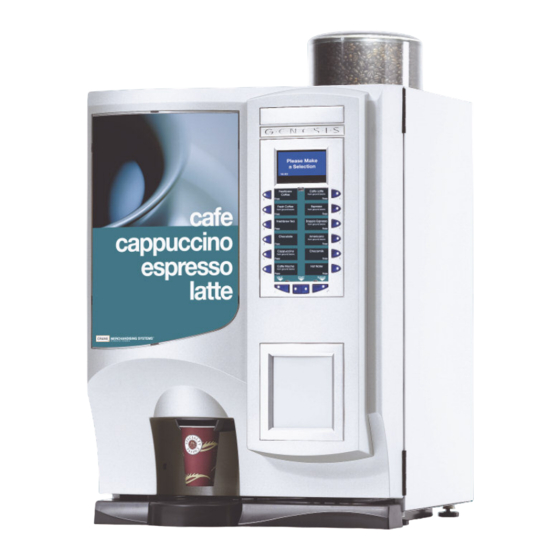
Page 7: External Features
Operators Manual External Features Key: Coin Entry Coin Return Coin Reject Button Foot LCD Display Door Lock Drink Selection Keypad Graphic Panel Selection Decals 10. Door... -
Page 8: Internal Features
Operators Manual Internal Features N.B. Photograph shows Genesis double freshbrew machine Key: Instant Ingredient Canister Waste Tray Grille Freshbrew Tea Canister Moving Dispense Head Main Loom 10. Door Switch Freshbrew Coffee Canister 11. Mixing System Paperless Dual Brewer 12. Cup Drop Unit Brewer Waste Bucket 13. -
Page 9: Drinks Choice - Instant Models
Operators Manual Drinks Choice - Instant Models Ingredients: Option 1 - 7 Canisters 1. Milk 2. Sugar 3. Cappuccino Topping 4. Chocolate 5. Instant Tea 6. Instant Coffee 7. Instant Decaf. Coffee Option 2 - 7 Canisters 1. Milk 2. Sugar 3. -
Page 10: Drinks Choice - Freshbrew Models
5. Freshbrew Tea 6. Freshbrew Coffee Option 2 - 6 Canisters 1. Milk 2. Sugar 3. Instant/Decaf. Coffee 4. Chocolate 5. Freshbrew Tea 6. Freshbrew Coffee Option 1: All speciality drinks made with freshbrew coffee. Cappuccino made with cappuccino topping. -
Page 11: Drinks Choice - B2C Models
Operators Manual Drinks Choice - B2C Models Ingredients: 6 Canisters 1. Milk 2. Sugar 3. Cappuccino Topping 4. Chocolate 5. Freshbrew Coffee 6. Coffee Beans B2C: All speciality drinks made with freshly ground coffee beans and cappuccino topping. Drink Selections 6 Canisters Fresh Ground Coffee Freshbrew Coffee... -
Page 12: Drinks Choice (B2C & Teapot Machines)
Operators Manual Drinks Choice (B2C & Teapot Machines) Ingredients: 7 Canisters 1. Milk 2. Sugar 3. Cappuccino Topping 4. Chocolate 5. Freshbrew Tea 6. Freshbrew Coffee 7. Coffee Beans B2C: All speciality drinks made with freshly ground coffee beans and cappuccino topping. -
Page 13: Section 2 - Installation Procedure
Operators Manual Section 2 - Installation Procedure Important! It is essential that personnel responsible for installing, commissioning and servicing the machine understand the following: The installation and commissioning of the machine should only be carried out by trained and authorised service engineers. All water and electrical services must be correctly and safely connected. -
Page 14: Connecting The Water Supply
Connect the hose to the inlet valve located on the rear of the machine. Ensure that the seal is correctly fitted. Ensure that all water supply fittings are tight. Freshbrew & B2C Machines: Genesis machines fitted with a paperless freshbrew brewer or CoEx® brewer must be connected to the water supply via a water filter. -
Page 15: Commissioning Procedure
Operators Manual Commissioning Procedure The following procedure must be carried out by a trained installation engineer before the machine can be used for the first time. Ensure that the electrical and water services to the machine are connected correctly and turned on. Ensure that the waste tray is fitted correctly to the machine. - Page 16 LCD will display the message as shown opposite., indicating that the water in the boiler is being heated. Instant & Freshbrew Models: As the water heats, ensure that no water overflows from the heater tank overflow pipe into the waste tray. Check the system for leaks.
- Page 17 Operators Manual Check the LCD display on the front of the machine to ensure that the water has heated to the correct temperature and that the machine is in standby mode. A machine set to free vend mode will alternate the messages: N.B.
-
Page 18: Warranty Card
Operators Manual 16. Remove the safety key and close the cabinet door. Ensure that the machine is left in a clean and safe condition. Warranty card Please complete and return the warranty card that comes with the machine. Use the card to note any problems you encountered during installation, your feedback helps us to improve our products and services. -
Page 19: Section 3 - How To Vend A Drink
Operators Manual Section 3 - How to Vend A Drink Selecting A Drink Drink selections are made by pressing the appropriate selection button on the keypad and then utilising the keypad selection buttons and the LCD display to alter the drink strength and add milk/sugar to suit the customers personal preference. When in standby mode, all drink selection buttons will be lit indicating that the drink is available to be selected. - Page 20 Operators Manual If Extra Milk is required the customer presses the milk button a second time. A third press will display the No Milk selection. Freshbrew T ea Freshb rew Tea No M ilk No Milk Press milk key to Milk Milk incre ment strength...
-
Page 21: Replacing/Updating Drink Selection Decals
Operators Manual Certain drink selections do not allow the Capp ucc ino strength option to be selected or milk added. For example, if the customer presses the Cappuccino selection button, Press Sugar / Start all of the other selection buttons will be 12.40 PM extinguished, the Sugar and START buttons will light up and the LCD will display the screen opposite. - Page 22 Operators Manual Peel the relevant drink selection decals from their backing sheet (part no. PR10233000) and apply to the backing sheet using the printed guides as shown opposite. Apply price decals as described above. Place the decal carrier behind the transparent decal cover and refit complete assembly to the door.
-
Page 23: Section 4 - Daily Cleaning And Re-Filling
Operators Manual Section 4 - Daily Cleaning and Re-filling The quality of drinks produced by the Genesis can only be maintained if the machine is cleaned regularly following the schedule outlined. Before carrying out the daily cleaning procedure described on the following pages, it is recommended that... -
Page 24: Cleaning & Filling Procedure - All Machines
Operators Manual Cleaning & Filling Procedure - All Machines Important: It is necessary to carry out the cleaning and maintenance procedure outlined on the following pages on a regular basis, either at the end of the day or at the start of the day before the machine is in constant use. Fill a cleaning bucket with hot water and dilute the bactericidal cleaner in accordance with the instructions on the product packaging. - Page 25 Operators Manual Remove and clean the extract tray (see para; 4.5.3 for details). Refit the whipper base. Push the whipper base onto the motor shaft with the ‘arrow’ symbol lined up with the motor plate fixing screw (f) as shown. Turn the whipper base clockwise until it locates with the first (click) locking position (g).
- Page 26 Operators Manual 4.5.5 Ingredient Canisters - Fill and Refit Check the ingredient canisters and refill if required. Refit canister into machine. Repeat this operation for all soluble/freshbrew ingredient canisters fitted to the machine. Rotate the canister outlets to their correct operating positions.
- Page 27 Operators Manual Carefully remove the waste tray from the machine. Remove the waste tray grille and empty the contents of the tray. Wash the tray and grille thoroughly and where necessary, sanitise using the diluted bactericidal cleaner solution. Dry both components using a clean, dry cloth. Reassemble the waste tray and grille and refit to the machine.
-
Page 28: Paperless Brewer Unit - Cleaning Procedure
Operators Manual 4.5.10 Test Insert the safety key supplied with the machine into the door switch. The machine is now o o n n . Using the service keypad located in the rear of the door (see page 30), proceed as follows: Press the Cup Test button (7) and check that a cup is ejected correctly from the Cup drop unit. - Page 29 Operators Manual Clean the brewer chambers/wiper assembly in the sanitiser solution. Rinse with clean water and dry thoroughly. Carefully slide the brewer chambers/wiper assembly into the brewer unit. Important: The wiper arm lug (c) must be located between the stainless steel arms (d) as shown.
-
Page 30: Coex® B2C Brewer Unit - Daily Cleaning Procedure
Operators Manual Remove the door switch safety key. Remove and empty the water waste container. Refit the brewer guard. Remove the brewer waste container from the machine as shown. Empty the contents. Wash the waste container thoroughly and where necessary sanitise using the sanitiser solution. - Page 31 Operators Manual Remove the B2C coffee chute assembly as shown. Unscrew the two knurled thumbscrews and remove the coffee chute and coffee chute cover. With a clean, dry brush clean the area around and under the coffee dispense outlets. With a clean, dry brush wipe away any coffee deposits from both the coffee chute and cover mouldings.
- Page 32 4.7.2 Weekly Cleaning Procedure The Genesis has a routine cleaning cycle for the CoEx® brewer, with a warning message to indicate a clean is recommended or required. If the ‘required’ message is ignored B2C and freshbrew drinks cannot be selected until the...
-
Page 33: Tea Pot Brewer Cleaning Procedure
Operators Manual Tea Pot Brewer Cleaning Procedure The following procedure must be carried out weekly. Proceed as follows:- Safety First! Never clean or service the tea pot brewer unit while it is in motion as fingers may become trapped in the mechanism. Remove the tea outlet pipe from the dispense head block. -
Page 34: Section 5 - Service Keypad Functions
Before the sequence begins, the system waits until the water in the boiler is at the correct temperature determined by the thermistor. Instant/Freshbrew Machines: In order to guarantee the highest standards of cleanliness, the boiler fill valve is disabled, ensuring that the water used in the sequence is delivered at the optimum temperature to kill any micro-organisms. -
Page 35: Button 4 - Brewer Clean (Freshbrew Models)
Operators Manual Press and release the Flush button (3). The flush sequence begins. Empty the waste water container when complete. Button 4 - Brewer Clean (Freshbrew Models) The brewer clean button allows the brewer to be cleaned independently. In order to guarantee the highest standards of cleanliness, the boiler fill valve is disabled, ensuring that the water used is delivered at the optimum temperature to kill any micro-organisms. -
Page 36: Button 5 - View Counters
Operators Manual Button 5 - View Counters The View Counters button (5) allows the operator to access the Data Recall Menu. Entry into this menu allows the operator to view Non-Resettable and Resettable Sales Data, view data relating to Timed Events and Identification Numbers of installed components and (if feature enabled) view SureVend™... -
Page 37: Button 9 - Fill Tank (B2C Machines)
Operators Manual Button 9 - Fill Tank (B2C Machines) When this button is pressed, the machine pumps a measured amount of water through the system - approximately 400ml, heating it as it does so. This ensures that heated water is immediately available when a drink is selected. This button should also be used to purge any water left in the system after the machine has been moved or shut down for any length of time. -
Page 38: Section 6 - Programming Mode
SUGAR Menu Display The Genesis features the new interactive menu display. The multi line LCD display helps to make navigating the programming menu structure easy and intuitive. It is used to display programming information and will change according to the type of data being updated. -
Page 39: Accessing The Programming Mode
Operators Manual To return to the Main Menu from any screen, simply press the X (Exit) key until you reach the Main Menu. Accessing the Programming Mode Open the front door of the machine and insert the safety key to restore power to the machine. - Page 40 ↵ ↵ (Edit) key to store/save it (indicated by the filled radio button). All operator programming for the Genesis range follows the procedures as described above. Specific program actions are described fully in the following section.
-
Page 41: Section 7 - Operators Program
Operators Manual Section 7 - Operators Program To access the Operators Program, enter the Main Menu programming mode as described in section 6. Once Data Recall in the Operators Program the LCD on the front of Diagn ostics the machine will display the top level programming Price Product Confi gur atio n menu screen - Main Menu. - Page 42 Operators Manual Discount-# Displays the total number of discounted vends Test Vend-£ Displays the total monetary value of all test vends in £ Test Vend-# Displays the total number of test vends Surcharge-£ Displays the total monetary value of all surcharges in £ Surcharge-# Displays the total number of surcharge vends Free Vend-£...
- Page 43 Operators Manual When complete, press the X (Exit) key on the drink selection keypad to return the machine to the previous screen. The operator can then view data for more selections using the procedure described above and also access further menus via the Non Resettable Sales Data menu relating to Cash, Cashless and Token audit data.
- Page 44 Operators Manual From the Resettable Sales Data screen, Clear Data highlight the Clear Data sub menu using (down) key and press the ↵ (Edit) Are you sur e you want to set all r esett able key. The LCD on the front of the machine data to zero ? will display the screen as shown opposite, CANCEL - EXIT...
-
Page 45: Diagnostic Menu
Operators Manual 7.1.5 SureVend This menu becomes available when SureVend is enabled via the Product Configuration menu (see page 45). From the Data Recall menu scroll down SureVend and highlight SureVend then press the ↵ Cup Drop Failures 1-# SV Assisted-# (Edit) key. -
Page 46: Price Menu
Inst ant Tea for the highlighted selection. The example Choc olate shown illustrates an Instant Coffee Cappuc cino =£ 0. 35 selection with a price set currently at 35p. To change the price of the highlighted selection, press the ↵... - Page 47 Operators Manual Press the ↵ (Edit) key to access the Entire Entire Machine Machine sub menu. To update the value, 000.50 e.g. set a price of 50p, press the sequence 0-0-0-5-0 using the appropriate number 0-9 to E dit Value keys on the drink selection keypad.
-
Page 48: Product Configuration Menu
Operators Manual 7.3.4 View High/Low Price This sub menu allows the operator to view the highest and lowest values in force, programmed via the Individual Prices sub menu. Product Configuration Menu Product Configur ation Entry into this menu allows the operator to disable Configu rat ion Version drink selections and turn SureVend™... - Page 49 Operators Manual 7.4.3 SureVend™ Entry into this menu allows the operator to turn the SureVend™ product delivery sensor on or off. Overview: SureVend™ ensures that a cup is always available in the cup station before any money is collected or product delivered. The sensing system is a beam of infra-red light across the cup station that is broken by a cup as it falls into position from the cup drop unit, or by a customer placing his own mug in the dispense area.
-
Page 50: Coins In/Out Menu
Operators Manual Press the ↵ (Edit) key to confirm the selection and return to the SureVend screen. Verify that the status line at the bottom of the screen displays Off when SureVend is highlighted. Pressing the X (Exit) key will move back to the Product Configuration screen and save the new parameter to the machines memory. - Page 51 Operators Manual Machine In form ation From the Systems Settings menu highlight Machine Information and press the ↵ (Edit) Mach ine ID Mach ine Loca tion key. The LCD will display the screen as shown opposite. To view the Machine ID press the ↵...
- Page 52 Operators Manual As the operator presses the final zero, the Time AM value will appear within a dotted box hh / mm / mod e: 12 / 24 and the text at the bottom of the LCD 10 : 30 will now read ‘Press Arrows To Select’.
- Page 53 Operators Manual DTS Standby Mode: Scroll down and highlight DTS from the System Settings DTS Standby Mode menu. Press the ↵ (Edit) key to access the DTS Audit L ist CA304 D ata Type menu. The LCD will display the screen as Data Reset Mode Event Re set Mode shown.
- Page 54 Operators Manual Printer Baud Rate: This allows the operator to set the correct baud rate for a serial printer if one is to be used. It is important for this to be set correctly to ensure successful data transfer. 7.6.4 Backup/Restore This menu allows the operator to manually backup information stored in the machines memory to the controller board.
- Page 55 Operators Manual backed up data. After a few seconds the machine will beep once and the Initialising screen will be displayed before the machine returns to standby mode, ready to vend. 7.6.5 Software Version The Software version menu displays the version number of the software installed and is for information only.
-
Page 56: Security Codes Menu
Operators Manual Security Codes Menu The security code for entry into the Operators Program is factory set so that the operator presses button 1 on the service keypad followed by the sequence 2-2-2-2 on the drink selection keypad. On no account should this code be altered without first consulting your supervisor or manager. - Page 57 Upon entry to the sub menu, the Start = Set or C lear Al l Instant Coffee selection will be highlighted with an empty box. Pressing the ↵ (Edit) key will select the day, indicated by an X appearing in its adjacent box.
- Page 58 Operators Manual (down) key and the ↵ (Edit) key, highlight and select Using the additional drink selections that will be available during the free vend period. Tip - Items 9 & 10: To set the required days/selections quickly, press the START/? key to check all boxes, then using the (down) key, scroll and highlight the days/selections not required and press the ↵...
- Page 59 Operators Manual Once in the Timed Events menu press the Sanita tion Events Menu (down) key to highlight Sanitation Timed Events Menu then press the ↵ (Edit) key. Timed Timed The LCD will display the screen as shown. Timed Timed Timed The following example describes how the operator can program a timed event to flush the water system at 07.00 am, everyday.
- Page 60 Operators Manual Press the (down) key to highlight Days Days of Week Of Week and press the ↵ (Edit) key. From Monday Tuesday this menu the operator can set the days Wednes day on which the sanitation event will take Thursday Friday place.
- Page 61 Operators Manual Press the (down) key to highlight Event State Type. By default the event is set to Timed Event Type as indicated by the text displayed in the Delay status line at the bottom of the screen. Therefore it is not necessary for the Post Vend operator to enter this sub menu.
- Page 62 Operators Manual Press the ↵ (Edit) key to access the State State sub menu. Using the (down) key, set the state to On (indicated by the filled radio button). Press the ↵ (Edit) key and verify that the status line confirms the State is set to On.
- Page 63 Operators Manual From the Main Menu press the M(down) Energy S aving Events key until Timed Events is highlighted then press the ↵ (Edit). Press the M(down) key three times to access the Energy Saving Events menu screen. The LCD will display the screen as shown.
- Page 64 Operators Manual Press the M(down) key to highlight Days Days of Week Of Week and press the ↵ (Edit) key. The Tuesday Wednes day operator can now set the days on which Thursday the Energy Saving period will take place. Friday Saturday Upon entry to the sub menu, the first day,...
-
Page 65: Section 8 - Dispense Pipe Lengths
Operators Manual Section 8 - Dispense Pipe Lengths Instant - Option 1 Machines Pipe No Diameter Length 6 mm I.D. x 10 mm O.D. 170 mm 6 mm I.D. x 10 mm O.D. 160 mm 6 mm I.D. x 10 mm O.D. -
Page 66: Instant - Option 2 Machines
Operators Manual Instant - Option 2 Machines Pipe No Diameter Length 6 mm I.D. x 10 mm O.D. 170 mm 6 mm I.D. x 10 mm O.D. 160 mm 6 mm I.D. x 10 mm O.D. 170 mm 6 mm I.D. x 10 mm O.D. -
Page 67: Freshbrew Machines
Operators Manual Freshbrew Machines Pipe No Diameter Length 6 mm I.D. x 10 mm O.D. 170 mm 6 mm I.D. x 10 mm O.D. 160 mm 6 mm I.D. x 10 mm O.D. 170 mm 8 mm I.D. x 13 mm O.D. 250 mm 8 mm I.D. -
Page 68: B2C Machines
Operators Manual B2C Machines Pipe No Diameter Length 6 mm I.D. x 10 mm O.D. 170 mm 6 mm I.D. x 10 mm O.D. 160 mm 6 mm I.D. x 10 mm O.D. 170 mm 8 mm I.D. x 13 mm O.D. 360 mm H = Hot Water Dispense Pipe Milk/Sugar... -
Page 69: B2C & Teapot Machines
Operators Manual B2C & Teapot Machines Pipe No Diameter Length 6 mm I.D. x 10 mm O.D. 170 mm 6 mm I.D. x 10 mm O.D. 160 mm 6 mm I.D. x 10 mm O.D. 190 mm 8 mm I.D. x 13 mm O.D. 360 mm H = Hot Water Dispense Pipe... -
Page 70: Section 9 - Recommended Spare Parts
Hygiene Kits Ref. No. Item Hygiene Kit - Part No. (& item quantity per kit) 1GHYG 1GHYG 1GHYG B2C 1GHYG B2C INSTANT 2 FBREW 2 2 (Bean to TEA 2 (Bean (Instant) (FreshBrew) Cup) to Cup) Whipper base... -
Page 71: Waste Tray And Cup Catcher
Operators Manual Waste Tray and Cup Catcher Ref. No. Part No. Item Description PL10008000 Waste tray PL10014000 Grille - waste tray FA01416000 Thumb nut - M5 S101142960 Silicon pipe - 16mm OD PH04863000 Cup catcher moulding - squat cup PH04864000 Cup catcher moulding - tall cup Not illustrated SA06075000... -
Page 72: Section 10 - Error Messages And Simple Problem Solving
Operators Manual Section 10 - Error Messages and Simple Problem Solving 10.1 Error Messages The table below lists the error messages that may be encountered and, where applicable, offers the operator solutions for curing them. Safety First! Should the solution given not cure the problem, or the fault requires the assistance of a trained service engineer, DO NOT ATTEMPT TO CURE THE FAULT YOURSELF. -
Page 73: Error Messages (Cont'd)
Operators Manual 10.1 Error Messages (Cont’d) Error Message Cause Solution Sorry Out of Service The waste tray is full Empty, clean and refit the Waste Tray Full waste tray Sorry Out of Service Operator/engineer running Wait until machine completes Rinsing the rinse program rinse cycle and returns to standby mode... -
Page 74: Simple Problem Solving (Cont'd)
Operators Manual 10.2 Simple Problem Solving (Cont’d) Fault Possible Cause Remedy Blank LCD display Electricity supply Ensure electricity supply turned off is turned on at the mains Cups jamming Incorrect cup size Remove cups from cup stack and replace with correct size cups No change given from Coin tubes jamming... - Page 76 MERCHANDISING SYSTEMS A C r a n e C o . C o m p a n y Pipsmore Park, Bumpers Farm Industrial Estate, Chippenham, Wiltshire SN14 6NQ Tel: +44 (0)1249 444807 Fax: +44 (0)1249 444819 Email: sales@cranems.co.uk Website: www.cranems.co.uk...
Need help?
Do you have a question about the Instant and is the answer not in the manual?
Questions and answers