Table of Contents
Advertisement
Advertisement
Table of Contents

Related Manuals for TouchTunes Karaoke

Summary of Contents for TouchTunes Karaoke
- Page 2 Service Hotline: 1-847-353-1954 Fax: (847) 419-3304 TouchTunes may use or distribute whatever information you supply in any way it believes appropriate without incurring any obligations to you. Copyright © 2012 TouchTunes Interactive Networks. All rights reserved, including those to reproduce this...
-
Page 3: Table Of Contents
Installing the “TouchTunes Karaoke” Hard Drive ........ - Page 4 Logging into the Karaoke Event Manager Website ........
-
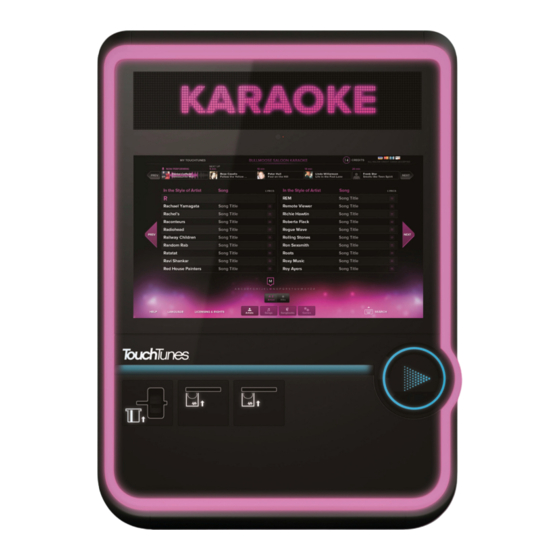
Page 5: Welcome To Touchtunes Karaoke
Karaoke songs on your Virtuo SmartJuke or from their mobile devices using the TouchTunes Karaoke mobile app! This guide will show you how to install and configure the equipment your locations will use to host their own Karaoke events. -
Page 6: Disclaimer And Safety Information
TouchTunes Interactive Networks is not responsible for any damage resulting from the improper installation or connection of test kit components or any other external equipment to your Virtuo, nor is TouchTunes responsible for any damage caused during shipment (except the shipment to the original purchaser) or any damage caused by: •... -
Page 7: Contacting Touchtunes
Actions performed immediately before the problem occurred. • Any additional comments. If you need assistance with this or any other TouchTunes product, please call or email technical support. We value your comments. TouchTunes Karaoke Installation and Setup Guide 900587-001 Rev 03... - Page 8 Welcome to TouchTunes Karaoke Contacting TouchTunes TouchTunes Karaoke Installation and Setup Guide...
-
Page 9: Installing Touchtunes Karaoke
• a component video connection cable • a component audio connection cable The TouchTunes Karaoke Kit also includes a Karaoke “briefcase” to leave with locations that includes: • two wireless microphones (plus batteries and spare batteries) • a Karaoke remote control for Virtuo (plus batteries and spare batteries) •... -
Page 10: Marketing Kit
Unpacking the Karaoke Equipment Marketing Kit In addition to the hardware components in the main kit, you will also receive a Karaoke Marketing kit containing promotional materials to be used at locations. You will receive one Karaoke Marketing kit for each Karaoke kit ordered. -
Page 11: Inner White Box 1 - Microphone Receiver Box
15 foot CAT-5 Ethernet cable for connecting the wireless microphone receiver to Virtuo’s IO board. • Remove the wireless microphone receiver and 15 foot CAT-5 Ethernet cable from this box. Top level - The wireless microphone receiver Bottom level - 15 foot Cat-5 cable TouchTunes Karaoke Installation and Setup Guide 900587-001 Rev 03... -
Page 12: Inner White Box 2 - Video Interface Module (Vim) Box
Middle level - The VIM’s power supply and cabling for connecting the VIM to a television For a given location, you will only need either the HDMI cable or the component cables Bottom level - 50 foot Cat 5 cable TouchTunes Karaoke Installation and Setup Guide... -
Page 13: Metallic Case
Metallic Case The Karaoke Kit also includes a metallic case that should be left with the location for hosting Karaoke events. Once you have set up Karaoke and provided the location with access to the Karaoke Event Manager website (as discussed in Chapter 4), this case contains everything a location will need to run Karaoke events autonomously. -
Page 14: Connectivity Overview
You should study this diagram carefully to determine where you will install each of the components for Karaoke. NOTE: This diagram is also printed on the inside of the Video Interface Module and Wireless Microphone Receiver white boxes. -
Page 15: Connecting The Wireless Microphone Receiver
• The receiver should be placed in a location where patrons will not be able to access it. • The Karaoke kit contains a 15-foot cat-5 Ethernet cable for connecting the Wireless Microphone Receiver to Virtuo. • The wireless microphone receiver does not require an additional power source, as power is supplied over the ethernet cable. -
Page 16: Connecting The Video Interface Module (Vim) To The Location's Tv
(i.e. the location’s television and network hub). • TouchTunes recommends mounting the VIM behind the location’s television. 2. Plug one end of the 50 foot cat-5 RJ-45 Ethernet cable into the VIM’s Ethernet port. 3. Plug the other end of the 50 foot cat-5 RJ-45 cable into the router that the Virtuo is also connected to. - Page 17 Plug the color-coded white and red audio cables into the VIM’s left and right Audio OUT ports, and the other end into the television’s color-coded left and right Audio IN ports. NOTE: The VIM has no ON/OFF switch, as it is intended to remain powered on. TouchTunes Karaoke Installation and Setup Guide 900587-001 Rev 03...
-
Page 18: Connecting Virtuo To The Location's Dhcp Network (If Required)
Virtuo and VIM. Connecting the Video Interface Module (VIM) to the DHCP Network The Karaoke Kit includes a 50-foot Cat-5 Ethernet cable for connecting the VIM to the same DHCP network as the Virtuo. • Plug one end of the 50-foot Cat-5 Ethernet cable into the VIM’s ethernet port, and plug the other end into your DHCP network. -
Page 19: Installing The "Touchtunes Karaoke" Hard Drive
Installing the “TouchTunes Karaoke” Hard Drive Installing the “TouchTunes Karaoke” Hard Drive In order to run the Karaoke service, Virtuo must be equipped with a hard drive labeled “TouchTunes Karaoke”. As of May 2012, this is the standard drive shipped with all new Virtuos. - Page 20 Installing TouchTunes Karaoke Installing the “TouchTunes Karaoke” Hard Drive 9. Using your fingers, push in and then tighten the thumb screw (clockwise) on the Karaoke hard drive tray until the thumb screw is securely tightened. Tightening the hard drive thumb screw CAUTION: Using a screwdriver on the thumb screw is not necessary and applies significantly more torque than is required.
- Page 21 If Virtuo is connected to the Internet, it will download the latest version of OpenStage, upgrade and reboot. 15. Once the Virtuo has rebooted into the home screen, proceed to the next section, where you will switch Virtuo to Karaoke mode and configure it for the location. TouchTunes Karaoke Installation and Setup Guide 900587-001 Rev 03...
- Page 22 Installing TouchTunes Karaoke Installing the “TouchTunes Karaoke” Hard Drive TouchTunes Karaoke Installation and Setup Guide...
-
Page 23: Configuring Touchtunes Karaoke
Learning the New Virtuo Remote Virtuo Volume and Microphone Gain Adjustment In order to provide your locations with optimal sound, you will need to enable Karaoke on the Virtuo, modify some settings, and adjust the Karaoke-specific volume levels. Operator Menu Settings If you have not already booted up Virtuo with the new drive and updated the software (as discussed in the previous chapter), do so now. -
Page 24: Learning The New Virtuo Remote
If OFF is selected, explicit Karaoke songs will be hidden from patrons. 5. Set the surcharge for Karaoke plays to add extra credits to the base cost of a Karaoke play. The base cost of a play is automatically set at the credit equivalent of $1. To set the surcharge, use the + and - buttons. -
Page 25: Virtuo Volume And Microphone Gain Adjustment
CMP music. 3. Set the Karaoke MIC A and Karaoke MIC B sliders to the maximum (by dragging the sliders to the top, or 0 dB). 4. Repeat steps 1 through 3 for each zone that will be used for Karaoke. - Page 26 Configuring TouchTunes Karaoke 9. On the confirmation screen, select Yes using the remote control or by touching the screen. 10. Queue up 3 to 4 Karaoke songs. 11. Turn on both microphones and position them where the patrons will be singing.
-
Page 27: Television (Second Screen) Verification
While a Karaoke song is playing, the onscreen lyrics scroll in sync with the current song. • If Virtuo is in Karaoke mode but not playing a Karaoke song at that moment, it is normal for the television screen to display the following. - Page 28 Configuring TouchTunes Karaoke TouchTunes Karaoke Installation and Setup Guide...
-
Page 29: Karaoke Event Manager
The Karaoke Event Manager website is a one-stop shop for your location’s TouchTunes Karaoke needs. Once you have set them up with the equipment and provisioned them to use the Karaoke Event Manager website, your locations will be able to schedule and host Karaoke events autonomously. -
Page 30: Linking Your Dashboard And Mytouchtunes Accounts
By linking your Dashboard account to your myTouchTunes account, you will now be recognized as an operator when you log into the Karaoke Event Manager website. Since your accounts are now linked, the Karaoke Event Manager can access and display your list of locations. TouchTunes Karaoke Installation and Setup Guide... -
Page 31: Logging Into The Karaoke Event Manager Website
Karaoke Event Manager Logging into the Karaoke Event Manager Website Logging into the Karaoke Event Manager Website 1. Open a web browser and navigate to the Karaoke Event Manager website at: https://karaoke.touchtunes.com/login 2. Log in to the site using your myTouchTunes account. -
Page 32: Assigning Location Managers To Locations
Assigning Location Managers to Locations Assigning Location Managers to Locations 1. For each of your karaoke locations, click Add Location Owner to assign Location Owners to your venues by linking their myTouchTunes accounts to the location. Clicking Add location Owner to assign an owner to Ray’s Magic Kingdom. - Page 33 2. To add a Location Owner to a location, enter their myTouchTunes account and click Save. Adding a myTouchTunes username to the location Final Fantasy Destination If the myTouchTunes username or email address is not recognized, you will see the following message: TouchTunes Karaoke Installation and Setup Guide 900587-001 Rev 03...
- Page 34 Karaoke Event Manager Assigning Location Managers to Locations Once a Location Owner has been successfully added to a location, they will be able to log into the Karaoke Event Manager website using their myTouchTunes account. TouchTunes Karaoke Installation and Setup Guide...
-
Page 35: Replacement Microphones
Microphone Frequencies and Colors Microphone Frequencies and Colors In order to reduce the possibility of interference with other locations (or a second Karaoke installation within a single location), TouchTunes Karaoke has three distinct frequency pairings of microphones and wireless microphone receivers. - Page 36 (consisting of a wireless receiver and two wireless microphones) that operate on a different frequency. The color rings for these microphones are blue and red, indicating they are part of a Kit 1 TouchTunes Karaoke Installation and Setup Guide...
Need help?
Do you have a question about the Karaoke and is the answer not in the manual?
Questions and answers