Table of Contents
Advertisement
Advertisement
Chapters
Table of Contents
Troubleshooting

Subscribe to Our Youtube Channel
Related Manuals for SMART Table 442i

Summary of Contents for SMART Table 442i
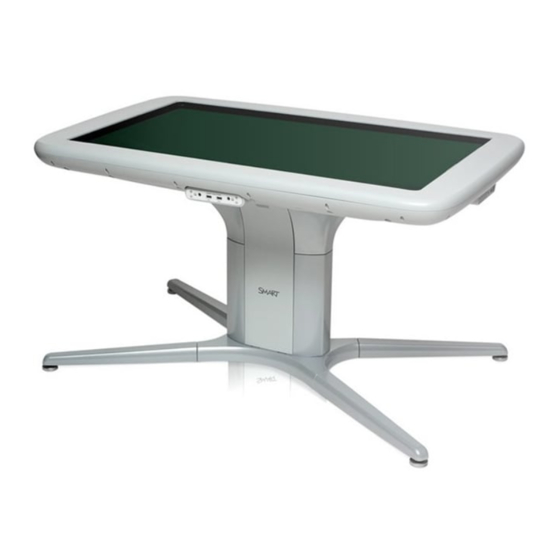
- Page 1 SMART Table® 442i Collaborative learning center Hardware user’s guide...
- Page 2 Product registration If you register your SMART product, we’ll notify you of new features and software upgrades. Register online at smarttech.com/registration. Keep the following information available in case you need to contact SMART Support. Serial number: Date of purchase:...
- Page 3 © 2013 SMART Technologies ULC. All rights reserved. No part of this publication may be reproduced, transmitted, transcribed, stored in a retrieval system or translated into any language in any form by any means without the prior written consent of SMART Technologies ULC. Information in this manual is subject to change without notice and does not represent a commitment on the part of SMART.
- Page 4 Do not climb (or allow children to climb) on your table. Climbing on your table could result in personal injury and product damage. To reduce the risk of fire or electric shock, do not expose your SMART product to rain or moisture.
- Page 5 Do not place cords, boxes or other items on the surface of your table. Doing so can scratch the surface. If your SMART product becomes wet, dry it completely before turning it on. I M P O R T A N T Do not operate your table in environments that are higher than 10,000' (3,000 m) above sea level.
-
Page 6: Table Of Contents
Chapter 1: Getting started About your SMART Table How your SMART Table works What’s included with your SMART Table Using your SMART Table with other SMART products Chapter 2: Using your SMART Table Turning your SMART Table on or off Using SMART Table software Connecting your SMART Table to the Internet Using your SMART Document Camera with your SMART Table... -
Page 8: Chapter 1: Getting Started
Important information Using your SMART Table with other SMART products This guide is intended for teachers and application developers. It introduces you to SMART Table software and explains how to use, maintain and troubleshoot your table. N O T E For information on setting up your SMART Table collaborative learning center or its accessories, see the SMART Table 442i textless installation instructions (smarttech.com/kb/170315) included... -
Page 9: How Your Smart Table Works
SMART Notebook™ collaborative learning software, as part of an overall learning solution. For example, you can introduce a new concept to students on a SMART Board® interactive whiteboard, and then ask the students to explore the idea in detail using the SMART Table collaborative learning center. -
Page 10: What's Included With Your Smart Table
If you must extend the power cable across the floor, ensure it’s properly marked to prevent a trip hazard. SMART Technologies recommends that you connect the power cable to a power bar rather than directly to an outlet. If you lose the cable, or if it becomes damaged, contact your support representative for a replacement. -
Page 11: Using Your Smart Table With Other Smart Products
There is an optional power cable (Part No. ST-DCC) that can be used to power the SMART Document Camera from the table. This cable runs directly from the document camera to the table and prevents tripping hazards. -
Page 12: Chapter 2: Using Your Smart Table
Connecting your SMART Table to the Internet Using your SMART Document Camera with your SMART Table After you set up your SMART Table as documented in the SMART Table 442i textless installation instructions (smarttech.com/kb/170315), it’s ready to use. C A U T I O N Do not leave objects on the table’s surface for extended periods. -
Page 13: Turning On Your Smart Table
C H A P T E R 2 Using your SMART Table Turning on your SMART Table To turn on your table 1. Connect the power cable to an outlet. 2. Push the Power button on the side of your table. -
Page 14: Using Smart Table Software
Press Cancel if you accidentally press the button. Using SMART Table software SMART Table Activities starts automatically when you turn on the table. The SMART Table Activities menu has two modes: Student and Teacher. Student mode Student mode is the default mode. It enables students to launch activities designed specifically for... -
Page 15: Teacher Mode
For more information on SMART Table Activities, see the SMART Table software and SMART Table Toolkit user’s guide (smarttech.com/kb/170414). Switching modes without inserting a USB drive You can also switch from Student mode to Teacher mode without inserting a USB drive. -
Page 16: Connecting Your Smart Table To The Internet
Connecting your table to the Internet enables you to download SMART Table activity packs from the SMART Exchange website directly onto your table. It also enables students to access the Internet from a SMART Notebook file with an embedded browser. - Page 17 To connect your table to a wired local area network T I P SMART recommends that you connect the table to a wireless local area network. See To connect your table to a wireless local area network on the previous page. N O T E You need to provide your own Ethernet cable.
-
Page 18: Using Your Smart Document Camera With Your Smart Table
USB receptacles on the side of the table. N O T E There is an optional power cable (Part No. ST-DCC) that can be used to power the SMART Document Camera from the table. This cable runs directly from the document camera to the table and prevents tripping hazards. - Page 19 3. Select an application that supports the use of the document camera, such as Media or SMART Notebook software. The document camera icon appears on the table’s desktop. For more information on SMART Table Activities, see the SMART Table software and SMART TableToolkit user’s guide (smarttech.com/kb/170414).
-
Page 20: Chapter 3: Maintaining Your Smart Table
Use an alcohol-free household glass cleaner, such as Windex® glass cleaner, to clean the surface at regular intervals. N O T E Before you clean your SMART Table, turn it off so you don’t inadvertently start applications when you wipe the surface. Updating the software I M P O R T A N T Refer to the SMART Table Software and SMART Table Toolkit User’s Guide... -
Page 21: Calibrating The Table
Maintaining your SMART Table Calibrating the table When you are using SMART Table activities and you or a student touch the table’s surface, a white dot should appear directly below the touch point. If the dot doesn’t align with your touch point, you might need to calibrate the table. - Page 22 C H A P T E R 3 Maintaining your SMART Table 4. Press your finger on the center of the first target until the red cross moves to the next target, and then repeat this step for each target.
-
Page 24: Appendix A: Troubleshooting
Diagnosing basic touch issues Restarting SMART Table Activities If you set up your SMART Table collaborative learning center following the procedures in the SMART Table 442i textless installation instructions (smarttech.com/kb/170315) included with your table, touch should work without any problems. However, if problems occur, follow the procedures in this chapter to resolve them. -
Page 25: Setting Up Your Table For Troubleshooting Touch Issues
Setting up your table for troubleshooting touch issues The troubleshooting procedures in this section requires you to close SMART Table Activities, and then connect a keyboard and a mouse. You can connect any keyboard and mouse that have any of the USB connectors to USB receptacles on the side of the table. -
Page 26: Diagnosing Basic Touch Issues
1. Press SMART Table Activities software closes and the Windows desktop appears. 2. Press the Windows Start button. 3. Type "SMART settings" in the search box, and then press ENTER. The SMART Settings dialog appears. 4. Under Tasks, press Orient/Align the SMART product. The orientation screen appears. - Page 27 <$paratext[h1_appendix]> To restart SMART Table Activities 1. Double-click the SMART Table Activities icon. SMART Table Activities starts. N O T E If you restart your table, SMART Table Activities starts automatically.
-
Page 28: Appendix B: Hardware Environmental Compliance
There are special regulations that must be met when shipping a product that has a lithium ion battery packaged with the product or shipping a lithium ion battery. When returning a SMART Technologies product which contains a lithium ion battery or returning a lithium ion battery, call SMART Technologies RMA for information on the special shipping regulations. -
Page 29: Packaging
Packaging Many countries have regulations restricting the use of certain heavy metals in product packaging. The packaging used by SMART Technologies to ship products complies with applicable packaging laws. Covered electronic devices Many U.S. states classify monitors as covered electronic devices and regulate their disposal. - Page 30 SMART Technologies smarttech.com/support smarttech.com/contactsupport...
Need help?
Do you have a question about the Table 442i and is the answer not in the manual?
Questions and answers