Table of Contents
Advertisement
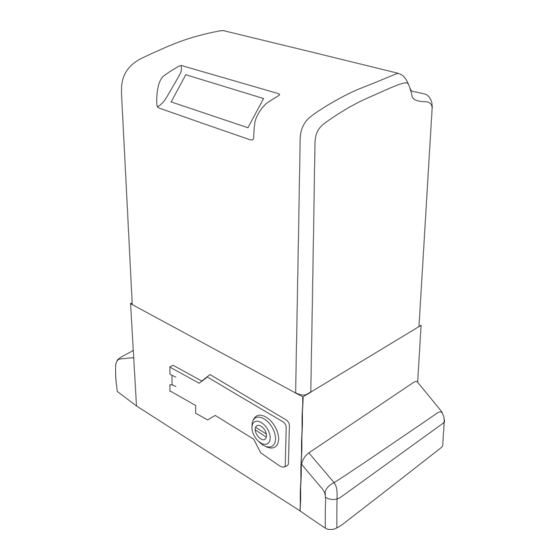
Smart Slider
Sliding Gate Opener
WARNING: IT IS VITAL FOR THE SAFETY OF ALL
PERSONS INSTALLING AND USING THIS OPENER TO
FOLLOW THE INSTALLATION INSTRUCTIONS AND
SAFETY WARNINGS. FAILURE TO COMPLY MAY RESULT
IN SERIOUS PERSONAL INJURY AND/OR PROPERTY
INSTALLATION MANUAL
DAMAGE AND FAILURE OF THE OPENER SYSTEM.
Advertisement
Table of Contents

Related Manuals for Smart Openers Smart Slider

Summary of Contents for Smart Openers Smart Slider
- Page 1 Smart Slider Sliding Gate Opener WARNING: IT IS VITAL FOR THE SAFETY OF ALL PERSONS INSTALLING AND USING THIS OPENER TO FOLLOW THE INSTALLATION INSTRUCTIONS AND SAFETY WARNINGS. FAILURE TO COMPLY MAY RESULT IN SERIOUS PERSONAL INJURY AND/OR PROPERTY INSTALLATION MANUAL...
-
Page 2: Table Of Contents
Technical Specifications Warranty To the extent that they may be lawfully excluded, Smart Openers Pty Ltd hereby expressly excludes all conditions and warranties, statutory or otherwise, which may be implied by law as conditions or warranties of purchase of a Smart Openers Pty Ltd gate opener. -
Page 3: Important Safety Warnings
Important Safety Warnings Description The Smart Slider gate opener described in this manual The Smart Slider gate opener requires a 240V AC 50Hz is designed for the automation of residential track or power input. The 24V DC motor can provide remote cantilever type sliding gates. -
Page 4: Operating Controls
Lock + Lock - Activity 2 + Activity 2 - Activity 1 + Activity 1 - DC Charger - DC Charger + 24V AC IN 24V Battery Motor 1 Motor 2 Back Up © March 2008 Smart Openers Pty Ltd... -
Page 5: Mechanical Installation
Remember: The unit has mains voltage running through 10. When installing the Smart Slider opener, strictly follow it (electrocution hazard, fire hazard, etc). all the instructions given in the instruction manual. If some points or procedures in this manual are not very 4. -
Page 6: Foot Print
Foot Print Use the diagram below as an indication for the opener footprint to plan your base. © March 2008 Smart Openers Pty Ltd... - Page 7 1. Read the instructions carefully. 2. Install a 240V, adequately protected 3-pin socket near where the Smart Slider opener is going to be installed 3. Make sure the gate and fence structure is solid and suitable to be motor driven. A strong base on the gate...
-
Page 8: Electrical Connection
Lock + Lock - Activity 2 + Activity 2 - Activity 1 + Activity 1 - DC Charger - DC Charger + 24V AC 24V Battery Motor 1 Motor 2 Back Up Fig. 4 © March 2008 Smart Openers Pty Ltd... -
Page 9: Quick Reference Guide
Time Delay 30 secs 5-400 secs 10.2 PED Close On/Off 10.3 PED Time Delay 30 secs 5-400 secs Transmitter Button PB=1 PD=4 PB, PD, OP, CL Hands Free Learn On/Off Power Save Mode On/Off © March 2008 Smart Openers Pty Ltd... -
Page 10: Coding Transmitters
4. Press MODE to save and exit to normal operation. Note: If a button is already allocated to one function it will not be available for any other. -10- © March 2008 Smart Openers Pty Ltd... -
Page 11: Setting Limits- Single Leaf
If you are not happy with the limits positions – reposition the limit cams, then press SET again for 3 secs and Fig. 14 repeat procedure as per above. Set Up Complete Fig. 15 -11- © March 2008 Smart Openers Pty Ltd... -
Page 12: Setting Limits- Dual Leaf
If you are not happy with the limits positions – reposition the limit cams, then press SET again for 3 secs and Set Time repeat initialising procedure as per above. Delay Fig. 20 Set Up Complete -12- Fig. 21 © March 2008 Smart Openers Pty Ltd... -
Page 13: Setting Pedestrian Mode
2. Close the gate onto the timber. If the gate does not reverse easily and attempts to continue to close adjust the force margin as per procedure above. -13- © March 2008 Smart Openers Pty Ltd... -
Page 14: Setting Motor Open/Close Speed
Power Save Mode must be set to OFF see page 15. Photo Beam Mode allows the gate to close once the beam has been tripped and restored. Smart Openers PE 2 strongly recommend the installation of a PE safety beam... -
Page 15: Setting Auto-Close Mode
1. To disable this function press MENU for 3 secs then SET to cycle though to HF Learning. 2. Press MENU to choose Off (Fig. 34). 3. Press SET to confirm or MODE to save and exit. -15- © March 2008 Smart Openers Pty Ltd... -
Page 16: Manual Disengagement
Manual Disengagement The Smart Slider opener is equipped with a manual disengagement device to enable you to open and close the gate in case of electrical failure, system malfunction or fire. -
Page 17: Maintenance
It is important for the installer to show their clients correct operational use of the Smart Slider including the use of the manual disengagement lever. Inform the owner about the need for regular and accurate maintenance, especially regarding a regular check of the safety and reversing devices. -
Page 18: Warranty
13. This warranty is not transferable. 14. Where the Product is retailed by any person other than Smart Openers , except for the warranty set out above, such person has no authority from Smart Openers to given any warranty or guarantee on Smart Openers behalf in addition to the warranty set out above. - Page 19 Notes -19- © March 2008 Smart Openers Pty Ltd...
- Page 20 No part of this publication may be reproduced, utilised, transmitted, or distributed in any form by any means including photocopying, recording, mechanical, electronic or otherwise by any party, without the written permission from the publisher Smart Openers Pty Ltd. Copying without authorisation is ILLEGAL.
Need help?
Do you have a question about the Smart Slider and is the answer not in the manual?
Questions and answers