Table of Contents
Advertisement
Quick Links
Advertisement
Table of Contents

Related Manuals for Fondital LINE Tech


Summary of Contents for Fondital LINE Tech
- Page 1 IST 03 C 397 - 02 NIAS CONDENSING INSTALLATION USE AND MAINTENANCE...
- Page 2 Dear Customer, Thank you for choosing and buying one of our boilers. Please read these instructions carefully in order to install, operate and service the boiler properly.
-
Page 3: General Information For Fitters, Maintenance Technicians And Users
General information for fitters, maintenance technicians and users This INSTRUCTION MANUAL, which is an integral and indispensable part of the product, must be handed over to the user by the fitter and must be kept in a safe place for future reference. The manual must accompany the boiler should it be sold or its possession transferred. -
Page 4: Rapid Operating Instructions
Rapid operating instructions The following instructions will help you to switch the boiler on quickly and regulate it for immediate use. It is presumed that the boiler has been installed by a qualified fitter, it has been used before and is ready to operate correctly. -
Page 5: Table Of Contents
TABLE OF CONTENTS General information for fitters, maintenance technicians and users ............................3 Rapid operating instructions ............................................4 1. User instructions ................................................7 1.1. Control panel ................................................7 1.2. LCD ..................................................8 1.3. BOILER STATUS – LCD ACTIVATION Correspondence ................................9 1.4. Operating the boiler .............................................10 1.4.1. - Page 6 LIST OF FIGURES fig. 1 - Control panel ................................................7 fig. 2 - LCD ....................................................8 fig. 3 - Calculated temperature ............................................12 fig. 4 - Thermoregulation curves ............................................12 fig. 5 - Filling tap ..................................................13 fig. 6 - Dimensions ...................................................16 fig. 7 - Plumbing system ................................................17 fig.
-
Page 7: User Instructions
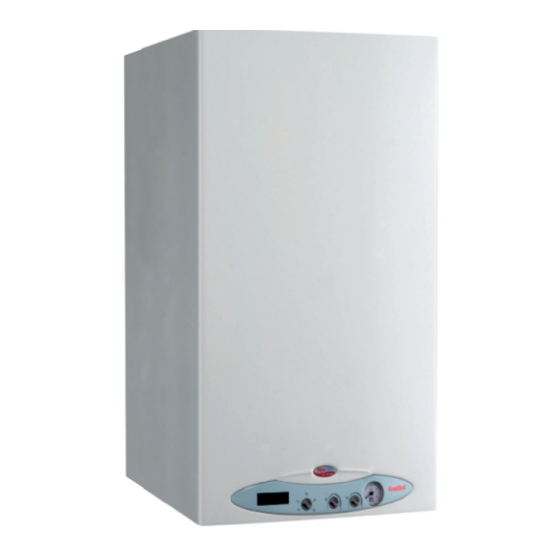
User instructions 1.1. Control panel fig. 1 1. Liquid crystal display (LCD) The LCD displays the boiler status and operating data (see fig. 2). 2. Boiler mode selector With the selector on RESET the boiler restarts after activation of the burner shutdown device. With the selector on OFF, the boiler is in stand-by mode, with the heating and hot water functions disabled. -
Page 8: Lcd
1.2. Rpm x 10 fig. 2 a. DHW indicator This comes on when the boiler is in DHW mode. It flashes when the DHW temperature is being regulated via regulator 3 (fig. 1). b. Water heater on indicator This indicator comes on when the water heater is activated via regulator 3 (fig. 1). c. -
Page 9: Boiler Status - Lcd Activation Correspondence
1.3. BOILER STATUS – LCD ACTIVATION Correspondence Normal operation Boiler selector on OFF Boiler selector on ANTI-FREEZE Boiler selector on SUMMER or WINTER No function active The water flow temperature is displayed Boiler selector on SUMMER or WINTER Aqua Premium system enabled, no function active The water flow temperature is displayed Boiler selector on WINTER CH function active (Aqua Premium system disabled) -
Page 10: Operating The Boiler
1.4. Operating the boiler 1.4.1. Switching on It is presumed that the boiler has been installed by a qualified fitter, it has been used before and is ready to operate correctly. • Open the gas cock; • Turn the master switch to ON – the LCD light up and shows the active function (see table 1); •... -
Page 11: 1.4.3.2. Instantaneous Production Of Dhw
When there is a demand for domestic hot water, the tap symbol (fixed) and the instantaneous water temperature are displayed. The burner symbol shows while the burner is in operation. The boiler can also operate as a standard instantaneous boiler, when the storage tank disabled. 1.4.3.2. -
Page 12: Pump And Valve Anti-Shutdown Function
1.4.5. Pump and valve anti-shutdown function If the boiler remains inactive and selector 2 is not in the OFF position, and the boiler is still connected to the mains supply, the pump, the switching valve and the two-way valve activate briefly every 24 hours to keep them efficient. 1.4.6. -
Page 13: Boiler Shutdown
1.5. Boiler shutdown The boiler shuts down automatically if a malfunction occurs. Refer to Tables 1 and 2 to identify the boiler operating mode. Refer to Table 2 and section 6 to identify possible causes of the shutdown. The troubleshooting section is at the end of this manual. Below is a list of kinds of shutdown and the procedure to follow in each. -
Page 14: Shutdown Due To Fan Malfunction
1.5.5. Shutdown due to fan malfunction IlThe fan work is constantly monitored and in case of malfunction it goes off; the boiler shutdown symbol displayed and code E17 flashes. This mode is maintained until the fan recovers normal working parameters. If the boiler should not start and remain in this mode, contact a qualified Service Centre or service engineer. -
Page 15: Technical Features And Dimensions
Technical features and dimensions 2.1. Technical features The boiler is equipped with a fully pre-mixed gas burner. The following models are available KB 24 condensing boiler with sealed chamber and forced draught, supplying CH water and instant DHW with Aqua Premium system, heat output 23.7 kW KB 28 condensing boiler with sealed chamber and forced draught, supplying CH water and instant DHW with Aqua Premium system,... -
Page 16: Dimensions
2.2. Dimensions View from below View from above Gas inlet Condensate drain CH flow CH drain tap DHW outlet DHW storage drain tap Cold water inlet 3-bar safety valve (CH) CH return 6-bar safety valve (DHW) Filling tap fig. 6... -
Page 17: Plumbing System
2.3. Plumbing system CH temperature probe Bruciatore Burner Heat exchanger Scambiatore di calore Ventilatore modulante Modulating fan Valvola di intercettazione Lock-out valve Flussostato 3-way valve Water flow switch Valvola a tre vie Accumulo Water storage tank CH flow Mandata Storage Sonda di temperatura riscaldamento tank probe... -
Page 18: Operating Data
2.4. Operating data Burner pressures must be verified after a three minute boiler operation time. KB 24 Max. CH Gas mains Diaphragm Flue gas Fuel type Input output output output pressure diameter [kW] (80-60°C) [kW] (50-30°C) [kW] [kW] [mbar] [mm] mbar Methane Gas G20 23.7... -
Page 19: Available Head
Reduced load KB 24 Pmax Pmin (30%) Casing heat loss with burner on Casing heat loss with burner off Chimney heat loss with burner on Flue gas system mass flow rate 12.4 Flue gas temp. – air temp °C Maximum heat output efficiency rating (60/80°C) 97.5 Maximum heat output efficiency rating (30/50°C) 104.8... -
Page 20: Instructions For The Fitter
Instructions for the fitter 3.1. Installation standards This is a II2H3P boiler which must be installed in compliance with the applicable laws and standards in the country of installation. 3.2. Installation Only original accessories and spare parts supplied by the manufacturer must be used for installation and maintenance. - Page 21 Wall-mounting template Fitting Ø Copper pipe Ø M = CH flow 3/4” 18 mm 349 mm C = DHW 1/2” 14 mm 389 mm G = Gas 1/2” 18 mm 349 mm F = Cold water 1/2” 14 mm 389 mm R = CH return 3/4”...
-
Page 22: Installing The Boiler
3.2.4. Installing the boiler Before connecting the boiler to the CH and DHW system, it needs to be cleaned thoroughly. Before putting a NEW system into service, clean thoroughly to remove any metal residue left over from manufacturing and welding processes, and any oil and grease deposits. This is because if they got into the boiler they would damage it or interfere with operation. -
Page 23: Air Intake / Flue Gas Discharge System
3.2.6. Air intake / flue gas discharge system Flue gas discharge into the atmosphere must comply with applicable laws and standards in the country of installation. The boiler is equipped with safety devices checking correct flue gas dischargeion. Should an air/flue gas system malfunction occur, the safety devices shut down the boiler and the LCD will display the burner shutdown symbol and flashing E03 code. -
Page 24: Air/Flue Gas System Duct Configuration: B23, B53, C13, C33, C43, C53, C83
3.2.6.1. Air intake/flue gas discharge system duct configuration: B23, B53, C13, C33, C43, C53, C83 Type B23 Boiler intended for connection to an existing flue system external to the boiler room. Combustion air is taken directly from the boiler room itself while flue gas is conveyed to the outside. The boiler is not to be fitted by anti-wind gust device;... -
Page 25: Ø 100/60 Mm And Ø 125/80 Mm Air/Flue Gas Coaxial Ducts System
3.2.6.2. Ø 100/60 mm and Ø 125/80 mm air intake/flue gas coaxial duct system The above data are referred to air intake/flue gas discharge systems which are implemented by means of smooth, rigid manufacturer approved and supplied pipes. Type C13 KB 24 Minimum permissible length of horizontal coaxial pipes is 1 meter, without accounting for the first elbow connected to the boiler. -
Page 26: Ø 80 Mm Air/Flue Gas Split Ducts System
3.2.6.3. Ø 80 mm air intake /flue gas discharge split duct system The above data are referred to air intake/flue gas discharge systems which are implemented by means of smooth, rigid manufacturer approved and supplied pipes. Installation types C43 - C53 - C83 Minimum permissible length of air intake pipe is 1 meter. -
Page 27: 3.2.7.2. Measurement Procedure
fig. 16 fig. 17 3.2.7.2. Measurement procedure The boiler is equipped with a tower allowing for air intake/flue gas discharge duct connection (fig. 18 and 19). The tower is designed with two pre-arranged openings directly accessing combustion air and flue gas ducts (fig. 19). Remove cap A from the pre-arranged openings on the tower, before starting combustion checking procedure (fig. -
Page 28: Gas Mains Connection
3.2.8. Gas mains connection The cross-section of the gas supply pipe must be equal to or greater than that of the boiler gas inlet pipe. The cross-section of the pipe depends on its length and route and the gas flow rate. The gas pipe must be dimensioned accordingly. Comply with the installation standards in force in the country of use, which are considered an integral part of this manual. -
Page 29: 3.2.10. Power Mains Connection
3.2.10. Power mains connection The boiler is supplied with a three-pole power cable, already connected to the electronic board and protected by a cable clamp. The boiler must be connected to a 230 V ~ 50 Hz mains supply. When connecting the boiler to the power mains, keep to the phase/neutral system. Installation must be carried out in compliance with the applicable standards, which are considered an integral part of this manual. -
Page 30: 3.2.14. Connection To An (Optional) External Probe And "Sliding Temperature" Operation
Precautions to take when installing the remote control: - The remote control cables must NOT be routed together with power cables: otherwise the disturbance would cause the remote control to malfunction. - Position the remote control on a wall inside the building, about 1.5 metres from the floor, in a suitable position for measuring the environmental temperature. - Page 31 The temperature probe must be installed on an outside wall facing north or north-east, in a position protected from atmospheric agents. Do not install near a window, ventilation openings or sources of heat. The external temperature probe automatically modifies the CH flow temperature in relation to: - the outdoor temperature measured - the thermoregulation curve selected - the calculated room temperature selected.
-
Page 32: Filling The System
3.3. Filling the system When all the boiler connections have been completed, the CH system can be filled with water. This must be done with caution, following these steps in sequence. • Open the air purging valve on all the radiators and check the efficiency of the automatic boiler valve. •... -
Page 33: Wiring Diagram
3.5. Wiring diagram Remote control 0SCHEMOD15: boiler main PCB E.RIV: detection electrode SE: external temperature probe (optional) 0CIRCSTA06: 230VAC relay PCB E.ACC: ignition electrode TR. ACC: ignition transformer 0SCHELCD00: LCD PCB PR: recirculation pump P3: boiler function selector PS: DHW recirculation pump P6: curve selection potentiometer for sliding CM1-CM2: jumpers for selecting type of boiler: V: fan... -
Page 34: Adapting To Other Gases And Regulating The Burner
3.6. Adapting to other gases and regulating the burner This boiler is built to run on the type of gas specified on the order, which is shown on the packaging and on the boiler rating plate. If you wish to switch to another type of gas, this must be done by a qualified technician using the accessories supplied by the manufacturer. He will make the necessary modifications and adjustments to ensure efficient operation of the boiler. -
Page 35: Testing The Boiler
fig. 25 Testing the boiler 4.1. Preliminary checks Before testing the boiler, it is advisable to check that: • the installation complies with the current regulations; • the flue gas discharge pipe and terminal are installed as instructed: when the boiler is running, no combustion gas must leak from any of the gaskets;... -
Page 36: Maintenance
Maintenance Maintenance and repairs must be carried out by a fully qualified technician. The user is strongly advised to have the boiler serviced and repaired by one of the Manufacturer’s fully qualified and authorised Service Centres Correct maintenance of the boiler will allow it to work efficiently, without harming the environment, and in complete safety. 5.1. -
Page 37: Troubleshooting
Troubleshooting BOILER STATUS PROBLEM POSSIBLE CAUSE SOLUTION Check gas pressure. Check that the gas valve opens or Gas supply failure whether any system safety valves have cut in. Gas valve disconnected Reconnect it Burner does not ignite Gas valve faulty Replace it PCB faulty Replace it... - Page 38 BOILER STATUS PROBLEM POSSIBLE CAUSE SOLUTION The boiler does not work in DHW Storage tank probe disconnected Reconnect it mode. The symbol is displayed and code E12 flashes. Operation Storage tank probe not working is resumed automatically when Storage tank probe faulty Replace it the cause of shutdown has been removed.
- Page 40 Tel. 0365/878.31 - Fax 0365/878.576 e mail: fondital@fondital.it - www.fondital.it The manufacturer reserves the right to modify the products as it deems necessary and useful, without affecting their basic features. Uff. Pubblicità Fondital IST 03 C 397 - 02 Gennaio 2011 (11/2011)
Need help?
Do you have a question about the LINE Tech and is the answer not in the manual?
Questions and answers