Table of Contents
Advertisement
Advertisement
Table of Contents

Subscribe to Our Youtube Channel
Related Manuals for Seagate Barracuda 7200.12


Summary of Contents for Seagate Barracuda 7200.12
- Page 1 Network Video Storage User’s Manual Version 1.1 00P3DG700ZXSEA1...
- Page 2 NVS User’s Manual Caution and Preventive Tips • Switch the 115/230V selector to your local voltage standard • Handle with care, do not drop the unit • Mount the unit in an equipment rack or place it on a solid, stable surface. •...
- Page 3 NVS User’s Manual Important Information Before proceeding, please read and observe all instructions and warnings in this manual. Retain this manual with the original bill of sale for future reference and, if necessary, warranty service. When unpacking your unit, check for missing or damaged items. If any item is missing, or if damage is evident, DO NOT INSTALL OR OPERATE THIS PRODUCT.
-
Page 4: Table Of Contents
NVS User’s Manual Table of Contents Overview ........................6 System Installation ....................... 7 Unit Position ......................7 Device Connection ....................7 Rear Panel Connectors ..................8 Compatible IP Cameras ..................9 ... - Page 5 NVS User’s Manual Event List Search ....................32 Snapshot ......................33 4.10 Health Status of HDD ................... 33 4.11 Main/Dual Stream ....................33 4.12 Remote Monitoring Software Troubleshooting ............34 Appendix A: Recommended HDDs ................
-
Page 6: Overview
NVS User’s Manual Overview The Network Video Storage (NVS) is a premium network video recorder supporting IP camera Plug & Play automatic installation, and up to 16 ports PoE switch. The NVS is an ideal edge recording solution for system integrators and installers applicable from small convenience stores and merchandise stores to medium-sized surveillance systems and projects. -
Page 7: System Installation
NVS User’s Manual System Installation The notices and introduction on system installation will be described particularly in this chapter. Please follow the description to operate the unit. In order to prevent the unit from data loss and system damage that caused by a sudden power fluctuation, use of an Uninterruptible Power Supply (UPS) is highly recommended. -
Page 8: Rear Panel Connectors
NVS User’s Manual Rear Panel Connectors There are various connectors on the rear panel for the NVS installations. The connectors are described as the following. Power Jack Connect the power supply cord shipped with the NVS. NOTE: Use of other power supply cords may cause overloading. -
Page 9: Compatible Ip Cameras
NVS User’s Manual Compatible IP Cameras The NVS is designed with dual stream function that provides two suitable streaming types respectively for Live display and recording videos. compression mode for Live display is H.264 with D1 resolution in multiple channels and with HD in single channel. For recording videos, the compression mode will be H.264 with HD resolution. -
Page 10: General System Setup
NVS User’s Manual General System Setup Before operating the NVS, some general configuration should be setup first. The following subsections will introduce function keys on the front panel and general configuration of the NVS. The LCD display on the front panel will show current date/time and IP address plus unit name of the NVS at normal mode, as shown below. -
Page 11: Power On / Shutdown / Reboot
NVS User’s Manual Power On / Shutdown / Reboot If the NVS must be shutdown for any reason, please use the proper shutdown and power on procedures to avoid damaging the NVS. Power On the Unit: Check the type of power source before plug in the power cord to the NVS (the acceptable power input is between AC110V ~ AC240V), and power on the unit via pressing the POWER key on the front panel. -
Page 12: Osd Menu Of The Nvs
NVS User’s Manual NOTE: To avoid network conflict, DO NOT set IP of the NVS as 192.168.50.xxx due to the default IP for the built-in PoE hub is 192.168.50.1. OSD Menu of the NVS Aside from shutdown/ reboot/ network setting, users can also check out system information, view system log, and perform software upgrade in the NVS’s OSD menu. -
Page 13: Remote Monitoring Software
NVS User’s Manual Remote Monitoring Software The remote monitoring software is a browser-based software application designed to remotely operate with the NVS products. Using the software, users are allowed to view live and recorded video, and to configure the NVS remotely via a LAN, WAN or Internet on a personal computer. -
Page 14: Software Installation
NVS User’s Manual Software Installation Refer to the following description to install the remote monitoring software. 4.2.1 Internet Setting The PC operating with the remote monitoring software should be set to accept ActiveX plug-ins. Please follow the steps to set the Internet security settings appropriately. - Page 15 NVS User’s Manual • Uncheck “Require server verification (https:) for all sites in this zone”. Type the IP address of the unit in field and click <Add> to add this web site to the zone. • Click <OK> to confirm the setting and close Trusted sites dialog. •...
-
Page 16: Software Installation
NVS User’s Manual 4.2.2 Software Installation Start the browser to initiate the installation of the remote monitoring software on the PC. The IP address of the NVS can be saved as a Favorites item in the web browser to enable easy access in the future. •... -
Page 17: Login / Logoff
NVS User’s Manual Login / Logoff The login window will be shown as below. One “admin” connection and up to three “user” connections are allowed to access a NVS at the same time. The following steps demonstrate procedures to connect and login to the NVS. •... -
Page 18: Live Monitoring
NVS User’s Manual Live Monitoring Users can view Live video from the cameras connected to the NVS by clicking <Live> button on the main window toolbar. While viewing Live video, users can perform Live monitoring operations such as display mode, IP dome camera control, and digital zoom. -
Page 19: Digital Zoom
NVS User’s Manual Dome ID (ID) Click for changing the dome ID and protocol. Proper authority is required to access this function. Focus +/− Use to adjust the camera lens to focus on objects for a clear view. Click on <Focus +>... -
Page 20: Instant Recording
NVS User’s Manual Instant Recording Instant Recording function allows users to record video to the PC by one click. Note that the audio function is preset as OFF. If users wish record video with audio, click on the <Audio On/Off> button. Follow the steps to start recording instantly: •... -
Page 21: Remote Video Playback
NVS User’s Manual 4.6.1 Remote Video Playback Click <Play> on the main window toolbar, then click <Remote Playback> tab. The <Remote Playback> window will be displayed. The <Available Record Video> area displays the duration of recorded video available for playback. To playback remote video, follow these steps: •... -
Page 22: Digital Signature Verification
NVS User’s Manual 4.6.3 Digital Signature Verification The digital signature verification function aims to authenticate if a video file with assigned digital signature is altered. Follow the description below to verify the digital signature. • Click <Play> on the main window toolbar. •... -
Page 23: Osd Configuration Menu
NVS User’s Manual OSD Configuration Menu Click <Menu> on the main window toolbar and users can setup OSD configuration of the NVS. Note that the login account has to be administrator in order to have full access to the OSD menu. Main menu of the configuration window are: System Setup, Camera Setup, Record Setup, Event Setup, Database Setup, Configuration, PoE Setup, and Shutdown. - Page 24 NVS User’s Manual Enable DDNS Host Name DDNS Setup DDNS Port Submit/Update ezDDNS UPnP UPnP Setup UPnP NAT Traversal System/Version Info This submenu shows system and software information of the NVS, including model name, hardware version, software version, MAC address 1, and MAC address 2.
-
Page 25: Camera Setup
NVS User’s Manual If users are using a dynamic IP address and wish to synchronize the IP to a static domain name, enter DDNS Setup menu and enable DDNS function. Then enter a preferred host name and DDNS port, select <Yes> next to <Submit/Next>, and click <Apply>. - Page 26 NVS User’s Manual IP Camera Name Users can enter a preferred camera name. It will be shown on the screen. IP Camera Hidden Under this item, users can choose whether to hide the camera image. Device Search Select this item and a confirm window will popup. Click <OK> and the system will begin to search for all UPnP devices in the LAN.
-
Page 27: Record Setup
NVS User’s Manual 4.7.3 Record Setup Under Record Setup menu, the menu items are listed as below: Day Time Start Day Time End Night Time Start Schedule Setup Night Time End Weekend Schedule Weekend Start Record Weekend End Setup Preset Config Data Lifetime Mode Data Lifetime Data Lifetime... -
Page 28: Event Setup
NVS User’s Manual 4.7.4 Event Setup Under Event Setup menu, the menu items are listed as below: Internal Buzzer Email Notice Email Attachment Alert Notification Alert IP Alert Notification Set 1 ~ Set 3 Setup Event Alert Port Setup Alive Interval Event Duration Video Loss Detect Per Channel... - Page 29 NVS User’s Manual Per Channel Config User can configure different event setting for each channel individually. First decide to enable/disable <Video Loss Detect>. Then set <Motion Detect> option to <OFF>, <Day>, <Night>, <Day & Night>, <Weekend>, <Day & Weekend>, <Night & Weekend>, or <All>. If motion detection is enabled, users have to further setup <Detection Config>.
-
Page 30: Database Setup
NVS User’s Manual 4.7.5 Database Setup Under Database Setup menu, the menu items are listed as below: Total Size Free Size Database Avail. Rec Time Setup Est. Rec Period Internal Disks Data Protection Date Time/ Event/ Loc./ Lock Total Size This item shows the total HDD size of the NVS. -
Page 31: Configuration
NVS User’s Manual 4.7.6 Configuration Under Configuration menu, the menu items are listed as below: Import Config Export Config Configuration System Log ID/ Date/ Time/ Code/ Value Operation Log Import Config Users can import a previously saved configuration file to apply to the NVS. Click <Execute>... -
Page 32: Shutdown
NVS User’s Manual 4.7.8 Shutdown Under Shutdown menu, the menu items are listed as below: Reboot Shutdown Auto Rebooting Reboot Time Reboot Click on the <Execute> button next to <Reboot> to remotely reboot the NVS. Auto Rebooting Users can enable/disable Auto Rebooting function here. Select a preferred day to auto reboot the NVS on a regular basis, or select <OFF>... -
Page 33: Snapshot
NVS User’s Manual Snapshot Snapshot is a simple screen capture tool. When users click <Snapshot> on the main window toolbar, it will capture the screenshot of the window that is currently showing on the screen. Each click captures one screenshot to be saved as a JPEG file on the desktop. -
Page 34: Remote Monitoring Software Troubleshooting
NVS User’s Manual 4.12 Remote Monitoring Software Troubleshooting What happened if the server requests to upgrade the software every time the NVS is connected? If the following window displays repeatedly, please follow the steps to delete the temporary internet files. •... -
Page 35: Appendix A: Recommended Hdds
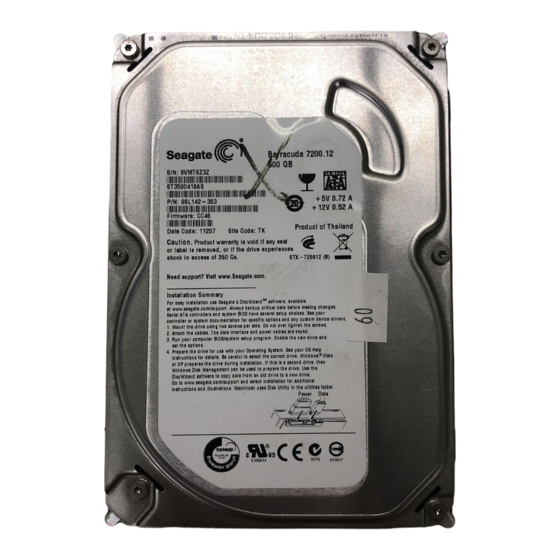
NVS User’s Manual Appendix A: Recommended HDDs The following is a list of recommended SATA HDDs. Brand Model Name Model Number Size Seagate Barracuda 7200.12 ST2500418AS 500GB AV-GP WD20EURS 2.0T NOTE: After a HDD is successfully installed, users will see a... -
Page 36: Appendix B: Nvs Osd Menu Tree
NVS User’s Manual Appendix B: NVS OSD Menu Tree Level 1 Level 2 Level 3 Level 4 Level 5 Hostname Management Port [1]Connection Type [1]IP Ethernet1 Network [1]Netmask Info [1]Gateway [2]Connection Type Ethernet2 [2]IP [2]Netmask Software Version Version Info Hardware Version [#]Link PoE Info PoE Port [1] ~ [8]...
Need help?
Do you have a question about the Barracuda 7200.12 and is the answer not in the manual?
Questions and answers