Table of Contents
Advertisement
Quick Links
Download this manual
See also:
User Manual
Advertisement
Table of Contents

Related Manuals for Birch BP002 Series


Summary of Contents for Birch BP002 Series
-
Page 2: Important Safety Instructions
BP-002 User's Manual Important Safety Instructions Read all of these instructions carefully and thoroughly and save them for later reference. The unauthorized operation would lead to malfunction or accident. Manufacturers have no responsibilities for the problems which are led by misoperations. Follow all warnings and instructions in the manual as well as marked on the product. - Page 3 BP-002 User's Manual Notice: The contents of this manual are subject to change without notice. *All the parts of the printer can be recycled. When it is abandoned, we can call it back freely. Please contact us when you abandon it. - ii -...
-
Page 4: Table Of Contents
BP-002 User's Manual Table of Contents Important Safety Instructions ........................i Chapter 1 Overview ............................1 1.1 Features ..............................1 1.2 Product Model Description ........................1 1.3 Main Parts of the Printer........................1 Chapter 2 Installing the Printer........................3 2.1 Unpacking & Checking ........................3 2.2 Removing the Protective Materials......................3 2.3 Connecting to Your Computer or Other Equipment ................3 2.3.1 Connecting the Cash Drawer Cable .....................3 2.3.2 Connecting the Parallel Interface Cable ..................4... - Page 5 BP-002 User's Manual 5.2.1 Cash Drawer Interface........................ 31 5.2.2 Parallel Interface......................... 32 5.2.3 USB Interface ..........................33 5.2.4 Serial Interface ........................... 33 5.2.5 Ethernet Interface ........................34 5.2.6 Power Supply Inlet........................35 Chapter 6 Troubleshooting and Maintenance ..................36 6.1 Maintenance............................36 6.2 Error Message on the Control Panel ....................
-
Page 6: Chapter 1 Overview
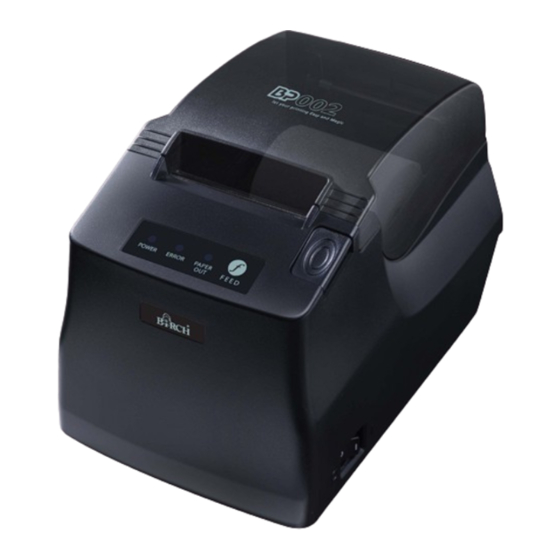
BP-002 User's Manual Chapter 1 Overview 1.1 Features BP-002 is a low-cost and high-reliability thermal printer facing low-income market. It can be widely used in the fields of supermarket, POS, catering, electronic instrument and so on. 1.2 Product Model Description According to different data ports (interfaces), BP-002 series is classified into several different models: BP-002BP, BP-002BU, BP-002BR, BP-002BN, BP-002BT, BP-002BF, BP-002WP, BP-002WU, BP-002WR, BP-002WN, BP-002WT, BP-002WF... - Page 7 BP-002 User's Manual Cash drawer interface Data interface Power supply inlet Figure 1-2 Back interfaces of the printer Note: According to the specific interface standards - 2 -...
-
Page 8: Chapter 2 Installing The Printer
BP-002 User's Manual Chapter 2 Installing the Printer 2.1 Unpacking & Checking Check the following items in the package, if any of these items is missing, please contact your dealer. Printer Power Cord Interface Cable Driver CD AC Adapter (Including User's Manual and Driver) Figure 2-1 Packing List 2.2 Removing the Protective Materials 1. -
Page 9: Connecting The Parallel Interface Cable
BP-002 User's Manual Cash Drawer Cable Cash Drawer Interface Figure 2-2 Connecting the cash drawer cable Caution: You must use the appropriate cash drawer, or else our company will not guarantee to keep the printer in good repair when it is damaged by improper cash drawer. 2.3.2 Connecting the Parallel Interface Cable 1. -
Page 10: Connecting The Serial Interface Cable
BP-002 User's Manual USB Interface Cable USB Interface Figure 2-4 Connecting the USB interface cable 2.3.4 Connecting the Serial Interface Cable 1. Make sure the computer and the printer are both turned off, connect the serial interface cable to the connector of the printer. -
Page 11: Connecting The Power Cord
BP-002 User's Manual Ethernet Interface Ethernet Interface Cable Figure 2-6 Connecting the Ethernet interface cable Note: Please refer to the user’s manual for the detailed instructions of internet settings. 2.4 Connecting the Power Cord 1. Make sure the printer’s power is turned off. (O mark on the power switch is pressed down) 2. -
Page 12: Installing The Driver
BP-002 User's Manual 2.5 Installing the Driver You should setup the printer driver in Windows before using the BP-002 printer. Please use the cable to connect computer with printer, then turn on the computer and the printer, put the driver CD into the CD-ROM. Install driver by the following ways: Auto-install way Double click the file “Setup.exe”... - Page 13 BP-002 User's Manual should select the path as follow: CD-ROM → “Driver” → “WIN2000 (XP-Vista-Win7)”, click “Open”, then click “OK” to return to the window of “Add Printer Wizard", select the respective model, click “Next”. 6. Follow the guide click “Next” gradually till the installation is finished. The installing steps for Windows 98 are as follows: (1) The installing steps with a parallel cable or a serial cable: 1.
-
Page 14: Installing Bluetooth Interface Driver
BP-002 User's Manual 4. A window of “Install From Disk” pops up, click “OK”, return to a window of “Add Printer”, then click "Next". 5. A window of “Printer port” pops up, select “Available ports”, select “JMUSB”, click "Next", and then show the printer’s name. - Page 15 BP-002 User's Manual 4. Select the “BP-002”, and then click “Next”. 5. Tick off the option of “Let me choose my own passkey” and enter “1234” as shown, then click “Next”. - 10 -...
-
Page 16: Ethernet Settings
Bluetooth device. 2.7 Ethernet Settings Please use Birch network setting software NetFinder to set the IP address for Birch Ethernet interface network printers, which can be found in the CD or downloaded from www.birch.com.tw. Caution: The network printing function needs the operation system of Windows2000 or above. -
Page 17: Connecting Printer
BP-002 User's Manual 2.7.1 Connecting Printer Power on the printer, connect with the Ethernet cable which has been connected to LAN, and look into the information of Ethernet LED indicator to ensure the printer has entered into the normal connection. Yellow LED Green LED Description... - Page 18 BP-002 User's Manual If the printer still can not be found out when the network connection is correct in the same network, please check whether the network fire wall on the PC opens or not. If there is fire wall, please close it temporarily, open again after finishing searching and setting a printer completely.
-
Page 19: Wi-Fi Setting
“Upgrade-install printer network driver (setting driver’s network port)”. 2.8 Wi-Fi Setting Please use Birch network setting software WiFiConfig to set the IP address for Birch Wi-Fi interface network printers, which can be found in the CD or downloaded from www.birch.com.tw. -
Page 20: Connect To The Printer, Run The Wificonfig Software
BP-002 User's Manual Caution: Wi-Fi interface transfers data through wireless network. The wireless signal may be affected by the surrounding environment, please ensure the signal around printer location is well enough. 2.8.1 Connect to the Printer, Run the WiFiConfig Software Connect the printer and the computer with the USB interface cable, make sure the printer is in normal working condition, and then turn on both the printer and the computer, double click WiFiConfig.exe in the driver CD. -
Page 21: Set Wi-Fi Parameters
BP-002 User's Manual Network name. The longest network name is 32 characters and there is no space between characters. SSID When WLAN type Infrastructure, the network name is the same with the router’s network name; When WLAN type Ad Hoc, the network name is the same with the wireless network card’s network name. -
Page 22: Checking Wi-Fi Parameters
BP-002 User's Manual 4. Click “Load”, the printer would load the current Wi-Fi setting. 5. Sets the network communication parameters. Please set the corresponding network communication parameters according to the actual network circumstances. The detailed information please enquire the network administer. WLAN type: Select the network mode. -
Page 23: Recover The Default Setting
BP-002 User's Manual 2.8.4 Recover the Default Setting When the malfunctions of the Wi-Fi parameters lead to the printer unable to connect with the network, you could recover the default setting to set the parameters again. Note: Printer does not need to enter setup mode when recovering the default setting. If the printer has entered into setup mode, please restart the printer before recovering the default setting. - Page 24 BP-002 User's Manual 5) A window of “Add Port” pops up, enter the IP address reported by the “Setting printer’s IP address” in the “Printer Name or IP Address” column. Take IP address “192.168.0.240” for example. “Port Name” is created automatically after finishing filling in IP address. 6) A window of “Additional Port Information Required”...
- Page 25 BP-002 User's Manual 8) Return to “Additional Port Information Required”, click “Next”. 9) A window of “Completing the Add Standard TCP/IP Printer Port Wizard” pops up, click “Finish”. 10) In the selection of “Manufacturers/Printers”, click “Have Disk”, and then click “Next”. 11) A window of “Install From Disk”...
- Page 26 BP-002 User's Manual 4) A window of “Printer port” pops up, select “Standard TCP/IP Port”, click “New port”. 5) A window of “Add Standard TCP/IP Printer Port Wizard” pops up, click “Next”. 6) A window of “Add a port” pops up, import the IP address reported by the “Setting printer’s IP address”...
- Page 27 BP-002 User's Manual 7) A window of “Additional Port Information Required” pops up, select “Custom” in the “Device Type”, then click “settings”. 8) A window of “Port Settings” pops up. Affirm that “Port name” and “Printer name or IP address” are correct, “Protocol”...
- Page 28 BP-002 User's Manual 9) Return to “Additional Port Information Required”, click “Next”. 10) A window of “Completing the Add Standard TCP/IP Printer Port Wizard” pops up, click “Finish”. 11) Return to “Printer Ports”, click “Close”. 12) Return to “Properties”, make sure the network port is selected, click “Apply”, and then click “Close”. Thus, printer’s network port setting is finished.
- Page 29 BP-002 User's Manual - 24 -...
-
Page 30: Chapter 3 Control Panel
BP-002 User's Manual Chapter 3 Control Panel 3.1 Control Panel There are three indicator lights and one key on the control panel shown as Figure 3-1. Figure 3-1 Control panel 3.1.1 Indicator light Indicator light Description Denotes whether the printer’s power supply is connected or not. The indicator POWER (Green) light is on when the power is connected. -
Page 31: Setting Slip Stitch (Update And Boot)
BP-002 User's Manual 3.5 Setting Slip Stitch (UPDATE and BOOT) Slip Stitch Cap Slip Stitch When Plugging Into When Pulling Out Slip Stitch is used to upgrade printer firmware. In normal working condition, BOOT slip stitch should be pulling out while UPDATE slip stitch should be plugging into. Note: Do not change the Slip Stitch without any permission of the factory, or the printer can not work. - Page 32 BP-002 User's Manual 5. In the window of Printer Settings, the left side of each item is parameter icon, the top right corner is parameter item and the bottom right corner is current value. The printer will load the current value automatically when each parameter window popping up.
-
Page 33: Chapter 4 Installing Paper
BP-002 User's Manual Chapter 4 Installing Paper The printer can install the paper conveniently, which should be 58mm wide. How to deal with the paper will be explained in details in this chapter. 4.1 Paper Installation Steps Note: 1. Don’t touch the thermal print head after printing to avoid being burned. 2. - Page 34 BP-002 User's Manual Figure 4-3 Pull out the paper 4. Put the paper as shown below, and then close the cover. Figure 4-4 Close the cover NOTE: After finishing installing the paper, if PAPER OUT indicator light and ERROR indicator light are still on, or the printer makes strange noise when feeding paper, please open the cover and re-close it tightly.
-
Page 35: Chapter 5 Specification
BP-002 User's Manual Chapter 5 Specification 5.1 General Specificaion Item Description Printing method Thermal line printing Printing direction Line by line Dot density 384 dots/ line (203×203 DPI) Printing speed 100 mm/s Reliability Print head life:50Km (under special condition), 100 million pulse Effective printing width 48 mm Paper feed speed... -
Page 36: Interface Specifications
BP-002 User's Manual Input voltage: 100 ~ 240 VAC Frequency: 50Hz/60Hz Power Supply Output voltage: 8.5V DC Current: 3 A Temperature: 5 ~ 40℃ Operating environment Humidity: 20%RH ~ 80%RH (No condensation) Environmental conditions Temperature: -40 ~ 55℃ Storage environment Humidity: ≤93%RH (40℃, No condensation) Weight Approx.1 Kg Noise... -
Page 37: Parallel Interface
BP-002 User's Manual Figure 5-1 Cash drawer connector Table A-1: Cash drawer connector Pin assignments Pin number Signal Direction Frame GND Cash Drawer drive signal Cash Drawer open/closed signal 12VDC Cash Drawer drive signal Cash Drawer open/closed signal ground Drive current≤12V/1A Table A-1: Cash drawer connector Pin assignments Note: Make sure the cash drawer meets the specification mentioned above, or we will not guarantee to keep the printer in good repair. -
Page 38: Usb Interface
BP-002 User's Manual /ERR Low level means the printer is in error state 14, 15, 17, 18, Not connect 34, 36 16, 19~30, 33 GND, “0” level in logic Table A-2: Connector Pin Assignments Note: ① “IN” means input to the printer, “OUT” means output from printer. ②... -
Page 39: Ethernet Interface
BP-002 User's Manual Table A-4 Pin assignments of the serial interface Pin Number Signal From Description Host Receive data from Host Printer Sent control code X-ON/X-OFF and data to the Host “MARK” state means printer is too busy to receive data; Printer “SPACE”... -
Page 40: Power Supply Inlet
BP-002 User's Manual Figure 5-8 Ethernet interface 5.2.6 Power Supply Inlet The BP-002 printer connects with a 8.5V±5% and 3A AC adapter. The power supply inlet is shown as Figure 5-9. Figure 5-9 Power supply inlet - 35 -... -
Page 41: Chapter 6 Troubleshooting And Maintenance
BP-002 User's Manual Chapter 6 Troubleshooting and Maintenance 6.1 Maintenance To prolong the printer’s life, make sure that the printer is well away from heaters and other sources of extreme heat, and the surrounding area is clean, dry, and free of dust. Cleaning paper holder and thermal print head periodically is the main task of maintaining the printer. -
Page 42: Chapter 7 Control Commands
BP-002 User's Manual Chapter 7 Control Commands 7.1 General The commands BP-002 supplies are based on ESC/POS. The format described as following: Command Function Format: ASCII: Indicates the ASCII equivalents Decimal: Indicates the decimal equivalents Hex: Written in hexadecimal code Description: The function and using instruction of that command. - Page 43 BP-002 User's Manual Set the right-side spacing of the character to n*(horizontal or vertical motion unit) n=0~255. Horizontal or vertical motion unit is specified by GS P command ESC ! Set print mode Format: ASCII: ! Decimal: Hex: Description: Select the print mode using n as follows. n=0~255 Value Function Character A...
- Page 44 BP-002 User's Manual Define the user-define Characters from c1 to c2. y=3; 32<=c1<=c2<=126; 0<=x<=12; [Character A 12*24], 0<=x<=9; [Character B 8*16]; d=0~255; k=c2-c1+1≤10; that is to say each time define characters could not over 10; y specifies the number of bytes in the vertical direction, x specifies the number of dots in the horizontal direction, d specifies the user-define data.
- Page 45 BP-002 User's Manual ESC 3 User-define line spacing Format: ASCII: Decimal: Hex: Description: Set the line spacing to n*. n=0~255. BP-002 printer’s line spacing is the minimum unit of horizontal n* The vertical or horizontal motion units are specified by GS P Command. ESC = Select peripheral device Format:...
- Page 46 BP-002 User's Manual ESC J Print and feed paper Format: ASCII: Decimal: Hex: Description: Print the data in print buffer and feed the paper n*(horizontal or vertical motion unit) inches. n=0~255; Horizontal or vertical motion unit are specified by GS P command. ESC M Select character font Format:...
- Page 47 BP-002 User's Manual ESC a n Select justification Format: ASCII: ESC a Decimal: Hex: Description: n=0, 48: Left justification; n=1, 49: centering; n=2, 50; right justification. ESC c 5 Enable/disable panel button Format: ASCII: Decimal: Hex: Description: When the LSB of n is 0, enable button. When the LSB of n is 1, disable button.
- Page 48 BP-002 User's Manual ESC { Turn on/off upside-down printing mode Format: ASCII: Decimal: Hex: Description: When the LSB of n is 0, upside-down printing mode is turn off. When the LSB of n is 1, upside-down printing mode is turn on. FS ! Select Chinese character mode Format:...
- Page 49 BP-002 User's Manual FS . Cancel Chinese language mode Format: ASCII: Decimal: Hex: Description: In this mode No Chinese character printed. FS 2 Define user-define Chinese characters Format: ASCII: c1 c2 d1……d72 Decimal: 50 c1 c2 d1……d72 Hex: 32 c1 c2 d1……d72 Description: c1=fe;...
- Page 50 BP-002 User's Manual GS B Turn white/black reverse mode on/off Format: ASCII: Decimal: Hex: Description: When the LSB of n is 0, turn the white/black reverse mode off. When the LSB of n is 1, turn the white/black reverse mode on. GS H Select print position of HRI character Format:...
- Page 51 BP-002 User's Manual n=1, 49; Selects character B (8*16) Set bar code height Format: ASCII: Decimal: Hex: Description: Set the height of the bar code to n dots. n = 0 ~ 48。 GS k Print bar code Format: ASCII: d1..dk Decimal: 107 m...
- Page 52 BP-002 User's Manual $, +, -, ., /, : ~ CODE128 Can be changed 2 ≤ n < 255 0 ≤ d ≤ 127 SP(7FH) GS v 0 Print raster bit image Format: ASCII: xL xH yL yH d1…dk Decimal: 29 118 48 xL xH yL yH d1…dk Hex:...
-
Page 53: Appendix Commands List
BP-002 User's Manual Appendix Commands List Here lists the commands supported in the printer in alphabetical order. Control commands Functions Horizontal tab Print and line feed DLE EOT Real-time status transmission ESC SP Set right-side character spacing ESC ! Set print mode ESC $ Set absolute print position ESC %... - Page 54 BP-002 User's Manual FS S Set Chinese character spacing FS W Turn quadruple-size mode on/off for Chinese character GS ! Select Character size GS B Turn white/black reverse mode on/off GS H Select print position of HRI character GS L Set left margin GS P Set horizontal or vertical motion unit...
Need help?
Do you have a question about the BP002 Series and is the answer not in the manual?
Questions and answers