Table of Contents
Advertisement
Quick Links
Advertisement
Table of Contents

Related Manuals for Birch BP-002


Summary of Contents for Birch BP-002
- Page 2 BP-002 User's Manual Declare About Trademark Corporation names and product names are the registered trademarks or commodity names of the corporation. * EPSON and ESC/POS are the registered trademarks of Seiko Epson Corporation. * Windows is a registered trademark of Microsoft Corporation.
-
Page 3: Important Safety Instructions
BP-002 User's Manual Important Safety Instructions Read all of these instructions carefully and thoroughly and save them for later reference. The unauthorized operation would lead to malfunction or accident. Manufacturers have no responsibilities for the problems which are led by misoperations. - Page 4 BP-002 User's Manual Warning: In order to ensure the printer life, strictly prohibit printing full line full black exceeding 2 CM. Notice: The contents of this manual are subject to change without notice. *All the parts of the printer can be recycled. When it is abandoned, we can call it back freely.
-
Page 5: Table Of Contents
BP-002 User's Manual Table of Contents Declare................................i Important Safety Instructions ........................ii Chapter 1 Overview ............................1 1.1 Features ..............................1 1.2 Product Model Description ........................1 1.3 Main Parts of the Printer........................1 Chapter 2 Installing the Printer........................3 2.1 Unpacking & Checking ........................3 2.2 Removing the Protective Materials......................3 2.3 Connecting to Your Computer or Other Equipment ................3... - Page 6 BP-002 User's Manual 5.2.1 Cash Drawer Interface........................ 41 5.2.2 Parallel Interface......................... 41 5.2.3 USB Interface ..........................42 5.2.4 Serial Interface ........................... 43 5.2.5 Ethernet Interface ........................44 5.2.6 Power Supply Inlet........................44 Chapter 6 Printer Maintenance ........................ 45 6.1 Cleaning the Printer .......................... 45 6.2 Error Message on the Control Panel ....................
-
Page 7: Chapter 1 Overview
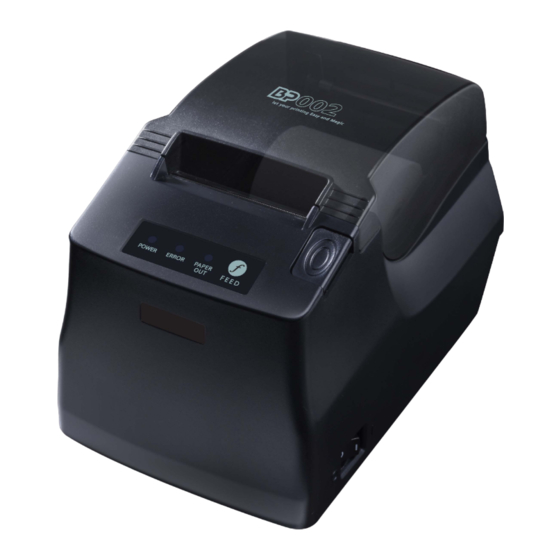
BP-002 User's Manual Chapter 1 Overview 1.1 Features BP-002 is a low-cost and high-reliability thermal printer facing low-income market. It can be widely used in the fields of supermarket, POS, catering, electronic instrument and so on. 1.2 Product Model Description... - Page 8 BP-002 User's Manual Cash drawer interface Data interface Power supply inlet Figure 1-2 Main parts of the printer (Rear) Note: Please take the specific interface as standard. - 2 -...
-
Page 9: Chapter 2 Installing The Printer
BP-002 User's Manual Chapter 2 Installing the Printer 2.1 Unpacking & Checking Check the following items in the package, if any of these items is missing, please contact your dealer. Printer Power Cord Interface Cable (Optional) Driver CD AC Adapter... -
Page 10: Connecting The Parallel Interface Cable
BP-002 User's Manual Cash drawer cable Cash drawer interface Figure 2-2 Connecting the cash drawer cable Caution: Please use the appropriate cash drawer. Manufacturer will not honor warranty when using unauthorized cash drawer. 2.3.2 Connecting the Parallel Interface Cable 1. Make sure the computer and the printer are both turned off, connect the parallel interface cable to the parallel interface of the printer, and then fasten the wire clips as shown in Figure 2-3. -
Page 11: Connecting The Serial Interface Cable
BP-002 User's Manual USB interface cable USB interface Figure 2-4 Connecting the USB cable interface Note: Please don't impact the plug after connecting USB interface cable. 2.3.4 Connecting the Serial Interface Cable 1. Make sure the computer and the printer are both turned off, connect the serial interface cable to the serial interface of the printer. -
Page 12: Connecting The Power Cord
BP-002 User's Manual Ethernet interface Ethernet interface cable Figure 2-6 Connecting the Ethernet interface cable Note: Please refer to the user's manual for the detailed instructions of network settings. 2.4 Connecting the Power Cord 1. Make sure the printer's power is turned off. (The pressed down side with O mark on the power switch denotes the printer is off) 2. -
Page 13: Installing The Printer Driver
AC adapter. 2.5 Installing the Printer Driver You should setup the printer driver in Windows before using the BP-002 printer. Please use the cable to connect computer with printer, then turn on the computer and the printer, put the driver CD into the CD-ROM. - Page 14 BP-002 User's Manual Software”, click “Next”. 6. Follow the guide click “Next” gradually till the installation is finished. The USB interface installing steps for Windows 2000/XP/Vista/Win7 are as follows: The following steps are used Windows XP as an example. There are slight differences among different operating systems.
-
Page 15: Installing Bluetooth Interface Driver
BP-002 User's Manual 4. A window of “Search for new drivers” pops up, check “Specify a location”, click “Browse”, select the path as follows: CD → ROM → “Drivers”-“[WIN98 (WINME) \ USBdriver]”, then click “OK”. 5. Return to a window of “Search for new drivers”, click “Next”; a window of “Windows driver file search for the device”... - Page 16 BP-002 User's Manual 3. Tick off the option of “My device is set up and ready to be found.” Click “Next” to continue. - 10 -...
- Page 17 BP-002 User's Manual 4. Select the “BP-002”, and then click “Next”. BP-002 5. Tick off the option of “Let me choose my own passkey” and enter “1234” as shown, then click “Next”. 6. Record the Outgoing COM port and click “Finish”, then reboot the computer.
-
Page 18: Ethernet Settings
BP-002 User's Manual 7. Set the printer driver print port as the outgoing port and the installation is finished. Note: Every Bluetooth device has its own address. Please reinstall it when replacing the Bluetooth device. 2.7 Ethernet Settings Caution: The network printing function needs the operation systems of Windows2000 and above and the operation systems of Window 98/ME and below are not supported. - Page 19 BP-002 User's Manual Button description: Exit — Exit from the software Search — Search printers in the same LAN Assign IP — Modify the IP address and other settings for the specified printer. 2. Search printer Click “Search” button in the main interface, the dialogue box appearing will begin searching automatically and show appearance, listing a printer in the main interface if found.
- Page 20 BP-002 User's Manual (dynamic/static) is noted behind the IP address. 1) Correlative description for IP address settings In order to search and set printer’s IP address conveniently for the first time, the factory default setting is DHCP mode which assigns IP address dynamically. If there is no DHCP server in the connected LAN and printer is set to DHCP mode as well, then it will use the internal pre-set address (IP: 10.0.0.1, Subnet Mask: 255.255.255.0) automatically.
-
Page 21: Wi-Fi Setting
BP-002 User's Manual Check the “Use DHCP” if need to assign dynamic address, the settings above will be disabled automatically. Please make sure there is a DHCP server in the network, or the printer can not receive an effective IP address. -
Page 22: Detailed Setting
BP-002 User's Manual 2.8.2 Detailed Setting 1. Select a printer: click “Refresh”, then select the corresponding connected printer model in the “Select a printer”. 2. Click “Enter setup mode”, then a figure of software as figure 2 pops up. The printer and computer is connected successfully when the dialogue box “Connection is successful”... - Page 23 BP-002 User's Manual Figure 3 4. The loaded information is just the setting information of the currently connected printer. For normal use, you need to reset the parameters according to the wireless networks you are using. The detailed settings and description are as follows: Note: Please make sure the wireless network card has been connected to the related router or hotspot before the following operation.
- Page 24 BP-002 User's Manual Note: The longest network name is 32 characters. Make sure there is no space between characters and distinguish the capital and small letter. You can find out SSID by the following way (Take the operation system WIN XP as an example): Right click “My Network Places”, and then click “Properties”...
- Page 25 BP-002 User's Manual Double click Local Area Connection 2 SSID Figure 5 - 19 -...
- Page 26 BP-002 User's Manual Security Select the security of the wireless network data. Acquire the security as the following way (Take the operation system WIN XP with selecting “Infrastructure” in the “WLAN type” as an example): (1) Click “Properties” in the window of “Local Area Connection 2 Status”. (Get...
- Page 27 BP-002 User's Manual Figure 7 (3) Select the current wireless network name in the item of “Preferred networks” and then click “Properties”. (As shown in figure 8) - 21 -...
- Page 28 BP-002 User's Manual Figure 8 (4) When the window of “Properties” pops up, find the security in the item of “Wireless network key”. (As shown in figure 9) - 22 -...
- Page 29 BP-002 User's Manual Security Figure 9 Fill in the corresponding key of the wireless network. When “Security” is selected to “None”, you do not need to fill in the key. Printer IP Set the IP address of the printer Wi-Fi interface in the same segment with the wireless networks.
- Page 30 BP-002 User's Manual Click ”Support” Figure 10 (2) Figure 11 displays the IP address information of the current wireless networks. Please find out the corresponding wireless network segment according to this IP address and set the printer IP with different IP address in the same segment.
-
Page 31: Checking Wi-Fi Parameters
BP-002 User's Manual Figure 11 Subnet Mask Set the subnet mask of the printer Wi-Fi interface. It is suggested that the subnet mask should be the same with the wireless networks. (Check the subnet mask in figure 11) Printer Port Set the port number of the printer Wi-Fi interface. -
Page 32: Installing Printer Network Driver
BP-002 User's Manual LED Indicators Description Network Infrastructure Ad Hoc WLAN type Connect BLINK Disconnect BLINK BLINK 2.9 Installing Printer Network Driver The ways of installing network driver are classified into Newly-install way and Upgrade-install way according to whether the PC installs the printer driver or not. - Page 33 BP-002 User's Manual 6) A window of “Additional Port Information Required” pops up, select “Custom” in the “Device Type”, then click “Settings”. 7) A window of “Port Settings” pops up. Affirm that “Port name” and “Printer name or IP address” are correct, “Protocol”...
- Page 34 1) Click “Start” → “Settings” → “Select Printers”. 2) Right click BP-002 driver, click “Properties” on the window popping up. 3) A window of “Properties” pops up, click “Ports” and “Add Port”. - 28 -...
- Page 35 BP-002 User's Manual BP-002 4) A window of “Printer ports” pops up, select “Standard TCP/IP Port”, click “New Port”. 5) A window of “Add Standard TCP/IP Printer Port Wizard” pops up, click “Next”. 6) A window of “Add a port” pops up, import the IP address reported by the “Setting printer’s IP address”...
- Page 36 BP-002 User's Manual 7) A window of “Additional Port Information Required” pops up, select “Custom” in the “Device Type”, then click “Settings”. 8) A window of “Port Settings” pops up. Affirm that “Port name” and “Printer name or IP address” are correct, “Protocol”...
- Page 37 BP-002 User's Manual 9) Return to “Additional Port Information Required”, click “Next”. 10) A window of “Completing the Add Standard TCP/IP Printer Port Wizard” pops up, click “Finish”. 11) Return to “Printer Ports”, click “Close”. 12) Return to “Properties”, make sure the network port is selected, click “Apply”, and then click “Close”.
- Page 38 BP-002 User's Manual - 32 -...
-
Page 39: Chapter 3 Control Panel
BP-002 User's Manual Chapter 3 Control Panel 3.1 Control Panel There are three LED indicators and one key on the control panel shown as Figure 3-1. Figure 3-1 Control panel 3.1.1 LED Indicator Description Denotes whether the printer’s power supply is connected or not. The LED is on POWER (Green) when the power is connected. -
Page 40: Setting Slip Stitch (Update And Boot)
Note: Do not change the Slip Stitch without any permission of the factory, or the printer can not work. 3.6 Online-aptitude Parameter Settings BP-002 supports the function of online-aptitude parameter settings, which can be set in the PC with the driver installed in. The concrete setting steps are shown as follows: 1. - Page 41 BP-002 User's Manual 5. In the window of Printer Settings, the left side of each item is parameter icon, the top right corner is parameter item and the bottom right corner is current value. The printer will load the current value automatically when each parameter window popping up.
- Page 42 BP-002 User's Manual 6. When setting parameter, please click parameter icon, then parameter setting window will pop up, there are parameter items, description and control button in this window. Select corresponding parameter and click “Set”, the printer will change the parameter settings after receiving setting command.
-
Page 43: Chapter 4 Installing Paper
BP-002 User's Manual Chapter 4 Installing Paper The printer can install the paper conveniently, which should be 57.5 ± 0.5mm wide. How to deal with the paper will be explained in details in this chapter. 4.1 Paper Installation Steps Note: 1. Don’t touch the thermal print head after printing to avoid being hurt. - Page 44 BP-002 User's Manual 3. Pull out a small amount of paper. Figure 4-3 Pull out the paper 4. Put the paper as shown below, and then close the cover. Figure 4-4 Close the cover Note: After finishing installing the paper, if PAPER OUT LED and ERROR LED are still on or the printer makes strange noise when feeding paper, please open the cover and re-close it tightly.
-
Page 45: Chapter 5 Specification
BP-002 User's Manual Chapter 5 Specification 5.1 General Specificaion Item Description Printing method Direct thermal printing 384 dots/ line (203×203 DPI) Dot density Print speed 100 mm/s Effective printing width 48 mm TF50KS-E (Japan paper co.ltd) Thermal paper Model AF50KS-E (JUJO THERMAL) Width: 57.5 ±... - Page 46 BP-002 User's Manual Current: 3 A Temperature: 5 ~ 35℃ Operating environment Humidity: 25 ~ 80%RH (No condensation) Environmental conditions Temperature: -40 ~ 55℃ Storage environment Humidity: ≤93%RH (40℃, No condensation) Weight Approx.1 Kg Noise <38 dB (A) (ISO7779 standard) Physical dimensions 120 mm (Width) ×...
-
Page 47: Interface Specifications
Note: Please use the cash drawer meets the specification mentioned above. Manufacturer will not honor warranty when using unauthorized cash drawer. 5.2.2 Parallel Interface BP-002 printer’s parallel interface is compatible with protocol, supporting BUSY/ACK CENIRONICS handshaking protocol and the interface connector is the 36 PIN Centronics type. -
Page 48: Usb Interface
BP-002 User's Manual DATA6 DATA7 DATA8 Acknowledge signal, Low level means that printer is /ACK ready to receive data. BUSY High level means printer is too busy to receive data. High level means that paper is out. High level with the pull-up resistance. -
Page 49: Serial Interface
The default settings in serial connecting way are 9600bps, 8 bits, parity check disabled and 1 stop bit. BP-002 printer’s serial interface can be connected with the standard RS-232C connector. When connecting with a PC, the connecting picture is shown as Figure 5-6. While connecting with an IBM PC or a compatible PC, you can connect the cable as shown in Figure 5-7. -
Page 50: Ethernet Interface
Ethernet interface of 10/100 Base-T can be connected to 10/100M. Figure 5-8 Ethernet interface 5.2.6 Power Supply Inlet The BP-002 printer connects with an 8.5V±5% and 3A AC adapter. The power supply inlet is shown as Figure 5-9. Figure 5-9 Power supply inlet... -
Page 51: Chapter 6 Printer Maintenance
BP-002 User's Manual Chapter 6 Printer Maintenance 6.1 Cleaning the Printer Cleaning periodically and the cleaning tool Periodical cleaning: every 3 months or every 300 working hours once Cleaning tool: dry cloth (please use soft cloth to clean metal parts) Cleaning the spare parts Clean the oily spare parts of the printer with dry cloth. -
Page 52: Chapter 7 Control Commands
BP-002 User's Manual Chapter 7 Control Commands 7.1 General The commands BP-002 supplies are based on ESC/POS. The format described as following: Command Function Format: ASCII: Indicates the ASCII equivalents Decimal: Indicates the decimal equivalents Hex: Written in hexadecimal code Description: The function and using instruction of that command. - Page 53 BP-002 User's Manual Set the right-side space of the character to n*(horizontal or vertical motion unit) n=0~255. Horizontal or vertical motion unit is specified by GS P command ESC ! Set print mode Format: ASCII: ! Decimal: Hex: Description: Select the print mode using n as follows. n=0~255...
- Page 54 BP-002 User's Manual Define the user-defined Characters from c1 to c2. y=3; 32≤c1≤c2≤126; 0≤x≤12; [Character A 12*24], 0≤x≤9; [Character B 8*16]; d=0~255; k=c2-c1+1≤10; that is to say each time defined characters could not be over 10; y specifies the number of bytes in the vertical direction, x specifies the number of dots in the horizontal direction, d specifies the user-defined data.
- Page 55 ASCII: Decimal: Hex: Description: Set the line spacing to n*. n=0~255. BP-002 printer’s line space is the minimum unit of horizontal n* The vertical or horizontal motion units are specified by GS P Command. ESC = Select peripheral device Format:...
- Page 56 BP-002 User's Manual ESC J Print and feed paper Format: ASCII: Decimal: Hex: Description: Print the data in input buffer and feed the paper n*(horizontal or vertical motion unit) inches. n=0~255; Horizontal or vertical motion unit are specified by GS P command.
- Page 57 BP-002 User's Manual ESC a n Select justification Format: ASCII: ESC a Decimal: Hex: Description: n=0, 48: Left justification; n=1, 49: centering; n=2, 50; right justification. ESC c 5 Enable/disable panel button Format: ASCII: Decimal: Hex: Description: When the LSB of n is 0, enable button.
- Page 58 BP-002 User's Manual ESC { Turn on/off upside-down printing mode Format: ASCII: Decimal: Hex: Description: When the LSB of n is 0, upside-down printing mode is turned off. When the LSB of n is 1, upside-down printing mode is turned on.
- Page 59 BP-002 User's Manual FS . Cancel Chinese language mode Format: ASCII: Decimal: Hex: Description: In this mode No Chinese character printed. FS 2 Define user-defined Chinese characters Format: ASCII: c1 c2 d1……d72 Decimal: 50 c1 c2 d1……d72 Hex: 32 c1 c2 d1……d72 Description: c1=fe;...
- Page 60 BP-002 User's Manual GS B Turn white/black reverse mode on/off Format: ASCII: Decimal: Hex: Description: When the LSB of n is 0, turn the white/black reverse mode off. When the LSB of n is 1, turn the white/black reverse mode on.
- Page 61 BP-002 User's Manual n=1, 49; Selects character B (8*16) Set bar code height Format: ASCII: Decimal: Hex: Description: Set the height of the bar code to n dots. n = 0~48。 GS k Print bar code Format: ASCII: d1..dk Decimal: 107 m d1..dk...
- Page 62 BP-002 User's Manual GS v 0 Print raster bit image Format: ASCII: xL xH yL yH d1…dk Decimal: 29 118 48 xL xH yL yH d1…dk Hex: 1D 76 30 m xL xH yL yH d1…dk Description: Print a raster bit image using the mode specified by m as follows.
-
Page 63: Appendix Commands List
BP-002 User's Manual Appendix Commands List Here lists the commands supported in the printer in alphabetical order. Control commands Functions Horizontal tab Print and line feed DLE EOT Real-time status transmission ESC SP Set right-side character space ESC ! Set print mode... - Page 64 BP-002 User's Manual FS W Turn quadruple-size mode on/off for Chinese character GS ! Select Character size GS B Turn white/black reverse mode on/off GS H Select print position of HRI character GS L Set left margin GS P Set horizontal or vertical motion unit...
Need help?
Do you have a question about the BP-002 and is the answer not in the manual?
Questions and answers