Table of Contents
Advertisement
Advertisement
Table of Contents

Related Manuals for Birch BP007


Summary of Contents for Birch BP007
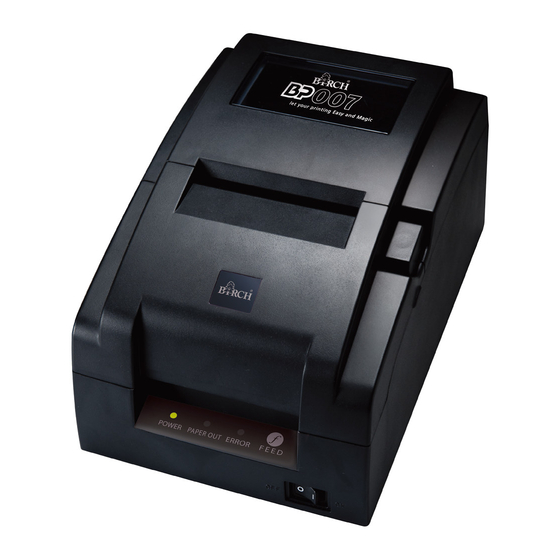
- Page 1 76 mm Dot Matrix Receipt Printer High -Performance, Flexible and Heavy Duty...
-
Page 2: Important Safety Instructions
BP-007 User’s Manual Important Safety Instructions Read all of these instructions carefully and thoroughly and save them for later reference. The unauthorized operation may lead to error or accident. Manufacturer will not answer for any problems which lead by unauthorized operations. Follow all warnings and instructions in the manual as well as marked on the product. - Page 3 BP-007 User’s Manual equipment. 15. Unplug this product from the power outlet and leave servicing to qualified service personnel under the following conditions: When the power cord or plug is damaged or frayed. If liquid has been spilled into the product. If the product has been exposed to rain or water.
-
Page 4: Table Of Contents
BP-007 User’s Manual Table of Contents Important Safety Instructions ........................i Chapter 1 Introduction ..........................1 1.1 Features ..............................1 1.2 Application............................1 1.3 Main Parts of the Printer........................2 Chapter 2 Printer Installation........................3 2.1 Unpacking and Checking ........................3 2.2 Removing the Protective Materials......................3 2.3 Connecting Computer or Other Equipments ..................3 2.3.1 Connecting the Cash Drawer Cable .....................3 2.3.2 Connecting the Parallel Cable ......................4 2.3.3 Connecting the USB Cable......................4... - Page 5 BP-007 User’s Manual 5.2.3 USB Interface ..........................36 5.2.4 Serial Interface ........................... 37 5.2.5 Ethernet Interface ........................38 5.3 Auto-cutter Specification........................39 Chapter 6 Troubleshooting and Maintenance ..................40 6.1 Clean the Printer ..........................40 6.2 Problems and Solutions ........................40 Chapter 7 Command Code Summary .....................
-
Page 6: Chapter 1 Introduction
BP-007 User’s Manual Chapter 1 Introduction 1.1 Features BP-007 series products are developed by our corporation in order to fulfill different requirements and using environments. BP-007 series printers can be configured with parallel interface, USB interface, serial interface, USB interface + Ethernet interface, Bluetooth or USB interface + Wi-Fi. Interface: BP-007 series products are configured with a cash drawer interface, you can choose one of the following data interfaces when purchasing this product:... -
Page 7: Main Parts Of The Printer
BP-007 User’s Manual 1.3 Main Parts of the Printer Paper stopper_Holder (57.5mm) Auto-cutter Assembly Ribbon Cartridge (Compatible Star RC 200B) Upper Cover Front Cover Cover-open Button Power Switch Figure 1-1 Main parts of printer (Front view) Power Supply Inlet Data Interface Cash Drawer Interface Figure 1-2 Main parts of printer (Rear view) Note: According to specific interface standards... -
Page 8: Chapter 2 Printer Installation
BP-007 User’s Manual Chapter 2 Printer Installation 2.1 Unpacking and Checking Check the following items in the package, if any of these items is missing, please contact your dealer: (1) Printer; (2) Power cord; (3) Interface cable; (4) AC adapter; (5) Driver CD; (6) Ribbon cartridge compatible star RC 200B;... -
Page 9: Connecting The Parallel Cable
BP-007 User’s Manual Cash Drawer Interface Cash Drawer Cable Figure 2-2 Connecting the cash drawer cable Note: You must use the proper cash drawer. Manufacturer will not honor warranty when using improper cash drawer. 2.3.2 Connecting the Parallel Cable 1. Make sure that the computer and the printer are both turned off, connect the parallel cable to the interface of the printer, and fasten the wire clips as shown in Figure 2-3. -
Page 10: Connecting The Serial Cable
BP-007 User’s Manual USB Interface USB Cable Figure 2-4 Connecting the USB cable 2.3.4 Connecting the Serial Cable 1. Make sure that the computer and the printer are both turned off, connect the serial cable to the interface of the printer and tighten the screws as shown in Figure 2-5. Screw Serial Interface Serial Cable... -
Page 11: Connecting The Power Cord
BP-007 User’s Manual Note: The detailed information of the network settings, please refer to the User’s Manual. 2.4 Connecting the Power Cord 1. Make sure the printer is turned off. (O mark on the power switch is pressed down). 2. Make sure the voltage of the electrical outlet matches that of the AC adapter. 3. -
Page 12: Installing The Driver
BP-007 User’s Manual 57.5mm Paper stopper_Holder Ribbon Core Ribbon Knob Upper Cover Ribbon Cartridge (Compatible Star RC 200B) Front Cover Paper Holder Auto-cutter Assembly Power Switch Cover-open Button Figure 2-8 Installing the ribbon cartridge Note: 1. When your print becomes faint, you need to replace the ribbon cartridge. Otherwise, the print quality will be affected and the print head may be damaged. - Page 13 BP-007 User’s Manual should select the path as follow: CD-ROM → “Driver” → “WIN2000 (XP-Vista-Win7)”, click “Open”, then click “OK” to return to the window of “Install Printer Software”, select the respective model, click “Next”. 6. Follow the guide click “Next” gradually till the installation is finished. 2) The installing steps of parallel interface for Windows 7 are as follows: 1.
- Page 14 BP-007 User’s Manual 5. A window of “Printer port” pops up, select “Available ports”, such as, select “LPT1: Printer Port”, click “Next”, and then show the printer’s name. If the system is not installed by other printer driver process, the printer is treated as default printer by the application process of Window98 environment, click “Next”.
-
Page 15: Installing Bluetooth Interface Driver
BP-007 User’s Manual 2.7 Installing Bluetooth Interface Driver Note: Select to install this driver according to the chosen model. 1. Adjust the printer serial to 38400bps, 8 data bits, no check bit, 1 stop bit and the protocol is DTR/DSR. 2. - Page 16 BP-007 User’s Manual 5. Select the “BP-007”, and then click “Next”. BP-007 6. Tick off the option of “Let me choose my own passkey” and enter “1234” as shown, then click “Next”. - 11 -...
- Page 17 BP-007 User’s Manual 7. Record the Outgoing COM port and click “Finish”, then reboot the computer. 8. Set the printer driver print port as the outgoing port and the installation is finish. Note: Every Bluetooth device has its own address. Please reinstall it when replacing the Bluetooth device.
-
Page 18: Network Settings
BP-007 User’s Manual 2.8 Network Settings Please use Birch network setting software NetFinder to set the IP address for Birch Ethernet interface network printers, which can be found in the CD or downloaded from www.birch.com.tw. Caution: The network printing function needs the operation system of Windows2000 or above. - Page 19 BP-007 User’s Manual counting down in the progress bar (10s in total) and the search will finish as soon as the time is over. When going on searching, press “search” button again. If the printer still can not be found out when the network connection is correct in the same network, Please check whether the network fire wall on the PC open or not.
-
Page 20: Wi-Fi Setting
“Upgrade-install printer network driver (setting driver’s network port)”. 2.9 Wi-Fi Setting Please use Birch network setting software WiFiConfig to set the IP address for Birch Wi-Fi interface network printers, which can be found in the CD or downloaded from www.birch.com.tw. -
Page 21: Connect To The Printer, Run The Wificonfig Software
BP-007 User’s Manual 2.9.1 Connect to the Printer, Run the WiFiConfig Software Connect the printer and the computer with the USB interface cable, make sure the printer is in normal working condition, and then turn on both the printer and the computer, double click WiFiConfig.exe in the driver CD. -
Page 22: Set Wi-Fi Parameters
BP-007 User’s Manual Network name. The longest network name is 32 characters and there is no space between characters. SSID When WLAN type is Infrastructure, the network name is the same with the router’s network name; When WLAN type is Ad Hoc, the network name is the same with the wireless network card’s network name. -
Page 23: Checking Wi-Fi Parameters
BP-007 User’s Manual 2. Check if the corresponding printer model is in the list of Select a printer, if no, please click “Refresh”, select the corresponding printer model after it appears. 3. Click “Enter setup mode”, it will pop up a Success dialog box when it enters the mode successfully. After entering setup mode, printer could not receive print data, and you should restart the printer before printing. -
Page 24: Recover The Default Setting
BP-007 User’s Manual connection is properly. 1. Through “ping” command to check if the printer connects to network or not. 2. When “WLAN type” is select to “Infrastructure”, you could look into the Wi-Fi indicator lights to judge the connection status. Indicator Lights Description Light Network... - Page 25 BP-007 User’s Manual 5) A window of “Add Port” pops up, enter the IP address reported by the “Setting printer’s IP address” in the “Printer Name or IP Address” column. Take IP address “192.168.0.240” for example. “Port Name” is created automatically after finishing filling in IP address. 6) A window of “Additional Port Information Required”...
- Page 26 BP-007 User’s Manual 7) A window of “Port Settings” pops up. Affirm that “Port name” and “Printer name or IP address” are correct, “Protocol” is “RAW” and “Port Number” is “9100”, click “OK”. - 21 -...
- Page 27 BP-007 User’s Manual 8) Return to “Additional Port Information Required”, click “Next”. 9) A window of “Completing the Add Standard TCP/IP Printer Port Wizard” pops up, click “Finish”. 10) In the selection of "Manufacturers/Printers", click “Have Disk”, and then click “Next”. 11) A window of “Install From Disk”...
- Page 28 BP-007 User’s Manual 5) A window of “Add Standard TCP/IP Printer Port Wizard” pops up, click “Next”. 6) A window of “Add a port” pops up, import the IP address reported by the “Setting printer’s IP address” in the “Printer name or IP address” column. Take IP address “192.168.0.240” for example.
- Page 29 BP-007 User’s Manual 8) A window of “Port Settings” pops up. Affirm that “Port name” and “Printer name or IP address” are correct, “Protocol” is “RAW” and “Port Number” is “9100”, click “OK”. - 24 -...
- Page 30 BP-007 User’s Manual 9) Return to “Additional Port Information Required”, click “Next”. 10) A window of “Completing the Add Standard TCP/IP Printer Port Wizard” pops up, click “Finish”. 11) Return to “Printer Ports”, click “Close”. 12) Return to “Properties”, make sure the network port is selected, click “Apply”, and then click “Close”.
-
Page 31: Chapter 3 Control Panel
BP-007 User’s Manual Chapter 3 Control Panel 3.1 Control Panel There are three LEDs and one key on the control panel as shown in Figure 3-1. Figure 3-1 Control panel 3.1.1 Indicator LEDs Blink Power on Power off —— POWER Paper out with alarm beep Paper is about to end Paper in... -
Page 32: Printer Setting Descriptions
BP-007 User’s Manual BP-007 9Pin Mini Printer VX.XX XXX XXXX-XX-XX SN: XXXXXXXXXXXXXXXXXXXX Cutter: Black Mark: Print Mode: BI-DIR Paper Width: 76mm CODEPAGE: 0:PC437 1:PC850 2:PC860 20:THAI(KU42) 21:THAI(TIS11) 26:THAI(TIS26) Figure 3-2 BP-007 Default settings (Parallel and USB interface) BP-007 9Pin Mini Printer VX.XX XXX XXXX-XX-XX SN: XXXXXXXXXXXXXXXXXXXX... -
Page 33: Parameter Settings
BP-007 User’s Manual UNI-DIR unidirectional or bidirectional PAPER 76 mm; 57.5 Specify the bill width of 76mm or 57.5mm. WIDTH INTERFACE RS-232 Specify the interface type. Only Serial interface model BAUD RATE 9600 bps; Specify the printer serial data transfer rate. Only Serial 19200 bps... -
Page 34: Self-Test Function
BP-007 User’s Manual 5. In the window of “Printer Settings”, select parameter types in the Printer Setting Class, then select the parameter items in the Options list. At last, select the parameter in the right column. 6. Click “Reset All” to recover all the parameter to the default settings and does not change the printer parameter settings. -
Page 35: Hex Dump Mode
BP-007 User’s Manual ■ Mode of Alignment Adjusting While pressing the FEED key and holding on, turn on the printer. The printer sounds three beeps, and you should loosen the FEED key at the same time. The printer will print the degree of alignment adjusting. -
Page 36: Chapter 4 Installing Paper
BP-007 User’s Manual Chapter 4 Installing Paper The printer can use the paper with the width of 76±0.5mm or 57.5±0.5mm, and it is easy to load paper. How to load paper will be introduced in this chapter. 1. Press the cover-open button to open the upper cover. If you want to use 57.5mm paper to print, you must install the 57.5mm paper stopper_mechanism and 57.5mm paper stopper_holder. -
Page 37: Chapter 5 Specifications
BP-007 User’s Manual Chapter 5 Specifications 5.1 Basic Specifications Item Description Printing method 9 Pins Dot matrix impact Printing direction Bidirectional logic seeking Diameter of wire 0.3mm Dot density 160×144DPI (maximum) Auto-cutter Standard Cuttable thickness:0.065 ~ 0.075mm Print speed: 4.7lines per second (paper width 76mm, 40 columns); Copy 3 pieces (Original + 2 copies) Reliability... -
Page 38: Interface
Grade B Note: The Print head life and MCBF above are realized by using appointed printing paper and ribbon cartridge in the environment appointed by BIRCH PRINTER. 5.2 Interface This printer is equipped with one data interface (parallel interface, serial interface, USB interface, USB interface + Ethernet interface, Bluetooth or USB interface + Wi-Fi) and one cash drawer interface. -
Page 39: Parallel Interface
BP-007 User’s Manual Table A-1 Definition of the Cash drawer Connector Pins Pin NO. Signal Name Electric Characteristic Signal Direction Frame GND Cash drawer drive signal DC24V/1A Output Cash drawer Open/close signal Input 24VDC Power Cash drawer Open/close signal GND Drive current≤24V/1A Note: Please use the proper cash drawer. - Page 40 BP-007 User’s Manual Pulse width is about 12µ sec. Low level /ACK Answer out means that data is received and the printer is ready for receiving more data. High level out means that printer is busy and can’t receive data. High level is out from this pin on the following condition: BUSY Printer state...
-
Page 41: Usb Interface
BP-007 User’s Manual (4) Time sequence of Parallel to transmit data (as shown by Figure 5-3): BUSY /ACK /STR μs μs μs μs μs Figure 5-3 Time sequence of parallel to transmit data 5.2.3 USB Interface 1. The USB interface connector is USB-B type (as shown by Figure 5-4): USB interface is 2.0 Full-Speed version. -
Page 42: Serial Interface
BP-007 User’s Manual 5.2.4 Serial Interface (1) Serial interface is RS-232 type and the connector type is DB-25. The DB-25 connector is shown as Figure 5-6. Figure 5-6 Pin number of the serial interface connector (2) Connecting figure of printer and computer with serial interface The figure is shown as follows: Host computer’s 9PIN connector Printer’s 25PIN connector... -
Page 43: Ethernet Interface
BP-007 User’s Manual The printer is ONLINE The available memory of data buffer is larger than limited value. The printer has no error. When the DTR is Low level means the printer is BUSY and it can’t receive the data from the Host. DTR is Low level when it belongs to the following three conditions: The printer is OFFLINE The available memory of data buffer is less than limited value. -
Page 44: Auto-Cutter Specification
BP-007 User’s Manual 5.3 Auto-cutter Specification BP-007 is equipped with an auto-cutter, which parameter is shown as table A-4: Table A-4 Auto-cutter Specification Item Specification Paper width 85mm (max.) Cuttable thickness Paper thickness: 65~75 µm Full cut or partially cut leaving point (one Cutting mode point, 2mm) Drive voltage (V) -
Page 45: Chapter 6 Troubleshooting And Maintenance
BP-007 User’s Manual Chapter 6 Troubleshooting and Maintenance 6.1 Clean the Printer It’s necessary to clean the printer periodically. Auto-cutter Assembly Carriage shaft Carriage Frame Figure 6-1 Cleaning the printer Cleaning periodically and the cleaning tool Periodically cleaning: every six months or every 300 working hours once Cleaning tool: dry cloth (please use soft cloth to clean metal parts.) Cleaning the paper channel and spare parts under carriage Wipe off wasted paper and clean dirt and dust. - Page 46 BP-007 User’s Manual ① Please make sure that the printer is connected with the computer correctly and the paper is loaded well. ② If it can't print with online function all the time, please replace the interface cable with a new one. (3) Paper out ①...
-
Page 47: Chapter 7 Command Code Summary
BP-007 User’s Manual Chapter 7 Command Code Summary 7.1 General The BP-007 printer‘s control commands are compatible with ESC/POS. Explanation of every command contains format and description. “Format” parts give three kinds of command format, including ASCII Code, Decimal code and hexadecimal code. “Description” parts describe the function of command. - Page 48 BP-007 User’s Manual Print and change page Format: ASCII: Decimal: Hex: [Description] Prints one line data in the line editing buffer and feeds to the top of next page based on the current page length. ESC SP Set right-side character spacing Format: ASCII: ESC SP n...
- Page 49 BP-007 User’s Manual ESC & Define user-defined characters Format: ASCII: ESC & s n m a d1 d2……db Decimal: 27 38 s n m a d1 d2……db Hex: 1B 26 s n m a d1 d2……db [Description] This command is used for self-defining characters. The meaning of each parameter is shown as follows: S: The number of longitudinal byte.
- Page 50 BP-007 User’s Manual Bit image data The first pin The eighth pin Print data ESC - Turn underline mode on/off Format: ASCII: ESC - Decimal: Hex: [Description] n=0, turns off underline mode; n=1, turns on underline mode. ESC 2 Set 1/6 inch line spacing Format: ASCII: ESC 2...
- Page 51 BP-007 User’s Manual Cancel he user-defined character “n”. This command function can be canceled only after the computer being restarted. ESC @ Initialize printer Format: ASCII: ESC @ Decimal: Hex: [Description] This command is used for initializing the printer, and its function is described as follows: (1) Clearing the data in the print buffer and line-editing buffer.
- Page 52 BP-007 User’s Manual ESC G Turn double-strike mode on/off Format: ASCII: ESC G Decimal: Hex: [Description] When double-strike mode is turned on, the same character will be printed twice in the same position. • When n is 0, double-strike mode is turned off. •...
- Page 53 BP-007 User’s Manual ESC c 5 n Enable/disable panel buttons Format: ASCII: ESC c Decimal: 99 53 Hex: 63 35 [Description] Enable or disables the panel buttons. • When n=<*******0>B, all buttons are enabled (Default). • When n=<*******1>B, all buttons are disabled. ESC d Print and feed n lines Format:...
- Page 54 BP-007 User’s Manual ESC p Generate cash drawer drive pulse Format: ASCII: Decimal: Hex: [Description] Generate cash drawer drive pulse. M=0, 1, 48, 49; 0≤n1≤n2≤255 The format of pulse is shown as follows: n1×2ms n2×2ms ESC v Transmit printer status Format: ASCII: Decimal:...
- Page 55 BP-007 User’s Manual FS - Set Chinese underline mode Format: ASCII: Decimal: Hex: [Description] Turns on or off underline mode for Chinese characters, using n as follows: When n=0, underline has no effect on Chinese characters; When n=1, Chinese characters are set by single underline mode; When n=2, Chinese characters are set by double underline mode, but the shift generated by “HT”...
- Page 56 BP-007 User’s Manual GS ( A Test command Format: ASCII: ( Decimal: Hex: [Description] pL=2, pH=0, n=0, m=1, 49 Enter HEX print mode (HEX DUMP) To cancel this command, you must restart the printer. GS ( F Set offset of black mark for printing and cutting position Format: ASCII: (...
- Page 57 BP-007 User’s Manual beginning print-position that is set, and the tearing/cutting position of the current bill is the tearing/cutting position that is set. Calculation explanation for the tearing/cutting position offset and the beginning print-position offset is shown as follows: 1. When the distance L of the tearing/cutting position offset from the black mark is same with the inherent mechanical value L of the printer, and the distance Q of the tearing/cutting position offset from the beginning print-position is same with the inherent mechanical value Q...
- Page 58 BP-007 User’s Manual command is shown as follows: the beginning print-position offset = (Q- Q )/0.176+ tearing/cutting position offset Note: When setting the beginning print-position offset, the parameter “a” of “GS ( F” command should be “1”. 4. The inherent mechanical value of the printer: L =A (mm) Q =C (mm) (shown as figure 7-1).
-
Page 59: Appendix Commands List
BP-007 User’s Manual Appendix Commands List Control Code Hexadecimal Code Function Horizontal tab Print and line feed Print and carriage return Page mode print and return ESC SP 1B 20 n Set right-side character spacing ESC ! 1B 21 n Select print mode (s) ESC % 1b 25 n... - Page 60 BP-007 User’s Manual Set offset of black mark for printing and cutting position pH a m nL nH m nL nH GS r 1D 72 n Transmit status GS V m n 1D 56 m n Select cut mode and cut paper - 55 -...
Need help?
Do you have a question about the BP007 and is the answer not in the manual?
Questions and answers