Table of Contents
Advertisement
Advertisement
Table of Contents

Related Manuals for GEOSATpro DSR100c


Summary of Contents for GEOSATpro DSR100c
-
Page 2: Installation Guide
The basic operation of both models are identical, but the DVR1100c offers several digital recording features that are not found on the basic DSR100c receive only model. The additional features of the DVR1100c are noted in the menu features and operation guides. - Page 3 For More information: http://www.fcc.gov/cgb/satellite.html Materials contained in this installation manual are the property of: Satellite AV, LLC. 8801 Washington Blvd., Suite 101 Roseville, CA 95678 http://www.satelliteav.com ©2008 Satellite AV, LLC www.geosatpro.com Toll Free 888-483-4673...
-
Page 4: Table Of Contents
Page Table of Contents Important Safeguards DSR100c / DVR1100c Specifications Receiver Front / Rear Panel Remote Control Layout Basic Remote Operation Receiver Operation Guide Receiver Menu Items DVR Operation - DVR1100c Glorystar Installation Guide Glorystar Install Introduction Glorystar Parts List... -
Page 5: Important Safeguards
Important Safeguards www.geosatpro.com Toll Free 888-483-4673... - Page 6 Service assistance may be arranged by contacting your reseller or GEOSATpro technical support at 888-483-4673. Safety Check Upon completion of any service or repairs to this product, ask the service technician to perform safety checks to determine that the product is in proper operating condition.
-
Page 7: Dsr100C / Dvr1100C Specifications
AC 90 to 240V, 50 -60Hz Power Consumption Max.30W Protection Separate Internal Fuse Type SMPS Physical Specification Size (W x H x D) DSR100c - 260 x 50 x 210mm DVR1100c - 290 x 50 x 220mm Net Weight 2.0Kg www.geosatpro.com Toll Free 888-483-4673... -
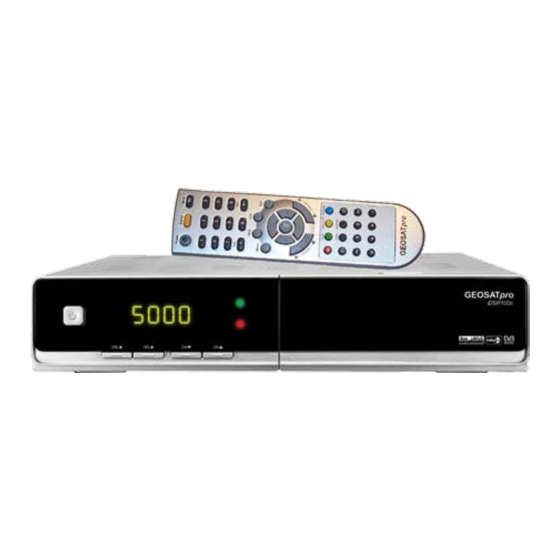
Page 8: Receiver Front / Rear Panel
DSR100c Front Panel Switch the receiver between standby and operation mode Change Channel up / down Increase or decrease the Volume CAS Slot - Subscription card insertion foil contacts facing down DVR1100c Front Panel Switch the receiver between standby and operation mode... -
Page 9: Rear Panel
Connects USB 2.0 memory device for DVR / multi-media 5V/500ma (DVR1100c Model only) AC power plug connection (90 - 250VAC / 60Hz, 30W) Master Power Switch disconnects receiver from external power The GEOSATpro DSR100c & DVR1100c digital satellite receivers are Glorystar Approved. www.geosatpro.com Toll Free 888-483-4673... -
Page 10: Remote Control Layout
Remote Control Unit B. Gohl © Satelliteav.com... - Page 11 Remote Key Functions DSR100c / DVR1100c Switch the receiver between standby and operation modes Display the Signal Strength and Signal Quality Meter Select the Favorite Channel List mode Display TV / Radio Electronic Program Guide (future Glorystar activation) Display the Main Menu screens...
-
Page 12: Basic Remote Operation
Basic Remote Operation Place the satellite receiver in standby or operation modes, ON/OFF, using the Power button. Change channels by either entering the channel on the numeric keypad or by pressing CHANNEL UP/DOWN buttons. Press PREVIOUS CHANNEL button to return to the last channel. -
Page 13: Receiver Operation Guide
YELLOW button to unsort. 3. Simple Channel List Press List OK button during normal live mode to view a channel list When a detailed channel list is displayed on screen, press RED button to display a simple channel list. www.geosatpro.com Toll Free 888-483-4673... -
Page 14: Last Channel
4. EPG - Electronic Program Guide Press EPG button during normal live mode. An Electronic Program Guide will be displayed on the screen. Select the desired channel. Press OK once to view the channel in the preview window. Press OK a second time to go to the channel in live mode. -
Page 15: Zoom Function
Press ANT/SAT button to toggle the TV/VCR output on the rear of the receiver between the receiver’s satellite channels or any Cable TV, antenna or any source that is connected to the ANT input on the rear of the receiver. Perfect for connecting with Cable TV. www.geosatpro.com Toll Free 888-483-4673... -
Page 16: Signal Meter
Type: Select Once, Daily, Weekly • Channel: Select a TV or Radio channel • Month: Select month of the event DSR100c • Date: Select the date of the event • Start: Enter the start time in 24 hour mode. Example: Midnight is 00:00, 1:30pm is set as 13:30. -
Page 17: Receiver Menu Items
Press OK on the channel to add or delete A mark will appear on the selected channel Press OK to add or delete. Selected channels are automatically saved. Press EXIT to return to previous menu or to go to the current live channel. www.geosatpro.com Toll Free 888-483-4673... - Page 18 I-2. Rename Press the Navigation button volume right to highlight RENAME. Select channel to rename. Press OK. Enter or edit the name using the keypad dialog screen. Press YELLOW to rename Favorite 1-8. Press BLUE to rename Satellite Press EXIT to return to previous menu or MENU to go to the current live channel.
- Page 19 - Select the proper search type. Press OK LNB Power - Press OK to display list ON / OFF - Select if to provide LNB power. Press OK Search - If Signal Quality meter is displaying Quality, Press OK to scan for channels. www.geosatpro.com Toll Free 888-483-4673...
- Page 20 II-2. Motor Setup Highlight Motor Setup. Press OK. Enter Password (default 0000) Motor Type USALS is preferred way to install - Press OK to display DiSEqC 1.2 / USALS - Select the control method. Press OK - Press GREEN button and enter the install location Longitude and Latitude. Satellite - Press OK to display list of satellites - Select the proper satellite.
- Page 21 - Select proper display type 4:3, 16:9 or 4:3 letterbox mode. Press OK Channel History - Press OK to display the of number of previous channels for RETURN button. - Select the desired quantity. Press OK www.geosatpro.com Toll Free 888-483-4673...
- Page 22 III-2. Control Panel Highlight Control Panel. Press OK. RF Channel sets TV /VCR output channel - Press OK to display output channels 3 or 4 - Select the desired output channel. Press OK Closed Captioning enables / disables feature - Press OK to display ON / OFF - Select correct mode, Press OK EPG (Electronic Program Guide) Duration - Press OK to show length of time for EPG...
- Page 23 This section will assist in reviewing the system information, using the USB 2.0 functions with the DVR1100c, manually setting event timers and resetting the system. IV-1. System Information IV-2. USB - DVR1100c IV-3.a Timer - DSR100c IV-3.b Time Record - DVR1100c IV-4. Factory Default DSR100c DVR1100c IV-1. System Information Highlight System Information.
- Page 24 Enable - Press OK to display YES / NO - Select YES to enable. Press OK Number DSR100c - Press OK to display event timers 1 - 10 - Select timer to program. Press OK Type - Press OK to display event frequency - Select Once, Daily, or Weekly.
- Page 25 V. Accessory This section will assist in setting up the receiver for Time Machine recording and defeating the automatic receiver updating via the satellite. V-1. Time Machine - DVR1100c V-2. DSR100c DVR1100c V-3. Smart Card www.geosatpro.com Toll Free 888-483-4673...
- Page 26 This screen provides information regarding the reception of subscription based programming with a CAS (conditional access card / smart card). Insert the subscribed Smart Card: DVR1100c - Foil contacts facing up DSR100c - Foil contacts facing down B. Gohl © Satelliteav.com...
-
Page 27: Dvr Operation - Dvr1100C
PAUSE button or set up as a timed event. If the program title is listed with the EPG (Electronic Program Guide) button, highlight the desired program and press the RECORD button. The program record date, start and duration times will be automatically set. www.geosatpro.com Toll Free 888-483-4673... - Page 28 DVR Operation DVR1100c - continued Timer - DVR1100c If no event information is available in the EPG, press the TIMER button and manually set an event timer: • Event Number: 10 timers available • Enable a Timer: YES / NO • Type: ONCE, DAILY, WEEKLY •...
- Page 29 Press the RIGHT arrow button to rapidly skip forward in the recording. Delete Recordings - DVR1100c Press the PLAY button to display the Recorded Program List • • Highlight the program to be deleted Press the BLUE button to delete • www.geosatpro.com Toll Free 888-483-4673...
-
Page 30: Glorystar Installation Guide
Glorystar Installation Guide Glorystar requires that you carefully read through these pages before beginning the installation. Save all original boxes, manuals, accessories and packaging materials in case it is necessary to return the merchandise. You have 30 days from the date of delivery to return the equipment for refund or exchange. -
Page 31: Glorystar Parts List
22KHz Switch (1) LNBF (2) Twin LNBF Clamp (1) 3’ Coax Jumper (2) Installation Kit (1) Satellite Receiver Dish Accessory Kit (1) and Remote (1) Tools Required Phillips Screwdriver 10, 11mm Socket Drill and Bits Measuring Tape Hammer www.geosatpro.com Toll Free 888-483-4673... -
Page 32: Site Survey
Site Survey If you feel comfortable with drilling holes in the walls and/or roof of your home, climbing ladders, attaching wires to the ground according to NEC and local codes and following step-by-step instructions, you might consider installing your own system. The satellite is located over 23,000 miles away and the installation does require precise tuning and a great deal of patience to correctly install. - Page 33 30 and 60 degrees. Southern US point more toward 60 degrees; northern US point more toward 30 degrees. Northern Canada and Hawaiian elevations can be as low as 10 degrees, but in Central American dishes are aimed almost straight up! Dish Elevation Angle: ___________ www.geosatpro.com Toll Free 888-483-4673...
-
Page 34: Reception Of Two Satellites
Elevation Angle Finder Compass Using the aiming coordinates included with this system or found at http://www.GeoSatFinder.com along with a compass and the Site Check Angle Finder located on the last page of this manual, locate a suitable dish mounting position. While facing south, hold the compass level in the palm of your hand. -
Page 35: Dish Mounting Options
36” dish. The dish and mount are designed to remain operational in winds up to 80+ mph and survive wind gusts over 110+ mph. Failure to install the tripod legs will result in a charge back to the professional installer. www.geosatpro.com Toll Free 888-483-4673... -
Page 36: Dish And Lnbf Clamp Assembly
Dish and LNBF Assembly Once a suitable dish mounting location has been chosen it is time to set up the dish. Use the large cardboard shipping box as a working surface to prevent damage to the dish components during assembly. We recommend assembling the dish first and then installing on the post mount. - Page 37 If not, repeat the flexing process until the reflector edges are uniformly flat. Important Note: An assembled dish will not be accepted for refund. GEOSATpro 90cm Dish Hardware Item Quantity Description Size Carriage Bolt...
- Page 38 Attach the LNBF Arm to the Elevation Bracket. Assemble the Elevation Bracket and Post Clamp. The Post Clamp has two holes drilled. One hole is stamped with an A and the other with a B. Assemble the Elevation Bracket to the Post Clamp inserting Structural Bolt A (part #6) through the hole stamped A if the Dish Elevation Angle is between 10 -...
- Page 39 If the Mast or mounting post is not Example: Negative -40 is PERFECTLY plumb, the skew angle set while standing in front will not be correct and the dish will be of the dish looking into or difficult to aim! towards the reflector. www.geosatpro.com Toll Free 888-483-4673...
-
Page 40: Universal Post Mount Assembly And Install
Install two GEOSATpro Mini Bullet LNBFs into the Twin LNBF Clamp, align the centering line on the top of each LNBF with the centering pointer on the clamp. Slide the LNBF forward towards the reflector so the white front face of LNBF the LNBF cap is slid 20mm (3/4”) - Page 41 If you hire a local installer, please be sure that the legs are installed. Glorystar will charge back contracted professional installers if mast support tripod legs are not installed. www.geosatpro.com Toll Free 888-483-4673...
-
Page 42: Dish Aiming
Dish Aiming Level and Secure Post Place the assembled dish onto the post. Set the Dish Elevation to the angle provided on the cover of this manual. The pointer for the elevation indicator is a white line that is visible through the elevation scale and is located near the edge of the elevation fastening nut. - Page 43 Semi-tighten the post clamp nuts, but allow the dish to be just loose enough to be moved left or right by gripping the elevation bracket with applying light pressure. www.geosatpro.com Toll Free 888-483-4673...
-
Page 44: Connect Receiver To A Tv
Connect Receiver to a TV The easiest way to aim the satellite dish is to temporarily place the satellite receiver connected to a small television at the dish antenna mounting location. CAUTION: DO NOT ATTEMPT TO OPERATE ELECTRONIC DEVICES UNSAFE LOCATION OR IN VIOLATION OF SAFEGUARDS PROVIDED IN THIS MANUAL OR ANY OTHER EQUIPMENT MANUAL PROVIDED WITH THIS... -
Page 45: Receiver Connection Examples
The manual will include important connection and operational information. Please contact Glorystar technical support for assistance in connecting the receiver to a television. Questions regarding the connection to any other equipment should be directed to the manufacturer of that device. www.geosatpro.com Toll Free 888-483-4673... -
Page 46: Activating The Glorystar Receiver
Activating the Glorystar Receiver Remote Control Navigation Buttons Highlight the language for the receiver menus. If required, press the remote control navigation UP arrow to select an alternative language. Press OK to accept the language and go to next screen. Highlight the System Type GLORYSTAR. - Page 47 A Signal Level reading of 50% or better indicates that the receiver is connected to a working LNBF. Signal Quality readings below 10% indicate that the dish is not properly aimed or the LNBF properly rotated to receive the satellite signal. www.geosatpro.com Toll Free 888-483-4673...
-
Page 48: Locate And Peak Satellite Signal
Locate and Peak Satellite Signal While observing the Signal Quality (Q) reading, slowly move the dish towards the right. Reference the distant landmark or the string on the ground that you identified in your site check that corresponds with the Azimuth (compass) reading. Usually the satellite will be found within a few degrees either side of the compass reading. - Page 49 2nd satellite, Galaxy19 on LNBF #2. Verify the Signal Quality reading is at least 50%. If the Signal Quality is less than 50%, make very small adjustments to fine tune the dish elevation and azimuth (side to side). www.geosatpro.com Toll Free 888-483-4673...
- Page 50 Note: Do not re-adjust the skew rotation of the twin LNBF clamp or adjust the LNBFs rotation or placement while locating the satellites. This will make the installation process very difficult! Press CH/UP arrow button to place the receiver on The Word Network, Ch.
-
Page 51: Switch Installation
Mount the Switch on the back of the dish and secure the coax cables and Switch to the LNBF arm with nylon ties. You may now safely Power On the Master Power located on the rear of the receiver. Two Room Install Diagram - (optional) www.geosatpro.com Toll Free 888-483-4673... - Page 52 Multiple Room Install Diagram Updating the Glorystar Channel List The Glorystar satellite receiver was shipped pre programmed with a list of the Christian channels available at time of manufacture. The receiver will be automatically updated with the most current channel list each week with a channel list update sent via the satellite.
-
Page 53: Lnbf Adjustments - (Optional)
(3/4”) forward position. Place the receiver on the weakest Galaxy19 channel and slowly slide LNBF #2 in or out. If there is improvement, return the LNBF to the 20mm (3/4”) offset. Tighten the two Phillips head screws to secure the dual LNBF clamp. www.geosatpro.com Toll Free 888-483-4673... -
Page 54: Using Satellite Meters
Using Satellite Meters Inexpensive satellite meters can speed up the installation process, but they only display the signal strength of a satellite. It is important to understand that signal strength satellite meters do not indicate if the dish is aimed at the correct satellite and they will not be useful for fine tuning the dish aiming or LNBF skew (rotation or tilt) for maximum Signal Quality. -
Page 55: Completing The Install And Grounding
Do not use any device in the coax line unless approved for satellite installation. Multiple receiver installations must use a multiple output LNBF to avoid programming conflicts between the receivers. www.geosatpro.com Toll Free 888-483-4673... -
Page 56: Faq - Frequently Asked Questions
FAQ – Frequently Asked Questions How are new Glorystar channels added to the channel list? The receiver will automatically download any new Glorystar channels during the weekly receiver satellite update. If you do not want the channel list to be automatically updated, see OTA Updating section on page 24 for instructions on disabling the OTA updating feature. - Page 57 This model may not be compatible with the DVR. Please consult with the drive manufacturer. Glorystar customers may purchase an optional warranty extension and telephone technical support for an annual fee of $19.95. www.geosatpro.com Toll Free 888-483-4673...
-
Page 58: Warranty, Exchange And Refund Policy
Warranty, Repair, Exchange and Refund Policy GEOSATpro equipment is guaranteed to be free of defects in materials and workmanship under normal use for a period of 12 months from the date of Sales Invoice by the original purchaser. Satellite AV, LLC agrees to repair or replace a warranty unit at no charge within... -
Page 59: Accessories
RG-6 Coax Cable 3’ RCA A/V Cable S-Video Cable Connect VCR or to Splitter VCR or Stereo Connectors Better Quality Picture Extra Satellite Receiver Splitter for 2 TV Viewing Replacement or Upgrade Low Cost 2 Room Viewing www.geosatpro.com Toll Free 888-483-4673... -
Page 60: Satellite Elevation Finder
Cut Here B. Gohl © Satelliteav.com...
Need help?
Do you have a question about the DSR100c and is the answer not in the manual?
Questions and answers