
Related Manuals for Pura UVB SERIES


Summary of Contents for Pura UVB SERIES
- Page 1 INSTALLATION MANUAL & OWNER’S GUIDE ® ULTRAVIOLET WATER TREATMENT SYSTEMS UVB SERIES UV20 SERIES UVBB SERIES RACK SYSTEM UV1 SERIES ADDON SERIES 36103017 Rev. 10/08...
-
Page 3: Table Of Contents
INTRODUCTION DESCRIPTIONS AND DEFINITIONS CONDITIONS FOR USE ROUTINE MAINTENANCE SPECIFICATIONS INSTALLATION MOUNTING BRACKET AND PLUMBING UVB SERIES INSTALL QUARTZ SLEEVE AND DISINFECT SYSTEM INSTALL ULTRAVIOLET LIGHT AND FILTERS ACTIVATE SYSTEM SERVICE REQUIREMENTS AND RECOMMENDED INTERVALS PARTS ILLUSTRATION PARTS LIST UV20 SERIES... -
Page 4: Conditions For Use I
You have purchased one of the most technologically advanced Ultraviolet Water Treatment System available anywhere in the world. It ® has been designed with you, the consumer, in mind. PURA products are lightweight, easy to use, and simple to maintain. PURA products will provide you with healthy, clean drinking water for years to come. WHAT IS ULTRAVIOLET? -
Page 5: Routine Maintenance
Refer to Mounting Bracket and System Plumbing Installation Instructions on Page 1, and the appropriate System Assembly and Activation Procedures for detailed information to install your specific PURA system. Cleaning: The inside of the system and the quartz sleeve Filter Replacement: Filters will normally last should be cleaned each time the filters are changed. - Page 6 This Guide covers installation and maintenance of a basic “generic” system. Installer determines configuration of each system and must adapt these instructions to meet the specific requirements for that configuration. Specific component and assembly information is provided only for components that are unique to PURA systems. All inter-component connections use standard plumbing components and tools.
-
Page 7: Uvb Series
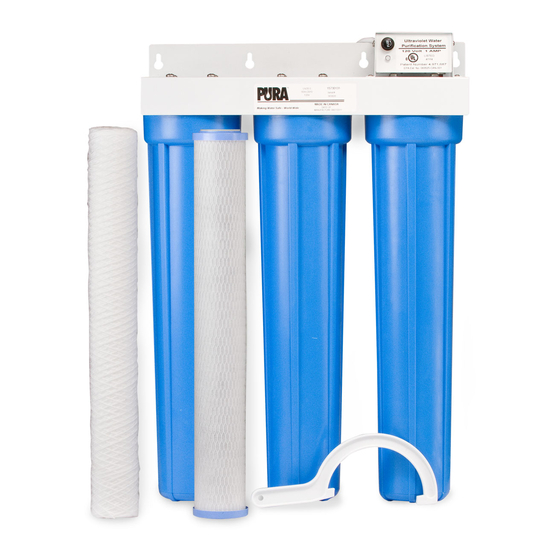
UVB SERIES - SYSTEM ASSEMBLY AND ACTIVATION PROCEDURES PREPARATION – INSPECT ALL PARTS Insert filter/sleeve assembly into sump as shown in Figure 1 with both Filter Gaskets (Item 4) in place. NOTE: Read Mounting Bracket and System Plumbing Installation instructions on Page 1 and all CAUTION: TIGHTEN SUMPS BY HAND ONLY. -
Page 8: Parts Illustration
Figure 1 Exploded Schematic, PURA UVB Series Parts List - UVB Series Item Description Part No. Item Description Part No. Item Description Part No. Sump, #10 153001-06 Switch, Safety ----- Sleeve Quartz #11, 36003034 “O” Ring, Sump #10/20 151120 Indicator, LED ----- with “O”... -
Page 9: Uv20 Series
UV20 SERIES - SYSTEM ASSEMBLY AND ACTIVATION PROCEDURES CAUTION: TIGHTEN SUMPS BY HAND ONLY. Do not use PREPARATION – INSPECT ALL PARTS tools as they will over-tighten and may damage NOTE: Read Mounting Bracket and System Plumbing sump. Take care not to cut or pinch “O” Rings Installation instructions on Page 1 and all (Item 2). -
Page 10: Parts Illustration
Figure 2 Exploded Schematic, PURA UV20 Series Parts List - UV20 Series Item Description Part No. Item Description Part No. Item Description Part No. Sump, #20 153013 Switch, Safety ----- Lamp UV #20 36002018 “O” Ring, Sump #10/20 151120 Indicator, LED... -
Page 11: Uvbb Series
UVBB SERIES - SYSTEM ASSEMBLY AND ACTIVATION PROCEDURES PREPARATION – INSPECT ALL PARTS For UVBB-2 and UVBB-3 Models only: Remove NOTE: Read Mounting Bracket and System Plumbing Sump (Item 1) from Filter Head (Item 20). Remove Installation instructions on Page 1 and all Filters (Items 21 and 22) from sump and set aside. -
Page 12: Parts Illustration
Figure 3 Exploded Schematic, PURA UVBB Series Parts List - UVBB Series Item Description Part No. Item Description Part No. Item Description Part No. Lamp, UV #20 36002018 Sump, UV #20 BB 92506 Mounting Bracket, 31910202 2 Sump BB “O” Ring, Sump BB... -
Page 13: Rack System
UVBB System Installation and NOTE: Figures 5 and 6 provide examples of configurations Activation Procedures on Page 6 before that may be applied to your PURA system. These assembling Rack System. configurations are not intended as a representation of a specific system to be installed. -
Page 14: Rack System
DATE INSTALLED SYSTEM OUTPUT RATING LPM/GPM CONFIGURATION: SERIES SERIES TO PARALLEL PARALLEL PARALLEL TO SERIES MODULE #1 TYPE: PURA PART NUMBER: MODULE #2 TYPE: PURA PART NUMBER: MODULE #3 TYPE: PURA PART NUMBER: MODULE #4 TYPE: PURA PART NUMBER: Table 1: System Configuration and Component Parts, Initial Installation... -
Page 15: Uv1 Series
UV1 SERIES - SYSTEM ASSEMBLY AND ACTIVATION PROCEDURE PREPARTATION – INSPECT ALL PARTS Loosen Screw (Item 9) securing slotted side of UV Lamp Retainer (Item 7). Remove the other screw securing the NOTE: Read Mounting Bracket and System Plumbing UV lamp retainer to UV head. Rotate UV lamp retainer Installation instructions on Page 1 and all away from center of UV head. -
Page 16: Parts Illustration
Figure 7 Exploded Schematic, PURA UV1Series Parts List - UV1 Series Item Description Part No. Item Description Part No. Item Description Part No. Housing, UV1, Pura* 92500-1 Retainer, UV Lamp UV1 31910408 Cap, Finish, c/w Control ----- “O” Ring, UV1, Pura... -
Page 17: Addon Series
ADDON SERIES - SYSTEM ASSEMBLY AND ACTIVATION PROCEDURES DISINFECT SYSTEM PREPARATION – INSPECT ALL PARTS NOTE: Read Mounting Bracket and System Plumbing CAUTION: TIGHTEN COLLAR BY HAND ONLY. Do not Installation instructions on Page 1 and all use tools as they will over-tighten and may instructions on this page before installing system. -
Page 18: Activate System
ADDON SERIES - SYSTEM ASSEMBLY AND ACTIVATION PROCEDURES CONT’D INSTALL TUBING cont’d ACTIVATE SYSTEM QUICK CONNECT FITTINGS CAUTION: Verify that inlet and outlet ports are connected to appropriate inlet/outlet pipes (see Figure 8). Fittings consist of two parts: a Body and a collet. WARNING: NEVER LOOK DIRECTLY AT A LIGHTED UV To install a tube, push it through Collet until it seats firmly LAMP. -
Page 19: Parts Illustration
UV ADDON 1GPM UV ADDON 3GPM Figure 9 Exploded Schematic PURA ADDON System Parts List - UV ADDON Item Description Part No. Item Description Part No. Item Description Part No. Sump, 1gpm Addon 31910007 Mounting Bracket, Addon 31910401 Sleeve, Quartz #11... -
Page 20: Cleaning And Disinfection
CLEANING, DISINFECTING, AND ROUTINE MAINTENANCE PROCEDURE RECOMMENDATIONS HAVE ALL COMPONENTS ON HAND AND READY BEFORE BEGINNING PROCEDURE A CLEAN WORK AREA AND EQUIPMENT ARE ESSENTIAL TO PROPERLY CLEAN AND/OR DISINFECT THE SYSTEM (i.e., CLEAN HANDS, TOOLS, WORK SURFACE, AND CONTAINERS) EQUIPMENT NEEDED Safety Glasses Liquid Dish Soap... -
Page 21: Filter Replacement
4. Slowly open the feed water supply valve. CAUTION: Do not attempt to remove sumps until water flow stops. This reduces pressure inside the 5. Open all downstream faucets. Keep faucets open until a system so sumps may be safely removed. chlorine smell is detected at each faucet, then close faucets. - Page 23 © 2008 WATERGROUP INC. Manufactured by: WaterGroup Companies Inc.
-
Page 24: Limited Warranty
PURA specifications. If the drinking water system is modified by anyone other than an authorized PURA dealer, the warranty shall be void.
Need help?
Do you have a question about the UVB SERIES and is the answer not in the manual?
Questions and answers